May 29, 2019

Wonderful Wednesday #73: Marigold and Mars

Wonderful Wednesday 73 - Marigold and Mars Hands pattern as featured by floresita on Feeling Stitchy

I have had my eye on this beautiful Hands pattern by Marigold and Mars for some time - previously this was only available as a hand-embroidered item by the artist herself, but as with all embroidery, I was itching to try a version of my own!

The colors she's chosen for this simple yet beautiful design are gorgeous:

Marigold and Mars has also had a book published recently - if you love the look of that pattern, you'll also want to check out: Hoop Dreams: Modern Hand Embroidery by Cristina Morgan!

Just so you know, this link is an Amazon Affiliate link - clicking through the link and buying costs no more for you and is one way to support our volunteer reviews.


For more things Marigold and Mars, be sure to follow her on Instagram: @marigoldandmars

Hi, I'm floresita, editor of Feeling Stitchy. I'm an avid stitcher, knitter, and crafter. You can see more of my stitching on Instagram and my blog. My vintage transfer collection is on Vintage Transfer Finds.

Feel free to email me with any ideas for the blog!

May 23, 2019

Project a Month: Sweet Home Ebook by Cutesy Crafts

Project a Month 6 - Sweet Home Ebook by Cutesy Crafts a feature by floresita for Feeling Stitchy

Remember that lovely Sweet Home Embroidery Ebook by Cutesy Crafts? Jessica was kind enough to share a copy of her Ebook with me, and I was determined to stitch something from it!

I chose the "Home" pattern - which has a lovely palette of navy blue, gray, coral and teal - colors I always love to stitch with! And yes, I did 2 projects this month, with time to spare. I'm glad I'm gaining speed on my finishes!

I started with the appliqué part first, and can I just admit, appliqué terrifies me?

Sweet Home Ebook by Cutesy Crafts

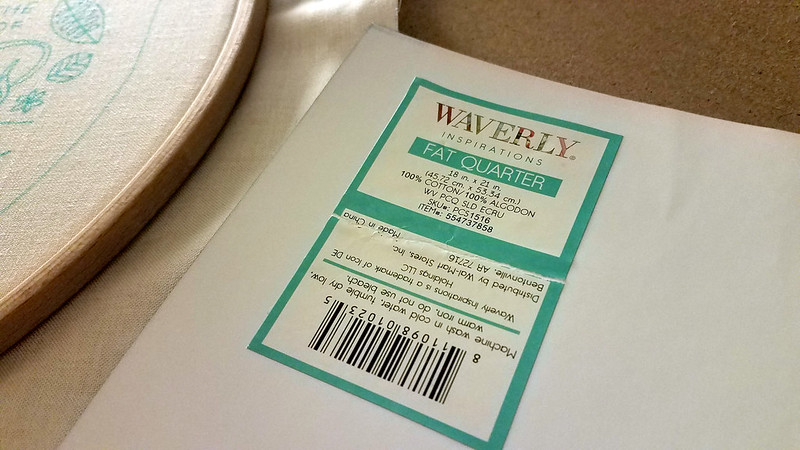
I used the same Ecru quilting cotton for the little house that I used in the Mother's Day Stitchalong, and a navy linen I've used for several projects now.

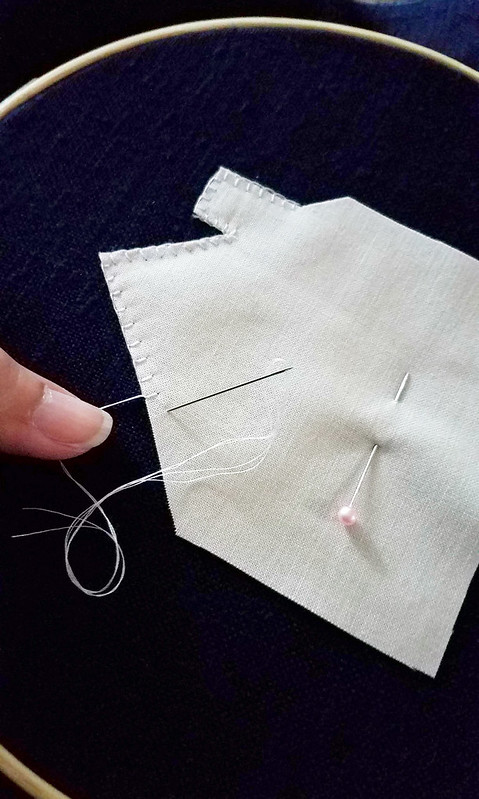
I didn't have the paper-backed interfacing that the pattern calls for, so instead I ironed on a lightweight interfacing and stitched it to my fabric the old fashioned way, with pins to secure it and a blanket stitch:

Sweet Home Ebook by Cutesy Crafts

And that's when I realized, appliqué really isn't that terrifying. Why had I been waiting so long to just try it?

As I stitched, it finally made sense to me that the blanket stitches protect and secure the raw edges of the appliqué. I also think the lightweight interfacing helped keep the raw edges secured and the appliqué house flat, but I'm not 100% sure on that.

Sweet Home Ebook by Cutesy Crafts

And voila! My first-ever appliqué done! You might notice that there is a mark from the pin I used to hold it in place, but I didn't stress about that, and the mark came out easily after washing and ironing later...

Sweet Home Ebook by Cutesy Crafts

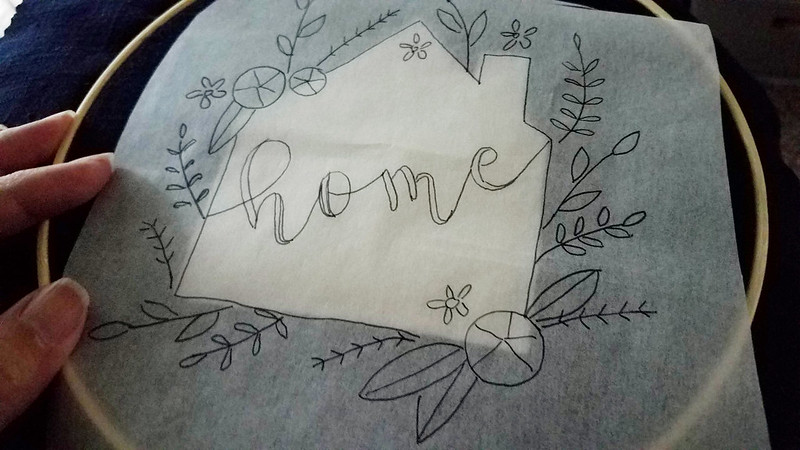
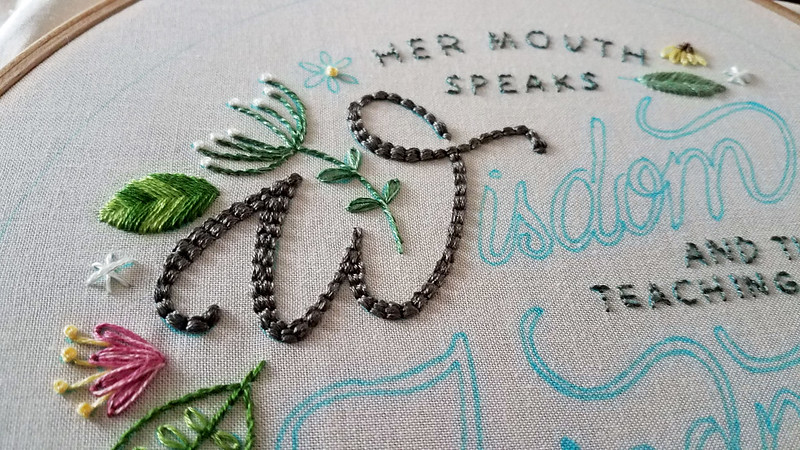
When it came to transferring the pattern, I didn't have any advanced technique - I used tracing paper to prick the outline of the design, and filled in the pinpricks with chalk. Then I connected the dots using a chalk pencil.

If I had white carbon paper, I'd have used that instead - the pinprick method was messy and laborious!

Sweet Home Ebook by Cutesy Crafts

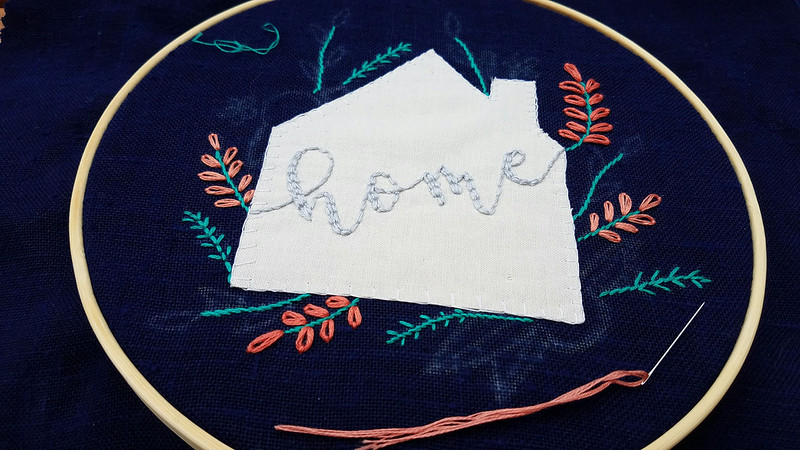
I could have used an iron on transfer pencil at this point, but I didn't want to have to flip the image, trace, and iron. So instead I stitched directly over the tracing paper, and picked out the paper after stitching:

Sweet Home Ebook by Cutesy Crafts

I used 6 strands of floss and back stitch for these letters, as the pattern calls for, in a technique very similar to the Mother's Day Stitchalong earlier this month.

Sweet Home Ebook by Cutesy Crafts

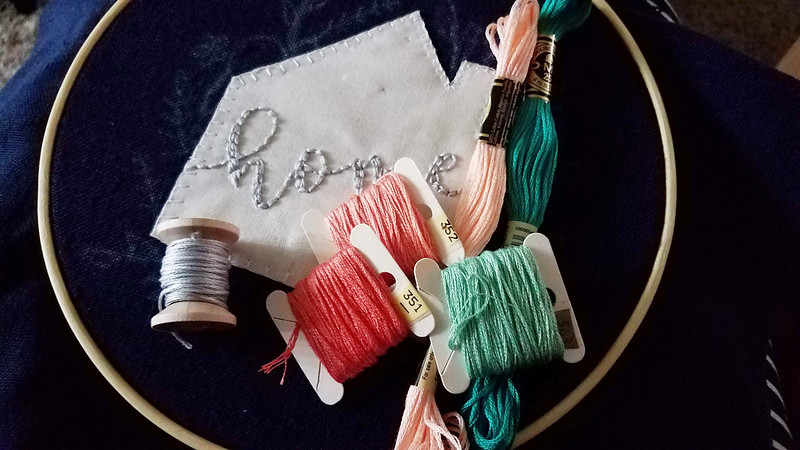
Here's a peek at the rest of the lovely colors that pattern calls for - I did make a few substitutions - the lightest peach color was too light for me, so I chose a darker - I didn't have the darkest teal the pattern calls for, so I just used the closest shade I had.

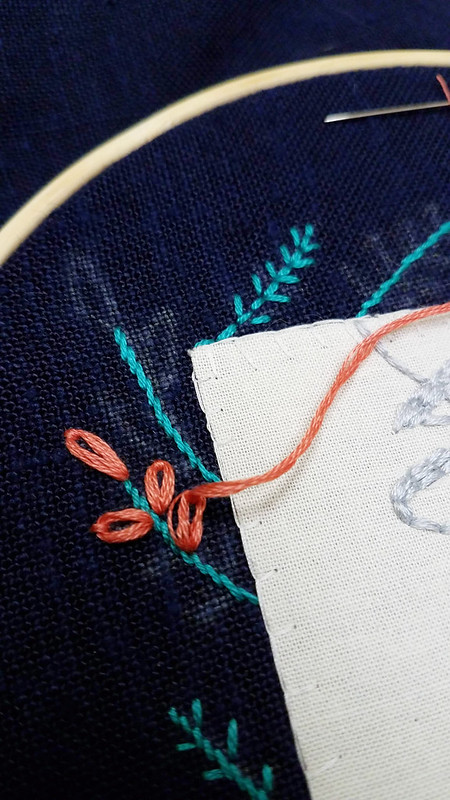
I stitched all the dark teal stems then moved on to the coral lazy daisy stitches... which brings me to this question...

Who out there hates stitching with all 6 strands of embroidery floss?

Sweet Home Ebook by Cutesy Crafts

I sure do. I know this chunky look is popular with modern embroiderers on Instagram, and I love it when others use it, but my threads *always* tangle when I use all 6 strands.

There were lots of helpful suggestions on Instagram, with Jessica from Cutesy Crafts beinng kind enough to chime in - try another needle, strip your threads, try 3 strands, folded over, and I tried them all, but still I'd get the tangles you see above.

Sweet Home Ebook by Cutesy Crafts

So I substituted 4 strands for the lighter coral lazy daisies, and I think they look just fine. Perhaps a tiny bit less chunky, but just as lovely!

Sweet Home Ebook by Cutesy Crafts

Next I stitched the light teal leaves in a fishbone stitch - I found this stitch a bit more challenging on linen, vs. quilting cotton. It looks less clean and regular, to me.

I tried 4 strands and 3 strands of floss, I preferred the look of 3 strands, which you see here.

Sweet Home Ebook by Cutesy Crafts

Next I stitched my woven wheel roses.

Sweet Home Ebook by Cutesy Crafts

Those are always easy and fun.

Sweet Home Ebook by Cutesy Crafts

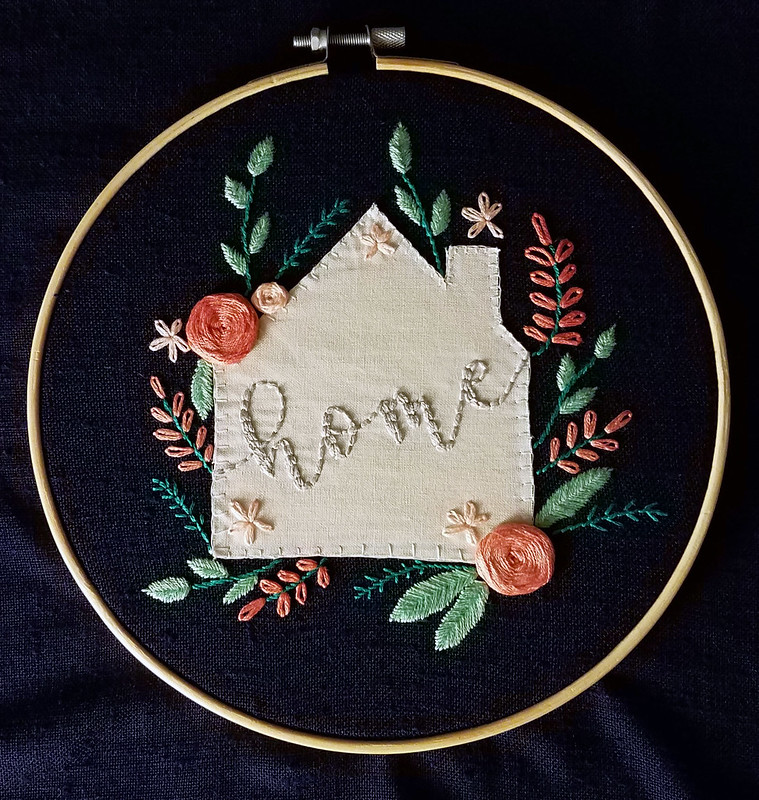
And done! I don't like to stitch my gifts right before I give them, but I at least had time to wash and press my project, which caused me some anxiety - what if the colors ran, what if the appliqué shrank (I hadn't remembered to pre-wash, of course), what if I couldn't get the wrinkles out?

Sweet Home Ebook by Cutesy Crafts

But it all came out beautifully, I think! I ironed my project damp, face down on a towel, taking care not to smoosh the woven wheel roses. Then I flipped it over and very very carefully ironed the appliqué, taking care not to iron and flatten the embroidered letters.

The slight shrinking helped removed the buckling in my appliqué, so it all worked out!

This was a quick stitch- it only took me a few days, and it was very fun and lovely. If you'd like to stitch this pattern, you can find it, as I mentioned in the Sweet Home Embroidery Ebook by Cutesy Crafts, it is chock full of lovely patterns, I highly recommend it! I wouldn't be surprised if I work in another project from Jessica's Ebook later this year!

Hi, I'm floresita, editor of Feeling Stitchy. I'm an avid stitcher, knitter, and crafter. You can see more of my stitching on Instagram and my blog. My vintage transfer collection is on Vintage Transfer Finds.

Feel free to email me with any ideas for the blog!

May 22, 2019

Wonderful Wednesday 72 - New Leaf Stitchery

Wonderful Wednesday 72 New Leaf Stitchery as featured by floresita on Feeling Stitchy

How beautiful is this Gingko Leaves pattern by New Leaf Stitchery? If you were fans of Sew Jenaissance you'll recognize their lovely style, New Leaf Stitchery is their new name.

I love all the imaginative color combinations here:
Gingko leaves pattern by New Leaf Stitchery on Etsy as featured by floresita on Feeling Stitchy

Be sure to follow @newleafstitchery on Instagram - this year they've done some lovely stitchalongs with free patterns, which you can find as well on their site: https://newleafstitchery.com/.

Hi, I'm floresita, editor of Feeling Stitchy. I'm an avid stitcher, knitter, and crafter. You can see more of my stitching on Instagram and my blog. My vintage transfer collection is on Vintage Transfer Finds.

Feel free to email me with any ideas for the blog!

May 16, 2019

Project a Month: Wrap-up - Stitchalong with Beth Colletti

Project a Month May - Mothers Day Stitchalong pattern by Beth Colletti as stitched by floresita for Feeling Stitchy

When last I left you, I was all done with the center portion of Beth Colletti's Mother's Day stitchalong pattern and was ready to start the Pekinese stitch border - easy peasy, right?

Stitching along with Beth Colletti

Wrong! :) I second guessed myself about a billion times when stitching this border!

Want to know how to do the Pekinese stitch? Try this Pekinese stitch tutorial by Mary Corbet.

In which I Stitch the border a billion different ways

It started out easily enough - I back stitched the simple pink border first, then I started looping the Pekinese stitch through:

Stitching along with Beth Colletti

Hmph. I used 4 strands of floss on these loops and was not happy at all with my first try. The strands did not stay together well, and it took A LOT of messing with the strands to get them to look kind of neat. I know, I know, I was a beginner with this stitch, but I wanted my finish to look less messy.

So I scrapped the regular floss and picked up some DMC perle cotton:

Stitching along with Beth Colletti

Stitching along with Beth Colletti

What I liked about the perle cotton is that the strand held together much better and was less messy to work with overall. It gave a pretty, heavy braided look that I really enjoyed:

Stitching along with Beth Colletti

I loved it! Until about midway through...

Stitching along with Beth Colletti

The more I looked at it...

Stitching along with Beth Colletti

The more I hated it. And here's where the entirely subjective matter of taste comes in - I asked for advice on Instagram, and plenty of people loved this look. But I didn't. The color was too pink (it was the only shade I had in a thin perle) and I thought it distracted from the center portion of the design.

So I scrapped the pink perle and decided simplest was best - I stitched a chain stitch border in off white instead and I loved it!

Stitching along with Beth Colletti

Until I washed it. After squinting at it, I lost confidence in my decision. It's too plain, I thought, and decided to try whip stitching with a dark pink from the pattern:

Stitching along with Beth Colletti

As usual, I liked it about halfway through, until I didn't like it at all:

Stitching along with Beth Colletti

As cute as it looked, it didn't match the overall vibe of the piece - I loved the candy-striped effect of the whipped chain stitch, but I just didn't like it with this piece.

Stitching along with Beth Colletti

You can see what I mean here, zoomed out, perhaps. Or maybe not - maybe you like that look - and that is perfectly fine! I just didn't like it.

Stitching along with Beth Colletti

Now in full wacko obsessive mode, I tried another woven option, which I also loved...

Stitching along with Beth Colletti

Until I got all the way through, and I hated it. Sigh.

Why did I take you through all these silly twists and turns in my project? I think just to communicate that this is the creative process, and not to get discouraged when it happens to you. It happens to me, too. Not everything is perfect, you won't always be happy with your outcomes, but that's ok.

You can always take out the stitches, and try again!

Stitching along with Beth Colletti

I got a simple suggestion on Instagram of adding another line of chain stitch, which I did, in snow white.

And I loved it!

Stitching along with Beth Colletti

You know what? Not everyone loved this simple border on Instagram. Some people even took the time to tell me multiple times that they did not love it. :)

But that's okay! I realized that what I loved, someone else might not love. Another thing I realized is that all these complicated borders might look nice in a tightly framed photo, but too busy in real life.

What's more important? Real life or a photo? I choose real life. :)

This wasn't always my choice! As evidence I have tons of half-finished projects (or finished) tucked away in crates in my closet.

What was most important to me in the past was the finished product for the blog and the internet. But I see now that that's a stitching life half-lived.

From now on, the most important thing to me is how useful and lovely an item can be in real life.

I realized how few embroidered gifts I have given away lately and how few I have given to my mom, who has always encouraged me and loved every item I have ever finished.

Stitching along with Beth Colletti

Into her hands it went, and I was joyful when I saw the joy on her face.

mami

My mom, the most beautiful woman I've ever met, and the woman who showed me the way I want to live, with her energy, her faith, and her determination to stick it out, do her best and never give up. Her life taught me wisdom and kindness, and I am so happy and proud that's she's my mom.

Stitch along with Beth Colletti

If you love this pattern, Mother's Day may have passed but you can still stitch along with Beth - purchase the pattern in her store and follow her on Instagram @bethcolletti to find all the helpful videos Beth made to walk you though each step!

Thank you to Beth for designing this lovely pattern and stitchalong at just the right time - it was perfect for my mom, and I know it can be the perfect gift for so many of you out there too, for whoever speaks wisdom and kindness in your life!

Previous post: http://www.feelingstitchy.com/2019/05/project-month-stitchalong-with-beth.html

Hi, I'm floresita, editor of Feeling Stitchy. I'm an avid stitcher, knitter, and crafter. You can see more of my stitching on Instagram and my blog. My vintage transfer collection is on Vintage Transfer Finds.

Feel free to email me with any ideas for the blog!

May 15, 2019

Wonderful Wednesday #71 - Chloe Redfern

Wonderful Wednesday 71 - Blue Jay pattern by Chloe Redfern as featured by floresita on Feeling Stitchy

I adore this Blue Jay Embroidery Pattern by Chloe Redfern. Look at all the dense detail in those stitches! Her patterns look well-designed and give you a chance to practice some beautiful stitch filling techniques.

I have been keeping up with Chloe's embroidered bird series for some time now - and they just keep getting lovelier and lovelier!


If you follow Chloe on Instagram @chloeredfernembroidery, you'll get a wonderful window into her creative process as well - as she shares images of her sketches and preliminary designs, which are also delightful:


Hi, I'm floresita, editor of Feeling Stitchy. I'm an avid stitcher, knitter, and crafter. You can see more of my stitching on Instagram and my blog. My vintage transfer collection is on Vintage Transfer Finds.

Feel free to email me with any ideas for the blog!

May 10, 2019

Project a Month: Stitchalong with Beth Colletti

Project a Month May - Stitchalong with Beth Colletti as featured by floresita on Feeling Stitchy

The moment I saw this Mother's Day Stitchalong pattern by Beth Colletti, I knew I had to stitch it. The quote is from Proverbs 31, and I knew it wasn't chance that I had just come across this passage in my Bible and had been meditating on it. It didn't matter that I was in the middle of stitching last month's pattern, I just did double stitching duty! :)

Mothers Day Stitchalong pattern by Beth Colletti as featured by floresita on Feeling Stitchy

I loved this quote, I loved the lettering, and I was fascinated (and terrified by) that Pekinese stitch border. But this is the year that I pledged to just try new stitches, even if they terrify me.

What's the worst that can happen? I don't do well at the stitch, or don't like it? The best thing about stitching is you can just pick it all out and start all over again... So I purchased my pattern from Beth's store and started on it right away!

Stitching along with Beth Colletti
Again, I used the DMC Water Erasable pen I showed you last month, and was really pleased with the clear lines.

I laid my fabric on top of the pattern and traced- it was see through enough that I didn't need a light source behind it.

I made sure to snap a photo of the fabric I used, as I sometimes get questions on that...

Stitching along with Beth Colletti

I picked this Ecru Fat quarter at Wal-Mart during some late-night shopping. I think it set me back a whole 97 cents, it's large enough for several projects, and there's lots of colors available. I am so glad I started embroidering on quilting cotton! I guess it's a totally duh statement, but it took me long enough to try it, and I'm so happy with the results.

Stitching along with Beth Colletti

Stitching this pattern was so much fun - I love the vivid greens in Beth's color palette, and the way you blend two different floss colors for a lovely effect, like on that pink flower:

Stitching along with Beth Colletti

Stitching along with Beth Colletti

My favorite element, which drew me to this pattern had to be the lettering!

Stitching along with Beth Colletti

The technique looks complicated but it isn't - go to Beth's IG for detailed videos on how to stitch the lettering: @bethcolletti.

If you are stitching this pattern, make sure you have at least 2 skeins of floss for the lettering - I ran out midway and had to buy more. :)

Stitching along with Beth Colletti

Here it is, almost finished, all that's left to add is the border.

And because I spent a hilariously long day stitching and re-stitching different border options, I will leave that for another post! Because honestly I am still not sure what border to go with yet, ha ha!

Join Beth Colletti's Stitchalong!

If you love this pattern, it is available in Beth Colletti's store. Beth has posted lots of helpful videos on her Instagram to walk you through each element of this design, don't miss those: @bethcolletti.

See you next week, when I'll (hopefully) show you my finished stitching!

Hi, I'm floresita, editor of Feeling Stitchy. I'm an avid stitcher, knitter, and crafter. You can see more of my stitching on Instagram and my blog. My vintage transfer collection is on Vintage Transfer Finds.

Feel free to email me with any ideas for the blog!

SITE DESIGN BY RYLEE BLAKE DESIGNS