October 31, 2012

Wayback Wednesday

halloween menu on light

Happy Halloween! Hope your night is a dreadful delight! Special thanks to shebrews for stitching up such a wonderful vintage Halloween menu...but I'll stick to candy!

October 28, 2012

October Stitch Along - week 4


Halloween T by The Stitch Up

We have witchy stitching of clothing this week! I love this Halloween T by The Stitch Up, perfect for the Halloween season! (And full admiration, stitching on T shirts isn't exactly easy!)


Halloween T close up by The Stitch Up

There's still a few days till Halloween, so still time to stitch up the Kitsch Witch, you can find the pattern here.

Hi, I'm Jo - I feature new embroidery patterns Sundays on Feeling Stitchy. I also post on our Twitter and Pinterest.

Is there a new pattern you'd like us feature? Email me!

October 27, 2012

New Embroidery with Vintage Patterns - An interview with gnomecat

Hi, everyone, hope everyone is enjoying the new interview format for my monthly round-up post for the New Embroidery with Vintage Patterns (NEwVP) stitch-alongs (SALs). I think it is really fun and interesting to get to know some of the people behind the stitches!  (If there are questions you wish I was asking, please let me know in the comments!)  This month, instead of featuring someone who participated in the monthly SAL, I am featuring someone who participated in the year-long stitchy quilt along!   

As always, I invite all of you to join our New Embroidery with Vintage Patterns group or at least stop by and take a peek.  There are lots of new embroideries with vintage patterns being added on a regular basis that are totally unrelated to any monthly SAL.  Plus, since I'm doing an interview format now, I'm not able to show-off all the beautiful SAL stitcheries in our photo pool!  

And now I am pleased to introduce you to Flickr peep gnomecat.  I hear her real name is Jen ;)  

1.  Please tell us a bit about yourself.

I am a twenty-something who is obsessed with crafting, junking, reading books, and playing with my five cats [Frank, Stewie, Milo, Hooch and Lily]. I honestly act more like a 70 year old grandma than a twenty-something and I love it.

Boy meets girl.


2.  Do you have a vintage embroidery pattern stash?  If so, please tell us about them!

I do. I’ve been building it for a few years, most of them have been found through Hoop Love Vintage Transfers Flickr group. My grandma has also passed quite a few vintage embroidery patterns to me that she no longer uses.

Girl plays hard to get.


3.  How long have you been stitching (embroidering)?  What or who got you started?

I have only been stitching for a few years. The husband and I purchased our first home in 2009 and I felt a strong yearning to learn different crafty mediums so that I could decorate it with a crafty flair and on a budget. One month after purchasing our home, my mother bought me a sewing machine and the rest is history. Since then I have learned lots of different crafting mediums with my favorites being quilting, embroidery and crocheting. My overall goal is to have a very crafty feeling home and I’m slowing accomplishing that.

Boy acts romantically.


4.  Why do you like vintage embroidery patterns?  Do you have a favorite one or a favorite theme?

I gravitate towards vintage embroidery patterns because they are so whimsical. Who doesn’t want to dry their dishes with a towel that has smiling silverware? I love how most vintage embroidery patterns will incorporate a face; it brings personification to a whole new level.


Kisses, due to romanticness.

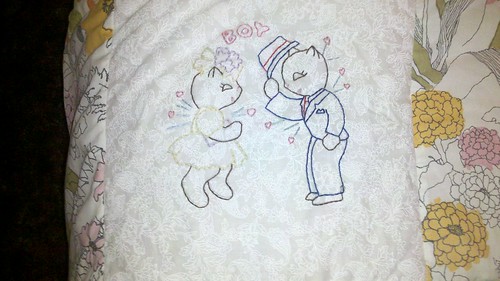
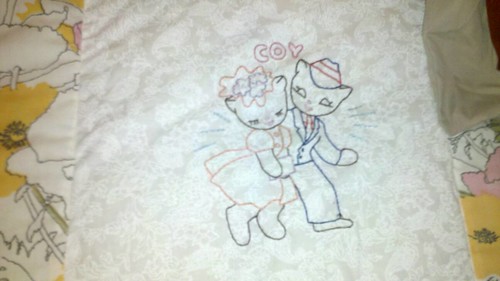
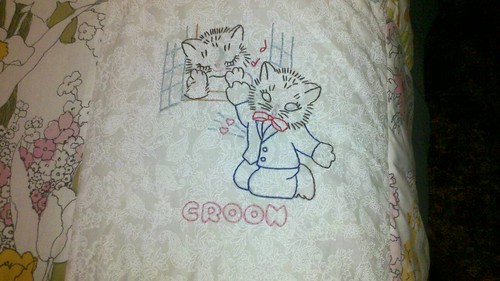
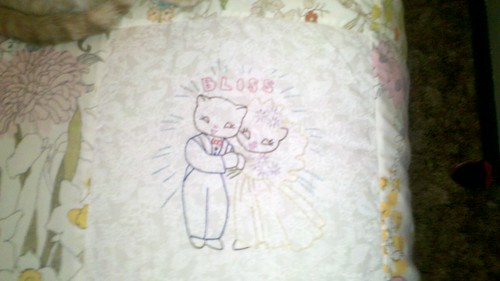
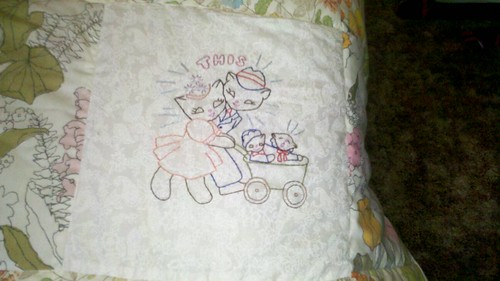
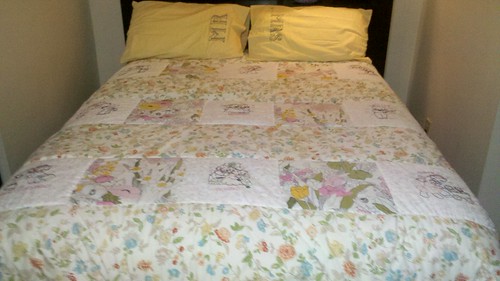
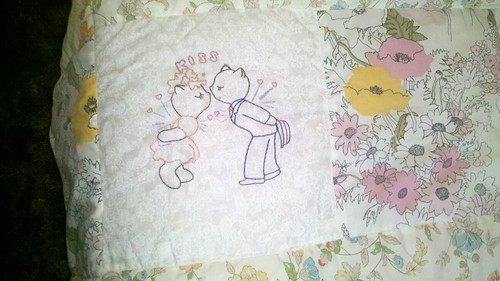
5.  Tell us a bit about the your "storybook of cat love" quilt you made.  (And I see stitchy pillowcases in one of the pictures too!)   
What attracted you to this particular pattern set?  Any story behind the fabrics you chose to piece the quilt together?  What does your hubby think about y'alls bed quilt and coordinating pillowcases?

Well as I mentioned, I love cats and I saw the patterns I used from Hoop Love Vintage Transfers about two years ago. I printed them and saved them for a rainy day. Earlier this spring, I was “bored” and needed to start a new project. It hit me, stitch up the cat love patterns. I decided at that point that this quilt should resemble a “storybook” as it went through the phases of the cat’s lives [courtship, marriage, kids, etc.]. As I was stitching the blocks, I even came up with a silly story about how the two cats met [isn’t stitching fun?!]. I had gone thrifting with a friend earlier in the year and had found some really cheap vintage floral sheets that I decided to use as the backing, sashing, boarders and binding. I then used the “stitch in the ditch” technique to “quilt” the quilt. As I was in the quilting phase, I got the urge to embroider again, and decided to find “Mr. and Mrs.” patterns thinking, “how cute would that look to match the cat love quilt?” so I couldn’t help myself.

Luckily, I have a very easy going husband who completely supports my love for crafting. His philosophy is whatever makes me happy, makes him happy. Of course, he likes to give me a hard time about how our house only represents my style but anytime I complete a project and ask for him to critique it; he declares it “the best thing ever” so therefore his opinion doesn’t matter much.


Cuddle time.


6.  Do you have a favorite embroidery stitch?  If so, why?

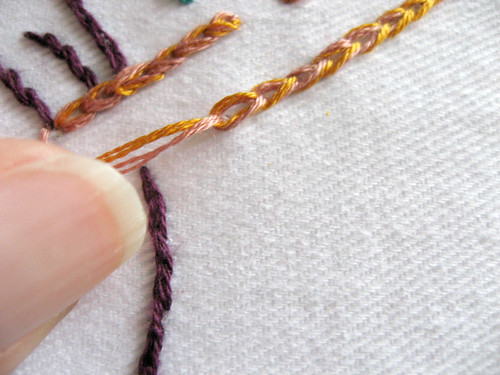
My favorite stitch is the back stitch. I love how it looks outlining everything! My biggest downfall as a stitcher is not branching out and trying lots of different stitches.

and next comes marriage.
 

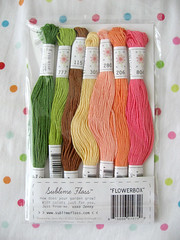
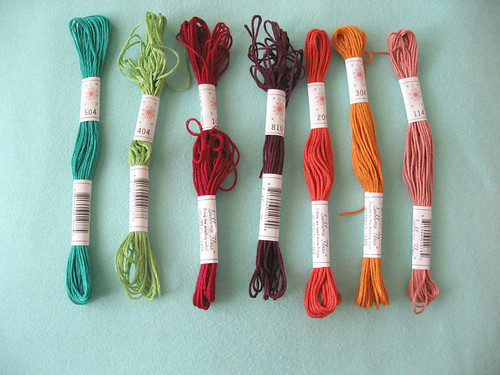
7.  Do you have a favorite DMC (or other brand) floss color?  If so, what is the color name & number?

I do not have a favorite DMC floss color, although that is my favorite brand. I tend to gravitate towards mustards and avocados as they are my favorite colors.

Honeymoon!!


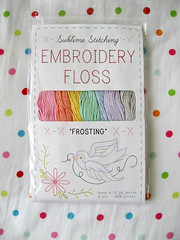
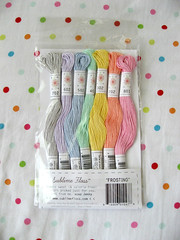
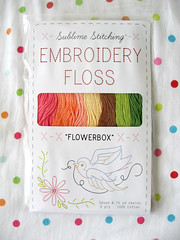
8.  And speaking of floss, how do you organize all your skeins of embroidery floss?

I used to keep the majority of my floss in a zippered pouch; however, that got out of control and I started winding them around bobbins and keep them in a plastic case. I haven’t finished putting them all on bobbins [it is quite a project!] but think it will be worth it in the long run. I have a large basket [looks similar to a picnic basket] which I have deemed my embroidery basket.

enjoying time together; knitting the hubby socks.


9.  In your home, where do you usually sit to stitch?  Do you like it to be quiet while you stitch, or do you watch tv, listen to the radio, or talk on the phone while you stitch?

As with all my crafting, I have to have the t.v. on for a bit of a distraction. The best is picking out a t.v. series and then watch it from Season one on. You will be surprised how far through the series you can get just working on one project or one set of blocks to embroider.

and then comes babies in the baby carriage.

 
10.  Anything else you would like to share?

Blog link: zeeramblingsofacatlady.blogspot.com


storybook of cat love quilt.


==========

Thanks for taking the time to read my post and meet just one of the many terrifically talented stitchers in our NEwVP group!  Please do stop by to visit!  Also, have you heard the news that the NEwVP group will be hosting another fantastic stitching contest?!  Oh yes!  Fantastic new prize sponsors too!  Stay tuned for the details coming toward the end of November!  The details will be posted in the NEwVP group!

October 25, 2012

Portugal - a living museum of embroidery - part II

Olá! This a week we'll continue on our trip through Portugal, a living museum of embroidery. Today we'll be indoors, visiting an old family house near Estremoz, in the Portuguese region of Alentejo. Rural houses in the Alentejo countryside are called Montes. Monte means a small hill, an elevation, and in this region, very well known by its vast plains, usually houses were built on small hills. 

These photos were taken on a rainy day, like today... Which is not very typical once Portugal is a shining country!! But I believe this transmitted a special and beautiful light to the photos. Hope you like them!

I believe that most of the embroidery pieces pictured were made by the grandmother and the great grandmother of the actual owners of the property, but I cannot be sure. I know both were great embroiderers since they have some signed beautiful pieces of embroidery. Most probably the photos show some designs and technique inspired by Portuguese Traditional Embroidery, but in this case again I cannot prove it. Beginning with this dresser cover, that I believe was inspired by Alinhavados from Nisa...

IMG_20121014_20117959
Vintage embroidered dresser cover, photo by ZPmoreira
This floral silk embroidery is of unique beauty and, believe me, no photo would be able to show the richness of the stitches and all marvellous details. It is framed and signed by the grandmother of the actual owners.

Vintage stitches...
Beautiful framed piece of embroidery signed by the owner's grandmother, photo by ZPmoreira
It's easy to identify in these blue stitches the influence of Azores embroidery. And there were more similar to this one... All charmingly beautiful.

IMG_20121014_20117981
Inspired by Traditional Embroidery from Azores, Photo by ZPmoreira
I can't describe the singularity of this extremely little and exquisite piece of embroidery. I believe its inspiration comes from Madeira Embroidery. Check here and here to delight yourself with some details.

IMG_20121014_20117976
Inspired by Madeira embroidery, Photo by ZPmoreira
This dresser cover with floral design is so colorful... I find some resemblances with a specific type of Madeira Embroideries, but in this case I would be much more careful to make this association... Charming, anyway.

IMG_20121014_20117961
Floral embroidered dresser cover, Photo by ZPmoreira
Some of these embroideries were being used, but many others were kept in drawers. As it happens in many Portuguese homes. I really would like to shout out loud: "Embroideries out of the drawers"!!

October 23, 2012

Tutorial Tuesday


Happy Tuesday, everyone! I have a Halloween themed tutorial for you today. I picked up this free embroidery pattern of a crow with a Halloween treat o'lantern over at Bird Brain Designs. I wanted to feature him somewhere in my kitchen, and thought an apron would be perfect. 


To make this apron, you will need:

-Embroidery floss
-Hoop
-Halloween Crow Pattern
-Sewing machine
-1 yard of fun Halloween fabric 
-Sewing machine
-Coordinating thread
-Iron
-Scissors
-Sewing needle
-Measuring tape or a rotary cutting mat

I used a variation of a simple waist apron pattern. I will include the steps here, but feel free to visit this site for a free pattern

Let's get started!

Step 1: Embroider your crow onto the fabric of your choosing. I decided to use white cotton. Cut your fabric into one 33 x 22.5-inch piece, four 3 x 36 inch strips, and one 10 x 10 inch square.


Step 2: Press under the edges of the embroidered fabric. I used a 1/4-inch fold here. Center the embroidery on the pocket front and use your sewing machine to stitch around.


Step 3: Fold all four edges of the pocket under a 1/4-inch and press. Then fold again and press to create a finished edge. Machine stitch around the edges to seal the fold.

Step 4: Pin your pocket on the front side of the apron piece. You can choose either left or right and make sure it is even. Following the stitch you used to seal the folded edged, stitch around the sides and bottom making sure to leave the top open. The pocket piece is finished!


Step 5: Fold and press the four edges of the main apron piece under at 1/4-inch. Fold over again and press. Machine stitch all the way around to close that fold. This will give you a clean hem for the entire apron.


Step 6: Now we move onto the straps for the waistband. Place two straps right sides together and machine stitch the shorter end. This will give you two long strips that will become the waist band. 


Step 7: Carefully press all the edges of both strap pieces under 1/4 of an inch. 

Step 8: Place the strips wrong sides together making sure to match the center seams and edges. Machine stitch all the way around to seal the waistband. 

This is what your waistband will look like. 


Step 9: Fold your apron in half and mark the top center. Do the same with the waistband. When you move on to gather your apron, it will be easy to sew because you will be able to match the centers. 

Step 10: Using a sewing needle and some thread, hand sew a gathering stitch at the top of your apron piece. I placed that stitch right underneath the top hemline. Begin to gather the apron until it measures 17-inches wide. 


Step11: Carefully pin the gathered apron to the waistband and machine stitch slowly, ensuring that you catch the gathered pieces on the underside of your waistband and it stays even. 

Step 12: Tie that apron on and get ready for the Trick or Treaters!


Hope you enjoy this tutorial and you have very happy Tuesday!

Hi, I'm Kristen! I am a lover of all things stitchy and crafty. I have been sewing for as long as I can remember. My grandmother taught me how to sew Barbie clothes when I was young and I have been sewing ever since.

You can find me at Bobbypin Bandit, on Instagram, and my Etsy shop.

Priscilla Embroidery Pattern: Play Apron Pt. 2

Hullo everyone! Here's the update on our Play Apron from Priscilla Embroidery.

Started by transferring all the patterns to one piece of muslin:


Looking at the original photo, it seemed like the stitch used for the figures was an outline/stem stitch. I am back-stitch kindda gal so it took me quite a bit of time to get into the groove of the stitch. Specially in going round corners and crevices. Any advice would be greatly appreciated on this.


I did all the outlines of all the characters first (including the other 2 of the other pockets) and gave them satin stitch eyes.

Upon closer scrutiny of the original design, I saw some more details which I failed to place in the pattern so it was the perfect time to work those in. Will update the pattern I posted with these changes.


I cannot quite pinpoint what stitches they used to fill in the figures, but I did see some form of straight stitches and zigzags. Started with straight stitches in green in a brick pattern:


Then, I took my yellow thread and wove some diamonds into it like so:


And that is it for now :-) Will fill everything else in and then tackle the assembly. Happy Monday everyone!


Have a great week and Happy Stitching!

October 21, 2012

October 2012 Stitch-along - week 3


Clockwise from left
  1. Kitsch Witch by Kleinina10
  2. kitsch witch with glow in the dark pumpkin face by snifferooski
  3. A Spooktacular Ta-Da by LaWhimsy
The coven of witches continues this week with three gorgeous witches (and don't forget Floresita's colourful witch from yesterday). I think Kleinina10's witch has to be the fanciest dressed witch yet, I love the pattern on her dress. I love the spooky glow in the dark face on snifferooski's pumpkin. And it's great to see LaWhimsy's piece all sewn up, it makes a great piece of Halloween decor.

It's not too late to join in! You can find Cherry and Cinnamon's gorgeously spooky pattern here, don't forget to add the tag oct2012stitchalong, so that we can find you!


Hi, I'm Jo - I feature new embroidery patterns Sundays on Feeling Stitchy. I also post on our Twitter and Pinterest.

Is there a new pattern you'd like us feature? Email me!

October 20, 2012

Sublime Stitching Floss Palettes - Team review and giveaway!

With the embroidery floss market dominated by so few manufacturers, it's always big news when a new brand of floss arrives, especially when it's from one of our favourite embroidery pattern people, Sublime Stitching!

floss11   Frosting Sublime floss palette

Untitled   Flowerbox Sublime floss palette

We were lucky enough to be able to have a try of the floss a few days before it was launched, the floss arrived in palettes of colour, in cute little packages, like the embroiderer's equivalent of going to the sweet shop. The palettes have cute names such as Frosting, Flowerbox, Breakdance and Parlour, just seeing the names instantly prompts you for the sort of embroidery you could do with them. And within the palettes, the floss itself has cute names (and very cute labels, make sure you read them), with names such as melon ball, fainting couch, leg warmer.

The floss itself is a pleasure to use, six stranded, the individual strands appear to be slightly thinner than the Anchor floss I'm used to, so when I stitched up my flower tea towel I used three strands instead of my usual two. The colours were vibrant and it did make the stitching easier because I could start on the pattern with full confidence that the colours I was using went together.

New Sublime Stitching Floss!!!!

Tea towel stitched with Sublime Stitching floss using the Sublime Stitching Fantasy Flowers pattern. The flower just peeking out on the left was stitched with the Flowerbox palette and a little bit of the Mingles floss, the flower in the middle was stitched with the Prism palette and the flower on the right was stitched with the Parlour palette.

Probably the most notable thing about the new floss though is that the range also includes a pre-blended palette called Mingles, each floss is three strands of one colour and three strands of another. Now that's going to be useful!

- Jo     

*****

Ok guys - floresita here now - I was also lucky enough to receive the full set of new Sublime Floss, (hence the team post today from Jo and I) and I have to say, "sublime" describes it pretty well....

Last night I took the "Parlour" floss palette for a test drive, and it was perfect for our Kitsch Witch stitchalong pattern.


"Parlour" Sublime floss palette

As you can see from my night photo - the floss has a pretty sheen - it is ever-so-slightly thinner than your average 6 strand floss (I am a DMC girl), and it has a silky feel under my fingertips. I tried a little bit of everything with this floss - 2 strands, 3 strands, 4 strands, and 6 strands, and attempted French knots, stem stitch, split stitch, straight stitch, and chain stitch. 

I love 4 strands for a thick line and 2 strands stitches up marvelously - for some reason, that was my favorite weight.

more witchy detail


The slight sheen on these threads lends itself well to blending, and I really liked the look of 2 different threads on this chain stitch:

2 strands Bell Pull + 2 strands Corset

Here's the "Parlour" floss palette again, this time in daylight, where it looks equally yummy:

"Parlour" Sublime floss palette

witchy detail

To sum up, Sublime floss is lovely - I love the palette concept, as it takes the guesswork out of stitching (choosing harmonious colors is the most taxing part of stitching, in my opinion). The color names are adorable, I love the pithy little remarks on the wrappers, the packaging is clever and sweet, and the floss is all-around delightful.

And now I've got floss coming out of my ears. So peeps, help me out here - would YOU like to try some brand new Sublime floss? To win, pop over to the Sublime Stitching site, have a look at the 9 new palettes, tell us your favorite (or your favorite color name), and tell us what you might stitch with it.

Leave a comment here by 9 PM Oct. 21, U.S. CST. I will be giving out 5 palettes, that's 1 palette each for 5 lucky winners! International winners, no problem. So what's your fave?

- floresita

Hi, I'm Jo - I feature new embroidery patterns Sundays on Feeling Stitchy. I also post on our Twitter and Pinterest.

Is there a new pattern you'd like us feature? Email me!

SITE DESIGN BY RYLEE BLAKE DESIGNS