Showing posts with label running stitch. Show all posts

February 21, 2013

Playing with running stitch

Olá! Last weekend I decided to make a gift for a sweet girl completing her first anniversary. Embroidery was my first (and only) thought... But I was not in a "pattern" mood... Do you have those days??? I wanted something simple, as simple as possible!

Then I thought... What can be simpler than using running stitch? So I decided to play with running stitch... As I didn't know the colors of her room, I used what I had at home, it was easier, too...

If you like it and want to make something similar you'll see that it's impossible to make something simpler...
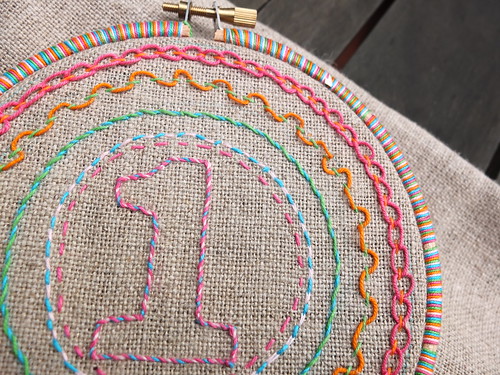
closer...
Playing with running stitch, my photo

I traced five circles using objects I had at home... If it was today I would have done it differently...
Each day I love more and more using tracing paper in embroidery... When the patterns and the stitches are simple or, above all, when the fabric is hard to trace, using tracing paper is perfect!

  • So... You can draw your circles in your computer, print them on tracing paper and then embroider the five circles with running stitch through tracing paper and the fabric.
  • Each stitch you see in this piece of embroidery is a variation of running stitch...And all variations begin with these straight stitches...
  • After embroidering all the circles with running stitch you can remove the paper. Be careful not to pull it all at once, it's better to remove it piece by piece. It will work...


Beginning with the first circle (in the center), these were the stitches I used: 1) running stitch, 2) Holbein stitch, also called double running stitch or reverse running stitch, much used in blackwork, but here I filled the spaces with a different color; 3) whipped running stitch; 4) laced running stitch; 5) double laced running stitch - sometimes called interlaced running stitch. (Do you use different names?)

Actually I began with the last stitch but it's better to begin with the common running stitch so you can practice and have regular stitches, which is very important in double lacing stitch. Beginning with the most difficult stitch was certainly not a wise decision!!

Finally... to embroider the "number one" I tried the double running stitch, but the colors didn't work, so I decided to whip it and I liked the final result. After that, I read that the whipped backstitch is great for lettering and as the final look is so similar I decided that I made the right choice...

As it was going to be a finished work to hang up, I wanted the hoop to have a beautiful look. Recently I've been finishing my hoops by wrapping them with the threads used in my embroidery and I have to say that I'm very proud of that final look...
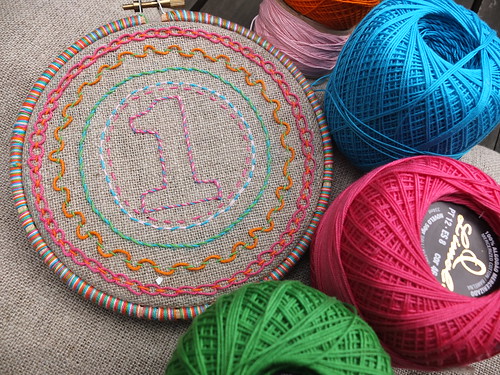
First year gift - variations on running stitch
Final look with the wrapped hoop, my photo 
Now that no one is listening to us, I must confess that this work is not as I would like it to be... The double laced running stitch is not perfect and the circles... You know what I mean... As we learn with our mistakes, I can give you a piece of advice... Print your circles first and begin with the easiest stitches... Next time I'll do that!!

Some months ago I was asked about the threads I use... I always use a Portuguese manufacturer, they make a very beautiful no.8 pearl cotton for Guimarães Embroidery. But usually I work with crochet thread no.12 (in this case) and no.6 - yes it's true...

Next week I'll tell you how I use my computer to make embroidery patterns with letters and numbers as I did this time with the "One".

Just to end... this beautiful fabric is also made in Portugal and here we call it "estopa"!!

June 25, 2012

Handicraft for Girls: Doll Quilt Pt. 3

Hullo! Here's a little work in progress and pattern no. 3 for the doll quilt.

The instructions said to do it in running stitch, but I decided to do the face in hands in backstitches so it will stand out. I plan on doing this to the other patterns as well. The running stitch was done with 3 strands embroidery floss and the backstitch was done with 2 strands polyster sewing machine thread.


If you are just catching up on these posts now, this is Part 1 and Part 2. For now, I will leave you with Pattern no. 3. Happy Stitching everyone!


June 11, 2012

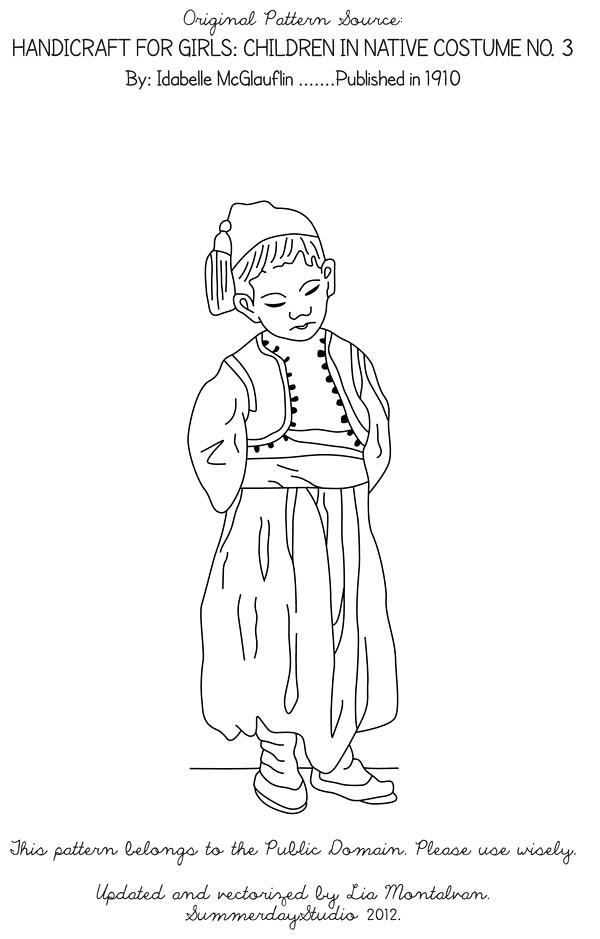
Handicraft for Girls: Children in Native Costume Doll's Quilt Pt. 1

Hullo! Our next project is from the book Handicraft for Girls by Idabelle McGlauflin, published in 1910.

In Chapter 2 of the book, an embroidery pattern of 4 children in native costume are provided and to be used in the different exercises.


Each design is embroidered with running stitches on a 6" x 8" piece of unbleached muslin. Now, it says to use "colored thread No. 50", and once again I have no idea what color that will be so enlightenment is welcome of course.

When done with the designs, we will continue to make the elective exercise which is a doll's quilt:


To attach the designs together, it states that they are to be "overhanded together" by turning a quarter-inch fold on the long side of both pieces and basting the folded pieces together and overhand.

The stitch is not shown in the book, only described so I went to look for an illustration and found this from ChestofBooks.com. It is the overhand stitch as described and illustrated in School of Needlework. A Course Study in Sewing designed for use in Schools:


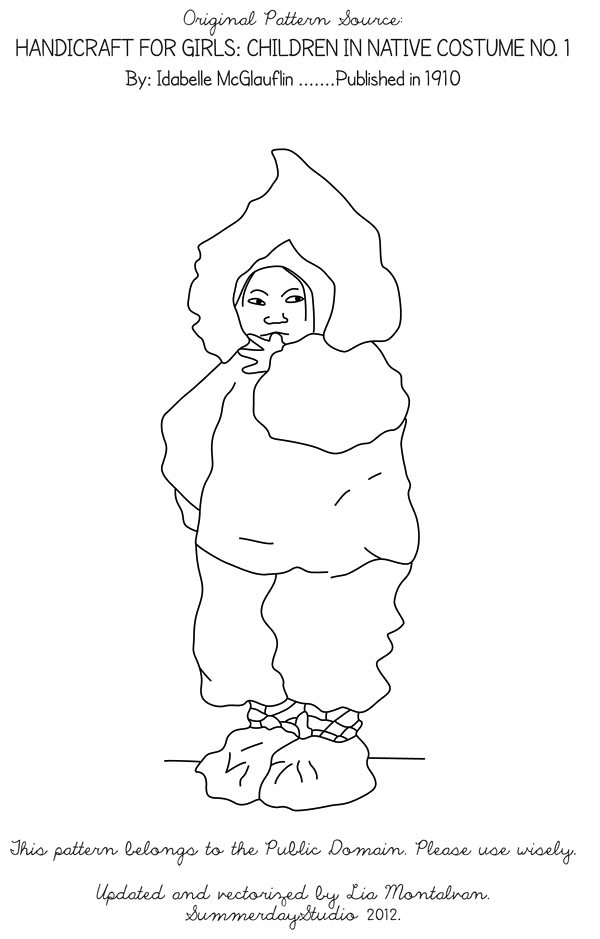
Should you wish to make this too, a pattern will be provided after each part every Monday. We will begin this week with Child in Native Costume No. 1:


Have a lovely week ahead everyone and keep on stitching!

Part 2.

September 19, 2011

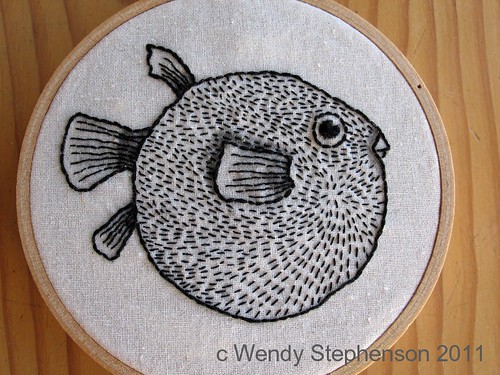
Perfectly fishy

For me, originally uploaded by wendalene.
This is really cute, don't you think?

But even more than that it's a great example of the effect you can get with just a couple of different stitches.

Love it!

August 1, 2010

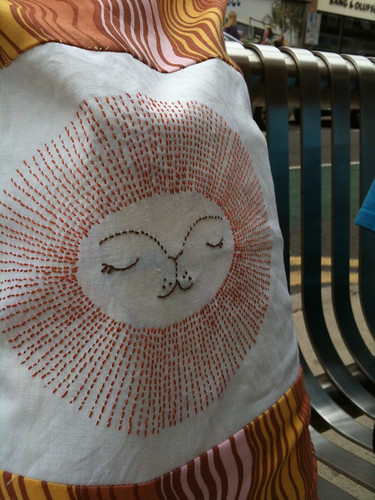
Patterns: Sunburst Lion

Lion close up

When I saw Cate Anevski's free Sunburst Lion pattern, over on her blog Bee's Knees Activities (scroll down to June), I just had to stitch it. All that running stitch creates a wonderful visual and textural effect. This pattern reminds me of retro children's illustrations and could be used in so many ways. I used my finished piece to make an oversized tote (just perfect for carting large packets of nappies from the shops) and it is now my new favourite bag.

Hi, I'm Jo - I feature new embroidery patterns Sundays on Feeling Stitchy. I also post on our Twitter and Pinterest.

Is there a new pattern you'd like us feature? Email me!

SITE DESIGN BY RYLEE BLAKE DESIGNS