September 30, 2012

Alabama Chanin


This isn't so much a specific pattern this week, more sort of a combined 'go check out these books people' / total awe at the patience, commitment and talent of someone who's actually made something from one of them! For those who know the work of Alabama Chanin, the gorgeous dress above is instantly recognisable as being one of her patterns, in which case, if you're anything like me, you bow down in awe at someone actually having the patience to make one of these dresses because as gorgeous as they are, eek, all that hand sewing! For those that don't know Alabama Chanin's work, yep, that dress is all hand sewn, all of it. So a massive wow at Soul_sister's work, always great to see embroidery on something other than a hoop.

Hi, I'm Jo - I feature new embroidery patterns Sundays on Feeling Stitchy. I also post on our Twitter and Pinterest.

Is there a new pattern you'd like us feature? Email me!

September 29, 2012

New Embroidery with Vintage Patterns - September Stitch Along with Interviews!

Hi, everyone, hope everyone is enjoying the new interview format for my monthly round-up post for the 
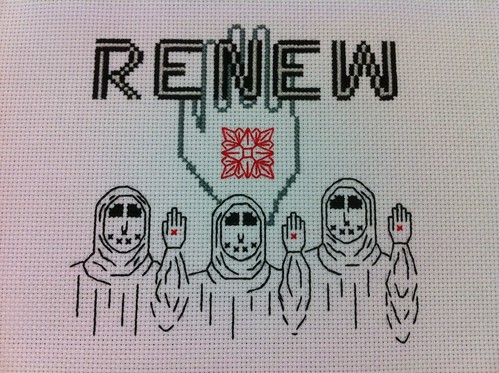
New Embroidery with Vintage Patterns (NEwVP) stitch-alongs (SALs). I think it is really fun and interesting to get to know some of the people behind the stitches!  (If there are questions you wish I was asking, please let me know in the comments!)  The theme for the September SAL was simply to pick any vintage embroidery pattern of your choice but to learn and use new, fancy embroidery stitches  -- which is such a good idea because it helps us break out of our stitchy routine of using the same ol' stitches!

As always, I invite all of you to join our New Embroidery with Vintage Patterns group or at least stop by and take a peek.  There are lots of new embroideries with vintage patterns being added on a regular basis that are totally unrelated to any monthly SAL.  Plus, since I'm doing an interview format now, I'm not able to show-off all the beautiful SAL stitcheries in our photo pool!  Mom Walds Place & I are are also on working on making the "discussion" part of our group more chatty so keep your eyes out for new discussion posts by various NEwVP members.  Since last month, sugarglider500 has added two new discussion posts to our group:  the joy of gloriana silk floss and sulky blendables thread for embroidery.

Meet Flickr peep, Mom Walds Place, the founder of the NEwVP Flickr group!

1.  Please tell us why you created the NEwVP group on Flickr.
I love vintage items and vintage patterns. People were making beautiful vintage inspired embroideries, and sharing them on Flickr. It occured to me that it would be wonderful to see them all together in one group.

Meeting some of these fabulous stitchers sounded like fun too. Wow, was I right!

2.  Please tell us about your vintage embroidery pattern stash.
My personal stash of vintage patterns has been growing by bits and bits. I sell complete patterns in my shop, so my collection is made up of orphans. I'll confess, that if I love a pattern that I am selling, I scan it first.

With so many wonderful folks sharing public domain vintage embroideries in the Flickr Hoop Love Group my collection is big enough now, that I can find a pattern to suit any project.

For quite a while I was collecting vintage embroidery patterns of flower baskets. I finally have a project for them, the Quilty Stitch Along the NewVP Group is doing
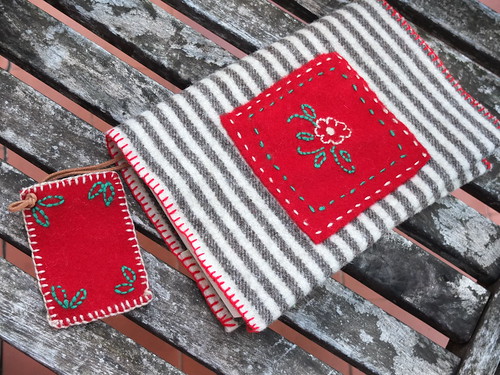
(And here are just a few of the lovelies Moms Walds Place has stitched up!)

First Embroidery of 2012February Embroidery for the 2012 Quilty SALMarch Quilty SAL BasketJune Quilty Stitch Along 2012

3.  Please tell us a bit about yourself.
Myself? We have been homeschooling our three kiddos for fifteen years now, so that is where most of my time and efforts are spent. When Hubby suggested I could go back to school for art, since the kids are older students now, I told him what I really wanted to do was have my own antiques and vintage shop. It has been a dream of mine ever since I was younger, and spent rambling Saturdays with my mom and sister on road trips to find treasures. All of these adventures and challenges have been in southern Wisconsin where the leaves are starting to turn a bit early this year.

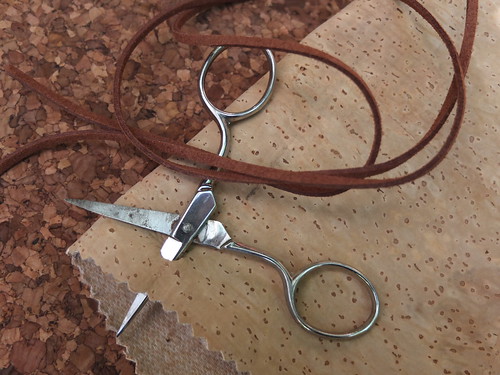
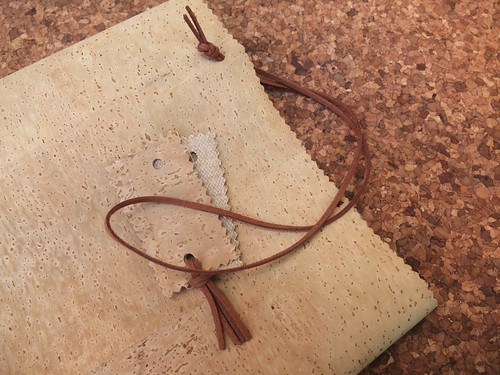
I find myself encouraging others to live simply but beautifully. If you need to purchase some glasses for your home, they should be ones that make you smile. You can use a vintage pitcher that reminds you of grandma for flowers instead of a generic vase. When zoning out in front of the television after a long day, stitch some napkins up while you watch, and have something useful and pretty when when you are done. It has been fun teaching folks to embroider a fun bag to use instead of a generic store one. Life is short, even the little things should be worth it.

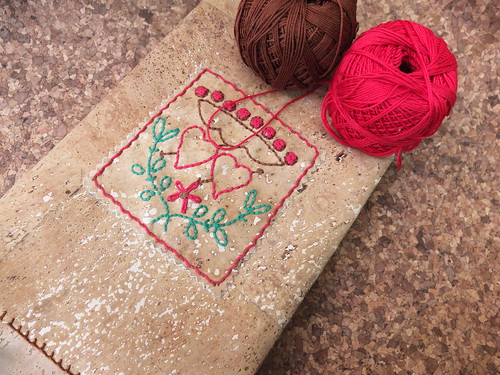
4. Tell us a bit about the embroidery (specifically your September SAL piece) you made.
The members of the New Embroidery with Vintage Patterns Group have been very encouraging and helpful with trying new things with embroidery.  Their enthusiasm inspired the September Stitch Along Theme of an embroidery sampler using a vintage pattern.  The idea of a sampler made me think of cookies, and the pattern I chose immediately came to mind.  It is a good example of using colors and themes we are comfortable with, while reaching out and experimenting with some new techniques.  The blue of the china is like my favorite vintage blue and white kitchen pieces, and the cookies are a delightful way to try new "flavors" of stitches.  Hmm, maybe I should try some new cookie recipes too.

Fly Stitch with Lazy Daisies
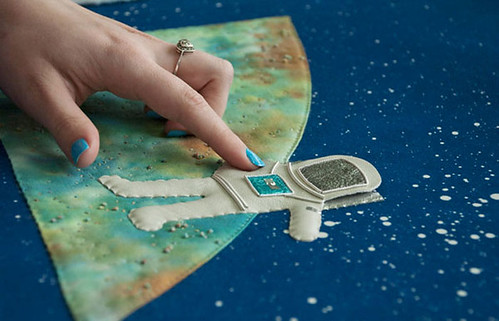
Fancy new stitches!  Fly stitch with lazy daisies!
Vintage Plate Inspiration
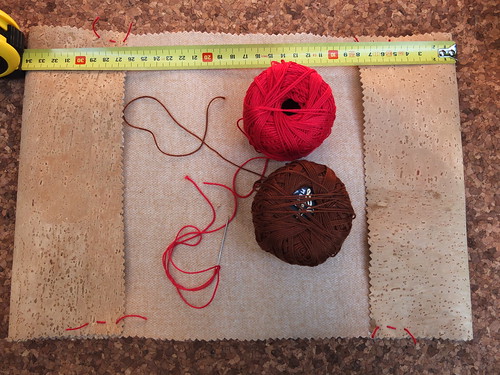
This vintage plate was the inspiration!
September Stitch Along Embroidery Sampler with a Vintage Pattern
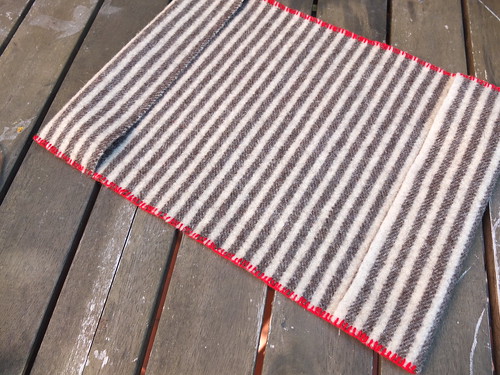
Mmmm.... stitchy cookies......


5. How long have you been stitching? What or who got you started?
I grew up with crafty women, and was allowed to pick out embroidery kits when I was a kid. It was a smart way for them to keep me busy. Although I had not done any for years, it was natural for me to choose embroidery to do while my mind was teaching the little ones. Now that they are bigger I still spend lots of time waiting and stitching.

6.  Why do you like vintage embroidery patterns?  Do you have a favorite one or a favorite theme?
Vintage and antique items are my favorite types of things. It's their history that intrigues me. The stories they could tell. Especially items that were primarily a woman's domain. Actual embroidered pieces speak to my heart. The variety of patterns that were available became astounding through the years. What made stitcher choose one over another? How styles and types of patterns changed in accordance with fashion and culture is fascinating.

Dishes are my favorite themes. So much so in fact, that I have started designing some of my own. Flowers are another favorite. Recently I took some photos of roses that are just like the ones I stitched on my August SAL Teapot. Fruits and veggies are always fun too. Stitching up a set of nine towels featuring fruits and veggies for a friend was great fun, as were blocks for a Veggie Market Embroidered Quilt.

7.  Do you have a favorite embroidery stitch?  If so, why?
The stem stitch is my all time favorite embroidery stitch. As an artist, I have always had a fascination with lines, and the stem stitch bends and swirls along so wonderfully. It is also easy to do one handed while the other holds the hoop making it nice to do while I pay attention to something or someone else.

8.  Anything else you would like to share?
When I meet people who ask, usually while I am doing handwork in public, why I would take the time for something so tedious, I am thrilled for the chance to explain. I share with them how repetitive handwork can be soothing, a background for thinking things through. How intricate patterns can prevent me from worrying. It gives me a chance to share about my love for creativity, and beauty even in little things. If we have enough time, we can even start discussing how history and learning enrich life.
It all starts with a simple thread.

How to find Mom Walds Place online...   Blog   Etsy   Flickr

Thanks for taking the time to read my post and meet just one of the many terrifically talented stitchers in our NEwVP group!  Please do stop by to visit!  The details for our October SAL have already been posted!

September 27, 2012

Castelo Branco Embroiderers and a treasure kept in a chest

Olá! This week I’m returning to Portuguese traditional embroidery and I’m very happy to get back to my research…

I’ll talk about what inspired the embroiderers of Castelo Branco, one of the most famous and rich Portuguese regional embroideries.

Embroidered colcha, image from Castelo Branco Municipality
In the first quarter of the 20th century, Maria da Piedade Mendes, a Portuguese woman living near Castelo Branco, received as an inheritance from her uncle a house and furnishings. Inside, she found chests with at least one Arraiolos tapestry and chests filled with beautiful colchas (coverlets) made of linen and embroidered with silk thread. Inspired by the silk works she begun reproducing the embroidery techniques and the patterns, which she continued doing her entire life with increasing perfection and creativity. Soon she also mastered the entire production cycle of silk thread and even the art of weaving linen and silk.

At that time this type of embroidery was known as “loose embroidery”, bordado frouxo, owing its name to the type of stitches used, and only later it begun being known as Castelo Branco embroidery.

Working on linen with silk, photo from Castelo Branco Minicipality
A famous Portuguese writer, Aquilino Ribeiro, described what happened some centuries before, during Portuguese maritime expeditions. The lords of Castelo Branco returned from the Orient, bringing their suitcases crammed with textiles. So women, home embroiderers, were offered new inspiration sources and maybe people who taught them too, since it’s plausible to believe that some of the slaves coming from India could be experts in the art of embroidery.

The inspiration and the access to the techniques were there and the necessary materials, too…
There are references to linen embroidery with silk in other places but maybe the tradition of flax cultivation in the region of Castelo Branco, the fact that mulberry grew very well, allowing the creation of large scale silkworm silk, created the special conditions unique to the development of this embroidery art.

With oriental inspiration and the use of flax and silk, the art of embroidering colchas was very common in this region through the 18th century. Although this kind of work was reported since the 17th century it’s difficult to rigorously define when and how this art begun. But we can tell some curiosities about the original use of colchas

Piece of embroidery being worked on, photo from Castelo Branco Minicipality
As we saw in Nisa and with lenços dos namorados the great inspiration for embroidery was love… And getting married!!

The Castelo Branco needlewomen prepared the thread themselves, breeding silkworms and spinning and dyeing the thread with which they embroidered the bridal colchas. The girls at the age of marriage decorated their beds with profusely and colorfully embroidered colchas placed near the window overlooking the street where the boy could see them and possibly be impressed and enamored. The colcha was used in the marriage night and some authors say that afterward it was kept out of use and saved for very special occasions.

Similar to what happened in Nisa, there was a small locality in this region where the bride and groom’s home was opened on the eve of the wedding so that everyone could visit it. It usually ended in a pilgrimage to 'go see the bed' (most faithful possible to the Portuguese words…).

The idea of the colcha only being used in festivities is, however, contradicted by those who argue that they were used in everyday life, which would justify the poor condition in which many were found.

After this period, and without any known reason, in the 19th century there was a decline in this art… And linen and silk colchas were forgotten.

Until the day when a treasure was discovered in a chest…

September 26, 2012

Way Back Wednesday

RENEW

I remember when Logan's Run came out. I was just a little kid, but seeing the trailers for the movie scared me to death! It also made me fear the future.  Looking back, the movie is still awesome but silly and the future...well, I still fear it a little. Sailor. Mouth does an excellent job on this piece. Make sure you check out his clown series. It's excellent!

September 25, 2012

Tutorial Tuesday


Happy Tuesday, everyone!

This week I have a tutorial for you that can be used for almost any time of year. It is a fabric postcard with an embroidery collage. I decided to make one for my friend, Nick, because he is a wonderful person. I found that it did not take me long to finish this fabric postcard, and I was able to use up some of my fabric stash.

Note: This cannot be sent in the mail as is. It has to be placed in an envelope or hand delivered.


To make this postcard you will need:

-Fabric scraps or two pieces of fabric at 8 inches wide by 6.5 inches high
-1 piece of lightweight interfacing cut to 8 inches by 6.5 inches
-Embroidery floss in various colors
-Embroidery hoop
-Embroidery needles
-Sewing machine
-Rotary cutter or scissors
-Iron

Step 1: I decided to sift through my scraps in order to piece together the front panel of the postcard. I used a piece of paper cut to 8 inches wide by 6.5 inches tall and placed the fabric scraps on it until I found a placement I liked. If you prefer, you can use one piece of fabric instead of scraps or multiple pieces.


The image above is supposed to be the paper I used to keep track of my dimensions. I apologize for the blur. 


Step 2: I stitched together my scraps in order to make a rectangle that fit the 8x6.5 dimensions. I used smaller pieces of fabric as patches, I pressed under the raw egdes and stitched them directly onto the fabric I had pieced together. The cherry embroidery was a test stitch I did using a pattern from a Sublime Stitching starter kit. The kit I used is no longer in print, but you can find some new wonderful ones here: Sublime Stitching kits.


Step 3: This is the fun part! Once the piece of fabric is ready, it can be embellished with as many stitches as you like in order to create the embroidery collage. You can add patterns or allow the stitches to come to you organically. 


Step 4: Once this front panel is finished. It needs a little stability. I used one piece of very lightweight interfacing and basted it to the back of the panel using my sewing machine.


Step 5: Now it is time to work on the back panel. I decided to make this look as much like a postcard as I could. I used a pencil and lightly wrote what I wanted the back to say and stitched it up.


Step 6: Now it is time to attach the front and back panel in order to complete the postcard. Place the front and back panels right sides together. Stitch around the edge using a 1/4 inch seam. Leave a small space unstitched so you can flip the postcard. 


Step 7: Before flipping the postcard, clip the corners as close to the stitch without snipping it. Flip the postcard so the right sides face out and press. 


Step 8: In order to close up the small space I left open, I used a running stitch around the entire piece. I made sure to hide my knotted ends in between the front and back panels where I flipped the postcard.


Step 9: Gift to recipient! 


As I was finishing this up, I was thinking about all the ways this could be used for birthdays, holidays, Valentine's Day, or to ask someone to be a maid of honor or bridesmaid.

Hope you enjoy and give it a try!

Hi, I'm Kristen! I am a lover of all things stitchy and crafty. I have been sewing for as long as I can remember. My grandmother taught me how to sew Barbie clothes when I was young and I have been sewing ever since.

You can find me at Bobbypin Bandit, on Instagram, and my Etsy shop.

September 24, 2012

Priscilla Embroidery Pattern: Play Apron Pt. 1

Hullo everyone! Finally finished converting the play apron pattern and ready to start and share the project with you all. As mentioned in the last post, our project is a play apron from the Priscilla Embroidery Catalog (Fall-Winter 1915-16) of Priscilla Needlework Co.


It is my first time to make a pattern spread out on many pages, so I apologize if you find it a bit confusing and not user-friendly. As I still work on developing that skill, here are step-by-step photos instead of getting it all together :-)

The pattern for the apron comes in 5 pages, with the first page being the overview of the whole design and notes the pattern pieces (the letters). I did not make a pattern for the strap as it seemed like it would be better if it was made to fit the lucky child who will have the apron after :-)


1. To begin, DOWNLOAD THE PDF PAGES and print out.


2. Cut the pieces as shown below (you may do it however you feel comfortable, just make sure there is space for sticking them together). You may cut the sides by following the line, but do not cut the scallops on the line as this will be hard to transfer the design on your fabric later on. I chose to leave space on the right side of pattern A, whilst trimming B completely. Pattern C gets an allowance on top and the right while D gets trimmed except for the top part.


3. Place your glue as shown and stick the pieces together (B to A and D to C).


4. Now place your glue as shown below and attach together.


5. Your pattern piece is done! Each pocket must be traced on separately, the only pattern that you embroider on the apron itself are those of the two little elves on top. But we will tackle this next time :-)


In the catalog, the apron is tan linen, but I do not have such (as usual!) so I will be using some muslin (the ones I use to draft dress patterns). It also states that the thread colors are green, brown and yellow, so here goes!


Have a lovely week ahead everyone! 

September 23, 2012

Patterns: Happy When It Rains

Happy When It Rains by Follow The White Bunny

Feeling Stitchy friend Nicole has created this lovely shading tutorial on her blog for this cheerful little cloud. So head straight over if you've been curious about this embroidery technique!

Hi, I'm Jo - I feature new embroidery patterns Sundays on Feeling Stitchy. I also post on our Twitter and Pinterest.

Is there a new pattern you'd like us feature? Email me!

September 22, 2012

Interview: Emma Wood

astronaut

Hi guys, I'd like to introduce you to Emma Wood, a fascinating UK-based stitch artist. Last month, Emma reached out to us and since I have always been a sci-fi nut, burning through every sic-fi show and movie I can get my hands on, I was captivated by her space-inspired works - including her constellation lampshades and space embroideries. Here's an interview with Emma for you all - enjoy!

What is your stitching background?
My mother and grandmother are my main influences! I come from a very creative family, my mother used to make toys, she did a bit of cake decorating, was a florist and she now makes jewellery. I was introduced to cross stitch at a young age which was easy enough to start with, and then progressed to other more tricky hand embroidery techniques.


Did you attend art or design school? Why or why not?
I went to college and studied general Art & Design where I was able to cover all areas: graphic design, fashion, applied arts. I then went on to study applied arts at university, specialising in embroidered and printed textiles. I feel like my skills have improved so much whilst at university, it's nice to sometimes do a project or a technique you aren't familiar with and you form great relationships with tutors and colleagues along the way.


What draws you to space imagery?
I've always liked designing and making for children, so space is something that you can be quite playful with. Initially it was the amazing colours from the Hubble telescope that sparked my interest. I just wanted to recreate the swirls and bleeding colours with dyes on fabric. I also dyed my own space inspired threads that I could sew with.

Your works contain a fascinating amount of goldwork (in silver thread). What advice would you give our readers if they’d like to try goldwork?
If you're thinking about trying goldwork the easiest thread to start off using is pearl purl. Is super easy to couch down as the thread just disappears inside the coil and leaves a really neat finish. A book I found helpful was Beginner's Guide to Goldwork by Ruth Chamberlain, it contained a lot of the basic stitches and a few little projects to get you going. Goldwork takes a lot of patience and practice so don't take it up if you want instant results!


Please tell us about your children’s book project.
This is a project I undertook in my second year of university. I created a handmade children's book in which I used a combination of machine and hand embroidery with some CAD embroidery for the text. The pages are also hand dyed and various elements are screen printed. I wanted to create something tactile and completely unique. This is something I would love to do again, children's stories are full of inspiration!

How many hours does it take you to stitch your pieces?
The space inspired pieces each took about a week solid. I was working to a deadline at university so these pieces could've taken a lot longer if I'd had the extra time. Now I'm able to make these in my own time I can slow down and enjoy it even more!

The children's book was a little longer but that included a lot of dye work and screen printing. I had to do a lot of trial when it came to the construction and positioning of imagery and text.


Are you organized or cluttered? A careful planner or a procrastinator? :)
I'm extremely organised! I keep all my equipment and materials stacked neatly in boxes. I have 8 pairs of scissors, all for different things - they are all kept in a zip up case and are always put back in the correct slot! (Maybe that's a bit too weird?) Not at all!

When I was at university I was a very careful planner, working to tight deadlines meant no room for procrastinating! However I think now I'm able to do my own thing I will have fun just experimenting.

Please describe your work space OR describe your ideal work space if your current one is less than ideal! :)

I've moved house 3 times in the last 3 years so unfortunately I don't have a permanent work space :(
I would love to have my own shop selling local handmade bits and bobs with a studio out the back where I can print and dye and sew till my hearts content! Either that or when I have a nice big house (in my dreams) I can have a sun house in the garden where I can be creative and do my work in peace!


What do you do when you’re not stitching?
When I'm not stitching I do a lot of computer designed work, I like surface pattern design so I try to do some drawing and designs every now and again. I also created my website from scratch which I'm quite proud of! I like to read too, I've just finished “The Hunger Games” which was so good!

*****
Thanks, Emma, for showing us your work and sharing your inspirations with us! All photos in this post are courtesy of  Laura Ramsey and are used with her permission.

For more on Emma, visit:
Her Website: www.emmawoodtextiles.co.uk
Her Facebook Page: www.facebook.com/emmawoodtextiles

Hi, I'm floresita, editor of Feeling Stitchy. I'm an avid stitcher, knitter, and crafter. You can see more of my stitching on Instagram and my blog. My vintage transfer collection is on Vintage Transfer Finds.

Feel free to email me with any ideas for the blog!

September 20, 2012

Book cover tutorial with Portuguese soul

Olá! As asked by some of you, here you have a tutorial on how I make my book covers! Never forget that I only use Portuguese materials... So try your best to find some materials similar to these.

Making a book cover in burel or in cork skin (cork leather or cork fabric) is very simple ... Burel and cork skin, 100% Portuguese, are very beautiful and easy to work with because there is no need to finish edges since they won't unravel. This is very important, make sure you’ll use a fabric like these, so no sewing is needed!!!

You should start by defining the size of the cover. From my “reviews” I found that the best dimensions are 34cm (13 1/3”) wide if you measure the cover when open and 24cm (9 1/2”) height. I tried many books and almost all fit this size. But maybe in other countries publishers use different book dimensions…

I advise you not only to see the photos but also click the links, they will help you and show you different solutions...

Material needed to make a cork fabric book cover
Everything you need to make your book cover
What will you need:
- a piece of fabric that does not unravel of 50cm (20”) wide by 24cm (9 1/2”) height;
- two more pieces of fabric that does not unravel: one piece of 11cm (4 1/3”) squared and another of 11cm by 8cm (3 1/7”) (if you are working with inches, you may try to find a similar size easier to measure…)
- 50 cm (20”) of suede cord (or another type, as you prefer);
- a needle;
- wool thread or cotton floss, depending on the fabric you’ll be using;
- tracing paper and a pattern;
- a pair of scissors with sharp points.

And that’s all!! Let’s begin…

1. Fold over the two outer edges of burel or cork skin to the required size and baste (two or three stitches will be enough) the four corners of the book cover, making two side pockets.

DSCF6633
Fold over two outer edges to the required size
2. Use blanket stitch to hold the outer edges and to finish the whole cover. Instead of blanket stitch sometimes I use whipped running stitch and I believe that running stitch would be great, too.

DSCF3619
Use blanket stitch to finish the whole cover and hold the outer edges.
3. Use the square piece of fabric to embroider a motif that will decorate your book cover. With this kind of fabrics transferring the motif it’s never the easiest part… I use tracing paper with the pattern and I hold paper and fabric together embroidering through both. Believe me it works better than you would think! At least, if you keep your patterns simple. I’ve already shown some photos in a previous post

After embroidering the motif you must centre it on the front of the cover and use an appropriate stitch, like blanket stitch, running stitch or back stitch, to attach it to the cover. You can use the fabric without embroidering it, too. If you left the top open, you’ll have a pocket in your cover!!

Embroidered cork fabric book cover
An embroidered cork fabric book cover.
4. Your book cover could be ready to go, but I love to add a book marker to it. Use the small piece of fabric left and choose a shape to your bookmark. You can embroider it or keep it simple… In order to finish the book marker, you must perforate the top of the book marker with a sharp-pointed scissors. Or, even more simple, punch holes at the top and bottom with a hole punch.  Then pass the two ends of the suede through the hole and, if necessary, pull them with the tip of the needle. Tie a knot with the two ends together to hold the cord to the piece of fabric. On the other side you will attach the suede cord to the book cover. Fold the cover in half and choose a point at the top to make a small hole with the scissors.
Perforating the cork fabric in order to attach the bookmarker
Perforating the book cover to attach the book marker.
Tie a knot so that the marker is secured to the cover as in the photo.

Very easy to make - cork fabric bookmarker
Attaching the book marker.
Your book cover is finished! These is a very simple way of doing it but the possibilities are almost infinite... They will depend on the fabrics, the threads, the colors... And, above all, it will depend on your imagination...

DSCF5590
I love this book cover made of burel...
DSCF4392
"Burel" and cork, beautiful together...
I believe that when you are working with great materials, like burel and cork, they should be the stars and keeping it simple is always the best choice to make… Look here  and here to look at an even simpler way of doing it - a "four stitches" book cover... More simple is not possible!

You already know these words in Portuguese, but I don't mind repeating them... "Cortiça" for cork and "burel" - no translation available :)


SITE DESIGN BY RYLEE BLAKE DESIGNS