December 21, 2019
Christmas Countdown #8: Maid-a-milking
This was another fun stitch - I wasn't 100% happy with my colors, but it was a lot of fun to put together. One thing I loved about these ornaments was how they helped me overcome a bit of fear about working in 3d. :)
All these patterns are available in the Mmmcrafts Etsy store - this is Maid-a-milking.
Here's a link to my post for details on how I stitched this up:
Hi, I'm floresita, editor of Feeling Stitchy. I'm an avid stitcher, knitter, and crafter. You can see more of my stitching on Instagram and my blog. My vintage transfer collection is on Vintage Transfer Finds.
Feel free to email me with any ideas for the blog!
December 20, 2019
Christmas Countdown #7: Swan-a-swimming
I adored my swan ornament - one of the first finishes that I was perfectly happy with! I especially liked the two-tone water I did, instead of stitching a waterline.
All these patterns are available in the Mmmcrafts Etsy store - this is Swan-a-swimming.
Here's a link to my post for details on how I stitched this up:
Hi, I'm floresita, editor of Feeling Stitchy. I'm an avid stitcher, knitter, and crafter. You can see more of my stitching on Instagram and my blog. My vintage transfer collection is on Vintage Transfer Finds.
Feel free to email me with any ideas for the blog!
December 19, 2019
Project a Month: Jenny Blair Kit finish
I've finished my lovely Jenny Blair Owl kit in record time! When I last left you, I was about to stitch the final full moon in padded satin stitch...
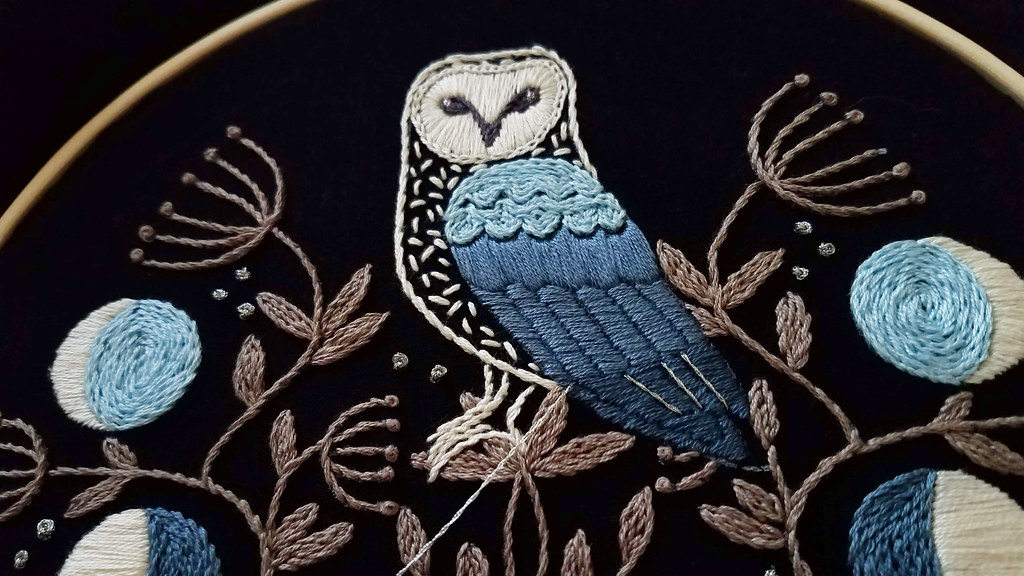
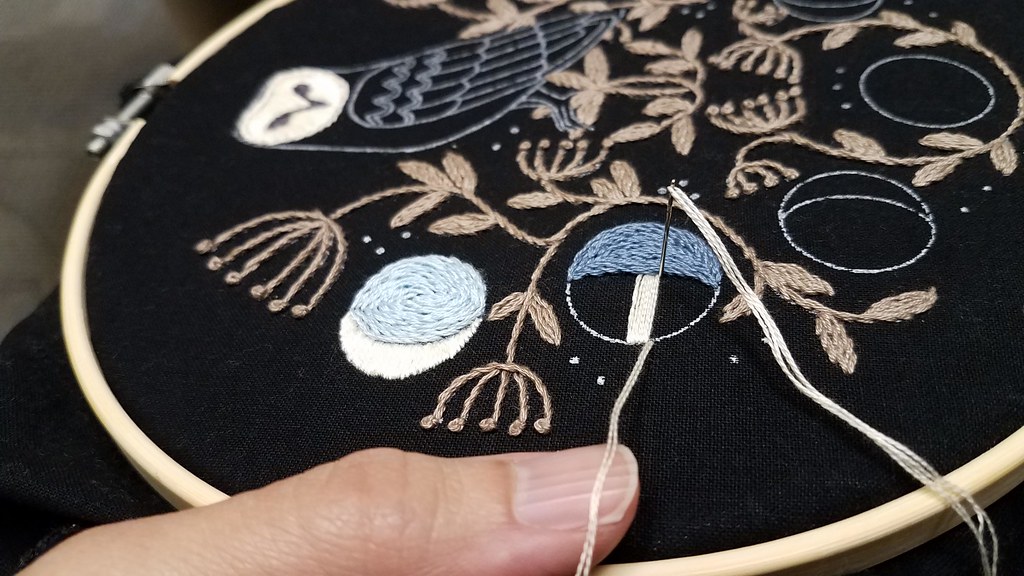
Here's how I began, scattering seed stitch across the moon. I then followed up with 2 strands of thread satin stitch, at times doubling up where the fabric peeked through.
Next I started on the owl details, once again using stem stitch for the top of the owl's wing...
Then I did satin stitch for the curved upper part of the wing - I loved the smooth texture...
Then more satin stitch in the opposite direction, on the lower parts of the wing.
Here's how it stood before adding the french knots... admittedly my satin stitch was a bit clumsy, I always struggle with satin stitch on perfectly circular shapes. I also thought the owl wing needed something more...
So I added a few metallic highlights on the bottom of the wing, like so...
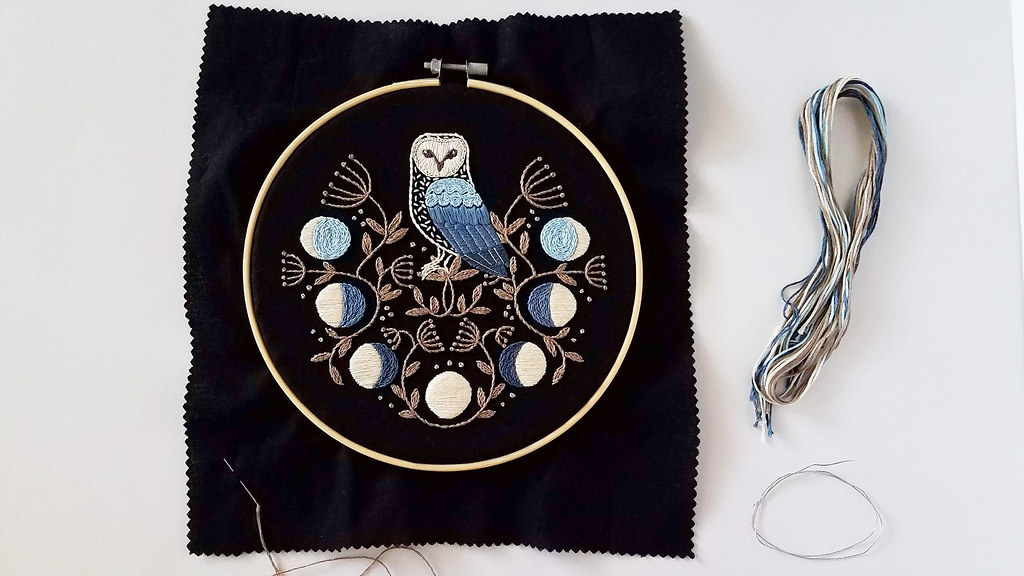
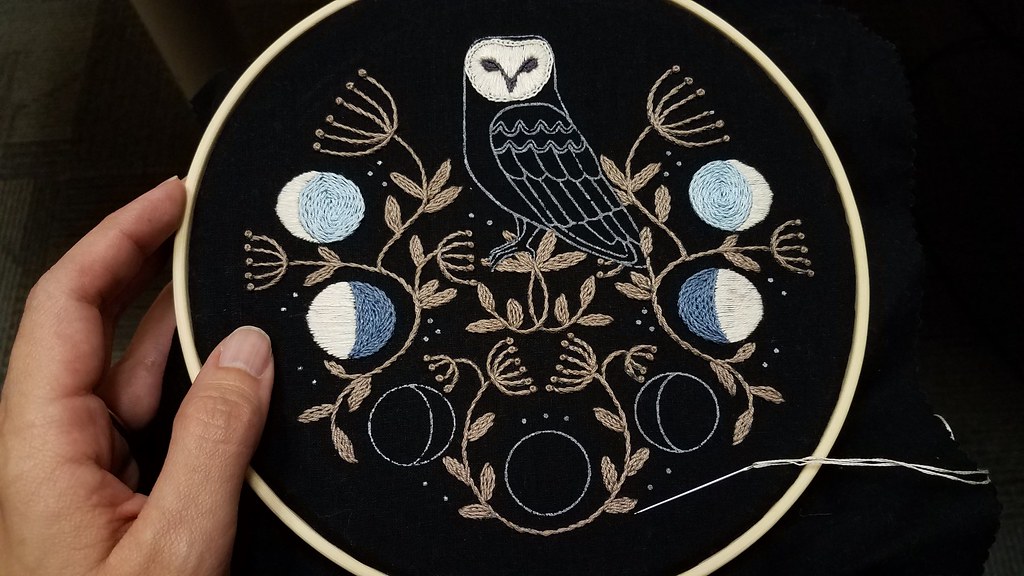
And here it is, finished - all in all, it's a lovely kit, and I'm glad I was able to fit this into my end of year stitching! I love the texture effect of the stem stitch, I'll have to remember to revisit stem stitch often in the future.
I had plenty of thread left over when I was finished! The only thread that I almost used up was the metallic thread (seen in the lower part of the photo), so do be careful with that if you order this kit, there isn't enough to make mistakes. :) I used 3 strands throughout, except for satin stitch, where I used 2 strands. I used the needle Jenny provided in the kit for my stitching - it was thin and very sharp - I did poke myself a few times, so be careful of that as well!
This kit is just wonderful for the price - the materials and design are just beautiful, I'm so glad I stitched it, and highly recommend Jenny's Etsy store, Jenny Blair Kits. I hope you enjoyed my quick progress on this project as much as I did!
Previous Posts
First post: http://www.feelingstitchy.com/2019/12/project-month-jenny-blair-owl-kit.htmlSecond post: http://www.feelingstitchy.com/2019/12/project-month-jenny-blair-kit-progress.html
Hi, I'm floresita, editor of Feeling Stitchy. I'm an avid stitcher, knitter, and crafter. You can see more of my stitching on Instagram and my blog. My vintage transfer collection is on Vintage Transfer Finds.
Feel free to email me with any ideas for the blog!
Christmas Countdown #6: Goose a Laying
Here is Goose a Laying - although I wasn't super happy about my color choices - I finished these in the midst of my first weeks of chemotherapy - and the strongest rounds, at that! So, another free pass. :)
All these patterns are available in the Mmmcrafts Etsy store - this is Goose-a-Laying.
Here's a link to my post for details on how I stitched this up:
Hi, I'm floresita, editor of Feeling Stitchy. I'm an avid stitcher, knitter, and crafter. You can see more of my stitching on Instagram and my blog. My vintage transfer collection is on Vintage Transfer Finds.
Feel free to email me with any ideas for the blog!
December 18, 2019
Wonderful Wednesday #79: Lily Adelaide Upton
Well, my year of stitching one project a month is almost over, and I admit, if I only had more time, THIS Christmas Beetle Kit would have been my December project! Isn't it lovely? I know some people are not fans of bugs, but I adore insects, and I love this twist on a simple wreath.
Lily offers this pattern in 3 versions in her Etsy store, if you'd like to stitch this:
As a kit:
As a digital tutorial with detailed stitch directions:
As a PDF pattern:
The kit looks gorgeous, so I'd lean towards that, but if you already have fabric and threads ready, the other two options would work well too!
Follow Lily @lilyadleaideupton on Instagram for more loveliness!
Hi, I'm floresita, editor of Feeling Stitchy. I'm an avid stitcher, knitter, and crafter. You can see more of my stitching on Instagram and my blog. My vintage transfer collection is on Vintage Transfer Finds.
Feel free to email me with any ideas for the blog!
Christmas Countdown #5: Golden Ring
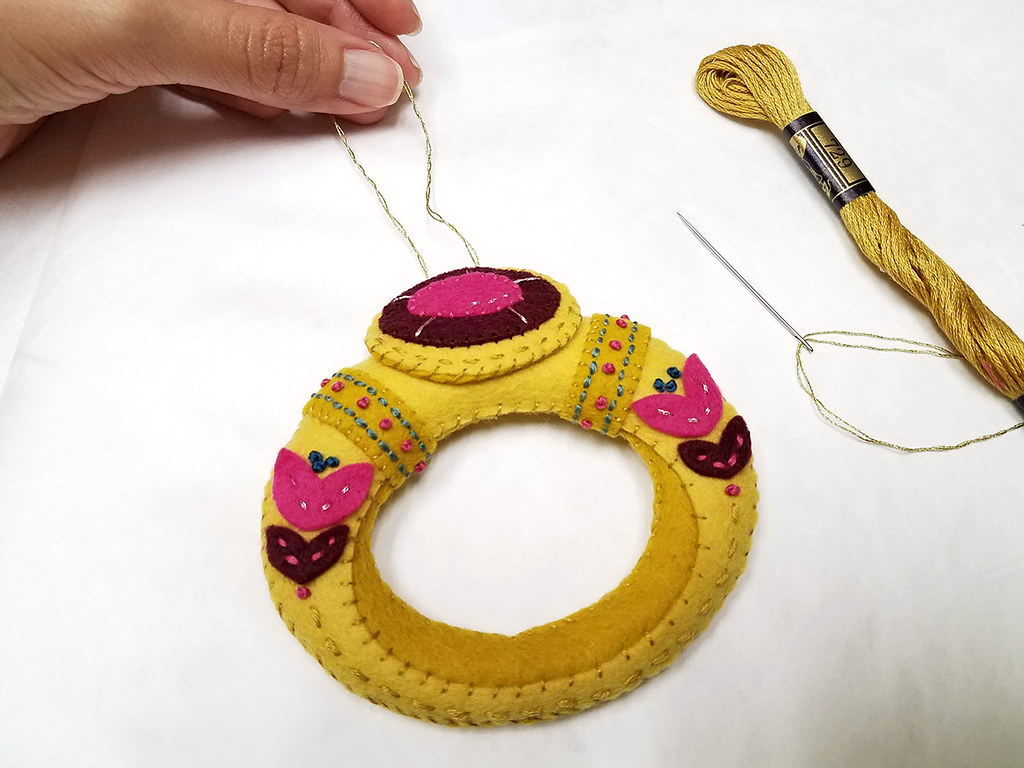
Here is the Golden Ring - I loved the 3d elements of this design - it was such fun to put together!
All these patterns are available in the Mmmcrafts Etsy store - this is Gold Ring.
Here's a link to my post for details on how I stitched this up:
Hi, I'm floresita, editor of Feeling Stitchy. I'm an avid stitcher, knitter, and crafter. You can see more of my stitching on Instagram and my blog. My vintage transfer collection is on Vintage Transfer Finds.
Feel free to email me with any ideas for the blog!
December 17, 2019
Christmas Countdown #4: Colly Bird
Here is Colly Bird - I never liked my finished stitching on this one very much, and my photos didn't help either. But still it was progress, so I'll cut myself some slack on this one. :)
All these patterns are available in the Mmmcrafts Etsy store - this is Colly Bird.
Here's a link to my post for details on how I stitched this up:
Hi, I'm floresita, editor of Feeling Stitchy. I'm an avid stitcher, knitter, and crafter. You can see more of my stitching on Instagram and my blog. My vintage transfer collection is on Vintage Transfer Finds.
Feel free to email me with any ideas for the blog!
December 16, 2019
Christmas Countdown #3: French Hen
Here is the French Hen - and this was where I began to love my ornaments - I learned something new on each one, all the while trying to keep them all in the same vivid, fun color family.
All these patterns are available in the Mmmcrafts Etsy store - this is French Hen.
Here's a link to my post for details on how I stitched this up:
Hi, I'm floresita, editor of Feeling Stitchy. I'm an avid stitcher, knitter, and crafter. You can see more of my stitching on Instagram and my blog. My vintage transfer collection is on Vintage Transfer Finds.
Feel free to email me with any ideas for the blog!
December 15, 2019
Christmas Countdown #2: Turtle Dove
Here is the Turtle Dove - one of my least favorite that I stitched - but I was still learning and progressing. :)
All these patterns are available in the Mmmcrafts Etsy store - this is Turtle Dove.
Here's a link to my post for details on how I stitched this up:
Hi, I'm floresita, editor of Feeling Stitchy. I'm an avid stitcher, knitter, and crafter. You can see more of my stitching on Instagram and my blog. My vintage transfer collection is on Vintage Transfer Finds.
Feel free to email me with any ideas for the blog!
December 14, 2019
Christmas Countdown #1: Partridge and Pear
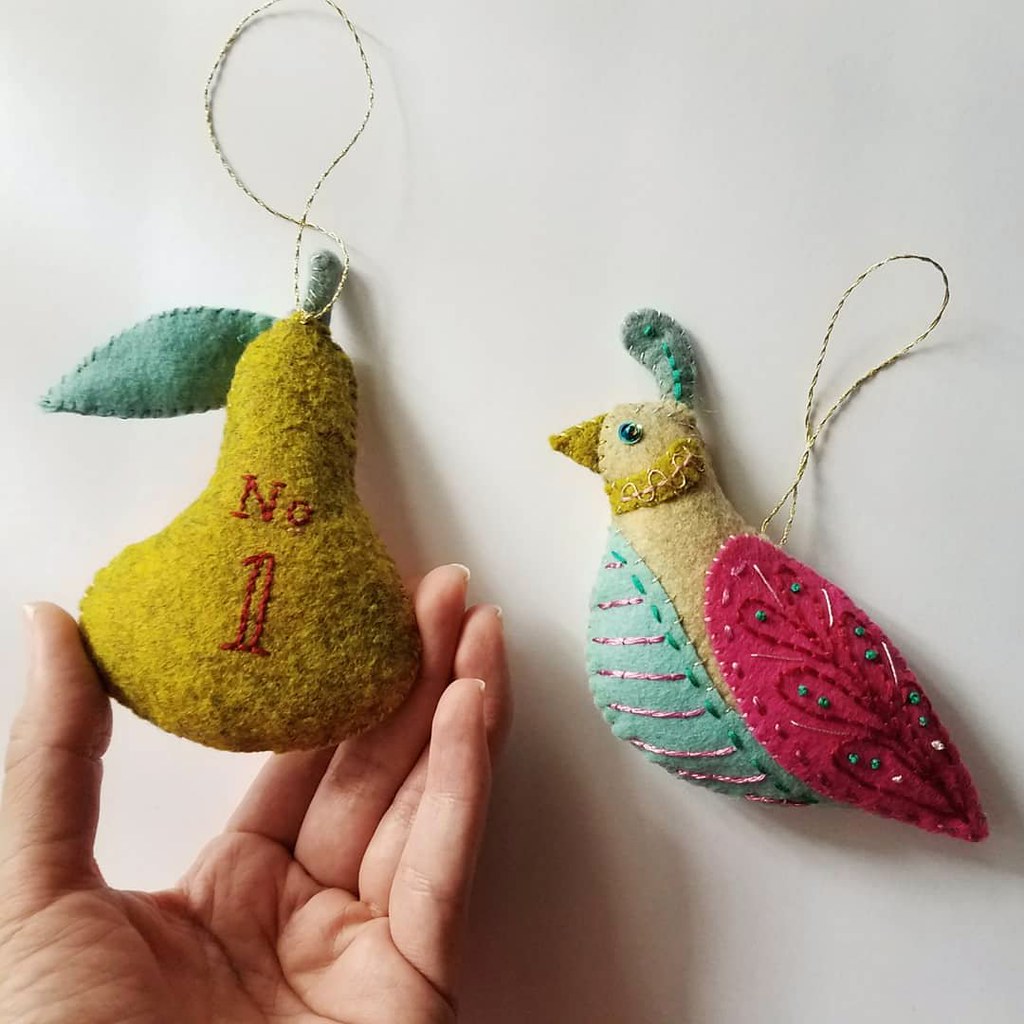
Hi all! I thought it would be fun to do a Countdown to Christmas day, using the 12 Days of Christmas ornaments I stitched up last year!
All these patterns are available in the Mmmcrafts Etsy store - this is Partridge and Pear.
Here's a link to my post for details on how I stitched this up:
Hi, I'm floresita, editor of Feeling Stitchy. I'm an avid stitcher, knitter, and crafter. You can see more of my stitching on Instagram and my blog. My vintage transfer collection is on Vintage Transfer Finds.
Feel free to email me with any ideas for the blog!
December 13, 2019
Project a Month: Jenny Blair Kit progress
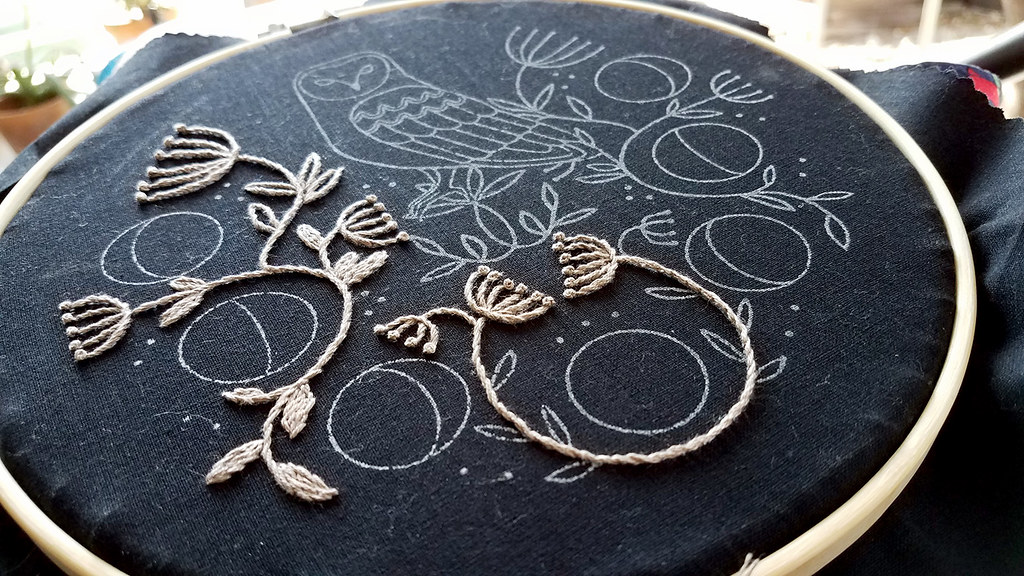
As I mentioned last time, I'm stitching this a bit differently from the stitches Jenny specifies - I've used stem stitch on all the branches and leaves, and the "dark" parts of the moon phases...
I used satin stitch on the little owl face as Jenny suggests, and added a chain stitch border using 2 strands of thread.
I forgot to do padded satin stitch on the light portions of the moon phases, but I do plan to try padded satin stitch on the last full moon...
I really love the subtle gradations of blue in this kit...
I think these colors are looking just beautiful together - what do you think?
Can't wait to finish this soon! :)
Hi, I'm floresita, editor of Feeling Stitchy. I'm an avid stitcher, knitter, and crafter. You can see more of my stitching on Instagram and my blog. My vintage transfer collection is on Vintage Transfer Finds.
Feel free to email me with any ideas for the blog!
December 6, 2019
Project a Month: Jenny Blair Owl Kit
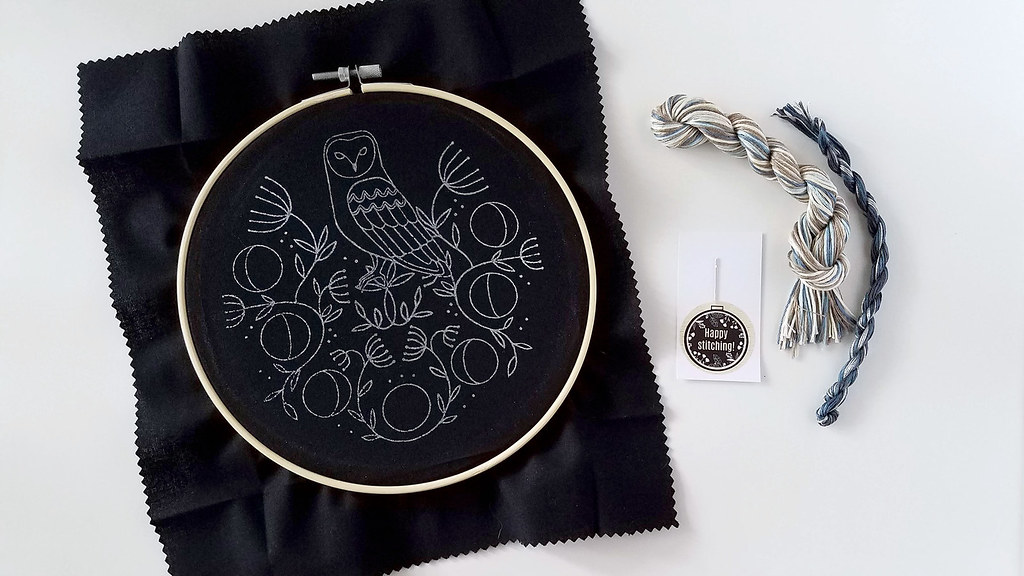
I've had my eye on this Jenny Blair Owl Kit ever since I first saw it on Jenny's Instagram account - it is just lovely! I am quite behind on my monthly projects - this should have been October's - so I am hoping for a quick stitch on this one.
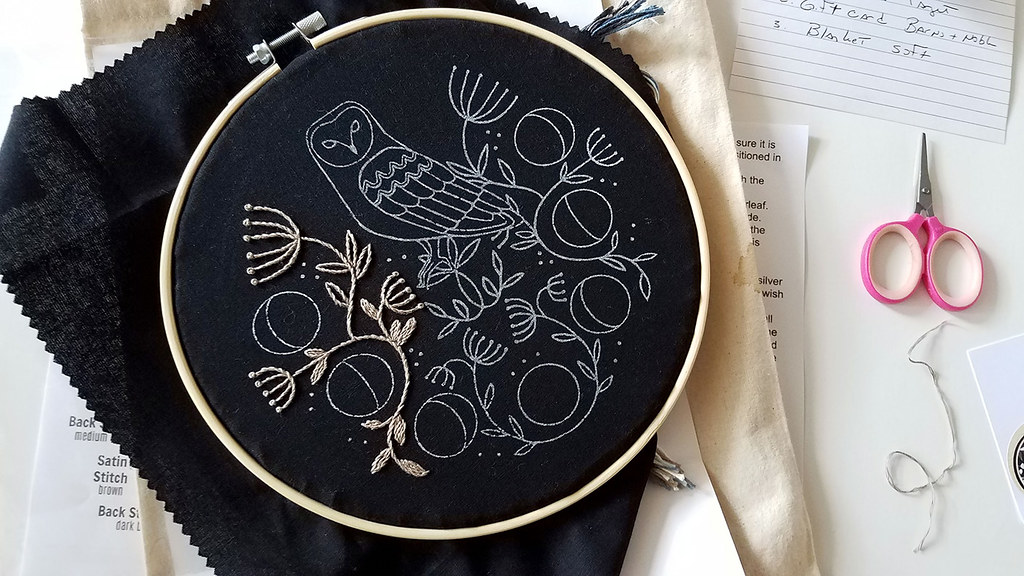
There are two versions of this kit, one with black fabric, and one with gray fabric (as above). After much deliberation, I chose the black, as it looked quite dramatic and unique compared to anything I'd done yet this year...
There is something so lovely about this design, isn't there? My reason for choosing this pattern was a wonderful, vivid memory of joy I had from last year, in October when I was on chemotherapy. It was a cold night, and I was having trouble sleeping - I heard a strange barking sound high up in a nearby tree - I stepped out into the cool night air to see the large, mysterious shape of an owl, hooting back at me! It was truly magical, and such a comforting moment of beauty in a difficult time, so I chose this pattern to remember that moment forever. :)
About the kit
This is a lovely, well-designed kit - the hoop is nice and sturdy, and the screen printed fabric is very nice to work with, as it is so difficult to do a good transfer on dark fabric. The included needle is small and very sharp - I'll be using it for my stitching!The directions are very thorough - with suggestions for stitches to use in each area, and a nice, clear photo of the finished project. If you stitch the kit as Jenny suggests, you'll have a nice sampler of stitches done by the end.
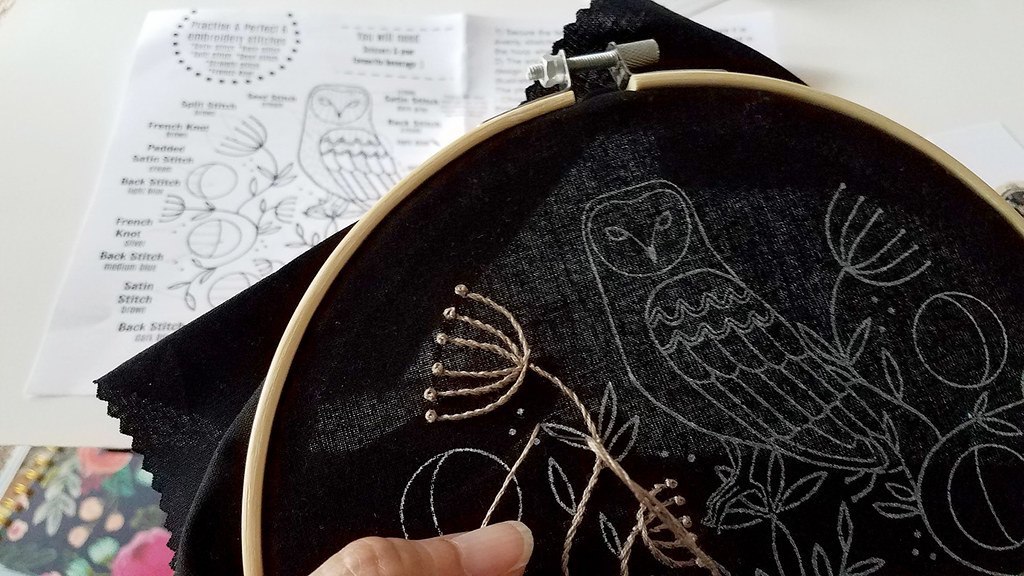
As for myself, I am still on a stem stitching high after finishing my Gimena Romero class pattern, so I chose to do all the branches and leaves in stem stitch...
I love that the threads are already cut in perfect lengths for stitching, so you don't have to fuss with tangling skeins or winding them onto bobbins - this would be a good, small travel project for a plane.
Here is my stitching so far!
If you would like to stitch along (or get this wonderful kit for a friend), this is the Owl Kit by Jenny Blair. More progress soon!
Hi, I'm floresita, editor of Feeling Stitchy. I'm an avid stitcher, knitter, and crafter. You can see more of my stitching on Instagram and my blog. My vintage transfer collection is on Vintage Transfer Finds.
Feel free to email me with any ideas for the blog!
December 2, 2019
Project a Month: Gimena Romero stem stitch class
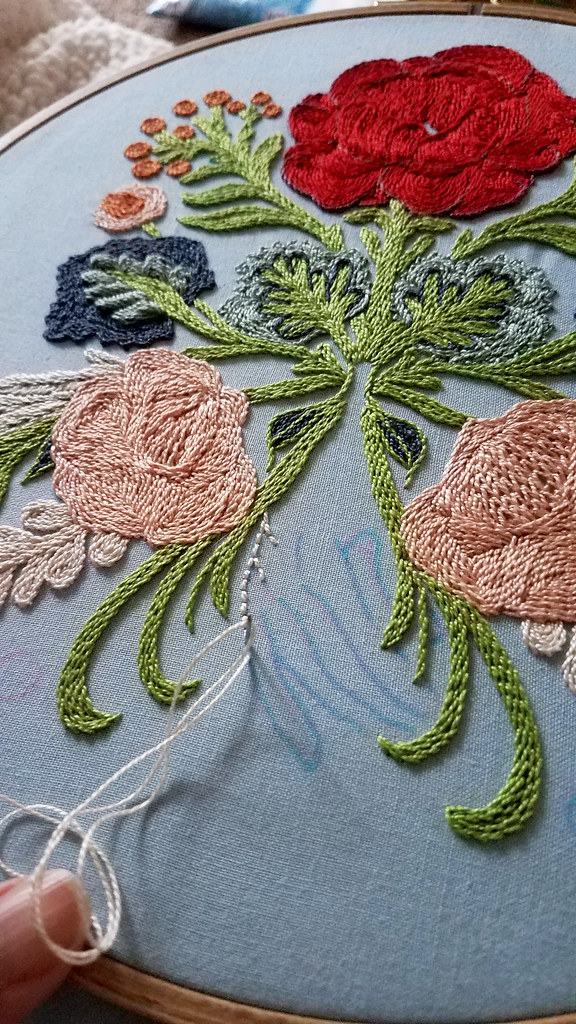
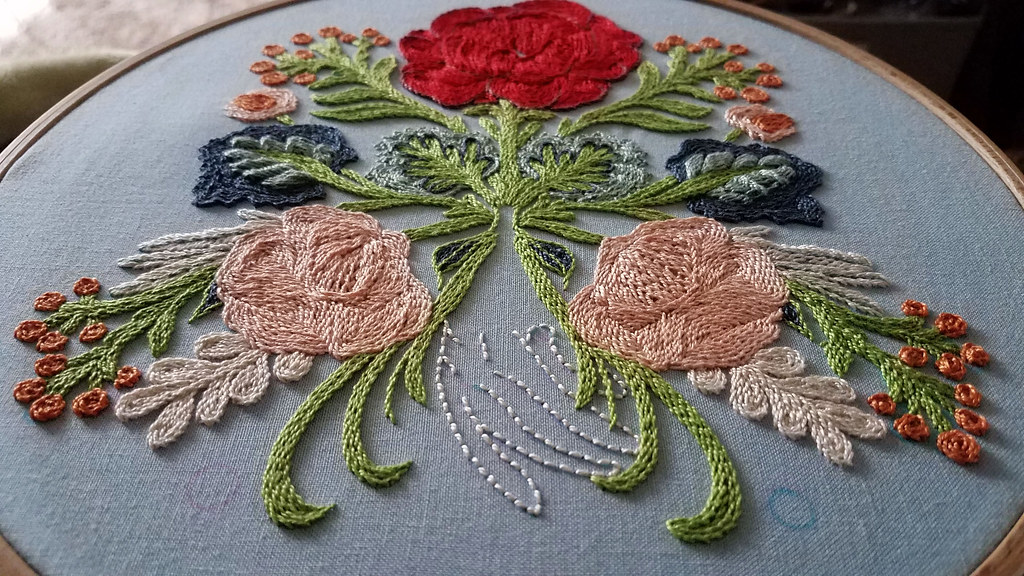
And I'm finished with the Gimena Romero final project! Believe me, there were times I never thought this days would come - it was very slow going for me at 2 months, but the result was very satisfying! As I mentioned previously, this was the TĂ©cnica de bordado con paso atrĂ¡s class by Gimena Romero on Domestika - the class and site are in Spanish, but there are English subtitles.
I cannot recommend this class enough! I thought I knew how to stem stitch (and that I didn't enjoy it) but there is something so informative about plunging into all the variations on the construction of this stitch that Gimena provides. I found myself enjoying this stitch so much more as I practiced it, and came to understand its architecture.
Threads I used
DMC perle cotton size 8: Ecru, 315, 503, 704, 754, 817, 922, 930, 950I also thought I didn't enjoy stitching with perle cotton threads - I've used them pretty sparingly over the years - but experimenting with size 8 perle cotton threads completely changed my perspective! They offer a marvelous sheen and texture that builds and builds...
When I last left you a month ago, I was about halfway through...
I added a couple more shades to my original palette as I went along...
When I came to the hand, I stitched the outline in backstitch, just as Gimena had prescribed in her directions...
I loved the ghostly effect of the outline, unfilled, and could very well have left it like that...
But I chose to fill the shape with stem stitch, and I think I like both effects. I actually used a lighter peach shade for the hand than I did for the peach roses - 950 - but the colors read almost exactly the same in the finished project.
Thank you for following along in the snail paced progress on this one! Stay tuned for my next project later this week!
Previous posts:
Stem stitch class progress
Stem stitch class first post
Hi, I'm floresita, editor of Feeling Stitchy. I'm an avid stitcher, knitter, and crafter. You can see more of my stitching on Instagram and my blog. My vintage transfer collection is on Vintage Transfer Finds.
Feel free to email me with any ideas for the blog!