Showing posts with label January stitchalong. Show all posts

January 28, 2012

January Stitchalong: hang it up and enjoy!

finished!

Can it be? We've finally arrived at week 4 of the January Stitchalong, and we're done! Or at least, I'm done - last week I walked you through possibilities for covering the backs of your letters and hanging them.

I chose to go with little felt loops that I secured with a tiny little x-stitch:
finished felt loops for hanging

Here's some more:
close up of the finished letters

As for "new" - I dangled those letters with white perle embroidery thread from the top row of letters:
dangly letters

I used thin white ribbon to hang them, and tied them onto simple tacks:
tacks and ribbon: quick and easy hanging

Just 4 tacks, some ribbon, and some wallspace, and we're done!
from a distance

On to your projects!

It looks like Aimee finished her family sampler using couched letters:

Isn't it nice? Gorgeous work! :)

Kleas gave us a tantalizing preview of some of her couching - knowing her - it's going to be great!
couching

And here's a cute peppermint-looking design by sisbabestitches:
Couching

Well, I hope you guys enjoyed the January Stitchalong! If you'd still like to give it a try, remember you can always join in - here's the free template - just add your pics to the pool and tag them "JanStitchalong".

Here's a list of the previous weeks:
Week 1: Pattern
Week 2: Couching 101
Week 3: Covering the backs and hanging

Is there anything you'd like to see in this year's stitchalongs? I'd love to hear it! :)

Hi, I'm floresita, editor of Feeling Stitchy. I'm an avid stitcher, knitter, and crafter. You can see more of my stitching on Instagram and my blog. My vintage transfer collection is on Vintage Transfer Finds.

Feel free to email me with any ideas for the blog!

January 21, 2012

January Stitchalong: covering the backs and hanging


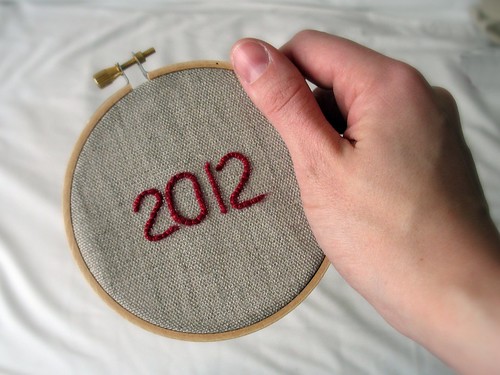
Hi guys! Welcome to week 3 in the January Stitchalong. The theme of our stitchalong is couching and banners, if you'd like, you can tackle both or either one. :)

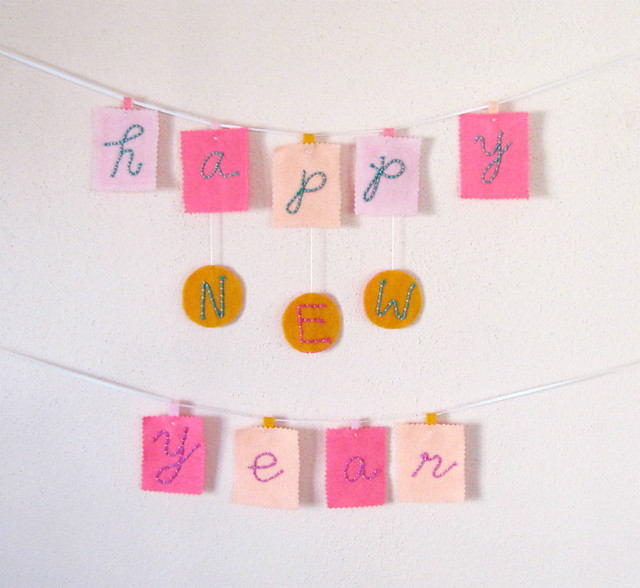
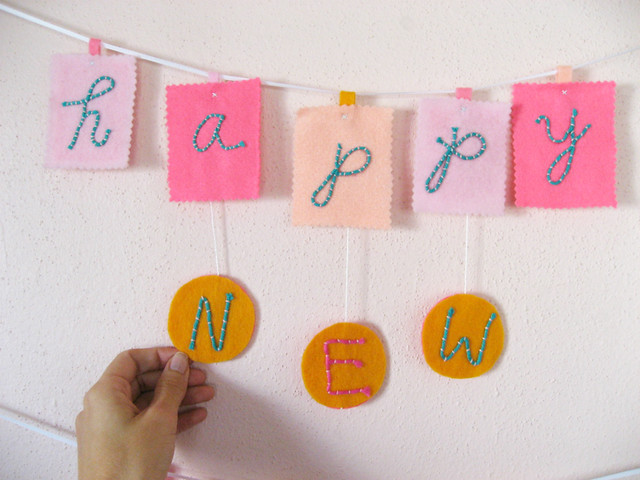
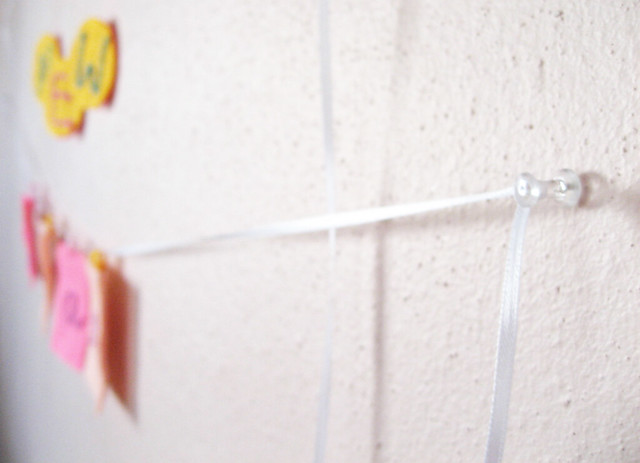
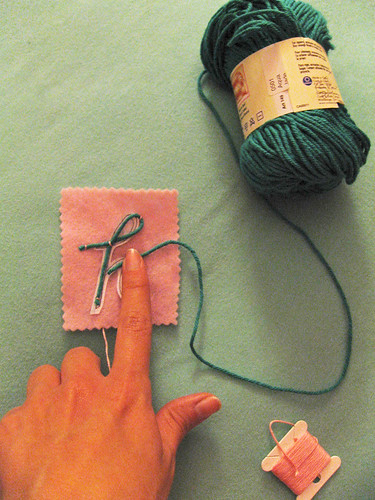
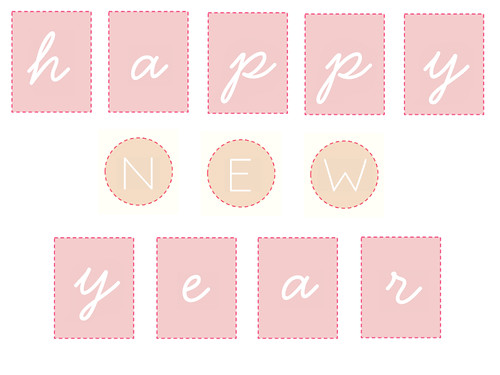
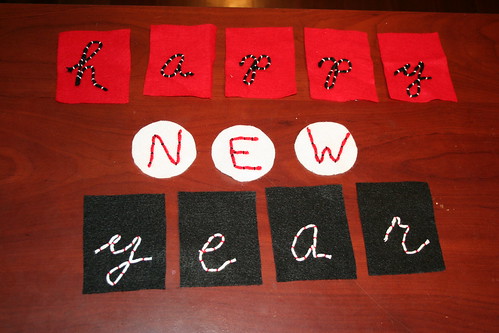
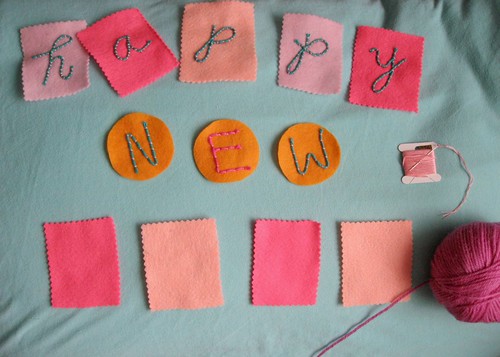
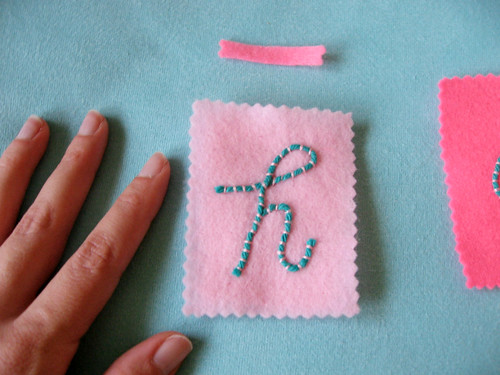
I'm doing a Happy New Year banner, using the shapes in the free template I provided. Up above, you see me trying to decide how I want this thing to hang - I decided to suspend "new" using white perle cotton from the letters a, p, and p.

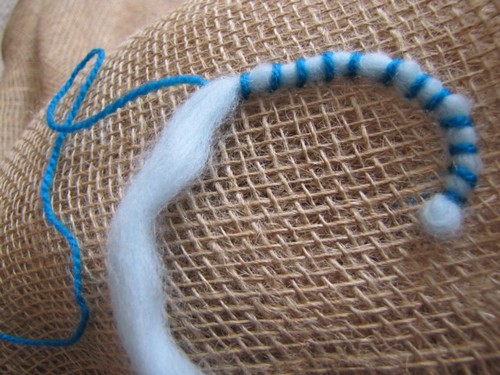
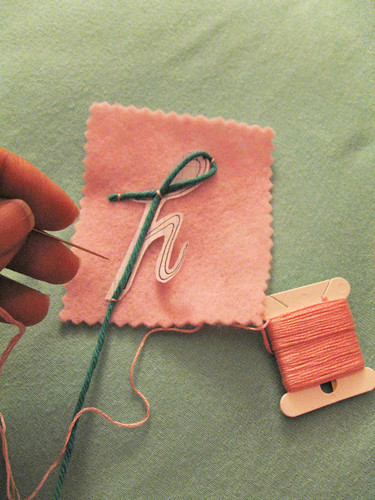
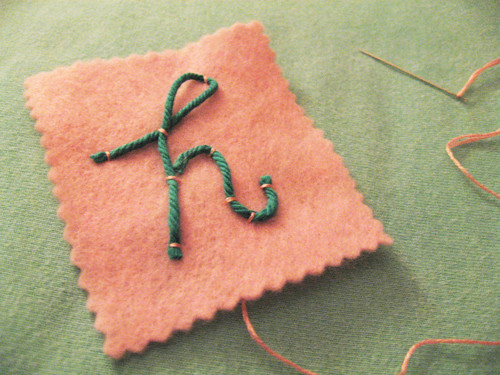
Some of you may be wondering about hiding the backside of your work?


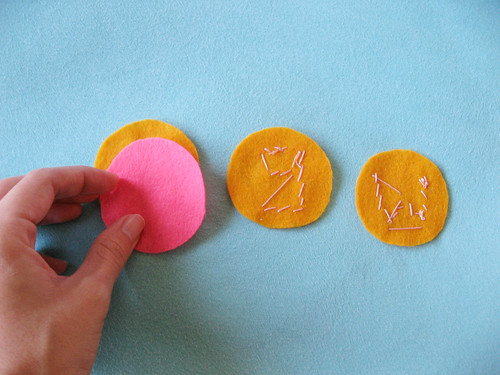
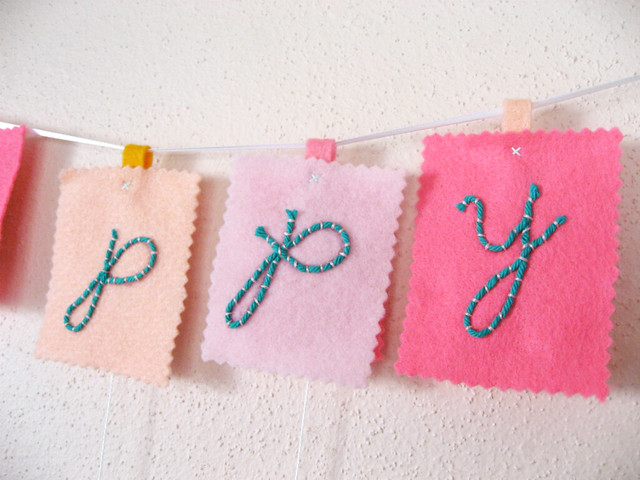
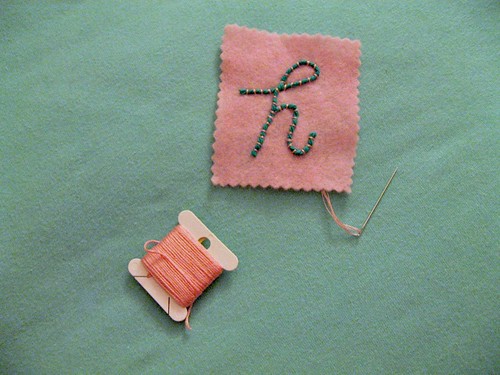
Well, I'm not super-neat but I am a bit prim about that, so I cut felt in contrasting colors to hide the back.

I'll just sandwich the perle cotton between the 2 layers of felt:


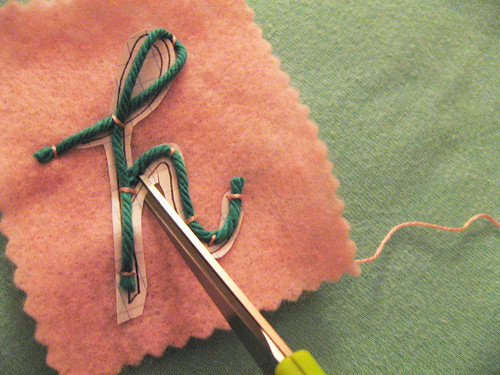
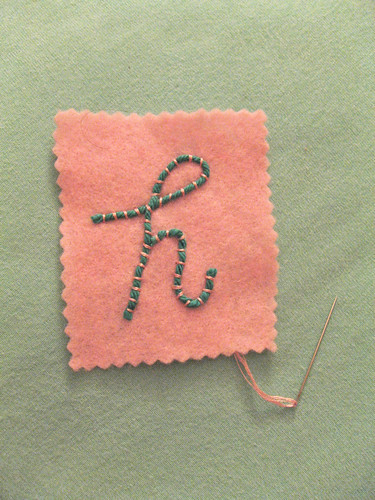
To attach them, you can stitch them together with a simple running stitch or blanket stitch.

I opted for the easier route: glue. ;) here's the glue I used

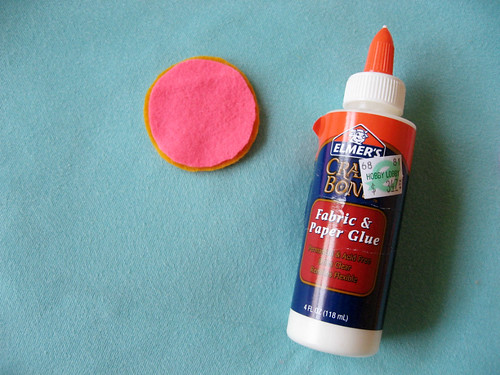
I picked it up for cheap at Hobby Lobby. Honestly, its performance is "meh" - it smells super-strong and it's very thick and hard to control, so I'm glad I did a test-run first on some "stunt" felt. :) By the way, let me know if you've had better results with another fabric glue on felt!

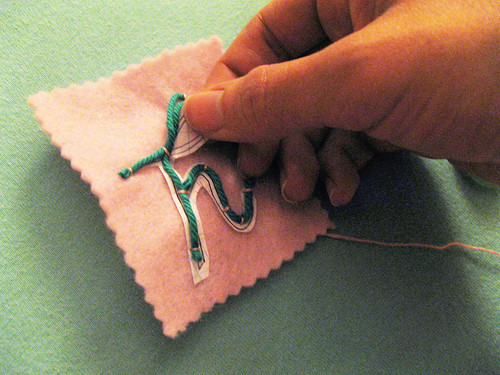
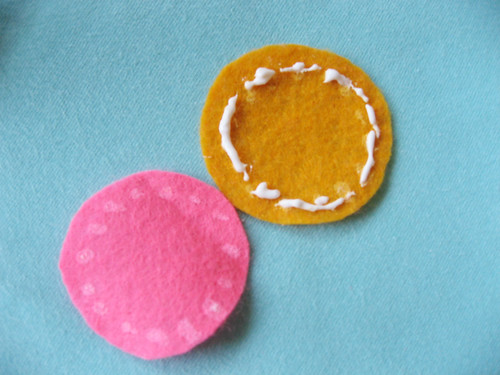
I decided the key to it actually sticking is to use lots of glue, but not so much that it seeps through and shows (ew). You can see my previous attempt on the pink side to use small neat dots. That didn't work. :)
key: lots of glue

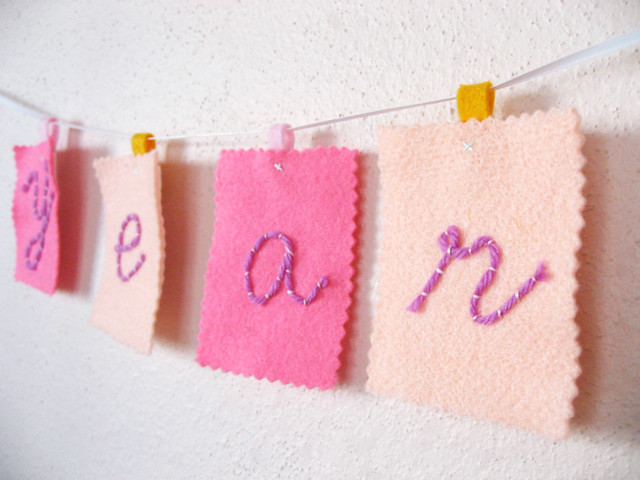
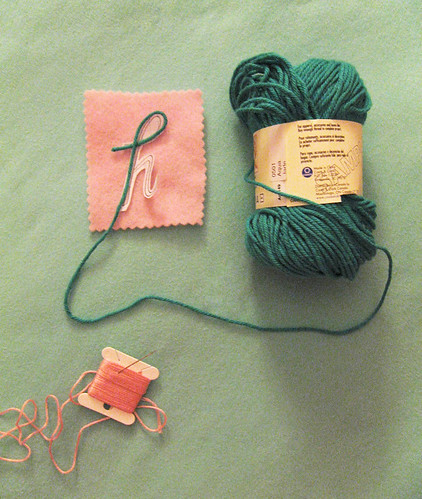
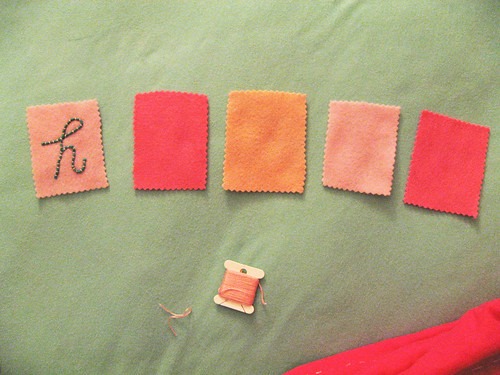
I had fun choosing contrasting colors for the backs - so that if they ever flip over, it'll still look cute:

backs

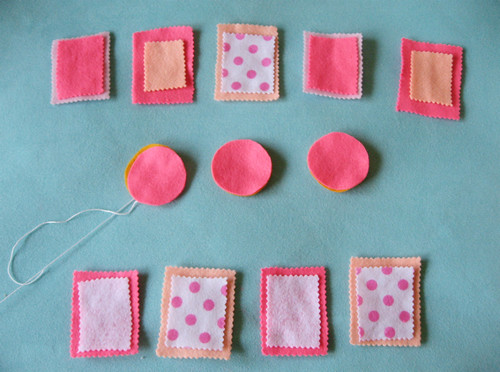
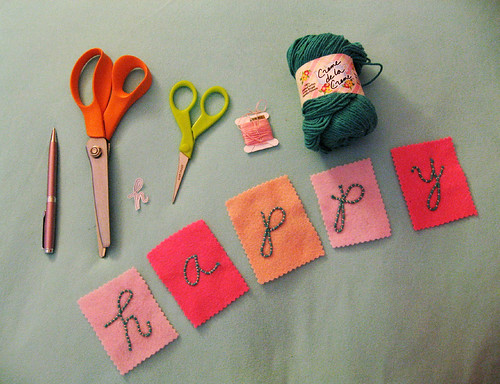
Ok, I'm just gonna admit I went way girly on this one. I think it's because I live in a pink room. It's infecting me! :)

Next step: how to hang your letters. There's a few ways you can do this, including sticking with the ultra-simple mini-clothespins I used above. Maybe even glitter clothespins? :)

Or, you could make ribbon loops, and secure them with stitches to the backs:

ribbon loops

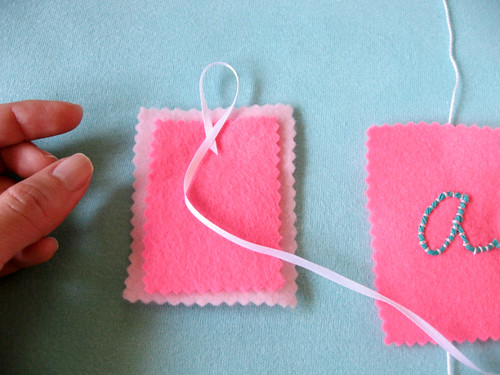
I decided to go with felt scraps - to follow along, cut a scrap about this big:


Fold in half:


Secure to the back with stitches, thread some ribbon or yarn through, and it's ready to hang!

c20

So, if you're following along at my speed, we've arrived thus far:

c27

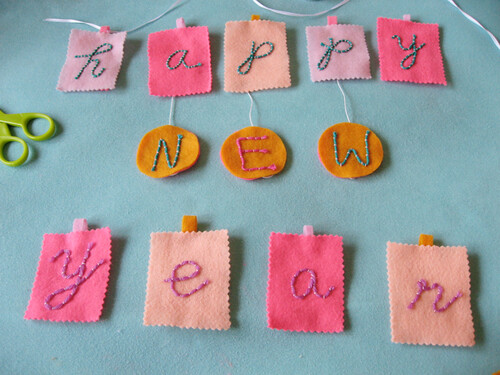
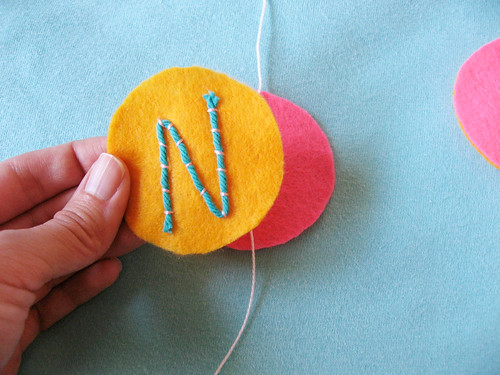
Now, if you're looking at the yellow-orangey felt I used for the letters "new" and wondering to yourself - what was she thinking, you are not alone. :) I'm not 100% sure about that color - at first I thought it was cute and contrasty, but I may change my mind before I'm completely done, next week... :)


Onto your projects! :)

Amy did a banner, but with snowflakes, instead of letters:

snowflakes (couching) for banner
I love the way her combinations of floss look like really neat running stitches! :)

Aimee is working on a couched sampler -

Jan'12 stitch along progress2
I love her combination of variegated yarn and bright green thread!

And finally, I dug up some lovely examples of couching on Flickr, like this beautiful piece by Eleanor:

Couching

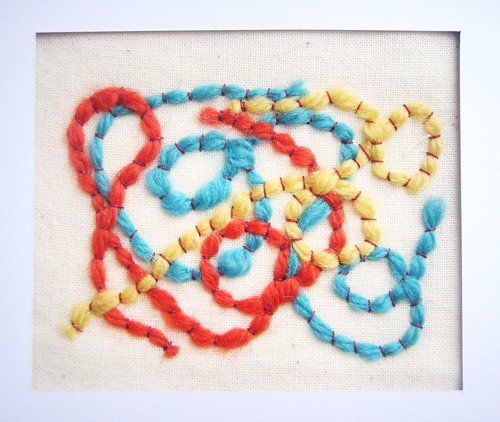
This stitched piece in progress by Lalania:

Couching- Embroidery

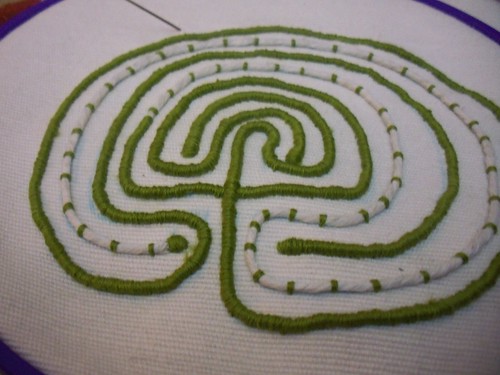
And this very delicately stitched labyrinth in progress by fattycrafter:

Labyrinth

Amazing stuff, huh? Hope you can join us this week, it's the last week of the January Stitchalong! To join in, add your pics to the embroidery pool and tag them "JanStitchalong.":)

Hi, I'm floresita, editor of Feeling Stitchy. I'm an avid stitcher, knitter, and crafter. You can see more of my stitching on Instagram and my blog. My vintage transfer collection is on Vintage Transfer Finds.

Feel free to email me with any ideas for the blog!

January 6, 2012

January Stitchalong: Couching 101

Last week I started off the January stitchalong and I promised you some details of my first attempt at couching. So, without further ado, here we go!

lighter2

Step 1: Trace your letter onto paper, cut out, and place on your felt


step 2

Step 2: Loop your yarn to form the first part of your "h"

I chose a chunky weight yarn, but experiment with whatever yarn you have on hand. Every yarn has a different "drape" so try a few and see what you like!

step 3

Step 3: Add a few stitches to keep your yarn in place, and trim (I made my "h" with 2 pieces of yarn)

step 4

Step 4: Lay down the second piece of yarn, add a few stitches to keep it in place, and trim

clip paper carefully

Step 5: Use sharp scissors to clip into the paper carefully (without clipping your yarn!) :)

step 6

Step 6: Tug the paper out very carefully

This is the trickiest step - don't panic if your stitches come loose - just have your needle ready to re-stitch as necessary.

oo12

Step 7: Briefly admire your work :)

I'm not kidding! It looks pretty nice so far, eh? :) I kind of liked it as is, but I added more stitches just in case...

all stitched

Step 8: Add remaining stitches

Stitch as much or as little as you like. Also, experiment with thread color vs. yarn color - I chose a combo that would show up nice and contrast-y for these pics. :) My advice in terms of color (since I am usually stumped) is keep it simple - I used three shades of felt I had on hand and 1 shade of floss.

one down, 4 to go

One down, 4 to go! :)

For all of you who are just now tuning in - welcome to the January Stitchalong! Last week I shared a free template with you that has a nice script alphabet, two template shapes, and ideas for a banner layout:

banner layout

From your comments, you guys are interested in a range of things, so feel free to experiment with couching, use the banner templates, use just the alphabet, or whatever you like!

To join in, just add your photo to the embroidery group and tag it "JanStitchalong"!


Some of you joined in right away - I love tamaratamara's elegant take on this stitchalong!

2012


IMG_8765
And one of you already has a banner ready to go! Bravo, kghawkes, for your first try at couching!!!

So, what do you say? I think we need to see some more stitching! :) I'll be back soon with more updates!!!

Hi, I'm floresita, editor of Feeling Stitchy. I'm an avid stitcher, knitter, and crafter. You can see more of my stitching on Instagram and my blog. My vintage transfer collection is on Vintage Transfer Finds.

Feel free to email me with any ideas for the blog!

December 31, 2011

January Stitchalong!


Hey guys! It's floresita here, with the last post of the year and our first stitchalong of next year! I was up at the crack of dawn a few days ago, couldn't sleep, and instead started to brainstorm a felt banner idea for the new year. I was thinking of new year's resolutions, and mine just happened to be - try something new every month. What haven't I tried yet? Couching!

IMG_2858

Using my own cursive, some yarn, and embroidery floss, I decided to give couching a try for the first time. If you, like me, have never tried couching before, this is a perfect simple project to try it out with!

Here's a nice video tutorial by Mary Corbet on couching: http://www.needlenthread.com/2006/10/couching-video-tutorial.html

And here's a very nicely photographed tutorial by Sarah Whittle: http://sarahwhittle.blogspot.com/2010/08/how-to-couch.html

If you'd like to join in this stitchalong, everything you need is pictured up above - a pen or pencil, scissors, pinking shears (if you want a decorative edge on your felt), embroidery floss, yarn, and felt.


I made a pattern file with the template pieces and a nice cursive alphabet called Handsome (if you don't trust your own handwriting). :) Get the free pattern.

template pieces for banner
Your finished banner can be a new year's banner, or maybe a Happy Birthday banner - with the letters in the pattern file, it can say anything you want. All you need to do to join in is add your picture to the embroidery pool and tag it "JanStitchalong"!

You don't have to wait until you're finished - we love seeing in-progress projects (check out my progress, below)

IMG_3002

I'll be back to check in later this week with my progress and a walkthrough of my first try at couching. In the meantime, why don't you line up some colors and materials, feel free to ask any questions here, and let's get stitching! Although, depending on how many spots I hit this evening I may not get to your questions right away tomorrow... ;) Hope you guys have a great time tonight and have lots of fun with this! :)

Hi, I'm floresita, editor of Feeling Stitchy. I'm an avid stitcher, knitter, and crafter. You can see more of my stitching on Instagram and my blog. My vintage transfer collection is on Vintage Transfer Finds.

Feel free to email me with any ideas for the blog!

SITE DESIGN BY RYLEE BLAKE DESIGNS