Showing posts with label autumn. Show all posts

November 1, 2017

Wonderful Wednesday #55: Tamar Nahir Yanai

Wonderful Wednesday 55 - Tamir Nahir Yanai featured by floresita on Feeling Stitchy

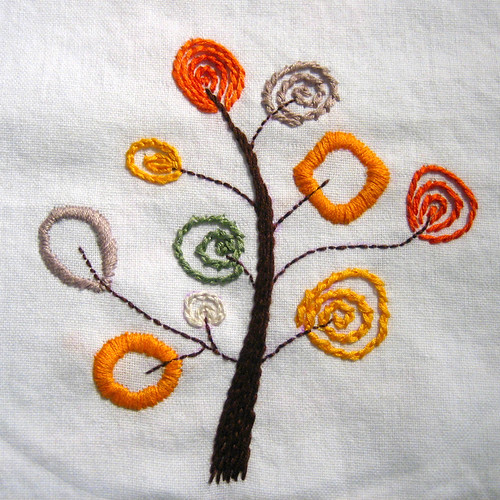
This beautiful Autumn Leaves Embroidery Kit by Tamar Nahir Yanai is so simple and perfect. There are several options offered by the shop - printed fabric, kit without hoop, or kit with hoop.

These delicate stitches and soft colors are such a wonderful way to remember fall.

Hi, I'm floresita, editor of Feeling Stitchy. I'm an avid stitcher, knitter, and crafter. You can see more of my stitching on Instagram and my blog. My vintage transfer collection is on Vintage Transfer Finds.

Feel free to email me with any ideas for the blog!

October 25, 2017

Wonderful Wednesday #54: MLM XOXO

Wonderful Wednesday 54 - MLM XOXO featured by floresita on Feeling Stitchy

What gorgeous Fall Leaf Embroidery Kits these are by MLM XOXO on Etsy! You may choose from a red leaf duo, acorns, or a dark chestnut leaf and the kits contain: a 4” wood hoop, design drawn on fabric, embroidery floss & needle, grosgrain ribbon, and card stock. I am loving the gorgeous, deep colors used on these!

Hi, I'm floresita, editor of Feeling Stitchy. I'm an avid stitcher, knitter, and crafter. You can see more of my stitching on Instagram and my blog. My vintage transfer collection is on Vintage Transfer Finds.

Feel free to email me with any ideas for the blog!

October 4, 2017

Wonderful Wednesday #51: Samantha Purdy Textile

Wonderful Wednesday 51 - Janet Purdy Textile featured by floresita on Feeling Stitchy

What a delightful, unique little pattern by Samantha Purdy Textile on Etsy! I was immediately enamored with this charming, simple Raking Leaves pattern, from the fall colors and the leaves, to the cute acorn hat.

There are so many unique and gorgeous little Fall and Winter themed patterns in this shop, that I thought I'd treat you to a few more peeks:

Fall Day Cross Stitch Pattern by Samantha Purdy Textile, featured by floresita on Feeling Stitchy
Fall Day

Apple Cider Cross Stitch Pattern by Samantha Purdy Textile featured by floresita on Feeling Stitchy
Apple Cider


Hi, I'm floresita, editor of Feeling Stitchy. I'm an avid stitcher, knitter, and crafter. You can see more of my stitching on Instagram and my blog. My vintage transfer collection is on Vintage Transfer Finds.

Feel free to email me with any ideas for the blog!

September 29, 2017

Freebie Friday - Fall and October

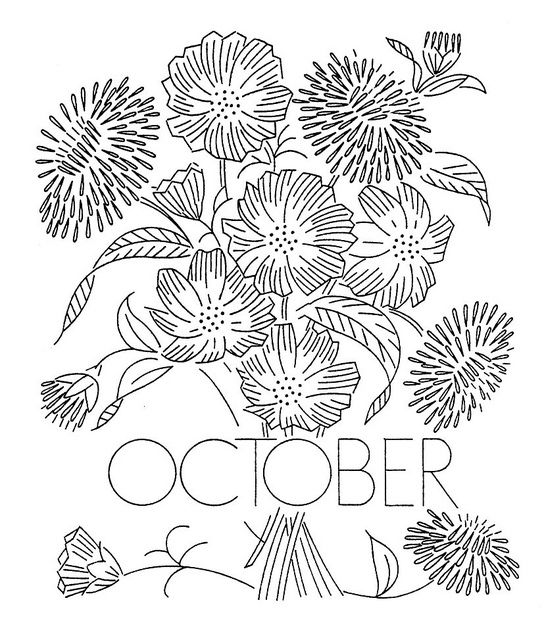
Free October pattern by Q is for Quilter, featured on Feeling Stitchy

There are LOTS of free resources for embroidery patterns out there - I thought I'd take you for a walk around them and explore all the lovely seasonal patterns! This lovely October pattern is in a set of monthly vintage patterns scanned by Q is For Quilter.

Free Autumn Embroidery pattern by Mollie Johanson for The Spruce, featured on Feeling Stitchy

I'm also loving this free Autumn pattern designed by Mollie Johanson for The Spruce. Those teeny maple leaves are adorable, aren't they? I'd love to see them even bigger. :)

Hi, I'm floresita, editor of Feeling Stitchy. I'm an avid stitcher, knitter, and crafter. You can see more of my stitching on Instagram and my blog. My vintage transfer collection is on Vintage Transfer Finds.

Feel free to email me with any ideas for the blog!

August 27, 2015

Thimblenest Thursdays: Summer/Winter Stitchalong--The Finished Banner


Do you have all of your letters stitched? If not, no worries, autumn doesn't officially begin until September 23, so you have plenty of time! Fall is my favorite season, so I am eagerly awaiting its arrival, although I am actually sorry to see summer go this year!

PATTERN/EMBROIDERY DESIGNS


One more time, here is the pdf with all of the letter/motif designs, as well as enlarged versions of most of the motifs.

MATERIALS


Let's put the bunting/banner together. If you weren't here for Week 1 of the stitchalong, gather the following materials:
  • 6* (or more)  9" x 7" (23 cm x 18 cm) fabric rectangles for backing**
  • 6* (or more) 8.5" x 6.5" (21.5 cm x 16.5 cm) rectangles of lightweight iron-on interfacing**
  • 1 package/3 yards extra wide double-fold bias tape (or make your own)
  • scissors
  • pins/sewing clips
  • sewing machine
*Cut more than 6 if you want to add extra autumn motifs or blank "flags" to your bunting (in addition to the letters).

ATTACH INTERFACING


Affix lightweight interfacing to the wrong side of each quilting cotton rectangle. These will become the backing for your embroidered pieces. Center the interfacing so that there is approximately 1/4" between it and all edges of the fabric.

SEW FRONTS AND FACINGS TOGETHER


With right sides together, sew an interfaced quilting cotton rectangle to the back of each embroidered rectangle using a 1/4" seam allowance. Sew only the sides and bottom. The top edges are left open to turn the embroidery right side out; the raw edges will be enclosed later. To make turning the fabric easier, take the corner stitches at a 45 degree angle, rather than making them square.

TRIM EDGES & CORNERS; TURN TO OUTSIDE; TOPSTITCH


Trim the corners close to stitching. You could trim along the other stitching as well; I opted not to because I felt like the seam allowance was already small enough and I didn't want to compromise the strength of the seam/fabric.

Flip each stitched rectangle right side out. Take your time here--use a turning tool (I use a chopstick) and a hot iron to make sure the edges are straight and the corners as sharp as possible. If needed, roll the edges of the rectangle a little toward the back to keep the quilting cotton from showing from the front.

Once you are happy with the turned edges, topstitch (1/4" from edge) around the sides and bottom to hold everything in place.

Trim any loose threads from the top of each rectangle.

PREPARE BIAS TAPE


Remove bias tape from the package and iron out creases. Find the center of the tape by matching the short edges together; mark with a pin at the center fold.

CENTER & SPACE RECTANGLES; PIN/CLIP


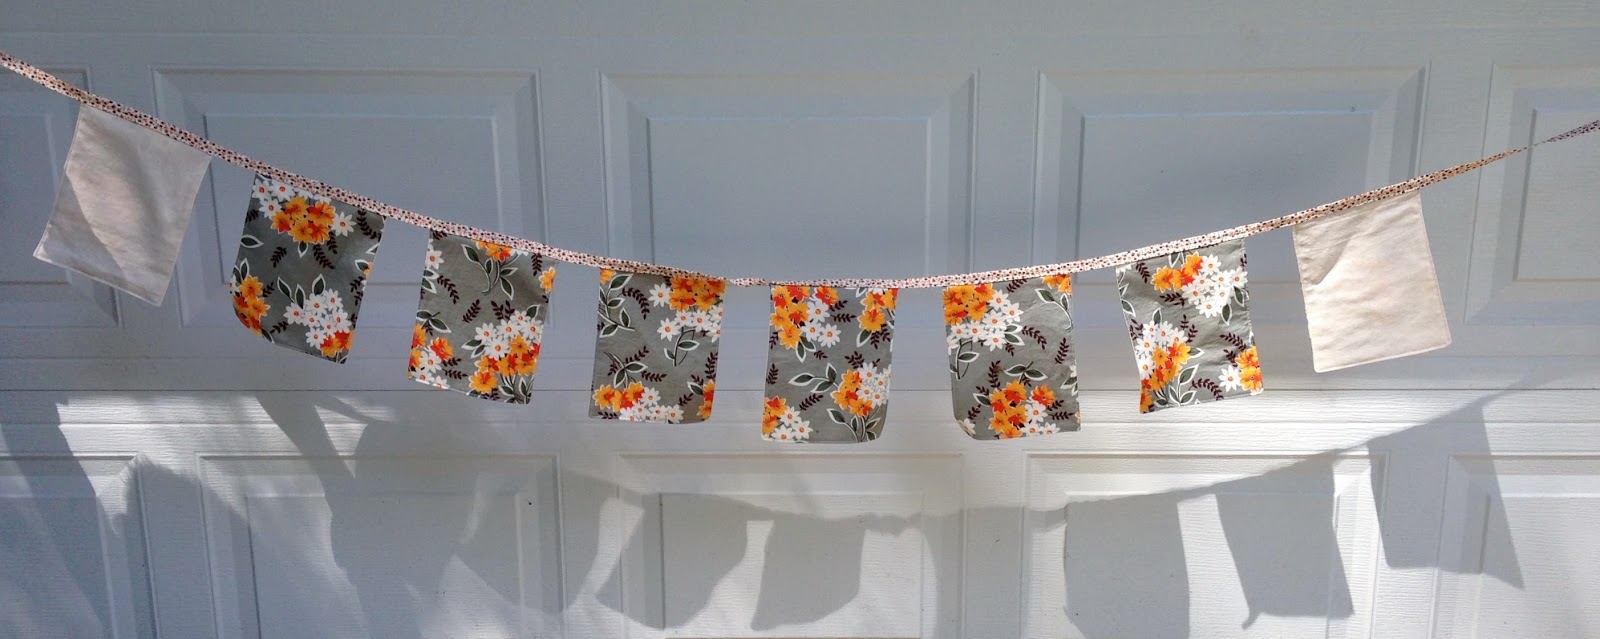
I had an even number of rectangles to sew onto my bunting, thus, the T and the second U needed to be on either side of the center of the bias tape. 


To achieve a 2" space between each rectangle/flag, start by placing the right edge of the T and the left edge of the second U 1" away from the center of the bias tape. 


Sandwich the top of each rectangle inside the bias tape and pin or clip securely in place. Be sure that the shorter edge of the bias tape is on top (on the front of each rectangle) and the longer side is towards the back.


Keeping a space of two inches between the rectangles/flags, continue to work from the center towards the outside edges, sandwiching each new rectangle inside the bias tape and pinning or clipping securely in place.

STITCH


Slowly and carefully, begin stitching at the far left end of the bias tape; with the short side up, stitch through to the back, closing the bias tape as you go. Stitch a continuous seam from the left side of the banner to the right. Each time you reach a rectangle/flag, backstitch a time or two at each edge for added stability. Be sure that the raw edges of each rectangle are fully enclosed within the bias tape.


Your banner/bunting is finished! As you can see, I flipped my two end rectangles around so that the quilting cotton showed on the front side at each end. I'd waited to long to use that Flea Market Fancy to hide all of it in the back!

Thanks for following along this summer as I brought you this stitchalong; I had fun preparing each letter and I'm super excited to hang up my new autumn banner!

As always, we'd love to see this or any other project inspired by a Feeling Stitchy post on Instagram (@feelingstitchyish) or in the Flickr Group!


Hi, I'm Wendy - I've been embroidering since age 9 when my grandma gave me some blank tea towels and a set of Aunt Martha’s transfers. I blog at ThimbleNest.

You can also find me on Pinterest.

July 16, 2015

Thimblenest Thursdays: Summer/Winter Stitchalong, Week 4


Welcome back to our Summer/Winter Stitchalong. Letter #4 is our second U in the word A-U-T-U-M-N. I've been trying to keep the fall motifs more unique, but I went ahead and included leaves this week, because what's autumn without a few colorful leaves?


As with all of the other letters, this U is outlined with chain stitch. The fill stitch (grouped running stitch) took some concentration and sometimes my eyes went a little buggy. To make the letter look more balanced I opted to add just two rows of the running stitch to the right hand sides of both legs of the U. Getting the curves to look balanced was a little tricky, too.


Here are the pattern, color, and stitch details all in one spot:

Embroidery Design for U #2
U Outline: DMC 728 (yellow), chain stitch
U fill: DMC 779  (brown), grouped running stitch (according to pg. 5 of Anchor Needlework Book #1)
Leaves: DMC 350 (peach/pink), 327 (purple), 721 (orange), back stitch


Just two more letters to embroider! In the meantime, if you're stitching along share your photos in the Flickr Group or on Instagram with #feelingstitchy!

Hi, I'm Wendy - I've been embroidering since age 9 when my grandma gave me some blank tea towels and a set of Aunt Martha’s transfers. I blog at ThimbleNest.

You can also find me on Pinterest.

June 4, 2015

Thimblenest Thursdays: Summer/Winter Stitchalong, Week 1


Welcome to Week 1 of the Feeling Stitchy Summer~Winter Stitchalong! Whether you're traveling cross country on a road trip or sitting by the pool in the Northern Hemisphere or cozying up with a cup of tea and your favorite sweater in the Southern Hemisphere, it's the perfect season for an embroidery project!

Every two weeks over the next three months I'll be posting a new design for the project with stitch tips/suggestions and hopefully some photos featuring your stitching from previous weeks! (Be sure to share your work in the Feeling Stitchy Flickr group and on Instagram with #feelingstitchy!)

When the Stitchalong is finished, you'll have everything you need ready to stitch together an "AUTUMN" banner/bunting, just as the seasons change once again (sorry, Southern Hemisphere, this is the only part I couldn't get to work out for you, too!).

Since this is Week 1, we have a lot to go over. First, let's gather our materials . . .


MATERIALS

  • 6* (or more)  9" x 7" (23 cm x 18 cm) fabric rectangles for embroidering (I'm using linen, but choose whatever you like best!)
  • embroidery floss (suggested color palette below)
  • AUTUMN embroidery design (get week 1 here)
  • embroidery transfer pen, etc.
  • embroidery hoop
  • pinking shears
  • sewing machine
  • 6* (or more)  9" x 7" (23 cm x 18 cm) fabric rectangles for backing**
  • 6* (or more) 8.5" x 6.5" (21.5 cm x 16.5 cm) rectangles of lightweight iron-on interfacing**
  • 1 package/3 yards extra wide double-fold bias tape (or make your own)
*Cut more than 6 if you think you would like to add autumn motifs (provided) to your bunting (in addition to the letters).
**When finished, your embroidered pieces can either be left as-is, or you can back them with a light interfacing and coordinating quilting cotton.

SUGGESTED COLOR PALETTE


The colors above are the ones I'll be pulling from as I stitch each letter; there's no guarantee that I'll actually use all of them by the end of the Stitchalong, but I just couldn't bear to leave any behind. DMC floss from left to right: 779, 327, 154, 350, 352, 721, 720, 728, and 3852.

Prep Fabric

If you plan on backing your embroidered fabric, serge, pink, or zigzag the edges of the linen so it doesn't fray while you're embroidering.

If you don't plan on backing your finished letters, just use pinking shears when you're cutting the rectangles out.

This Week's Letter: A

Click here for the Week 1 embroidery design.


I'm hoping each week's letter design will be accessible for all levels of stitchers, since this is meant to be a laid-back, un-stressful experience. I'm basing most of the stitch ideas off of the running stitch and cross stitch, after finding this gem of a resource. Each week I'll show you what I did, but you can adapt/change/throw my ideas out as you see fit--make this yours!


Here's what I did with the Letter A; for all stitches I used 3 strands of embroidery floss:

  • Chain stitch outline (DMC 720)
  • Vertical interior running stitch (DMC 154)
  • "Zig zag" between running stitches (DMC 728)
  • Acorn bottoms (DMC 3852)
  • Acorn "caps" (DMC 154)--3 strands was too much here; I should have used only 1 or 2.
Any questions?--I'll check the comments below. Otherwise, I'll be looking for your fabulous stitching in the Flickr Group and on Instagram and we'll meet back here in two weeks for the next letter! Happy Stitching!


Hi, I'm Wendy - I've been embroidering since age 9 when my grandma gave me some blank tea towels and a set of Aunt Martha’s transfers. I blog at ThimbleNest.

You can also find me on Pinterest.

October 28, 2011

Fall Flower


I know we have already featured some Fall themed embroideries in the past couple of weeks but I really wanted to show you all this fabulous flower stitched by charm.mama. The colours are so vibrant and well...autumnal. And the fill stitching (notice the different stitches she used?) is just lovely. Read more about this project here.

Are you still in 'Fall' mode with your stitching or already stitching up winter themed patterns?

September 28, 2011

Texture and leaf

Fall Leaf Embroidery, originally uploaded by flossbox.
This is a lovely piece, isn't it? Perfect autumn colours, great texture and a lot of different stitches.

How many different stitches do you see?

October 31, 2010

Patterns: Rosie and Bear

Rosie and Bear first three

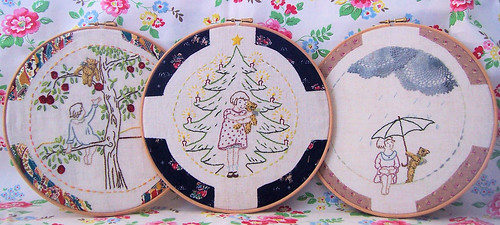
September, November and December Rosie and Bear patterns by Bustle and Sew

I have to admit I squealed with delight when Bustle and Sew released the first three patterns from the new Rosie and Bear pattern set, I think they're incredibly cute! I had been tempted to try a calendar series for a while now and as these patterns look like something I can happily get my teeth into, I'm really looking forward to sitting down and starting to stitch these, once I've got all my Christmas sewing out of the way first of course (ah the demands of this time of year). I think the fur on Bear looks fun to try and I love the extra details like the filled in apples and the optional doily rain clouds. Plus as usual with Bustle and Sew patterns, they come with comprehensive, detailed instructions. You can purchase the patterns for download here.

Hi, I'm Jo - I feature new embroidery patterns Sundays on Feeling Stitchy. I also post on our Twitter and Pinterest.

Is there a new pattern you'd like us feature? Email me!

October 7, 2009

Fall loveliness

Tea Towel Tour 5 for IamSusie
Stitched by ritapizza

Don't the luscious fall colors look gorgeous on this? Awesome work, ritapizza!

Hi, I'm floresita, editor of Feeling Stitchy. I'm an avid stitcher, knitter, and crafter. You can see more of my stitching on Instagram and my blog. My vintage transfer collection is on Vintage Transfer Finds.

Feel free to email me with any ideas for the blog!

September 22, 2008

More Fall Embroideries

Inspired by the last post and the fact that it's the first day of Autumn (I'm a little early posting since I usually post on Tuesdays, but I was excited by what I found...) here are even more beautiful Fall inspired pieces from the Flickr Embroidery Pool! Happy Autumn!


1. Autumn Bag Embroidery, 2. Untitled, 3. Acorn Fairy, 4. Pumpkin Buttons, 5. acorn towel, 6. Purse for Children's Dramatic Play or Treasure Collecting, 7. embroidered pumpkin, 8. cuties, 9. Falling Leaf Placemats, 10. fall flower pincushion, 11. fall forest baby, 12. fall market bag 2, 13. fall_buttons, 14. mice: the acorn fairy stitchette, 15. IMG_0545, 16. Acorn Stump Embroidery

September 19, 2008

Fall Lovelies


One artist I spotted on etsy has an array of simple and wonderful fall lovelies. I am browsing while drinking my favorite fall drink---cafe mocha. Jenny reminds of windy, balmy days and cool cricket nights.


Whatever am I going to do with all these tomatoes? This has been an especially good harvest for me this year.......we have been BLT happy!


This weekend I am headed to Northern Wisconsin to view the leaf colors---affectionately known as Colorama Weekend. These leaves are a beautiful way to celebrate such earthly ornaments!


This reminds me of the chickory that lines the roadways here in the fall.


And, it is just a matter of time before the winter berries appear here in the North..........
SITE DESIGN BY RYLEE BLAKE DESIGNS