Showing posts with label loveandasandwich. Show all posts

April 13, 2012

April Stitchalong: week 2

Preparing to make a monster cupcake
photo by Animerae

Well I was super-excited to see so much progress on April's stitchalong - Love and a Sandwich's Monster cupcake! I've got my pieces all cut out, but I think I'll start by showing you all the gems that have been uploaded in the pool so far...

First up is Animerae's fierce little purple cupcake:
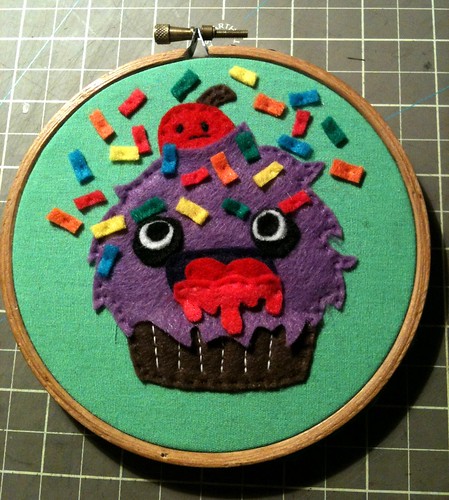
Sprinkle's!!!! Nom nom nom


I love how LaWhimsy sketches out her ideas and includes her drawings in her pictures:
AprilStitchalong2012 ~ Happy Monster Cupcake and Sketch
I'm glad she stitched out of her comfort zone and made this cute little cupcake her own. :)


Look at this cutie stitched by Luciana!
happy cupcake
He looks sort of like a happy little gnome cupcake, and I love the shiny bead sprinkles.


Little Red Emo Hood stitched an adorable version on pink gingham:
Cupcake applique


And I love the pillow pinkaleen made with her cupcake pattern:
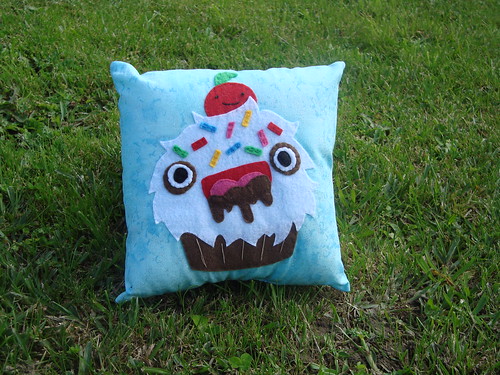
DSC00367


Is all of this inspiring you to stitch your own cupcake? I don't know about you but I'm hungry for more cupcakes!
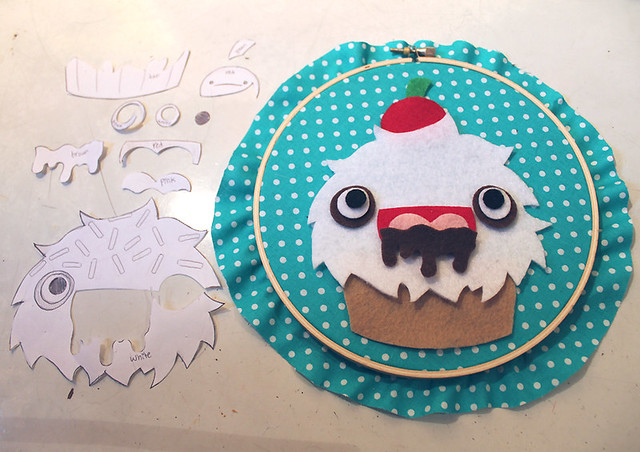
finishedparts4


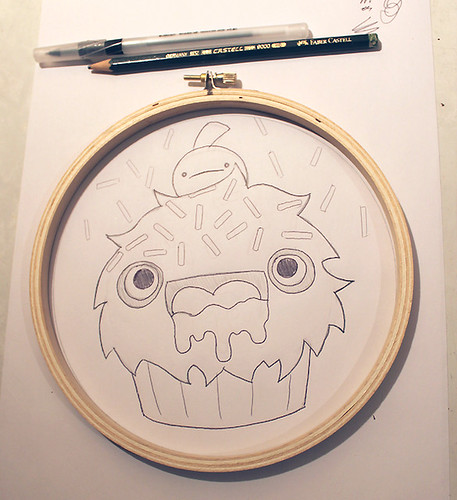
You can also use Chelsea's drawing as a guide to arrange your pieces:
tempfinished6

Download the PDF
Week One

Dont forget to tag your photos "AprilStitchalong2012" and add them to the Embroidery group, so we can all see them!

Oh, and yes, your eyes do not fool you - we've finally taken the plunge and are using Disqus for our comments. Some of you have had a hard time commenting since Blogger changed their system, and Disqus offers lots of cool options to keep a conversation going. I'm hoping this will make it even easier for you to share your thoughts with us! Any comments made before today are temporarily invisible while they migrate into Disqus - but everything should be synced up within a week, I hope. Any new comments should show up right away, so feel free to give us a test comment today!
Hi, I'm floresita, editor of Feeling Stitchy. I'm an avid stitcher, knitter, and crafter. You can see more of my stitching on Instagram and my blog. My vintage transfer collection is on Vintage Transfer Finds.

Feel free to email me with any ideas for the blog!

April 7, 2012

April Stitchalong: Love and a Sandwich


This month's stitchalong pattern was created by the incredibly awesome Chelsea of Love and a Sandwich. From monsters to robots to cupcakes, she embroiders it all. She also does a series of posts on MrXStitch called Plush Love (and a Sandwich). Her style is bright, colorful, and crazy fun. If you read Feeling Stitchy, you've seen her work before - we featured a time lapse of her embroidery process, and we interviewed her here.

Here's Chelsea's monster cupcake tutorial, from start to finish!

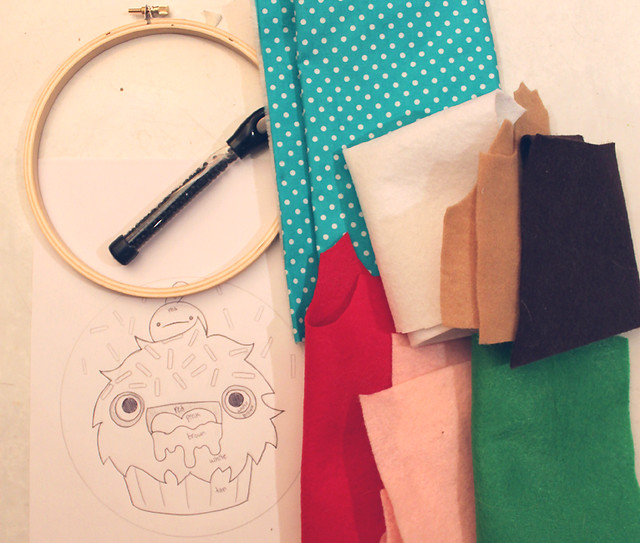
IMG_6120r

Step 1: Original sketch, I just traced the hoop I wanted to use and drew inside it to create my pattern.
(If you're working from the template, use your embroidery hoop as a guide and enlarge or shrink your cupcake accordingly.)


IMG_6125r

Step 2: Materials - you'll need:
embroidery hoop
felt
cotton fabric
tiny plastic beads (for cherry's eyes)
black and white embroidery floss
sewing thread
pins
needle


IMG_6155r

IMG_6158_1r

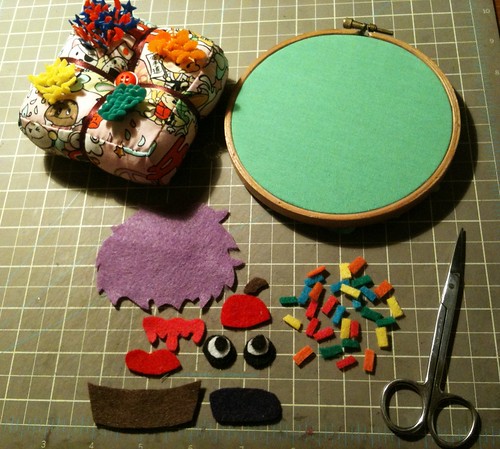
Step 3: Cut out the pattern pieces!
I left a little extra on the ends of the smaller pieces that needed to go underneath the bigger pieces so they were easier to sew down.


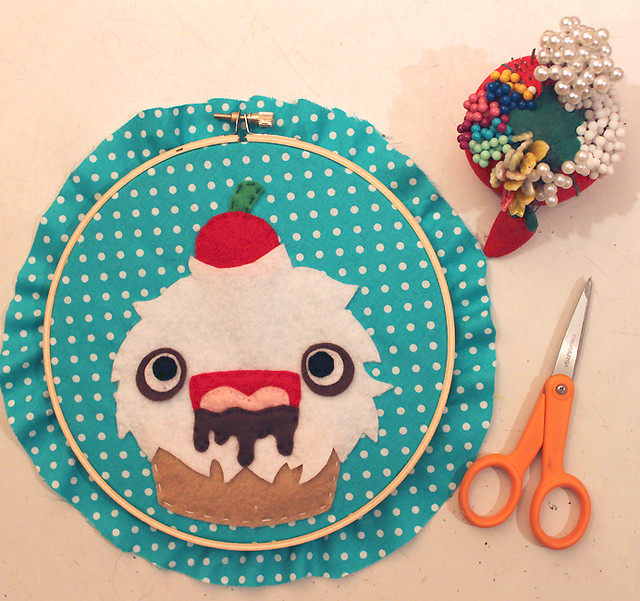
IMG_6162r

Step 4: Applique!
I purposely didn't sew down certain parts, like the brown parts of the eyes, and the bottom of the white on the cupcake, to make it look more 3D.


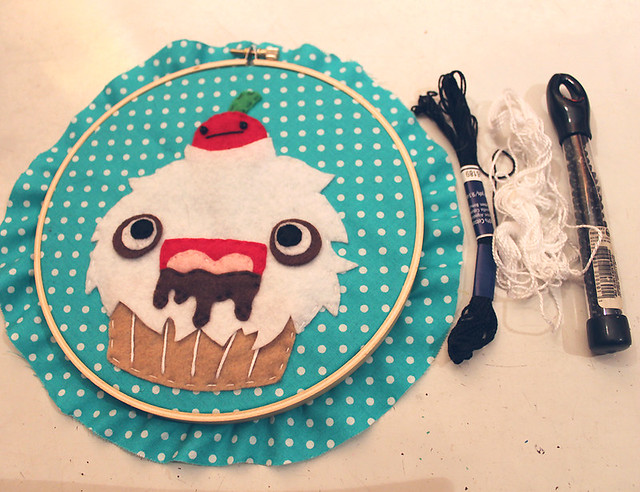
IMG_6163r

Step 5: Used embroidery thread to make the lines in the cupcake holder, and the little cherry's mouth. Used tiny plastic beads for their eyes, but doing little french knots would work too! I drew out lightly with pen where I wanted the lines to go before I used the thread.


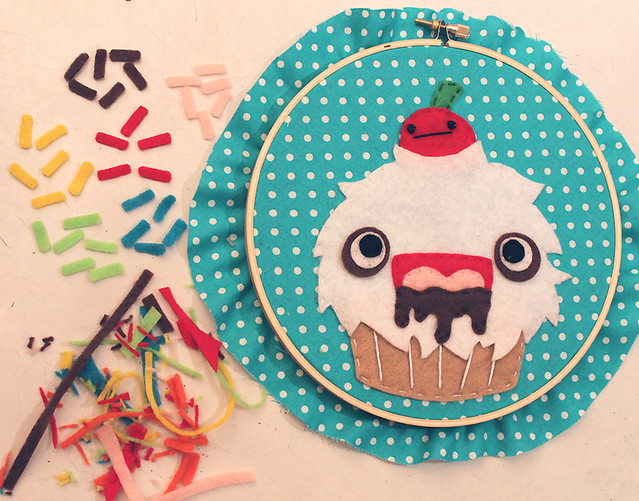
IMG_6164r

Step 6: Cut the Sprinkles!
I purposely chose colors that were already in my hoop, plus the green & yellow because they were bright.


IMG_6166r

Step 7: Carefully arranged and appliqued the sprinkles, only used 2 stitches on each one. Tacky glue would work as well.


IMG_6167r

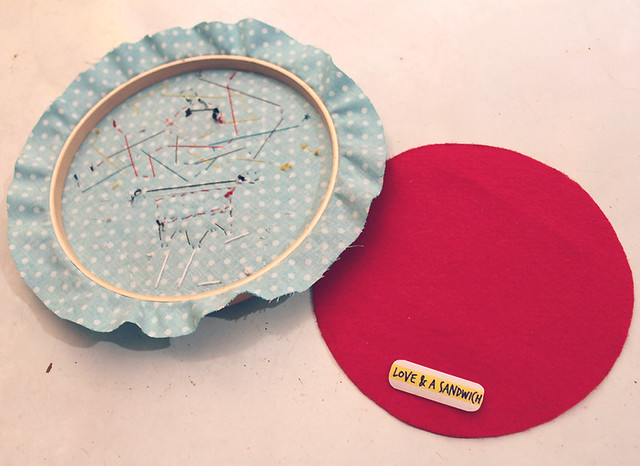
Step 8: Traced the hoop on felt to use as a backing. Hot glued down all the fabric edges (watch her video for an example of this), and then glued down the red felt with my little label.


IMG_6169r

Finished cupcake!

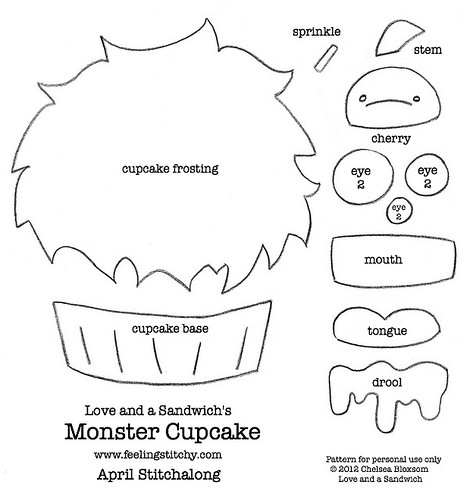
Thank you Chelsea! Are you guys ready to join in? I bet you are! I traced over Chelsea's drawing, to make a template:
finishedparts4


Feel free to use Chelsea's drawing as a guide to arrange all your pieces:
tempfinished6

Download the PDF

Remember, this is your cupcake, so stitch it exactly as you like - leave things off, add things, change the colors, with or without sprinkles - get creative!

As you stitch, be sure to snap photos, tag them "AprilStitchalong2012" and add them to the Embroidery group. I'll be checking in with you guys this month, and sharing your work (and mine!)

Hi, I'm floresita, editor of Feeling Stitchy. I'm an avid stitcher, knitter, and crafter. You can see more of my stitching on Instagram and my blog. My vintage transfer collection is on Vintage Transfer Finds.

Feel free to email me with any ideas for the blog!

February 3, 2012

Love: Chewbacca embroidery timelapse by Love and a Sandwich


Approximately 2 and a half hours of awesomeness in 2 and a half minutes. Stitched by the incredibly awesome Chelsea of Love and a Sandwich.

Hi, I'm floresita, editor of Feeling Stitchy. I'm an avid stitcher, knitter, and crafter. You can see more of my stitching on Instagram and my blog. My vintage transfer collection is on Vintage Transfer Finds.

Feel free to email me with any ideas for the blog!

SITE DESIGN BY RYLEE BLAKE DESIGNS