
This month's stitchalong pattern was created by the incredibly awesome Chelsea of Love and a Sandwich. From monsters to robots to cupcakes, she embroiders it all. She also does a series of posts on MrXStitch called Plush Love (and a Sandwich). Her style is bright, colorful, and crazy fun. If you read Feeling Stitchy, you've seen her work before - we featured a time lapse of her embroidery process, and we interviewed her here.
Here's Chelsea's monster cupcake tutorial, from start to finish!
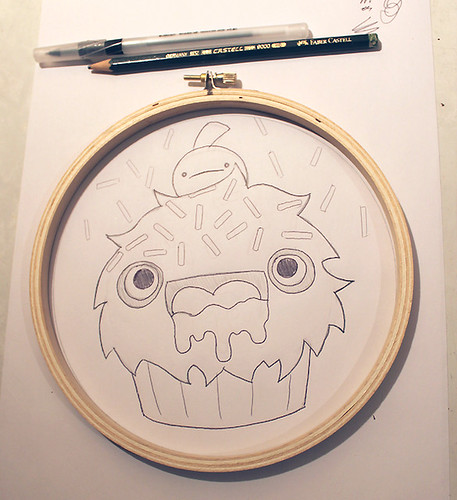
Step 1: Original sketch, I just traced the hoop I wanted to use and drew inside it to create my pattern.
(If you're working from the template, use your embroidery hoop as a guide and enlarge or shrink your cupcake accordingly.)
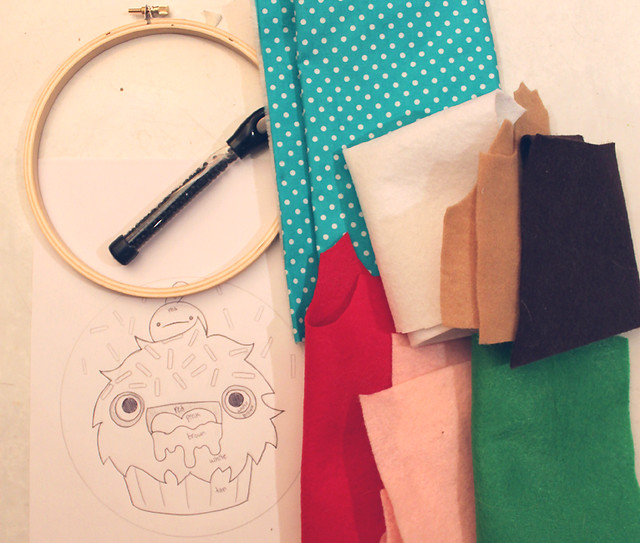
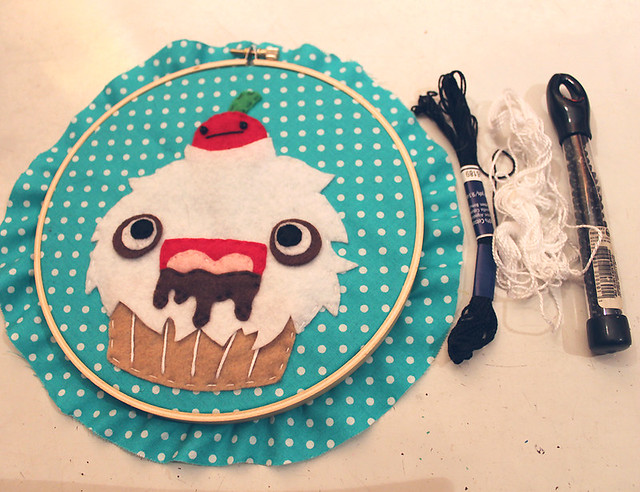
Step 2: Materials - you'll need:
embroidery hoop
felt
cotton fabric
tiny plastic beads (for cherry's eyes)
black and white embroidery floss
sewing thread
pins
needle

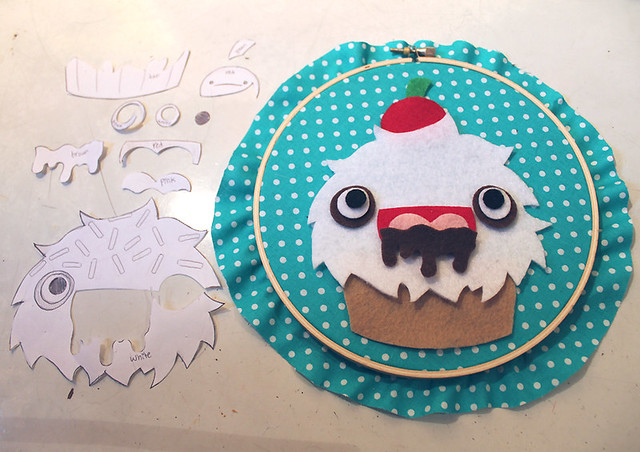
Step 3: Cut out the pattern pieces!
I left a little extra on the ends of the smaller pieces that needed to go underneath the bigger pieces so they were easier to sew down.
Step 4: Applique!
I purposely didn't sew down certain parts, like the brown parts of the eyes, and the bottom of the white on the cupcake, to make it look more 3D.
Step 5: Used embroidery thread to make the lines in the cupcake holder, and the little cherry's mouth. Used tiny plastic beads for their eyes, but doing little french knots would work too! I drew out lightly with pen where I wanted the lines to go before I used the thread.
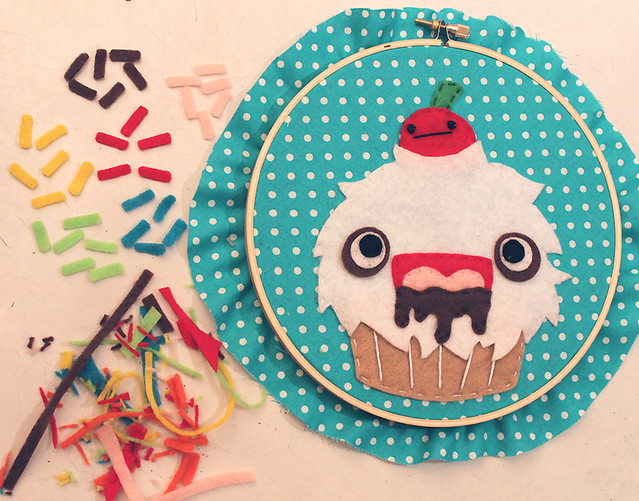
Step 6: Cut the Sprinkles!
I purposely chose colors that were already in my hoop, plus the green & yellow because they were bright.

Step 7: Carefully arranged and appliqued the sprinkles, only used 2 stitches on each one. Tacky glue would work as well.
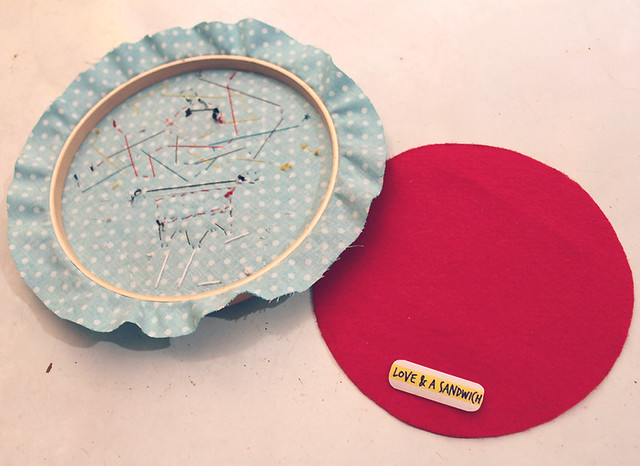
Step 8: Traced the hoop on felt to use as a backing. Hot glued down all the fabric edges (watch her video for an example of this), and then glued down the red felt with my little label.

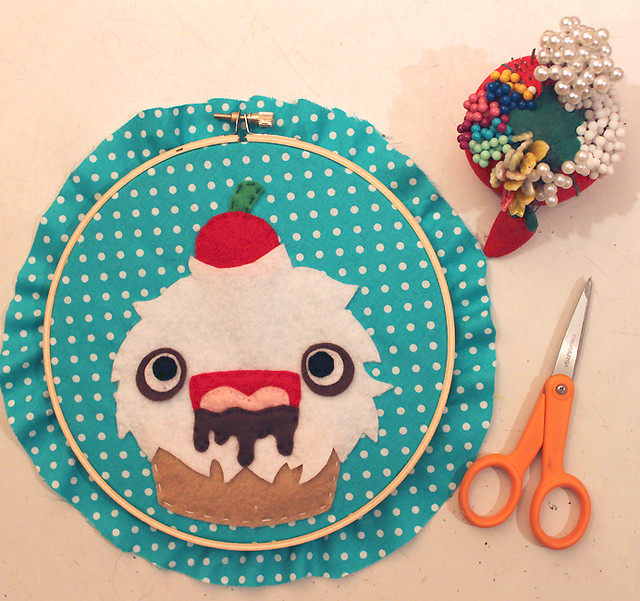
Finished cupcake!
Thank you Chelsea! Are you guys ready to join in? I bet you are! I traced over Chelsea's drawing, to make a template:
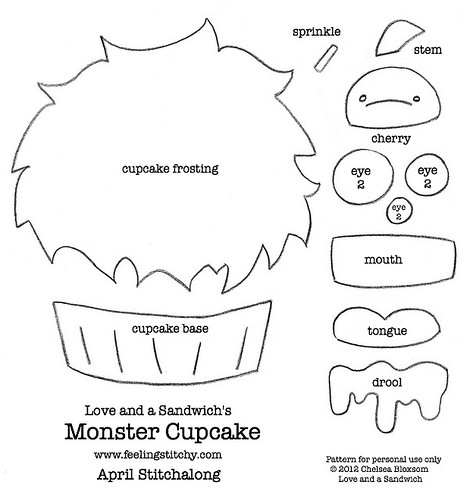
Feel free to use Chelsea's drawing as a guide to arrange all your pieces:

Download the PDF
Remember, this is your cupcake, so stitch it exactly as you like - leave things off, add things, change the colors, with or without sprinkles - get creative!
As you stitch, be sure to snap photos, tag them "AprilStitchalong2012" and add them to the Embroidery group. I'll be checking in with you guys this month, and sharing your work (and mine!)


OMG! I love this! Most Def' am i going to participate!
ReplyDeleteLOVE!!! I love her work, especially the Miyazaki inspired ones.
ReplyDeleteThank u for the inspiration!
ReplyDeleteAwesome! Thank you so much!!!
ReplyDeleteVery cute!!
ReplyDeleteWow you are amazing, thank you so much for sharing!
ReplyDeleteLove Chelsea's designs! Definitely having at go at this one. It'll be my first stitchalong!!!
ReplyDeleteI blogged mine here with a link back to this tutorial - Monster Cupcake- stitched as part of the Feeling Stitchy April Stitchalong http://cherryandcinnamon.com/2012/04/30/april-stitchalong-2012/
ReplyDeletecutest thing ever. i have never tried embroidery but i have hoops for quilting projects. lucky me found a bunch of floss at a garage sale and some more items at Goodwill. i am going to attempt to make a monster cupcake!
ReplyDelete