Showing posts with label stitches. Show all posts

July 15, 2019

Stunning Stitches for Crazy Quilts Blog Hop!

Stunning Stitches for Crazy Quilts by Kathy Seaman Shaw as featured by floresita on Feeling Stitchy

Hello all, I am pleased to have Feeling Stitchy to be one of the last spots on the blog hop for Stunning Stitches for Crazy Quilts by Kathy Seaman Shaw! Kathy sent me a free copy of this book, as well as a digital download, so I can assure you they are both equally stunning.

Stunning Stitches for Crazy Quilts by Kathy Seaman Shaw as featured by floresita on Feeling Stitchy

Just so you know, the book link above is an Amazon Affiliate link - clicking through the link and buying costs no more for you and is one way to support our volunteer reviews.

Kathy is also doing a giveaway on this post - so stick around to win a digital copy of this truly stunning book!

Kathy Shaw teaches Crazy Quilt and Embroidery techniques on her site - you'll want to visit her for one more chance to win a copy of this book on her blog tomorrow: https://shawkl.com.

Now, some of you may be thinking - quilting? Crazy quilting? What does that have to do with embroidery? Crazy quilting remains a technique I have yet to try. But whether you are new to crazy quilting, seasoned, or have no intention of ever crazy quilting - this book is a wonderful title for you to explore!

Let's have a look inside!

Stunning Stitches for Crazy Quilts

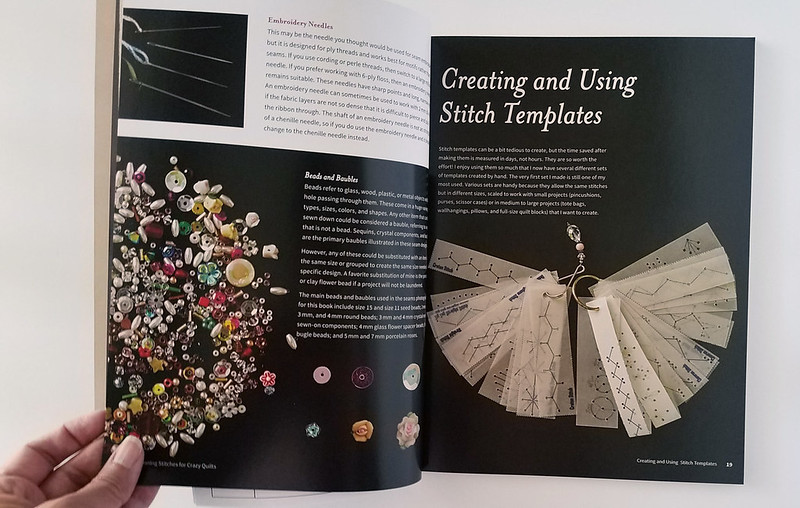
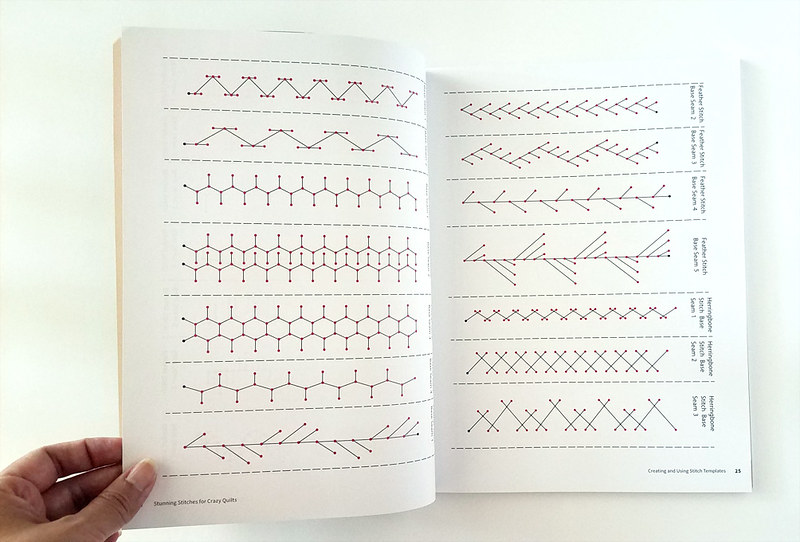
One of the strengths of this book, and what I know will interest all embroiderers, are the wonderful stitch templates!
Stunning Stitches for Crazy Quilts

These stitch templates are easy to photocopy or print (I'll show you how I used mine later on) and they provide a very helpful framework for where your needle should go in and out of the fabric to achieve a perfect stitch.

Stunning Stitches for Crazy Quilts

If you are a crazy quilter - these designs can be stitched on the borders of your fabric pieces to embellish them, and Kathy gives excellent instructions on placement.
Stunning Stitches for Crazy Quilts

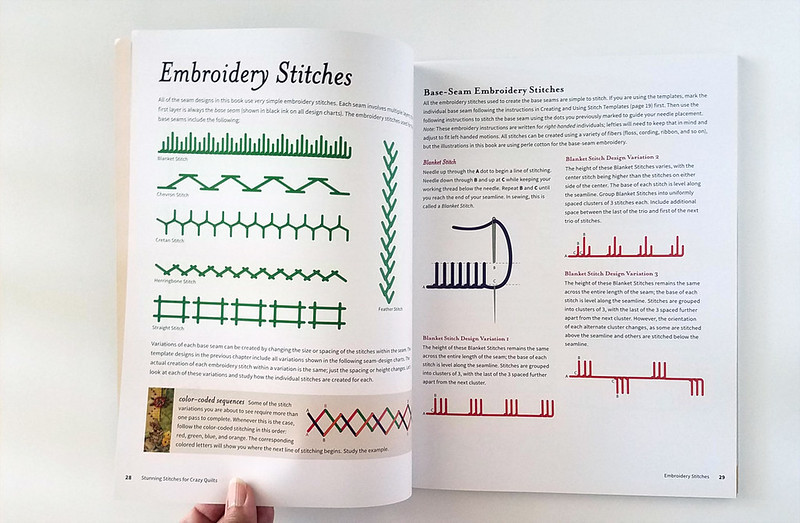
There are 36 stitch templates in all - with her directions they are all easy to achieve. I found myself drawn to stitches I had tried in the past, but wasn't happy with - like herringbone and feather stitch...
Stunning Stitches for Crazy Quilts

Kathy provides full instructions for using each of these stitch templates, so there is no guessing at all!
Stunning Stitches for Crazy Quilts

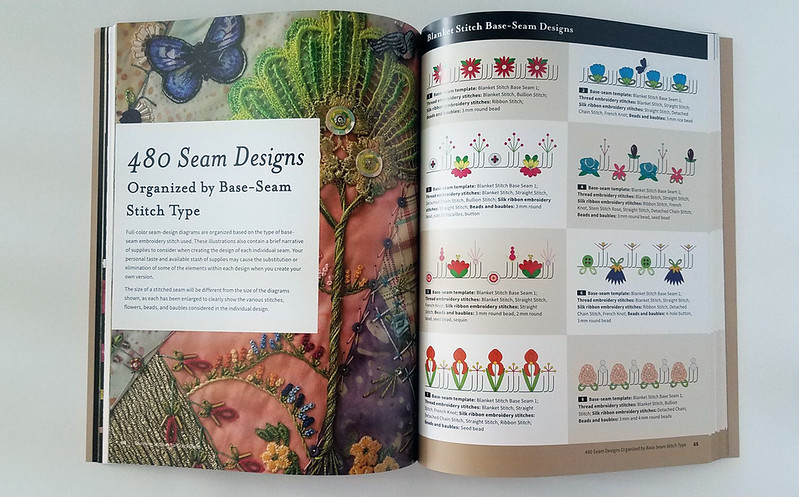
Now, here is the stunning part - using those base stitch templates, Kathy has created 480 different designs!

Stunning Stitches for Crazy Quilts

Each design is very carefully illustrated, and is a wonderful springboard to creativity!

Stunning Stitches for Crazy Quilts

For each design, Kathy includes a detailed color-coded line drawing, stitches, and suggested materials used.

There are also stitched examples so you can know exactly what your finished stitching could look like!

My stitching

Stunning Stitches for Crazy Quilts

I decided to explore a stitch I've never been comfortable with - feather stitch - and see if I could improve my stitching with the stitch templates...

Stunning Stitches for Crazy Quilts

I printed my templates on regular copy paper, then cut and taped them into place on my fabric. I used a large, thick needle to punch holes in every dot...

Stunning Stitches for Crazy Quilts

Then I used a chalk pencil to color in each dot on my fabric - you could also use a water soluble pen or heat erasable marker...
Stunning Stitches for Crazy Quilts

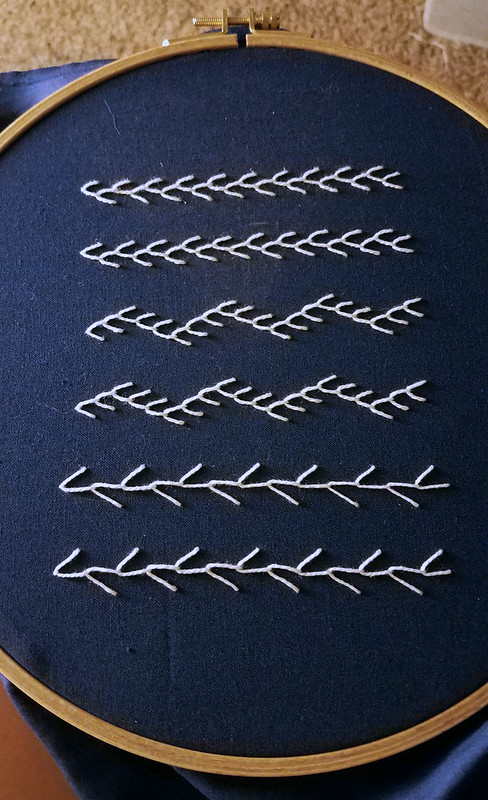
A few hours later, I was stunned to see the neatest feather stitches I'd ever attempted!
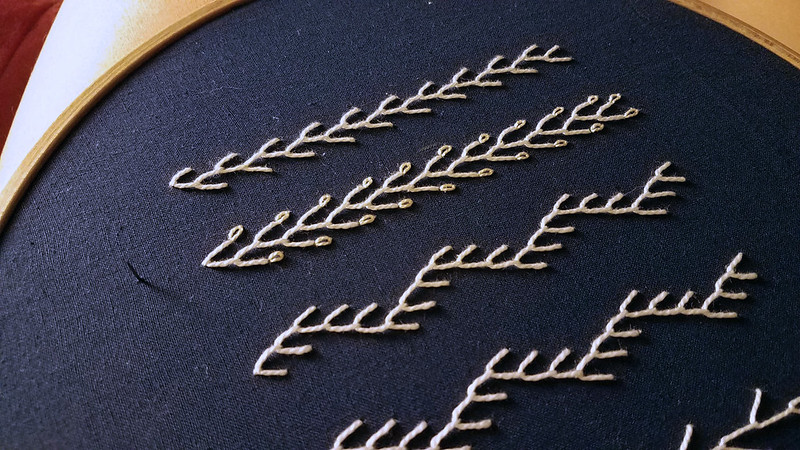
Stunning Stitches for Crazy Quilts

Then, using Kathy's seam designs as inspiration, I began adding embellishments...
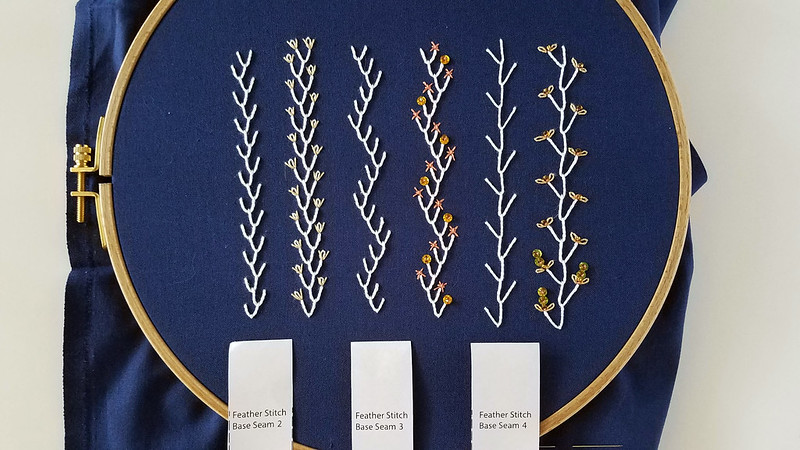
Stunning Stitches for Crazy Quilts

Here are my three experiments with the templates - as you see I used templates 2, 3, and 4, stitching one unembellished row, and one embellished one.
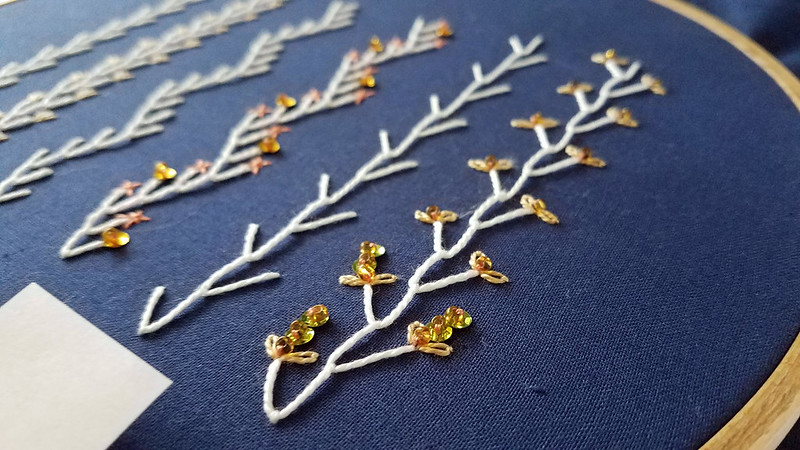
Stunning Stitches for Crazy Quilts

I had SO MUCH FUN with this project! Now you see why I would recommend this book to any stitcher, beginning or advanced - quilter or non-quilter - there are so many different ideas contained in this book to inspire your embroidery and embellishments.

Kathy has done an incredible job with this book, and I highly recommend it - if you're looking to improve your stitching, your crazy quilting, or just looking for some creative exercises, this book will do the job!

The Giveaway!

Kathy is giving away 1 free digital download of this book to 1 lucky winner on this blog!

To enter - leave a comment on this post and tell us: are you a crazy quilter, embroiderer, neither, or both? We will draw 1 winner and announce them soon!

Hi, I'm floresita, editor of Feeling Stitchy. I'm an avid stitcher, knitter, and crafter. You can see more of my stitching on Instagram and my blog. My vintage transfer collection is on Vintage Transfer Finds.

Feel free to email me with any ideas for the blog!

November 4, 2017

Saturday Stitches - Namaste Embroidery

I am really loving the sped up stitch videos Jessica of Namaste Embroidery has been posting on Instagram! It is such a treat watching other people stitch, and I always feel like I learn something new from other stitcher's methods.


Be sure to follow Jessica on Instagram to see more stitch video goodness: https://www.instagram.com/namaste_embroidery/

Hi, I'm floresita, editor of Feeling Stitchy. I'm an avid stitcher, knitter, and crafter. You can see more of my stitching on Instagram and my blog. My vintage transfer collection is on Vintage Transfer Finds.

Feel free to email me with any ideas for the blog!

March 26, 2015

Thimblenest Thursdays: Twisted Lazy-Daisy Edge Stitch


In two weeks I'll be bringing you another project tutorial. As I started pulling that post together, though, I realized that I didn't know a great stitch to give it the finish I wanted. After searching in vain for an edge stitch that: 

1. accommodates a curved edge 
2. could be used for joining two (preferably knit) fabrics together
3. and provides a dressier touch than something like blanket stitch, 

I decided to invent something I'm calling "Twisted Lazy-Daisy Edge Stitch". By outlining the steps for this stitch here today, my next tutorial won't need to include directions for that project and this stitch. By the way, I found this post helpful in developing the directions below.

Here we go . . . 


For the purposes of this tutorial, I'm joining the circle above to the square. 


Mark dots around the inside of the circle, spacing them your desired distance apart. The dots indicate where the top of each stitch will be. For this circle, my dots were 3/8" (0.95 cm) from the edge of the circle; I eyeballed the distance between each dot. The next time I use this stitch, I think I will decrease the amount of space between stitches.


Pin the circle to the square and thread your needle. In these pictures I used three strands of embroidery thread, but two worked fine during some of my practice runs.


Bring your needle up through the square fabric right at the edge of the circle, and directly below one of the dots.


Insert your needle back down through the fabric slightly to the left of where you brought the thread up, and continue back up through both thicknesses, coming up through the dot.


Continue pulling the thread up until just a small loop remains; stop short of pulling the thread taut. Twist the loop one turn to the left.


Above you can see the difference between a stitch that is twisted and one that is not. I felt that adding a twist added a little more finesse, as well as strength to the edge of the fabric that is being secured.


Now, just like with lazy-daisy stitch, bring your needle up just inside the top of the loop, holding the loop in the general area of the small dot; then go back down through the fabric just outside the top of the loop.


Bring your needle back up just above where you twisted the loop and then go back down just under the twist. One stitch is complete!

Begin the next stitch by coming up at the edge of the circle in line with the next dot to the right. Continue stitching until you have completed a full circle. I'll be back in two weeks with a fun project that uses the Twisted Lazy-Daisy Edge Stitch; see you then!


Hi, I'm Wendy - I've been embroidering since age 9 when my grandma gave me some blank tea towels and a set of Aunt Martha’s transfers. I blog at ThimbleNest.

You can also find me on Pinterest.

January 26, 2012

Feather stitch

Feather TAST - 04
stitched by Smallest Forest

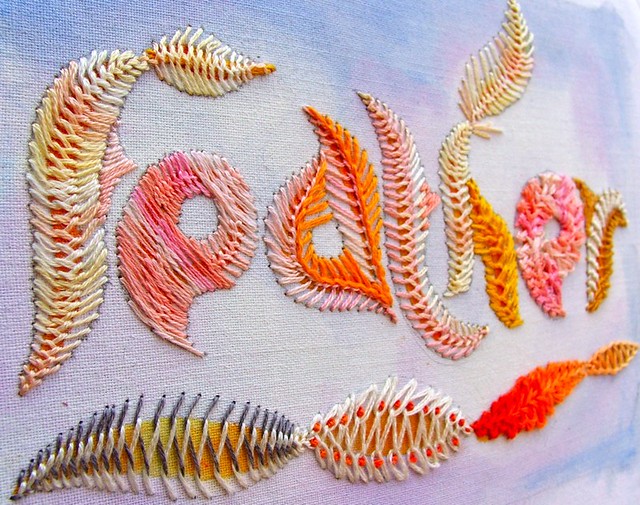
I am in awe of this feather stitched work by Smallest Forest. I really can't remember the last time I saw something so artful and beautiful. Read about her design process on her blog.

She's taking on the TAST, or Take a Stitch Tuesday Challenge, and this February, I will be too! I doubt I'll create anything as amazing as this, but I'm giving it a go for 4 weeks - and I'll be posting my results here each Tuesday in February. Are any of you already doing the TAST challenge? Please leave a link so we can see your work! :)

Hi, I'm floresita, editor of Feeling Stitchy. I'm an avid stitcher, knitter, and crafter. You can see more of my stitching on Instagram and my blog. My vintage transfer collection is on Vintage Transfer Finds.

Feel free to email me with any ideas for the blog!

February 19, 2010

Stitched-up doll

for my brave girl
Stitched by annaleahart

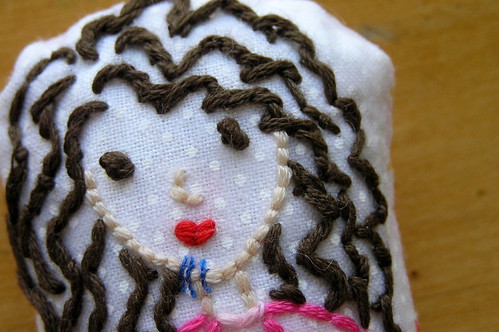
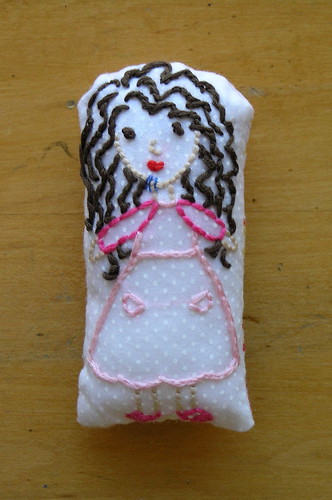
I love this little doll Annalea stitched for her little girl when she split her chin and had to have stitches. How special would you feel when your mom handed this to you? Love the bright blue stitches on her chin! :)


for my brave girl

Hi, I'm floresita, editor of Feeling Stitchy. I'm an avid stitcher, knitter, and crafter. You can see more of my stitching on Instagram and my blog. My vintage transfer collection is on Vintage Transfer Finds.

Feel free to email me with any ideas for the blog!

June 25, 2008

Chart your own text

Stitchpoint has a nifty tool for charting text for embroidery and crosstitch. Simply choose your favorite from the available 6 fonts and start "typing" using the keyboard on the screen. For @, &, and other characters click on Special Characters. The buttons in the top right corner make it super easy to figure out stitches for the particular fabric you are using. Enter your thread count, number of threads stitching across, and how much space you want around the stitching. For spaces between words use the keys to the right of the Special Characters key. When you're done print. Easy peasy.


SITE DESIGN BY RYLEE BLAKE DESIGNS