September 25, 2012

Tutorial Tuesday


Happy Tuesday, everyone!

This week I have a tutorial for you that can be used for almost any time of year. It is a fabric postcard with an embroidery collage. I decided to make one for my friend, Nick, because he is a wonderful person. I found that it did not take me long to finish this fabric postcard, and I was able to use up some of my fabric stash.

Note: This cannot be sent in the mail as is. It has to be placed in an envelope or hand delivered.


To make this postcard you will need:

-Fabric scraps or two pieces of fabric at 8 inches wide by 6.5 inches high
-1 piece of lightweight interfacing cut to 8 inches by 6.5 inches
-Embroidery floss in various colors
-Embroidery hoop
-Embroidery needles
-Sewing machine
-Rotary cutter or scissors
-Iron

Step 1: I decided to sift through my scraps in order to piece together the front panel of the postcard. I used a piece of paper cut to 8 inches wide by 6.5 inches tall and placed the fabric scraps on it until I found a placement I liked. If you prefer, you can use one piece of fabric instead of scraps or multiple pieces.


The image above is supposed to be the paper I used to keep track of my dimensions. I apologize for the blur. 


Step 2: I stitched together my scraps in order to make a rectangle that fit the 8x6.5 dimensions. I used smaller pieces of fabric as patches, I pressed under the raw egdes and stitched them directly onto the fabric I had pieced together. The cherry embroidery was a test stitch I did using a pattern from a Sublime Stitching starter kit. The kit I used is no longer in print, but you can find some new wonderful ones here: Sublime Stitching kits.


Step 3: This is the fun part! Once the piece of fabric is ready, it can be embellished with as many stitches as you like in order to create the embroidery collage. You can add patterns or allow the stitches to come to you organically. 


Step 4: Once this front panel is finished. It needs a little stability. I used one piece of very lightweight interfacing and basted it to the back of the panel using my sewing machine.


Step 5: Now it is time to work on the back panel. I decided to make this look as much like a postcard as I could. I used a pencil and lightly wrote what I wanted the back to say and stitched it up.


Step 6: Now it is time to attach the front and back panel in order to complete the postcard. Place the front and back panels right sides together. Stitch around the edge using a 1/4 inch seam. Leave a small space unstitched so you can flip the postcard. 


Step 7: Before flipping the postcard, clip the corners as close to the stitch without snipping it. Flip the postcard so the right sides face out and press. 


Step 8: In order to close up the small space I left open, I used a running stitch around the entire piece. I made sure to hide my knotted ends in between the front and back panels where I flipped the postcard.


Step 9: Gift to recipient! 


As I was finishing this up, I was thinking about all the ways this could be used for birthdays, holidays, Valentine's Day, or to ask someone to be a maid of honor or bridesmaid.

Hope you enjoy and give it a try!

Hi, I'm Kristen! I am a lover of all things stitchy and crafty. I have been sewing for as long as I can remember. My grandmother taught me how to sew Barbie clothes when I was young and I have been sewing ever since.

You can find me at Bobbypin Bandit, on Instagram, and my Etsy shop.

September 24, 2012

Priscilla Embroidery Pattern: Play Apron Pt. 1

Hullo everyone! Finally finished converting the play apron pattern and ready to start and share the project with you all. As mentioned in the last post, our project is a play apron from the Priscilla Embroidery Catalog (Fall-Winter 1915-16) of Priscilla Needlework Co.


It is my first time to make a pattern spread out on many pages, so I apologize if you find it a bit confusing and not user-friendly. As I still work on developing that skill, here are step-by-step photos instead of getting it all together :-)

The pattern for the apron comes in 5 pages, with the first page being the overview of the whole design and notes the pattern pieces (the letters). I did not make a pattern for the strap as it seemed like it would be better if it was made to fit the lucky child who will have the apron after :-)


1. To begin, DOWNLOAD THE PDF PAGES and print out.


2. Cut the pieces as shown below (you may do it however you feel comfortable, just make sure there is space for sticking them together). You may cut the sides by following the line, but do not cut the scallops on the line as this will be hard to transfer the design on your fabric later on. I chose to leave space on the right side of pattern A, whilst trimming B completely. Pattern C gets an allowance on top and the right while D gets trimmed except for the top part.


3. Place your glue as shown and stick the pieces together (B to A and D to C).


4. Now place your glue as shown below and attach together.


5. Your pattern piece is done! Each pocket must be traced on separately, the only pattern that you embroider on the apron itself are those of the two little elves on top. But we will tackle this next time :-)


In the catalog, the apron is tan linen, but I do not have such (as usual!) so I will be using some muslin (the ones I use to draft dress patterns). It also states that the thread colors are green, brown and yellow, so here goes!


Have a lovely week ahead everyone! 

September 23, 2012

Patterns: Happy When It Rains

Happy When It Rains by Follow The White Bunny

Feeling Stitchy friend Nicole has created this lovely shading tutorial on her blog for this cheerful little cloud. So head straight over if you've been curious about this embroidery technique!

Hi, I'm Jo - I feature new embroidery patterns Sundays on Feeling Stitchy. I also post on our Twitter and Pinterest.

Is there a new pattern you'd like us feature? Email me!

September 22, 2012

Interview: Emma Wood

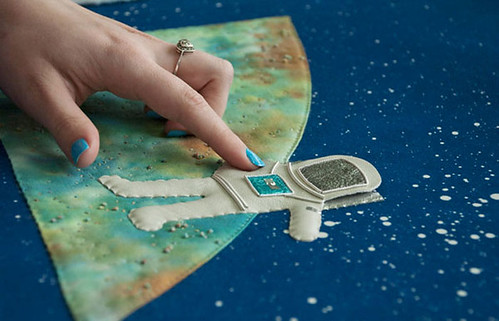
astronaut

Hi guys, I'd like to introduce you to Emma Wood, a fascinating UK-based stitch artist. Last month, Emma reached out to us and since I have always been a sci-fi nut, burning through every sic-fi show and movie I can get my hands on, I was captivated by her space-inspired works - including her constellation lampshades and space embroideries. Here's an interview with Emma for you all - enjoy!

What is your stitching background?
My mother and grandmother are my main influences! I come from a very creative family, my mother used to make toys, she did a bit of cake decorating, was a florist and she now makes jewellery. I was introduced to cross stitch at a young age which was easy enough to start with, and then progressed to other more tricky hand embroidery techniques.


Did you attend art or design school? Why or why not?
I went to college and studied general Art & Design where I was able to cover all areas: graphic design, fashion, applied arts. I then went on to study applied arts at university, specialising in embroidered and printed textiles. I feel like my skills have improved so much whilst at university, it's nice to sometimes do a project or a technique you aren't familiar with and you form great relationships with tutors and colleagues along the way.


What draws you to space imagery?
I've always liked designing and making for children, so space is something that you can be quite playful with. Initially it was the amazing colours from the Hubble telescope that sparked my interest. I just wanted to recreate the swirls and bleeding colours with dyes on fabric. I also dyed my own space inspired threads that I could sew with.

Your works contain a fascinating amount of goldwork (in silver thread). What advice would you give our readers if they’d like to try goldwork?
If you're thinking about trying goldwork the easiest thread to start off using is pearl purl. Is super easy to couch down as the thread just disappears inside the coil and leaves a really neat finish. A book I found helpful was Beginner's Guide to Goldwork by Ruth Chamberlain, it contained a lot of the basic stitches and a few little projects to get you going. Goldwork takes a lot of patience and practice so don't take it up if you want instant results!


Please tell us about your children’s book project.
This is a project I undertook in my second year of university. I created a handmade children's book in which I used a combination of machine and hand embroidery with some CAD embroidery for the text. The pages are also hand dyed and various elements are screen printed. I wanted to create something tactile and completely unique. This is something I would love to do again, children's stories are full of inspiration!

How many hours does it take you to stitch your pieces?
The space inspired pieces each took about a week solid. I was working to a deadline at university so these pieces could've taken a lot longer if I'd had the extra time. Now I'm able to make these in my own time I can slow down and enjoy it even more!

The children's book was a little longer but that included a lot of dye work and screen printing. I had to do a lot of trial when it came to the construction and positioning of imagery and text.


Are you organized or cluttered? A careful planner or a procrastinator? :)
I'm extremely organised! I keep all my equipment and materials stacked neatly in boxes. I have 8 pairs of scissors, all for different things - they are all kept in a zip up case and are always put back in the correct slot! (Maybe that's a bit too weird?) Not at all!

When I was at university I was a very careful planner, working to tight deadlines meant no room for procrastinating! However I think now I'm able to do my own thing I will have fun just experimenting.

Please describe your work space OR describe your ideal work space if your current one is less than ideal! :)

I've moved house 3 times in the last 3 years so unfortunately I don't have a permanent work space :(
I would love to have my own shop selling local handmade bits and bobs with a studio out the back where I can print and dye and sew till my hearts content! Either that or when I have a nice big house (in my dreams) I can have a sun house in the garden where I can be creative and do my work in peace!


What do you do when you’re not stitching?
When I'm not stitching I do a lot of computer designed work, I like surface pattern design so I try to do some drawing and designs every now and again. I also created my website from scratch which I'm quite proud of! I like to read too, I've just finished “The Hunger Games” which was so good!

*****
Thanks, Emma, for showing us your work and sharing your inspirations with us! All photos in this post are courtesy of  Laura Ramsey and are used with her permission.

For more on Emma, visit:
Her Website: www.emmawoodtextiles.co.uk
Her Facebook Page: www.facebook.com/emmawoodtextiles

Hi, I'm floresita, editor of Feeling Stitchy. I'm an avid stitcher, knitter, and crafter. You can see more of my stitching on Instagram and my blog. My vintage transfer collection is on Vintage Transfer Finds.

Feel free to email me with any ideas for the blog!

September 20, 2012

Book cover tutorial with Portuguese soul

OlĂ¡! As asked by some of you, here you have a tutorial on how I make my book covers! Never forget that I only use Portuguese materials... So try your best to find some materials similar to these.

Making a book cover in burel or in cork skin (cork leather or cork fabric) is very simple ... Burel and cork skin, 100% Portuguese, are very beautiful and easy to work with because there is no need to finish edges since they won't unravel. This is very important, make sure you’ll use a fabric like these, so no sewing is needed!!!

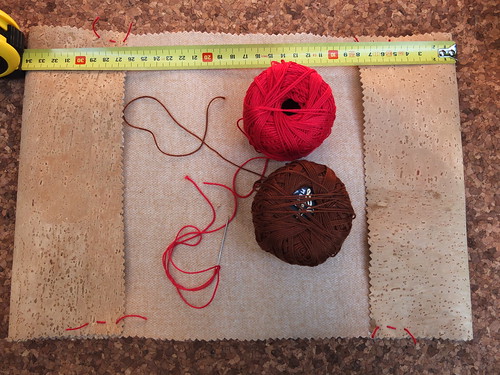
You should start by defining the size of the cover. From my “reviews” I found that the best dimensions are 34cm (13 1/3”) wide if you measure the cover when open and 24cm (9 1/2”) height. I tried many books and almost all fit this size. But maybe in other countries publishers use different book dimensions…

I advise you not only to see the photos but also click the links, they will help you and show you different solutions...

Material needed to make a cork fabric book cover
Everything you need to make your book cover
What will you need:
- a piece of fabric that does not unravel of 50cm (20”) wide by 24cm (9 1/2”) height;
- two more pieces of fabric that does not unravel: one piece of 11cm (4 1/3”) squared and another of 11cm by 8cm (3 1/7”) (if you are working with inches, you may try to find a similar size easier to measure…)
- 50 cm (20”) of suede cord (or another type, as you prefer);
- a needle;
- wool thread or cotton floss, depending on the fabric you’ll be using;
- tracing paper and a pattern;
- a pair of scissors with sharp points.

And that’s all!! Let’s begin…

1. Fold over the two outer edges of burel or cork skin to the required size and baste (two or three stitches will be enough) the four corners of the book cover, making two side pockets.

DSCF6633
Fold over two outer edges to the required size
2. Use blanket stitch to hold the outer edges and to finish the whole cover. Instead of blanket stitch sometimes I use whipped running stitch and I believe that running stitch would be great, too.

DSCF3619
Use blanket stitch to finish the whole cover and hold the outer edges.
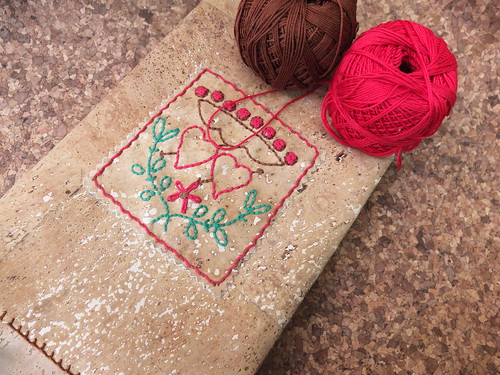
3. Use the square piece of fabric to embroider a motif that will decorate your book cover. With this kind of fabrics transferring the motif it’s never the easiest part… I use tracing paper with the pattern and I hold paper and fabric together embroidering through both. Believe me it works better than you would think! At least, if you keep your patterns simple. I’ve already shown some photos in a previous post

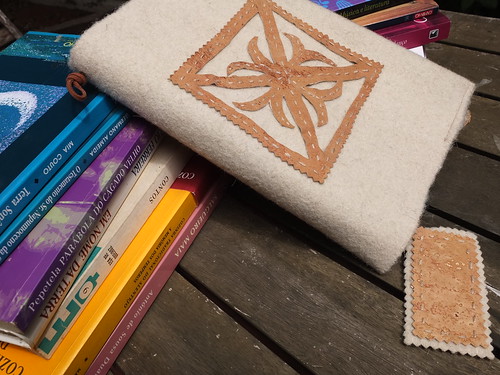
After embroidering the motif you must centre it on the front of the cover and use an appropriate stitch, like blanket stitch, running stitch or back stitch, to attach it to the cover. You can use the fabric without embroidering it, too. If you left the top open, you’ll have a pocket in your cover!!

Embroidered cork fabric book cover
An embroidered cork fabric book cover.
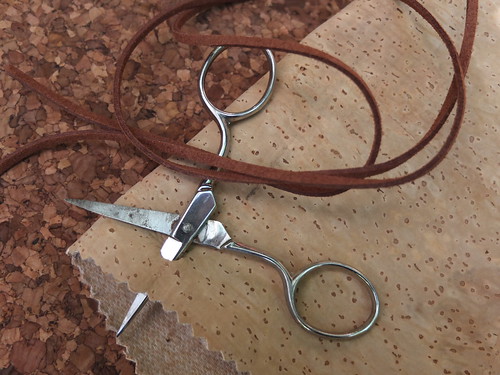
4. Your book cover could be ready to go, but I love to add a book marker to it. Use the small piece of fabric left and choose a shape to your bookmark. You can embroider it or keep it simple… In order to finish the book marker, you must perforate the top of the book marker with a sharp-pointed scissors. Or, even more simple, punch holes at the top and bottom with a hole punch.  Then pass the two ends of the suede through the hole and, if necessary, pull them with the tip of the needle. Tie a knot with the two ends together to hold the cord to the piece of fabric. On the other side you will attach the suede cord to the book cover. Fold the cover in half and choose a point at the top to make a small hole with the scissors.
Perforating the cork fabric in order to attach the bookmarker
Perforating the book cover to attach the book marker.
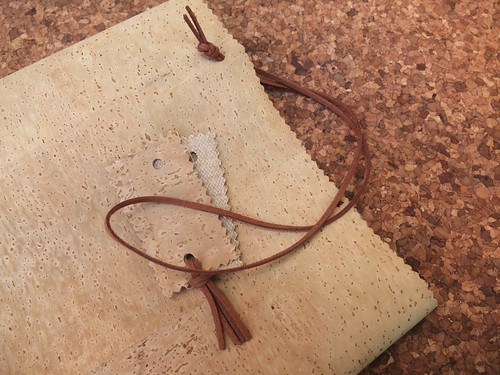
Tie a knot so that the marker is secured to the cover as in the photo.

Very easy to make - cork fabric bookmarker
Attaching the book marker.
Your book cover is finished! These is a very simple way of doing it but the possibilities are almost infinite... They will depend on the fabrics, the threads, the colors... And, above all, it will depend on your imagination...

DSCF5590
I love this book cover made of burel...
DSCF4392
"Burel" and cork, beautiful together...
I believe that when you are working with great materials, like burel and cork, they should be the stars and keeping it simple is always the best choice to make… Look here  and here to look at an even simpler way of doing it - a "four stitches" book cover... More simple is not possible!

You already know these words in Portuguese, but I don't mind repeating them... "Cortiça" for cork and "burel" - no translation available :)


September 16, 2012

Patterns - (NOT SAFE FOR WORK) States of undress

Just to warn you, the pattern featured below, although perfectly tasteful (and some may consider a little tame) contains nudity and therefore if that is not your thing, you may wish to skip the pattern post this week.

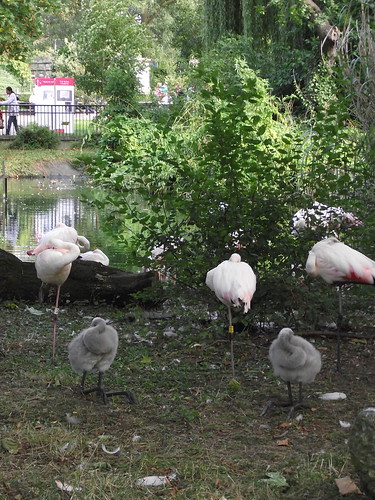
So to shamelessly rip off Mr. X Stitch's NSFW Saturdays, do not go below the cute picture of baby flamingos (who knew they were grey? who knew they could sit on their knees like that? awwwww) if nudity offends you (everyone is going to think this piece is far more graphic than it actually is now!).

London zoo

We did warn you


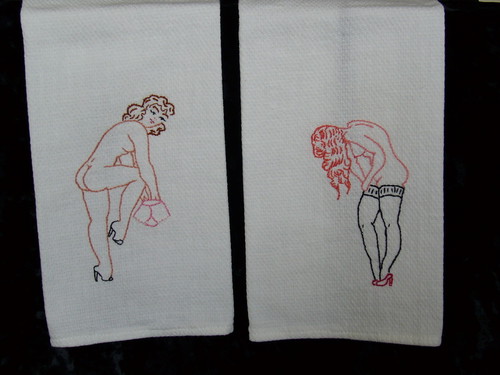
States of undress

States of Undress by sewclever

I love sewclever's stitching of these vintage patterns from vintage embroidery pattern superstar Brian Campbell's Flickr stream. You can find the patterns here and here (I also particularly love the Made in Hawaii pinup in the second link).

Hi, I'm Jo - I feature new embroidery patterns Sundays on Feeling Stitchy. I also post on our Twitter and Pinterest.

Is there a new pattern you'd like us feature? Email me!

September 12, 2012

Way Back Wednesday

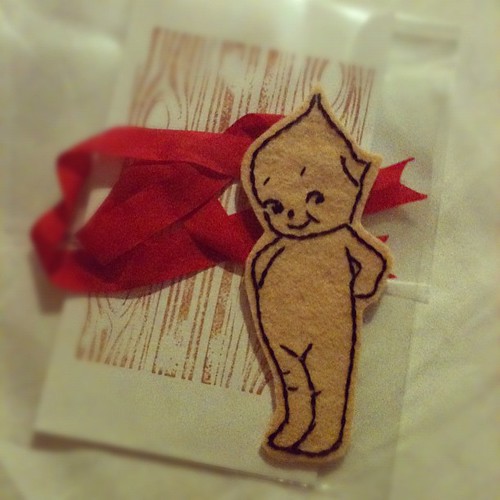
I embroidered another Kewpie ornament...

My grandmother said one of the reasons she fell in love with my grandfather is because he won her a Kewpie doll at the state fair. Michele Lea's embroidery is just too much! Love it! Thank you, Michele, for reminding me of a sweet love story with your wonderful stitching. 

September 11, 2012

Tutorial Tuesday

Happy Tuesday, everyone!

I have a tutorial roundup for you this week. Hopefully you'll get to give one, or all, of these a try, as they are super cute ideas!

If you would like to learn some stitches to include on the edges of a blanket or scarf, the Purl Bee has some great tutorials for a Chevron Blanket Stitch, Triple Blanket Stitch with a knot, and a Knotted Buttonhole stitch. Head over to the Purl Bee site to check some of these out.


If you are looking for a fun way to accessorize with embroidery for you or the little one in your life, this headband with french knots would look dazzling! The instructions for the headband can be found at Heidi & Finn. After the tutorial, there are various images of additional embroidery ideas for the headband.


Aside from having some adorable embroidery patterns for sale, Urban Threads offers some great tutorials on their site. This embroidered sock monkey is one of the cutest and easiest tutorials to follow. 

Hope you all have a fantastic Tuesday!

Hi, I'm Kristen! I am a lover of all things stitchy and crafty. I have been sewing for as long as I can remember. My grandmother taught me how to sew Barbie clothes when I was young and I have been sewing ever since.

You can find me at Bobbypin Bandit, on Instagram, and my Etsy shop.

September 9, 2012

Patterns: Rabbit Heart and Lion Heart Girls


Rabbit Heart New Pattern by Cherry & Cinnamon

This lovely new pattern set by Cherry & Cinnamon features both the Rabbit Heart girl above and a Lion Heart girl. I love the different stitches used on this. You can find the pattern set here.

Hi, I'm Jo - I feature new embroidery patterns Sundays on Feeling Stitchy. I also post on our Twitter and Pinterest.

Is there a new pattern you'd like us feature? Email me!

September 7, 2012

Wee Little stitching

latest stitching

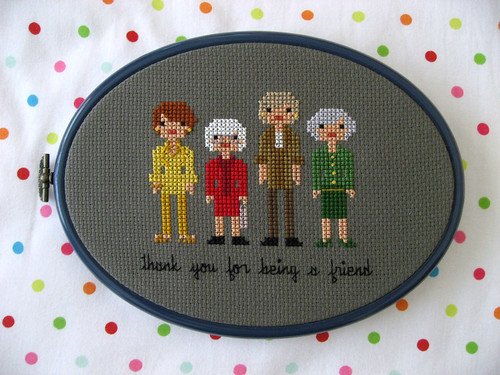
The second that I saw this pattern, it was pretty much a given I was gonna stitch it. That, and I just happen to know someone who loves The Golden Girls enough to own a framed photo of them. :) This pattern, as mentioned before, comes from the genius minds at Wee Little Stitches, and is available through our good friends at Kitschy Digitals.

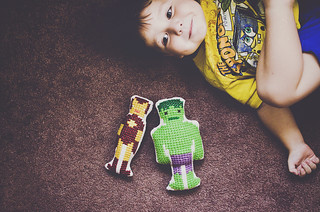
If stitching superheros is more your speed, Jacqueline stitched up doll-size versions of her patterns, using Smyrna Stitch:


Ooh, Smyrna stitch, you are new to me! Jacqueline worked her dolls on 14 count Aida, over 2 squares with the Smyrna stitch, making the pattern twice its normal size. Come to think of it, I'd love doll-sized versions of the Golden Girls - wouldn't they make cute Christmas ornaments? Ok, maybe I'm just being weird, here. :)


I love the added texture the Symrna stitch gives - I'll have to try this soon!

Also inspiring are Lisa's doll versions worked on Monk's cloth:
hanging out with superheroes

Hi, I'm floresita, editor of Feeling Stitchy. I'm an avid stitcher, knitter, and crafter. You can see more of my stitching on Instagram and my blog. My vintage transfer collection is on Vintage Transfer Finds.

Feel free to email me with any ideas for the blog!

September 6, 2012

Silver wings

Untitled
Stitched by whimsiology

One of my favorite things about summer, as a child, was watching cicadas hatch, revealing such pale and delicate wings lined with silver and gold - that's immediately what I think of when I see this delicate, beautiful embroidery by whimsiology. Gorgeous work!

Hi, I'm floresita, editor of Feeling Stitchy. I'm an avid stitcher, knitter, and crafter. You can see more of my stitching on Instagram and my blog. My vintage transfer collection is on Vintage Transfer Finds.

Feel free to email me with any ideas for the blog!

Back to school

OlĂ¡! In the next two weeks children will be back to school here in Portugal, after summer break. I'm reminded of those times when I was young (well, I like to believe I'm still young...) and one of the great things about being back to school was that special feeling of writing on the first page of a new notebook. Do you remember that? The first page seems to be made of a different kind of paper...

I loved to make my notebooks unique since I was a young girl. I enjoyed thinking: "my notebook is not like yours..." But I was no longer at school when I started embroidering notebooks. Today I'll show you some of those notebooks, hoping they can inspire you and your kids to make your own!!

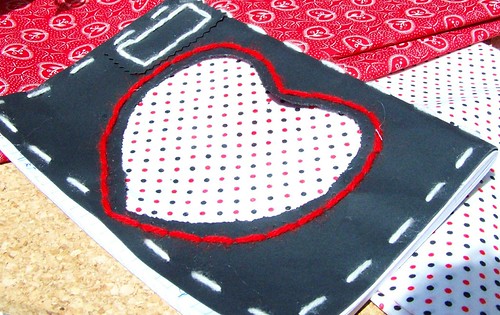
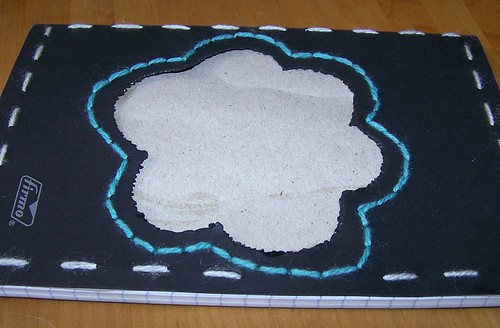
This was my first embroidered notebook. There I wrote down my first orders, the first supplies I bought... Good memories!!

Agulha nĂ£o pica's notebook
My first embroidered notebook
This one also had a black cover and was embroidered using wool yarn as the first one.

Next agulha nĂ£o pica's notebook
Using wool yarn on a black notebook...
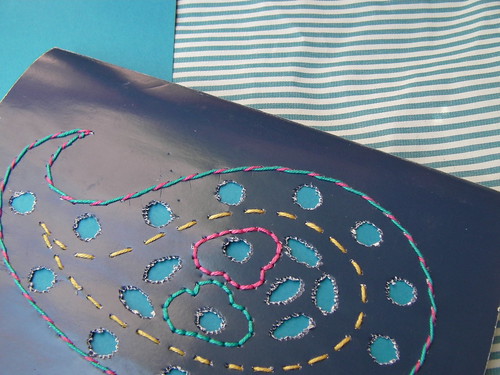
Some time later I began doing them differently, using more detailed patterns and embroidering with a floss similar to pearl cotton. One of this days I'll show you how I do it!! It's very easy... This is the notebook I use every day now... It's like my right hand, it keeps me from forgetting everything I need in my business. I prefer it to a netbook!

Better than a netbook...
Probably somewhere beside me...
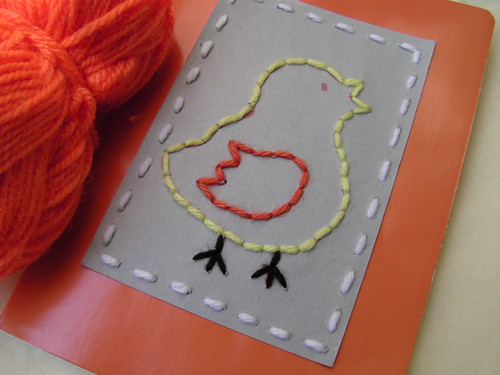
For those younger ones getting back to school here you have an idea to make their notebooks really unique. You'll have to use the technique of embroidering on card stock. The child will make a lacing card, perforating the card stock and then embroidering it using wool yarn. The notebook will look great and kids will be happy to say: "my notebook is not like yours"!

CAM_0361
A lacing card that became a notebook cover
As we would say in Portuguese: "bonito e barato"... Beautiful and cheap...

September 2, 2012

August Stitch Along 2012 round up


Left to right, top to bottom

  1. August stitch along 2012: the sisters by daisyeyes
  2. Passionfruit posing by LaWhimsy
  3. Little lemon slice by me
A big thank you to all those who stitched along with us on the August 2012 stitch along, it was fantastic seeing all the different ways the pattern could be interpreted. 

Don't forget you can still find this fantastic pattern by Cate Anevski here.


Hi, I'm Jo - I feature new embroidery patterns Sundays on Feeling Stitchy. I also post on our Twitter and Pinterest.

Is there a new pattern you'd like us feature? Email me!

SITE DESIGN BY RYLEE BLAKE DESIGNS