October 23, 2012

Tutorial Tuesday


Happy Tuesday, everyone! I have a Halloween themed tutorial for you today. I picked up this free embroidery pattern of a crow with a Halloween treat o'lantern over at Bird Brain Designs. I wanted to feature him somewhere in my kitchen, and thought an apron would be perfect. 


To make this apron, you will need:

-Embroidery floss
-Hoop
-Halloween Crow Pattern
-Sewing machine
-1 yard of fun Halloween fabric 
-Sewing machine
-Coordinating thread
-Iron
-Scissors
-Sewing needle
-Measuring tape or a rotary cutting mat

I used a variation of a simple waist apron pattern. I will include the steps here, but feel free to visit this site for a free pattern. 

Let's get started!

Step 1: Embroider your crow onto the fabric of your choosing. I decided to use white cotton. Cut your fabric into one 33 x 22.5-inch piece, four 3 x 36 inch strips, and one 10 x 10 inch square.


Step 2: Press under the edges of the embroidered fabric. I used a 1/4-inch fold here. Center the embroidery on the pocket front and use your sewing machine to stitch around.


Step 3: Fold all four edges of the pocket under a 1/4-inch and press. Then fold again and press to create a finished edge. Machine stitch around the edges to seal the fold.

Step 4: Pin your pocket on the front side of the apron piece. You can choose either left or right and make sure it is even. Following the stitch you used to seal the folded edged, stitch around the sides and bottom making sure to leave the top open. The pocket piece is finished!


Step 5: Fold and press the four edges of the main apron piece under at 1/4-inch. Fold over again and press. Machine stitch all the way around to close that fold. This will give you a clean hem for the entire apron.


Step 6: Now we move onto the straps for the waistband. Place two straps right sides together and machine stitch the shorter end. This will give you two long strips that will become the waist band. 


Step 7: Carefully press all the edges of both strap pieces under 1/4 of an inch. 

Step 8: Place the strips wrong sides together making sure to match the center seams and edges. Machine stitch all the way around to seal the waistband. 

This is what your waistband will look like. 


Step 9: Fold your apron in half and mark the top center. Do the same with the waistband. When you move on to gather your apron, it will be easy to sew because you will be able to match the centers. 

Step 10: Using a sewing needle and some thread, hand sew a gathering stitch at the top of your apron piece. I placed that stitch right underneath the top hemline. Begin to gather the apron until it measures 17-inches wide. 


Step11: Carefully pin the gathered apron to the waistband and machine stitch slowly, ensuring that you catch the gathered pieces on the underside of your waistband and it stays even. 

Step 12: Tie that apron on and get ready for the Trick or Treaters!


Hope you enjoy this tutorial and you have very happy Tuesday!

Hi, I'm Kristen! I am a lover of all things stitchy and crafty. I have been sewing for as long as I can remember. My grandmother taught me how to sew Barbie clothes when I was young and I have been sewing ever since.

You can find me at Bobbypin Bandit, on Instagram, and my Etsy shop.

Priscilla Embroidery Pattern: Play Apron Pt. 2

Hullo everyone! Here's the update on our Play Apron from Priscilla Embroidery.

Started by transferring all the patterns to one piece of muslin:


Looking at the original photo, it seemed like the stitch used for the figures was an outline/stem stitch. I am back-stitch kindda gal so it took me quite a bit of time to get into the groove of the stitch. Specially in going round corners and crevices. Any advice would be greatly appreciated on this.


I did all the outlines of all the characters first (including the other 2 of the other pockets) and gave them satin stitch eyes.

Upon closer scrutiny of the original design, I saw some more details which I failed to place in the pattern so it was the perfect time to work those in. Will update the pattern I posted with these changes.


I cannot quite pinpoint what stitches they used to fill in the figures, but I did see some form of straight stitches and zigzags. Started with straight stitches in green in a brick pattern:


Then, I took my yellow thread and wove some diamonds into it like so:


And that is it for now :-) Will fill everything else in and then tackle the assembly. Happy Monday everyone!


Have a great week and Happy Stitching!

October 21, 2012

October 2012 Stitch-along - week 3


Clockwise from left
  1. Kitsch Witch by Kleinina10
  2. kitsch witch with glow in the dark pumpkin face by snifferooski
  3. A Spooktacular Ta-Da by LaWhimsy
The coven of witches continues this week with three gorgeous witches (and don't forget Floresita's colourful witch from yesterday). I think Kleinina10's witch has to be the fanciest dressed witch yet, I love the pattern on her dress. I love the spooky glow in the dark face on snifferooski's pumpkin. And it's great to see LaWhimsy's piece all sewn up, it makes a great piece of Halloween decor.

It's not too late to join in! You can find Cherry and Cinnamon's gorgeously spooky pattern here, don't forget to add the tag oct2012stitchalong, so that we can find you!


Hi, I'm Jo - I feature new embroidery patterns Sundays on Feeling Stitchy. I also post on our Twitter and Pinterest.

Is there a new pattern you'd like us feature? Email me!

October 20, 2012

Sublime Stitching Floss Palettes - Team review and giveaway!

With the embroidery floss market dominated by so few manufacturers, it's always big news when a new brand of floss arrives, especially when it's from one of our favourite embroidery pattern people, Sublime Stitching!

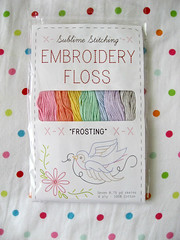
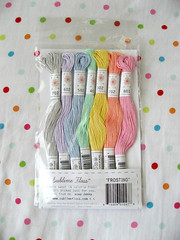
floss11   Frosting Sublime floss palette

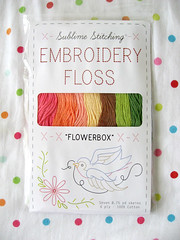
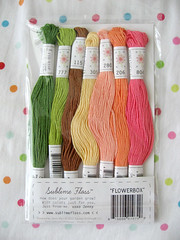
Untitled   Flowerbox Sublime floss palette

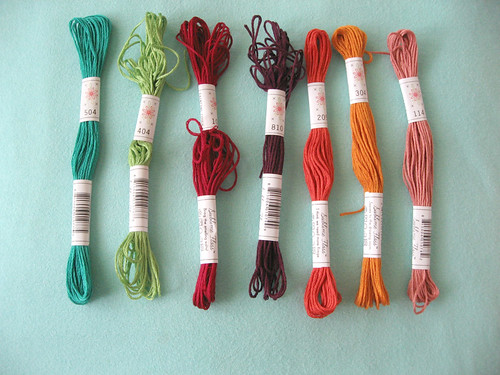
We were lucky enough to be able to have a try of the floss a few days before it was launched, the floss arrived in palettes of colour, in cute little packages, like the embroiderer's equivalent of going to the sweet shop. The palettes have cute names such as Frosting, Flowerbox, Breakdance and Parlour, just seeing the names instantly prompts you for the sort of embroidery you could do with them. And within the palettes, the floss itself has cute names (and very cute labels, make sure you read them), with names such as melon ball, fainting couch, leg warmer.

The floss itself is a pleasure to use, six stranded, the individual strands appear to be slightly thinner than the Anchor floss I'm used to, so when I stitched up my flower tea towel I used three strands instead of my usual two. The colours were vibrant and it did make the stitching easier because I could start on the pattern with full confidence that the colours I was using went together.

New Sublime Stitching Floss!!!!

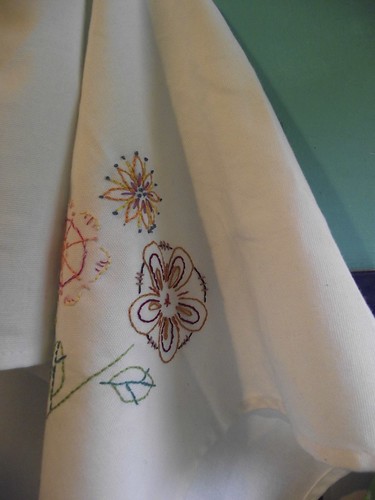
Tea towel stitched with Sublime Stitching floss using the Sublime Stitching Fantasy Flowers pattern. The flower just peeking out on the left was stitched with the Flowerbox palette and a little bit of the Mingles floss, the flower in the middle was stitched with the Prism palette and the flower on the right was stitched with the Parlour palette.

Probably the most notable thing about the new floss though is that the range also includes a pre-blended palette called Mingles, each floss is three strands of one colour and three strands of another. Now that's going to be useful!

- Jo     

*****

Ok guys - floresita here now - I was also lucky enough to receive the full set of new Sublime Floss, (hence the team post today from Jo and I) and I have to say, "sublime" describes it pretty well....

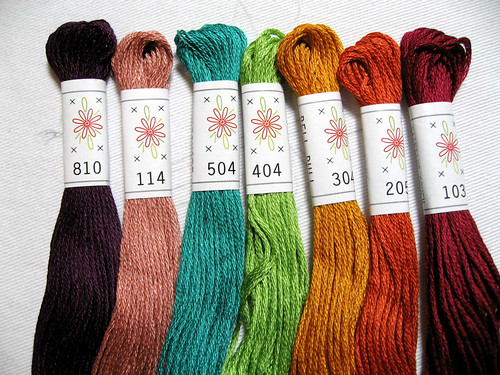
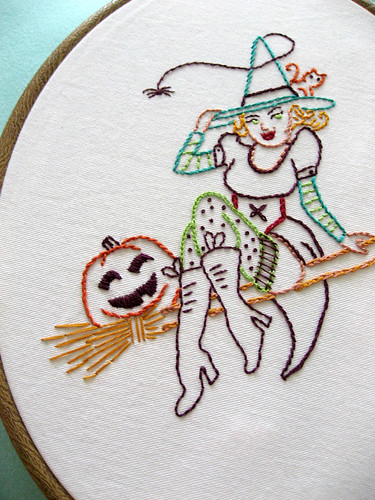
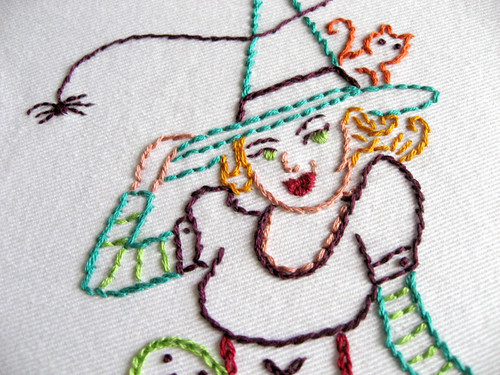
Last night I took the "Parlour" floss palette for a test drive, and it was perfect for our Kitsch Witch stitchalong pattern.


"Parlour" Sublime floss palette

As you can see from my night photo - the floss has a pretty sheen - it is ever-so-slightly thinner than your average 6 strand floss (I am a DMC girl), and it has a silky feel under my fingertips. I tried a little bit of everything with this floss - 2 strands, 3 strands, 4 strands, and 6 strands, and attempted French knots, stem stitch, split stitch, straight stitch, and chain stitch. 

I love 4 strands for a thick line and 2 strands stitches up marvelously - for some reason, that was my favorite weight.

more witchy detail


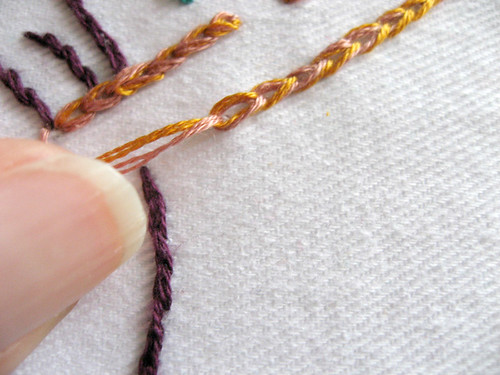
The slight sheen on these threads lends itself well to blending, and I really liked the look of 2 different threads on this chain stitch:

2 strands Bell Pull + 2 strands Corset

Here's the "Parlour" floss palette again, this time in daylight, where it looks equally yummy:

"Parlour" Sublime floss palette

witchy detail

To sum up, Sublime floss is lovely - I love the palette concept, as it takes the guesswork out of stitching (choosing harmonious colors is the most taxing part of stitching, in my opinion). The color names are adorable, I love the pithy little remarks on the wrappers, the packaging is clever and sweet, and the floss is all-around delightful.

And now I've got floss coming out of my ears. So peeps, help me out here - would YOU like to try some brand new Sublime floss? To win, pop over to the Sublime Stitching site, have a look at the 9 new palettes, tell us your favorite (or your favorite color name), and tell us what you might stitch with it.

Leave a comment here by 9 PM Oct. 21, U.S. CST. I will be giving out 5 palettes, that's 1 palette each for 5 lucky winners! International winners, no problem. So what's your fave?

- floresita

Hi, I'm Jo - I feature new embroidery patterns Sundays on Feeling Stitchy. I also post on our Twitter and Pinterest.

Is there a new pattern you'd like us feature? Email me!

October 19, 2012

Halloween goodies


If you're looking for something fun and cute to stitch, Danielle from Kitschy Digitals told me she's got oodles of cute patterns for sale on a Halloween theme...

Visit her holiday store if you're up for some spooky cuteness!

Hi, I'm floresita, editor of Feeling Stitchy. I'm an avid stitcher, knitter, and crafter. You can see more of my stitching on Instagram and my blog. My vintage transfer collection is on Vintage Transfer Finds.

Feel free to email me with any ideas for the blog!

October 18, 2012

Portugal - a living museum of embroidery

OlĂ¡! Today we'll have another small break in our historical reviews on Portuguese embroidery... Well... Maybe it won't be a break. Consider it instead as a visit to a living museum of embroidery.

Yes, I believe that Portugal can be seen as a living museum of embroidery... In every home we find beautiful stitches and even in the street you would be surprised at the pieces of embroidery that are being sold.

Last weekend I was out for a weekend near a beautiful town in Alentejo, Estremoz. As always I visited the Antiques and Flea Street Market and my favorite stall that sells vintage embroidery. And this time I asked my husband to take some pictures...

Vintage Stitches
Antiques and Flea Street Market in Estremoz, photo by ZPmoreira
It was great to have all these beauties nearby... But, at the same time, it made me wonder about what happened to all the families that have sold their treasures. All the embroiderers that worked these beautiful stitches never imagining that they would end up in a street market... As we would say in "good Portuguese", É a vida! "That's life!" And at least these embroidery pieces will end up in the hands of someone who will find them precious!!!

Vintage stitches
Beautiful stitches, photo by ZPmoreira
Each piece of embroidery was more beautiful and colourful than the other...

Vintage stitches
Beautiful embroidered tablecloth, photo by ZPmoreira
I asked the seller if she could tell me where the embroideries came from. But I obtained no answer, once she was more interested in assuring me that they were not stolen :)

Vintage stitches
One of my favorites, photo by ZPmoreira
I promise I will make my research work... I would like to be sure that these stitches have Portuguese Soul...

Vintage stitches
Beautiful flower embroidery, photo by ZPmoreira
It was so difficult to choose the photos... I would like to show you all of them, but as it is not possible, I hope you like my selection!

Vintage Stitches
Vintage and colorful stitches, photo by ZPmoreira
Next week I'll show you more of this living museum of embroidery...

October 14, 2012

October Stitch Along - week 2


Top to bottom, left to right
  1. oct2012stitchalong by KelseyBest
  2. kitchywitchy 1 by davyse
  3. Kitsch Witch in progress by LaWhimsy
  4. October 2012 stitch along by me

We've had some fantastic witches this week and lots of crayon tinting (as KelseyBest did, check out Aimee Ray's crayon tinting tutorial).

It's not too late to join in, you can find Cherry and Cinnamon's gorgeous pattern here (and as Bridgeen reminds us, this is a detailed pattern, so best to print of the pattern as large as you can - I printed the pattern off as full size on A4 paper, which turned out fine :) ). Remember to use the tag oct2012stitchalong on Flickr!

Hi, I'm Jo - I feature new embroidery patterns Sundays on Feeling Stitchy. I also post on our Twitter and Pinterest.

Is there a new pattern you'd like us feature? Email me!

October 11, 2012

Stitches from an island in the Atlantic - part II

OlĂ¡! Beginning where we stopped last week…
By the hand of Elizabeth Phelps, born to an English family settled on the Island, Madeira Embroidery was introduced to the British and after the 2nd half of the 19th Century these works of art began to be recognized as merchandise for trade between Madeira Island and the outside world.

She began with a school where poor workers where taught how to embroider. Initially, their works were sold to family and friends but when they were introduced to the British market their success occurred rapidly.

postcard - from Mindee, Finland
Embroiderers dressing regional costumes, old postcard from here
Madeira Embroidery began to be included in the families’ economy. At the beginning, embroiderers were responsible for the choice of fabrics and designs, using old family pieces of embroidery as inspiration. When the work was done, they would go to the harbour or door-to-door looking for someone to buy them, especially foreign tourists.

But with the growth of exportation, an enormous change in the fabrication process occurred: the designing and tracing phases went out of the hands of the embroiderers. The women living in the countryside received the fabric already prepared and then developed an extraordinary work of perfection with their agile and patient hands transforming the designed fabrics in unique works.

Madeira embroiderers gathered, photo from here
The embroiderers usually worked at farming with their husbands and they learned the art of embroidery from their mothers who were also embroiderers. Since the end of the 19th century, beautiful postcards captured and popularized images of the embroiderer seated in front of her cottage and groups of women who gather on the edge of ways to embroider.

Throughout the whole island, married and unmarried, old and young women were found together embroidering while talking about their lives and other’s lives…

But, as said before, embroidery in Madeira changed forever with Miss Phelps… As documented by popular oral tradition not only women knew the arts of needlework: Embroiders the father, embroiders the daughter, embroiders the mother… (popular verses)

Mother and daughter embroidering, image form this book
Another difference brought by Miss Phelps’ transformations was the fact that many embroiderers were no longer embroidering for pleasure but for need… But this has not diminished the value of their work… Madeira Embroidery is still a luxury item. Its value comes not only from the beauty and refinement of the design, the combinations of materials and the profusion of stitches but also from being an authentic handcrafted work. Each embroidery is an unique work of art, receiving the embroiderer’s personal touch.

Max, a famous Madeiran (born in the island), co-composed a song in honor of these women.
This is an old record, but we can hear in his voice with a strong Madeiran accent (I believe only Portuguese people can distinguish it..). Here you'll find a more recent version.

The lyrics says (talking about Madeira Island):
Like you there is no other
And in the dreamy nights
The waves foam is stitched
By the fingers of the embroiderers

In Portuguese (I made a very, very free translation...)
Como tu, nĂ£o hĂ¡ nenhuma
e, nas noites sonhadoras,
Bordam das ondas a espuma,
Os dedos das bordadoras.

October 10, 2012

Mending Moth Holes

patching
Stitched by ninimakes

Oh my goodness, isn't this stitched moth by ninimakes absolutely gorgeous?! I adore her idea of stitching a beautiful moth atop the moth holes in her wool sweaters - and they are so breathtakingly stitched they look like the real thing has alighted on your shoulder.... These moths would also make lovely magnets, brooches, or bows for fall-themed gifts.

She provides her own lovely moth illustrations and a full tutorial on her blog. Beautiful work, ninimakes!

Hi, I'm floresita, editor of Feeling Stitchy. I'm an avid stitcher, knitter, and crafter. You can see more of my stitching on Instagram and my blog. My vintage transfer collection is on Vintage Transfer Finds.

Feel free to email me with any ideas for the blog!

October 9, 2012

Tutorial Tuesday

Happy Tuesday, everyone!

Today's tutorial is meant to bring all of us a little luck. A lucky ladybug, that is!


I have seen some ladybug necklaces at some very expensive jewelry stores recently, and decided it was time to make my own. Which I am happy to share with all of you! I sketched out a little ladybug that you can access here.

In order to make this little ladybug to hang from a necklace, you will need the following items:


-Embroidery floss
-Scissors
-White cotton fabric
-Jump ring
-Necklace chain
-A pinch of fiberfill
-Jewelry pliers

Step 1: Transfer the ladybug to your fabric. 

Step 2: Stitch up the ladybug. I switched from a solid floss to these color variation flosses to add a little depth to the ladybug and the stitches around it. I used french knots for the spots on the ladybug and tips of the antennae. I used backstitches for the body of the ladybug, and running stitches that I overlapped as I stitched around the ladybug.


Step 3: Once you have stitched your ladybug and added the accent stitches to your liking, trim around the fabric in a circle until you get the size you like. Cut a second piece of blank fabric to use as the backing.


Step 4: Using a blanket stitch, attach the backing to the front. When you get close to completing the blanket stitch, add a little fiberfill to give the ladybug some body. Complete your stitches.


Step 5: Attach your jump ring through the top stitch on your ladybug.

Step 6: Thread the necklace chain and enjoy! I had that little horseshoe charm laying around and decided to add it to my necklace.

Hope you enjoy and have a happy and lucky Tuesday!

Hi, I'm Kristen! I am a lover of all things stitchy and crafty. I have been sewing for as long as I can remember. My grandmother taught me how to sew Barbie clothes when I was young and I have been sewing ever since.

You can find me at Bobbypin Bandit, on Instagram, and my Etsy shop.

October 7, 2012

October Stitch Along - Kitsch Witch!

Kitsch Witch
Kitsch witch by Cherry and Cinnamon

It's October Stitch Along time and of course it has to be a Halloween pattern! This year we've got a brilliant pattern from Bridgeen from Cherry and Cinnamon, thank you Bridgeen! I think the Kitsch Witch is so cute and is a perfectly cheerful way of celebrating Halloween. I can't wait to see what you guys come up with, you can download the pattern here (personal use only). Don't forget to post your wips and finished pics to the Flickr Embroidery pool, using the tag oct2012stitchalong, so that we can find you!

(And whilst you're in a witchy mood, why not check out Cherry and Cinnamon's other new witch pattern)

Hi, I'm Jo - I feature new embroidery patterns Sundays on Feeling Stitchy. I also post on our Twitter and Pinterest.

Is there a new pattern you'd like us feature? Email me!

October 4, 2012

Stitches from an island in the Atlantic

OlĂ¡! Continuing to travel through the roots of Portuguese traditional embroidery we have to leave mainland Portugal towards an archipelago in the Atlantic Ocean.

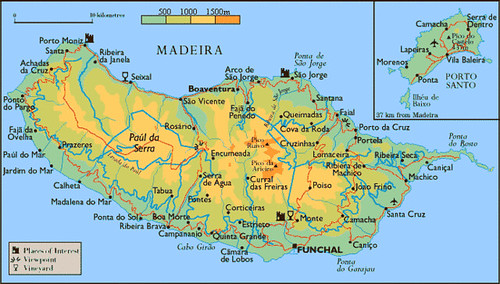
Madeira archipelago, i took this pic from the net
Madeira and Porto Santo, from here
Madeira appears in a map for the first time in 1433. Some years before two Portuguese captains had discovered an island in the Atlantic where they anchored after a storm, they named it Porto Santo (Holly Harbor). One year later was the time for the arrival at Madeira, that means “wood” in English. 

So… About Madeira’s history we can say that the Portuguese have put this archipelago on the map, but no one doubts that these islands were already there… The same happens with the history of Madeira Embroidery. Many claim that its history begins in 1850 with Elisabeth Phelps, but that is not true… She just put Madeira Embroidery on the map… But it was already there...

Today I’ll talk about what inspired the first embroiderers, those living before 1850 and next week we’ll see what changed after that…

Linen Madeira Embroidery, photo from an antiques blog.
The history of Madeira embroidery began with the first settlers on the island. Soon after their discovery the islands received the first inhabitants and their first embroiderers, too. The captains that first arrived at Madeira brought their families to live with them on the island and many other noble families followed. Fulfiling the need for the decoration of household linens as well as of clothing, noblewomen embroidered in their homes and nuns embroidering in convents were also known for their handcrafted work.

Most of the women that first arrived came from the North of Portugal, and many specifically from Viana do Castelo region, bringing with them the ancient tradition of embroidery and great skills. This art soon spread to almost all women of the island, even to those living in remote rural areas of the interior.
Women embroidered for own enjoyment or as gifts for their relatives and friends. For the young woman, the tradition of the wedding trousseau was very often the reason for such patient dedication to needlework. Embroidery pieces were passed from generation to generation not only for their great sentimental value but also for the richness of the embroidery.

Organdy Madeira Embroidery, photo from an antiques blog.
Although following the tradition, we can say that Madeira Embroidery is more exuberant than other Portuguese regional embroideries maybe owing it to the natural exuberance of the island that surely inspired embroiderers.
Nature lends its movements to embroidery, giving the embroidered items their uniquely respectable, refined romantic characteristics. In particular, the gracefully flowing movement, the composition of natural motifs where the abstract and imaginary flowers, as well as geometrical figures, provide graciousness and refinement in the embroidered items. (1)

The Madeira needlewoman became an expert in all types of needlework, from Cut Work to colored embroideries and tapestries in Tent Stitch. (2)

Ceramic Tile representing Madeira emboiderers, poto from this blog.
In the second half of the 19th century a woman born in an English family that was settled in Madeira since the 18th century started an embroidery school to teach impoverished workers. And she changed Madeira Embroidery forever... That story continues next week...
SITE DESIGN BY RYLEE BLAKE DESIGNS