Happy Tuesday, everyone! I have had New Year's Eve on my mind, and thought I needed a fun cocktail ring or accessory to add to my outfit for the evening. Today's tutorial can be used for any event or holiday, but I am going to use it as a New Year's Eve embroidered cocktail ring.
Supplies needed for this project:
-fabric scraps or small pieces of fabric
-button cover kit in the 1 1/8 inch (2.8cm) size
-embroidery floss and needles
-beads or decorative accents
-hot glue gun and/or glue of your choice
-pliers
-scissors
I used 6-strand purple and blue metallic embroidery floss from DMC, and separated them into 3-strands for each piece I stitched. I found ring bases at my local craft store, but they are also available here.
Step 1: Choose a piece of fabric and lay out your pattern. I had this fabric with a medallion print that was about the same size as the button form that I covered. This made it easy to keep the pattern within the print of the fabric. I filled the print of the fabric with french knots for one ring. I had some clear beads in my sewing box that I thought would add a little sparkle to the center of the french knot ring. I drew up a quick sketch of a diamond for the other, which you can access here.
For fabric without a print, I used a very light outline of the button in pencil and then stitched random little stars within that space.
Step 2: Once your stitches are complete, it's time to assemble the button and finish the ring. The package of buttons that I purchased had a pattern on the back that ensured the fabric was cut the appropriate size to cover the button. I made a template from the pattern on the package and used that to cut the stitched fabric.
Step 3: Now you can cover the button. These instructions came with the button kit that I purchased, but in case you need them, this is how to cover the button hardware with the stitched fabric. You will need the two button pieces, your stitched piece, and the button assembly tools for this step.
Place the stitched piece of fabric face down inside of the white curved button cover tool. Place the button top face down on the fabric.
Gently press the button into the white button cover tool and fold the excess fabric over the back of the button piece.
Place the back button piece on top of the fabric and pushed down gently.
Take the blue button cover tool and place the hollow side over the exposed button piece and press down.
You should hear a click when the back piece fits into the front button piece.
Gently remove the button from the white tool piece.
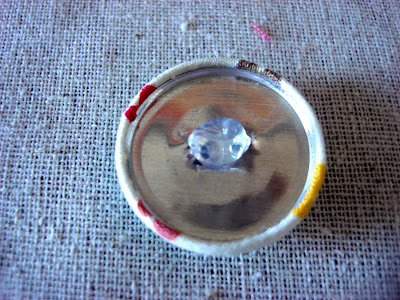
Step 4: Take your pliers and pull the wire out of the back of the button.
Step 5: Using the hot glue gun, add a small amount of glue in the center of the back of the button and then add the ring base to the back of that. Make sure to place the ring base centered so the stitches don't look crooked once the ring is on.
Step 6: Place ring on finger and enjoy!
Hope you all have a very wonderful holiday season and happy new year!


Cute idea!
ReplyDeleteOh, these button rings are brilliant! Thanks for sharing the tutorial!
ReplyDeleteSo cute! Love it!!!!
ReplyDeleteThis is so cool, im definitely going to get myself one of those button makers!
ReplyDeleteI've made these, and I've used the same method with smaller buttons for hairpins :)
ReplyDelete