Showing posts with label crafty blog school. Show all posts

February 1, 2018

Throwback Thursday: Does Anybody Blog Anymore?

In 2007, just as Feeling Stitchy was beginning, I did a series of posts called Crafty Blog School:

Crafty Blog School screenshot

The topic was relevant at the time - I remember spending HOURS combing through crafty blogs back then, finding them the old-school way, painstakingly hunting for links in Flickr profiles, and cataloging them in old-school feed readers which often went caput, taking all my joy with them.

Do you remember any of that experience, or am I getting a bit too old? :)

Anyhow, the ancient Photobucket links on my Crafty Blog School have long since expired, so I restored them to their former glory. These posts are an amusing trip back in time, to the early days of the internet, when so very few things looked polished and cool, so you could more generously appreciate the things which did. :)

All of which leaves me with a burning question:

Does anybody blog anymore?


Seriously, readers, help me out here - do you blog? Why or why not? If you did or do blog, share a link with us, so we can all stop by!

Hi, I'm floresita, editor of Feeling Stitchy. I'm an avid stitcher, knitter, and crafter. You can see more of my stitching on Instagram and my blog. My vintage transfer collection is on Vintage Transfer Finds.

Feel free to email me with any ideas for the blog!

March 3, 2008

Crafty Blog School: Getting Noticed

Crafty Blog School, a 2007 series of posts on blogging for Feeling Stitchy by floresita
Welcome to the 7th Crafty Blog School post - Getting Noticed. This post has been requested for awhile, so here you go!!

You Built It, But No One Came...
We all have harrowing memories of grade school and the daily humiliation we endured from the popular kids (okay, maybe you don't, but let's just play along here...) So maybe we feel the same "this crap ain't fair" sentiment when nobody visits our blog. All of a sudden we feel fat, awkward, pimply-faced and convinced we'll never make it in life. Whoa - slow down! Here's a few simple ways to get noticed:

Make Connections with Other Bloggers

  • Comment, Comment, Comment!
    Use Bloglines to subscribe to all the blogs you love.
    Comb through their links to find more blogs you love and subscribe to those, too.
    Every day, visit those blogs and leave comments when you see a project that knocks your socks off.
  • Say It With a Nice Email
    Did you find a blog that inspired you to re-paper all your walls, take up clog dancing, or re-arrange your sock drawers? Email this person, and tell them how much their blog means to you. Don't be afraid to gush and get all corny and sentimental. We love that. I'm not guaranteeing they'll become your blogging bud for life, but this is how blogging friendships start. Don't be afraid to make the first move!
  • Link to Blogs You Love
    Use your sidebar to link to blogs you love, and add a meaningful title like "blogs that inspire me" or "my favorite blogs". Just about everyone has site stats software that lets them find pages linking to their blogs. They'll see your kind words, and they'll remember you.

Connect with Your Readers

  • Ask Questions!
    Do you wonder why nobody leaves comments on your blog? Could it be because you don't ask for feedback? Always remember to ask a question in your post that invites feedback. For example, the next time you show off your new stash, why don't you ask your readers what they like to craft with?
  • Have a poll!
    If you have a Blogger blog, use the poll widget to ask any old question you want. Apples vs. Oranges. Scrunchies vs. Headbands. Obama vs. Clinton. You'll be amazed at how much feedback that produces and better yet, it lets your readers know you're interested in their opinions!
  • Do a giveaway!
    It it your 100th post? Your first smoke-free month? Celebrating the anniversary of de-clawing your cat? Celebrate with a giveaway! Give away something you've made or thrifted. It doesn't have to be big, it's the thought that counts.

Find Out Who's Visiting Your Blog
Are you sure no one visits your blog? Use Site stats and tools like Technorati to see who is reading and linking to your blog:

  • Site stats
    I've had good results with these two free site stats programs:
    Sitemeter
    StatCounter
  • Technorati
    This is a great tool that takes a minimum of effort. Just sign up for a free account, embed a tiny bit of code on your blog and voila - you can see who's linking to you!

The Great Comment Expedition
Want some comments on your blog? Just leave a comment here!

  1. I will leave a comment on the blog of everyone who comments on this post (preferably a crafty blog)
  2. You will look at the person who commented above you and leave a comment on their blog.
So every person who leaves a comment here will get 2 new comments on their blog. Be sure to include your blog address in your comment to "play". Let's do it!

Update: 3/11/08 - I just closed the comments because I'm going out of town this weekend and won't be able to keep up. 68 comments so far! Thanks everybody for playing! :)


All The Crafty Blog School Posts:
week 1: Where Do I Blog?
week 2: Choosing a Template
week 3: Name Your Blog & Create a Header
week 4: Blogging Photos from Flickr
week 5: How to Put that Darned Thimble Guy in Your Sidebar
week 6: How to Take Better Pictures of Your Crafts
week 7: Getting Noticed

Hi, I'm floresita, editor of Feeling Stitchy. I'm an avid stitcher, knitter, and crafter. You can see more of my stitching on Instagram and my blog. My vintage transfer collection is on Vintage Transfer Finds.

Feel free to email me with any ideas for the blog!

June 21, 2007

Crafty Blog School: How to Take Better Pictures of Your Crafts

Crafty Blog School, a 2007 series of posts on blogging for Feeling Stitchy by floresitaWelcome to the 6th (and final?) Crafty Blog School post - today I'll show you simple ways to take better pictures of your crafts. Want more Crafty Blog School posts? Just leave a comment with your suggestions, and I'll put as many more together as you want!

Why don't my crafts get the love they deserve?
Let's say you just finished this amazing craft. I mean, you look at it and say to yourself - "this is a freaking work of art, self." You snap a picture, upload it into Flickr or write a blog post and then... nothing happens. No comments, no faves. Absolutely no love for your masterpiece, which is looking sadder and lonelier by the minute. Has this happened to you? If it has, don't be sad or disappointed! Faves and oodles of comments are by no means a measure of greatness - if you love what you made, in my opinion, mission accomplished.

Could it be... the pictures?
Maybe one reason your crafts don't get the love they deserve is the pictures you post of them? You don't have to be a professional photographer with an expensive camera, or a Photoshop wiz with mad computer skills! There are a few simple things anybody can do to make their pictures better. I promise anybody can do it, and that means you too!

How to Take Better Pictures

  1. Always use daylight to take your pictures - try snapping pics of your crafts outside or by a bright window.
  2. Turn off that flash! It creates a nasty glare on your stuff, especially if it's bright or reflective.
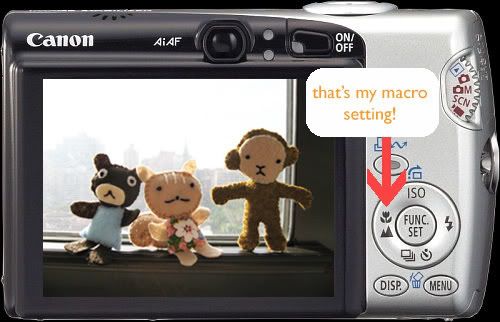
  3. Use your macro setting for close-ups! (Don't know where your macro setting is? Almost all digital cameras have it- usually it's a little flower symbol... mine looks like this)
  4. Put your crafts in fun and interesting settings - here are just a few examples...

Advanced: How to Tweak Your Pictures in Photoshop
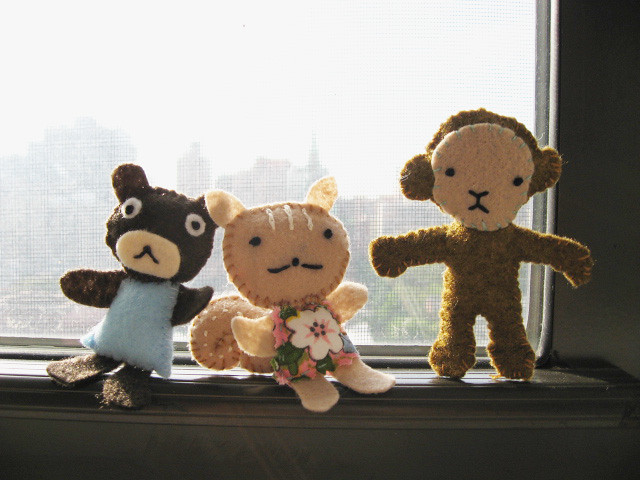
These 2 tweaks can make any picture look better! For example, this picture is way too dark:
too dark!

  1. Adjust levels: how do I do that?
    levels adjusted - still too dark
    Sometimes this does the trick - but our pic is still too dark, so now we'll...


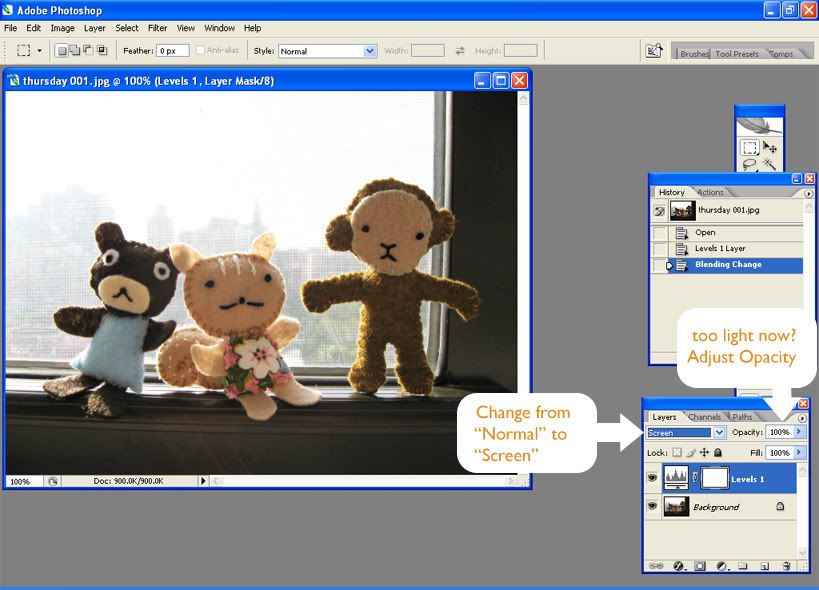
  2. Adjust brightness using Screen: how do I do that?
    nice bright critters
    Done! Yay!
Voila! After 2 simple tweaks, we have a much better picture! Now it's nice and bright, and the colors and contrast really pop!

That's All, Folks
Well, that does it for Crafty Blog School! I hope you enjoyed all the posts, learned a little something, or were inspired to try something new. This doesn't have to be the last post, I'm just tapped out for ideas... Let me know if there's something you'd like to see!

All The Crafty Blog School Posts:
week 1: Where Do I Blog?
week 2: Choosing a Template
week 3: Name Your Blog & Create a Header
week 4: Blogging Photos from Flickr
week 5: How to Put that Darned Thimble Guy in Your Sidebar
week 6: How to Take Better Pictures of Your Crafts
week 7: Getting Noticed

Hi, I'm floresita, editor of Feeling Stitchy. I'm an avid stitcher, knitter, and crafter. You can see more of my stitching on Instagram and my blog. My vintage transfer collection is on Vintage Transfer Finds.

Feel free to email me with any ideas for the blog!

June 14, 2007

Crafty Blog School: Hosting Graphics on Photo Bucket

Crafty Blog School, a 2007 series of posts on blogging for Feeling Stitchy by floresita

Welcome to Week 5 of Crafty Blog School - today I will answer the most asked question on Feeling Stitchy, and that is, how do you put that darned thimble guy in your sidebar to link to us!


Since the Feeling Stitchy guy is a web graphic and not a real photo, we'll be hosting him on Photo Bucket.

How To Put That Darned Thimble Guy in Your Sidebar
  1. Save the image to your computer
  2. Upload the image to Photo Bucket (it's possible with Flickr, but it's against the rules- so don't do it!).
  3. Copy the URL link for the image (in Photo Bucket, it's displayed right under the image)
  4. In Blogger, add a new HTML/Javascript element to your sidebar, and paste your code using this setup (you can use this code in any blog that lets you edit the HTML):

    <a href="URL OF YOUR PAGE"><img src="URL OF YOUR IMAGE" alt="YOUR PAGE TITLE" border="0"/ ></a>

    URL OF YOUR PAGE - http://flickrembroidery.blogspot.com/
    URL OF YOUR IMAGE - this is the URL link you copied in step 3
    YOUR PAGE TITLE - Feeling Stitchy

    An example of what your code might look like:
    <a href="http://flickrembroidery.blogspot.com/"><img src="http://i152.photobucket.com/albums/randomperson/thimble.gif" alt="Feeling Stitchy " border="0" /></a>

Why can't I do this on Flickr?
Because they said so -scroll on down to the "Don't" section where it says:

Don’t use your account to host web graphics like logos and banners.
Technically, it can be done - but if they let you do that every Tom, Dick and Harry would use Flickr to host web graphics and images for their websites. Then Flickr wouldn't have any real pictures for you to ooh and ahh over. So, use sites like Photo Bucket to upload any old web graphic you please without cluttering your Flickr photo stream...

Why don't you give me your Photo Bucket code so I can copy and paste that?
Bandwidth, my friends. If your first experience on the internet was Flickr (like me!) it's hard to understand bandwidth. Flickr gives you unlimited bandwidth, for free, which means if a gazillion people want to look at your pictures, a gazillion people can look at your pictures with no extra charge to you. But in the real world, bandwidth costs money! Ever visit a popular blog that posts a notice that they've exceeded their bandwidth? This means they are on a paid hosting site (like Typepad or others) and they've exceeded their allowed monthly traffic.

I Don't Want to Exceed My Bandwidth!
Photo Bucket works in a similar way, but you don't get a big ol' bill when you exceed your bandwidth. They just yank the rug out from under you, so to speak, and instead of displaying your image, there's a little image saying you exceeded your bandwidth. Their limits are really high and it seems hard to go over. But if I give you the code, you give somebody else the code, and they give it to their family and pets, between all of us sharing the same image we'll definitely exceed my bandwidth!
More on bandwidth and bandwidth stealing.

Next week: Taking Better Pictures of Your Crafts

Leave a comment with any questions or email me!

All Crafty Blog School Posts:
week 1: Where Do I Blog?
week 2: Choosing a Template
week 3: Name Your Blog & Create a Header
week 4: Blogging Photos from Flickr
week 5: How to Put that Darned Thimble Guy in Your Sidebar
week 6: How to Take Better Pictures of Your Crafts
week 7: Getting Noticed
Hi, I'm floresita, editor of Feeling Stitchy. I'm an avid stitcher, knitter, and crafter. You can see more of my stitching on Instagram and my blog. My vintage transfer collection is on Vintage Transfer Finds.

Feel free to email me with any ideas for the blog!

June 7, 2007

Crafty Blog School: Blogging Photos from Flickr

Crafty Blog School, a 2007 series of posts on blogging for Feeling Stitchy by floresitaWelcome to Week 4 of Crafty Blog School - today I'll show you how to blog photos from Flickr.
I'll also go over a trickier aspect of blogging on the internet, and that is, blogging someone else's Flickr photos... So, let's get started!
2 Ways to Blog Photos From Flickr
1) Cut and Paste Code from Flickr
  1. Log in to Flickr, and find the photo you want to blog.
  2. Just above the photo, click on "All Sizes"
  3. Choose a size from the top where it says "Available Sizes"
  4. Scroll down to where it says "Copy and paste this HTML into your webpage:" and copy and paste the code into your blog post!
    under a white cloud (small size)

2) Set up Blogging from Your Flickr Account Page
  1. Log in to Flickr, and go to your blogs page
  2. Add your blog information, and configure the size and layout of your photos.
  3. Once your blog is set up, return to your pics, and click "Blog This" just above your photo
  4. Fill in a title, and the body of your post, and voila, you've blogged a photo!


    under a white cloud
    Originally uploaded by floresita.
Blogging Other People's Flickr Photos
Now, here comes the tricky part! Let's say you've found a really great photo in someone else's Flickr stream and you're dying to blog it. You click "All sizes", and copy and paste the code or just click "Blog This." But, do you have this nagging feeling that maybe you've done something wrong? Are you scared they'll chase you down and accuse you of stealing their photo?
Photo Blogging "Nettiquette": Is Blogging Stealing?
Most people view it as a compliment when someone blogs their photo, and are flattered. But be aware that not everyone is flattered! Some people don't know that people can blog their Flickr photos, and they're not comfortable with it. Other people may even accuse you of stealing their work! But, if you use the 2 methods I showed you above, technically, you've done nothing wrong. The photo is on your blog, but you haven't "stolen" the image because it clearly links back to the user's Flickr stream.
Suggestions for blogging someone else's pics:
  • Blog photos from people who are your contacts, or someone you've traded emails or comments with.
  • Email people you don't know and ask for permission! They'll probably say yes and become a Flickr friend of yours.
  • Always credit the photographer and link back to their Flickr stream, blog, or Etsy store.
  • Never blog a photo to make critical remarks about it. That will make people mad for sure!
What do you think?
I'd love to see what people think on this topic - I've had my crafty pics blogged a few times by people I don't know and I enjoyed it! However, when one of my wardrobe pics was blogged on a porn blog, I definitely was not flattered! To specify who can blog your Flickr pics, go to your Privacy and Permissions page. Always remember that Flickr is a very public place. Post only photos you're comfortable sharing!

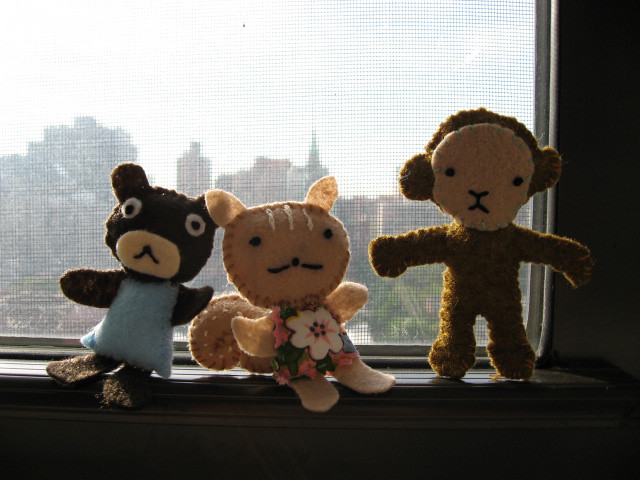
Next week: Want to find out how to put this little guy in your sidebar?

Tune in next week to find out!

All The Crafty Blog School Posts:
week 1: Where Do I Blog?
week 2: Choosing a Template
week 3: Name Your Blog & Create a Header
week 4: Blogging Photos from Flickr
week 5: How to Put that Darned Thimble Guy in Your Sidebar
week 6: How to Take Better Pictures of Your Crafts
week 7: Getting Noticed
Hi, I'm floresita, editor of Feeling Stitchy. I'm an avid stitcher, knitter, and crafter. You can see more of my stitching on Instagram and my blog. My vintage transfer collection is on Vintage Transfer Finds.

Feel free to email me with any ideas for the blog!

May 30, 2007

Crafty Blog School: Name Your Blog & Create a Header

Crafty Blog School, a 2007 series of posts on blogging for Feeling Stitchy by floresita
Welcome to week 3 of Crafty Blog School! Today we'll talk about naming your blog and creating a header.


Name Your Blog
Choose a name that describes you and your interests, or an unusual phrase that will stick in people's heads. My suggestion? Pick a humorous name! We all remember when something makes us laugh, even if it's a cheesy joke, like ahem, "Feeling Stitchy." :) Last step in naming your blog: Google it! Stay away from any names associated with companies, or names that are already taken by other blogs. Your blog deserves the chance to be unique and completely different! :)

Add Your Own Header
Maybe you think your drawing or design skills are not great or you're not the best at choosing typefaces or colors. Don't worry about it! Remember what I said in the last post about keeping it simple? That also applies to headers! Pick a favorite color and a font you like to create a very elegant design like Claudia's header.

Create a Header in 6 Easy Steps with Clipart
You can do it! All you need to make a header of your own is 1 clipart image and Photoshop. Rebekah of Sweet Bee volunteered for a blog header re-design, and here's how I tackled her banner in 6 easy steps:

1. Inspiration: Keeping in mind that her blog name is "Sweet Bee", I opened up Microsoft Word and found this cute clipart image of a bee:

2. Create a New Image: Find out how wide your header should be, open up Photoshop and create a new image. I created a new image 660 pixels wide and 200 pixels tall and inserted the cute bee:


3. Choose a Font: It can be a simple font or a fun font, just make sure it's readable! I chose a fun font that looked playful, and well, sweet:


4. Choose a Font Color: Use one of the main colors in your clipart image as the font color. The cute bee has light blue, yellow, and orange accents so I tried all 3 but liked the orange best:


5. Add the Subtitle: Use a smaller font of your choice - I suggest Trebuchet and Arial since they are both easy to read in very small sizes:


6. Add a Finishing Touch: I used the paintbrush and made a light blue dotted line as a little "path" for the bee, and presto, we're done!


Jpeg vs. Gif: Important Note About File Size!
Ever visit a blog with a huge, beautiful, color header that never, ever loads? You may think it's your connection that sucks (and this might be the case) but what you're really seeing is a header in need of a weight loss program! The image is too big to load quickly!

Always try saving your headers as Gif files - smaller files that load very quickly. Look at these 2 headers - the first is a Gif and the second is a Jpeg - see any difference? But notice how the Gif file is 1/3 the size of the Jpeg! So whenever you can, use Gif!


Gif file: 19 KB

Jpeg file: 59 KB

Uploading Your Header
Blogger: Uploading your header is very easy - find directions here.

Wordpress: Go to "Presentation" and "Custom Image Header" to find the exact dimensions of your header and upload it. Remember you must use the exact dimensions for Wordpress - Wordpress will re-size your images but the quality of the re-sized image is not good.


Was this Crafty Blog School helpful? I hope I inspired you to create a new header! As always, leave a comment with any questions or suggestions.

Next Week: Blogging Photos From Flickr

All The Crafty Blog School Posts:
week 1: Where Do I Blog?
week 2: Choosing a Template
week 3: Name Your Blog & Create a Header
week 4: Blogging Photos from Flickr
week 5: How to Put that Darned Thimble Guy in Your Sidebar
week 6: How to Take Better Pictures of Your Crafts
week 7: Getting Noticed
Hi, I'm floresita, editor of Feeling Stitchy. I'm an avid stitcher, knitter, and crafter. You can see more of my stitching on Instagram and my blog. My vintage transfer collection is on Vintage Transfer Finds.

Feel free to email me with any ideas for the blog!

May 23, 2007

Crafty Blog School: Choosing a Template

Crafty Blog School, a 2007 series of posts on blogging for Feeling Stitchy by floresita
Welcome to Week 2 of Crafty Blog School! I'm assuming everyone has chosen a blog service they're happy with. Well, your first challenge when you start a new blog is... choosing a template!
Or, you blogging veterans may have a template already, but you're not 100% sure you love it, or you feel guilty you haven't customized your blog with oodles of fonts, colors, or shiny animated gifs...

Less is More!
May I make a suggestion? Less really is more! I know you have lots of ideas, maybe for background colors, a cool header, a really cool font (or, like 10 different fonts), but when you're starting out, choose a template that's minimal. This way, if you want to customize it, it's much easier without having to figure out where all the pictures are "hidden" in the code. Also, if you have a crafty blog, do you really want the focus to be on 10 different cool fonts, a crazy background pattern that gives you a headache, funky animated pictures, or... your crafts? :)

Here are some nice Blogger and Wordpress templates you can easily customize:

Blogger templates

Minima


Washed Denim


Stretch Denim Light


Blix


Regulus


Pool


Typepad templates?
I'll leave the volunteering to all of you Typepad users! Leave a comment with your favorite template, or one that you'd recommend for a beginner...

A Note on "Minima" Blogs
That Blogger Minima template doesn't look like much, does it? Nothing's moving, there are no dancing or sparkling gifs, but the design is clean and the focus is where it should be: on the pictures of the crafts! My favorite Blogger blogs almost always use the Minima template. It may look plain, but adding your own header and changing the link colors can make a big difference. Take a look at this list and see if it inspires you to go Minima:

anna maria horner
geninne
crafty synergy
sugarloop


Next week: Naming Your Blog and Creating a Header... Leave a comment with any questions or suggestions!

All The Crafty Blog School Posts:
week 1: Where Do I Blog?
week 2: Choosing a Template
week 3: Name Your Blog & Create a Header
week 4: Blogging Photos from Flickr
week 5: How to Put that Darned Thimble Guy in Your Sidebar
week 6: How to Take Better Pictures of Your Crafts
week 7: Getting Noticed

Hi, I'm floresita, editor of Feeling Stitchy. I'm an avid stitcher, knitter, and crafter. You can see more of my stitching on Instagram and my blog. My vintage transfer collection is on Vintage Transfer Finds.

Feel free to email me with any ideas for the blog!

May 17, 2007

Crafty Blog School!

Crafty Blog School, a 2007 series of posts on blogging for Feeling Stitchy by floresita
Are you wondering how to have a crafty blog of your own? Or maybe you have a blog, but you're bored with the layout, wish you knew how to make a header, or wish your pictures looked a little better. Let's face it, we're not all crafty mamas with amazing graphic design skills or fabric designers with mouth watering photos. But, we've got our crafts, our things we do, and we want to share it with others. Welcome to Crafty Blog School!

Crafty Blog School is a series of posts on how to start a crafty blog of your own, add pictures to your blog, set up blogging from Flickr, create a header, choose a template, etc. Also, I'll do a post on how to take better pictures of your crafts! So, let's get started with the basics, and that is how to start a blog of your own...

Where do I blog ?
You can blog just about anywhere these days. But these 3 blog sites top my list because they're easy to use, customize, and integrate with Flickr:

Blogger (free)
Wordpress (free)
Typepad (paid)

Paid vs. Free Services
Typepad has a lot of nice templates to choose from, and many crafty people use it. But I think free services like Blogger or Wordpress are perfect for beginners - they're great to get your feet wet. After you know what you like you can switch to a paid service. All my blogs (including this one) are hosted on Blogger and I still see no reason to switch to a paid service. There may be other perks, but for me it's hard to argue with free!

What's the Difference?
Do Blogger blogs, Wordpress blogs, or Typepad blogs look different? Well, you be the judge! Here's a list of sample blogs arranged by blog service:

Blogger blogs:
kup, kup land
freehand sketching
paper flower girl

Wordpress Blogs:
losabia
craft daisy
lorelei

Typepad blogs:
this vintage chica
buttons magee
gooseflesh


Remember that no matter what service you choose, you can edit your template to look however you want. But if you have no interest in learning HTML or CSS, choose a service with templates you love so you won't have to mess with them at all.

So how was your first Crafty Blog School class? I hope you enjoyed it! Is there anything you want to learn in the next class? Leave a comment, and see you next week! :)

All The Crafty Blog School Posts:
week 1: Where Do I Blog?
week 2: Choosing a Template
week 3: Name Your Blog & Create a Header
week 4: Blogging Photos from Flickr
week 5: How to Put that Darned Thimble Guy in Your Sidebar
week 6: How to Take Better Pictures of Your Crafts
week 7: Getting Noticed
Hi, I'm floresita, editor of Feeling Stitchy. I'm an avid stitcher, knitter, and crafter. You can see more of my stitching on Instagram and my blog. My vintage transfer collection is on Vintage Transfer Finds.

Feel free to email me with any ideas for the blog!

SITE DESIGN BY RYLEE BLAKE DESIGNS