November 20, 2012

Tutorial Tuesday


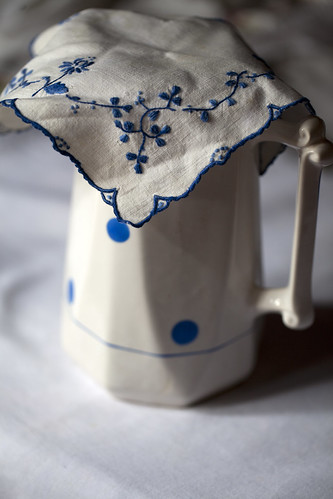
Hello everyone! Happy Tuesday. I have a quick tutorial for you today. This can become a very nice little gift for the holidays or a contemporary take on creating a potential family heirloom hanky. I have been super inspired by vintage stitches lately and thought it would be fun to create something similar to those vintage handkerchiefs I love so much.


Thanks to Floresita, our editor and fellow blogger here at Feeling Stitchy, I found this darling bird embroidery pattern at her Vintage Transfer Finds blog, and it's free! She has some great vintage patterns in her archives at VTF, but I opted for this little bird in order to place it on the corner of a hanky. I found a package of 6 handkerchiefs at Target for $5, and I will be using one of those here.

To make this sweet little hanky you will need:

-A handkerchief
-Embroidery floss in colors of your choice
-Vintage pattern
-Pencil or water soluble transfer pen
-Embroidery hoop


Step 1: Begin by washing and pressing the handkerchief. This will take care of any shrinkage that may occur. 

Step 2: Transfer your pattern to the handkerchief. The hanky is so thin, that it was very easy to see through to transfer the pattern. I used a pencil to transfer the pattern in order to keep the line thin, but it's just as easy to use a water soluble transfer pen.


Step 3: Separate the strands of floss in order to use thinner strands and create a more delicate look. I used 6 strand floss, and separated it into different strand widths throughout the pattern. For the bird, including the eye, beak and little claws, I used three strands of floss and a backstitch. The lazy daisy leaves and french knots are 4 strands of floss, and the branch is 6 strands of floss in a split stitch.

I find that it makes it easier for me to pull strands of floss apart if I pull them very slowly and I don't use a very long piece. I use the length from my finger tips to my elbow as the measurement for floss that I intend to separate.


Step 4: Stitch up the hanky. As you are stitching, make sure you tightly knot the ends of your floss and trim the excess as close to the knot as possible. I double knotted my stitches just to make sure they would not unravel during use or washing.


Step 5: This step is optional. My sister requested that I place a bow tie on the bird, so I did that, which means this hanky is being sent to her. 


Step 6: In order to ensure that your embroidered hanky can stand the test of time and become a vintage or heirloom hanky in the future, it's important to care for your stitches when washing. I usually wash hand embroidered items on the delicate or hand washing cycle in the washing machine. For smaller more dainty stitches, I recommend hand washing with a mild detergent, something akin to laundry detergent for babies. If you get makeup or lipstick on your hanky, I recommend spot cleaning and then washing the whole hanky by hand. It takes a little more time to care for stitches like this, but they will last.

Step 7: Enjoy your hanky! These would make a great gift to a family member or friend, as well. It's quick, and has a very nice handmade touch.


Hope you enjoy and have a great Tuesday!


Hi, I'm Kristen! I am a lover of all things stitchy and crafty. I have been sewing for as long as I can remember. My grandmother taught me how to sew Barbie clothes when I was young and I have been sewing ever since.

You can find me at Bobbypin Bandit, on Instagram, and my Etsy shop.

November 15, 2012

agulha não pica giveaway


Olá! Today is a very special day... I've been posting every Thursday since April and for me all Thursdays became special days...

I love the opportunity of researching and sharing Portuguese traditions, I love your kind comments and the mails I've been receiving. And I loved the coincidence of my birthday falling on a Thursday... So I decided to celebrate it properly... And I'll do it sharing my joy with you. I believe that a giveaway is a nice way of doing it. Don't you think?

Let's do it as if you were going shopping. I invite you to visit my agulha não pica ETSY shop. There you can browse my Embroidery Kits, Patterns or children burlap embroidery kits sections (and all the others obviously). Choose your favorite product and write its name on a comment to this post. That way you'll be applying to win it!

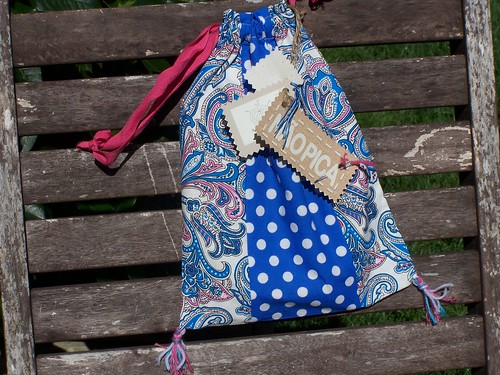
You can choose one of my beginner kits inspired by Portuguese traditions, like the ones with a heart or a Japoneira inspired by Viana do Castelo embroidery or the other one with a paisley pattern. All my beginner kits come in beautiful drawstring bags, taleigos.

Taleigos novos!
Portuguese heart - Coração de Viana

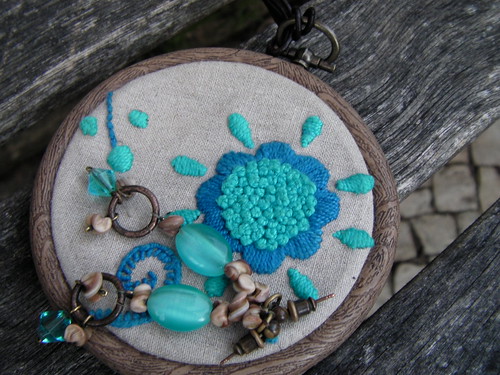
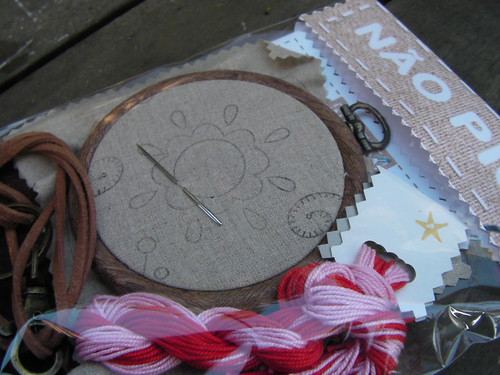
You may prefer an embroidery kit that comes with all the material and instructions to make your own embroidered pendant that you can use in a necklace or in a keyring.

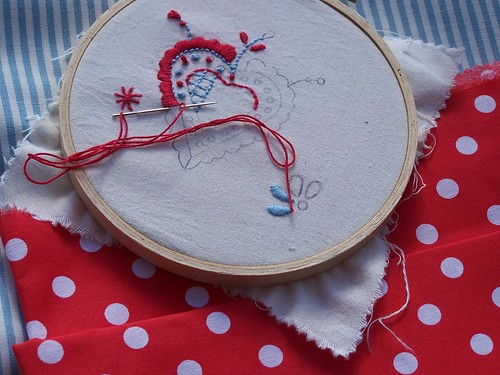
Colar pronto - embroidered pendant
Embroidered pendant kit

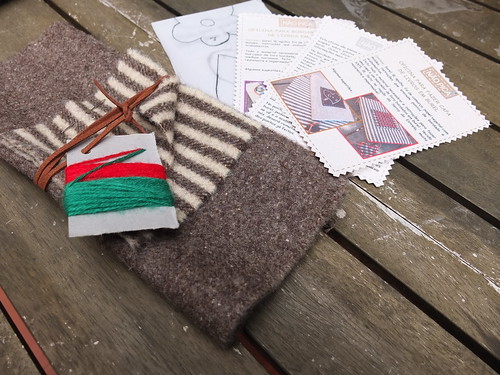
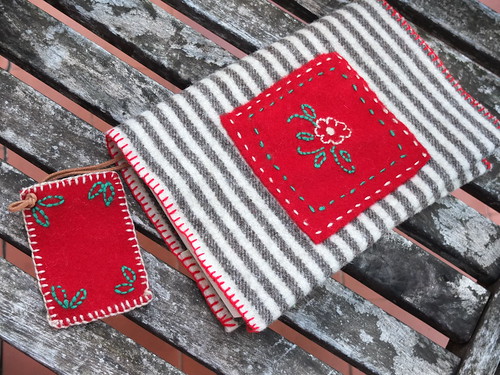
Or is it better for you to choose a new kit that just arrived in my Etsy shop? Made of Portuguese felted wool, this kit will allow you to make a wonderful book cover embroidered with a Portuguese traditional motif. It comes with all the material needed and step by step instructions.

kit para capa de livro em burel - book cover kit
DSCF5590

But if you are more interested in kids craft kids you're welcome too, you'll find there lacing card kits or card decorating kits...

All these products were created by me using Portuguese supplies and inspired by Portuguese traditions that I bring here each week. It's your opportunity to make your own stitches with Portuguese soul.

So... Don't forget to leave  a comment on this post with your favorite product from agulha não pica shop. There will be two lucky winners... And they will receive their favorite product. They will be randomly picked from all the comments.
But if you want to make a general comment about the shop, you'll be applying to a special Christmas gift, too. In that case I will choose my favorite comment.
Write your favorite product and a comment about the shop and you'll be applying to win both gifts!

Comments will be closed on 9 PM Nov.18, U.S. CST and winners will be announced next Thursday.

And to all of those celebrating their anniversary today: PARABÉNS!
(and we have one of "those" among us, here in feeling stitchy, I'm not alone!!!)

November 14, 2012

Way Back Wednesday

I am in love with Betty's Delights. Her "vintage" pieces are to die for. You can find them at her website or her etsy store.

November 11, 2012

Patterns: Season's Stitchings


Photos from  Septemberhouse

There's something about Septemberhouse's patterns that always make me go "squee" when I see them and boy did I squee loudly when I saw these! I love how they fit a range of different hoop sizes, how one of the patterns include applique and the colour scheme for the elf in particular works so well. I can see these patterns working particularly well in making small gifts this holiday season. You can find the pattern set here.

Hi, I'm Jo - I feature new embroidery patterns Sundays on Feeling Stitchy. I also post on our Twitter and Pinterest.

Is there a new pattern you'd like us feature? Email me!

November 8, 2012

Portugal - a living museum of embroidery - part III

Ola! This week we'll continue indoors near Estremoz, as it happened last time... You'll see why I say that Portugal is a living museum of embroidery. I've chosen the most colorful pieces of embroidery for this week. Hope you like them!

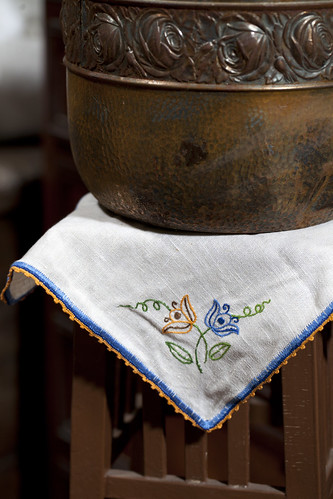
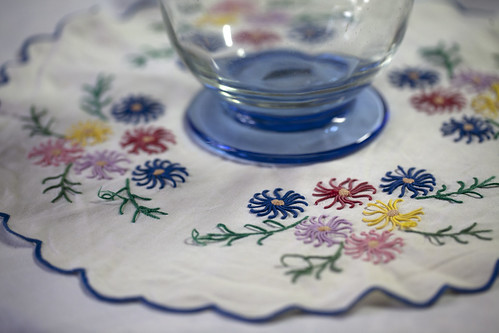
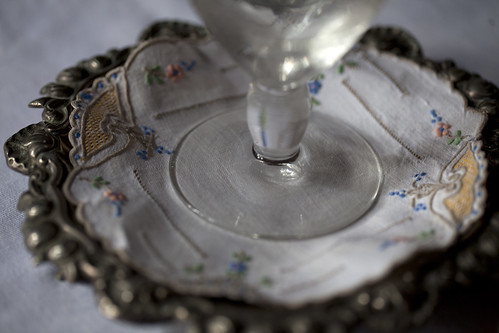
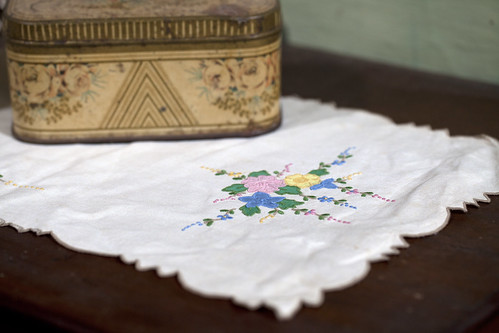
I found many similar table doilies, all using the same colors but with different patterns. So simple and beautiful...
IMG_20121014_20117966
Very simple piece of embroidery, photo by ZPmoreira
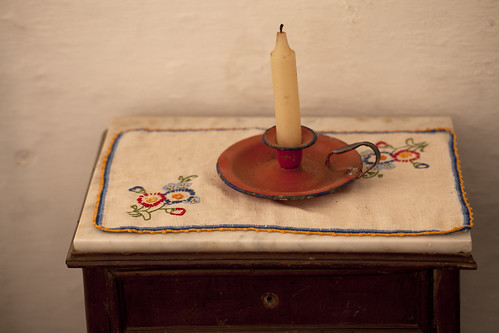
I believe that the photo of this bedside table cover perfectly describes the atmosphere that we live in a "Monte Alentejano" (a farm house from Alentejo)... Of course it is old... And very simple. But so colorful and cosy...

Vintage Stitches
Vintage bedside table cover, photo by ZPmoreira
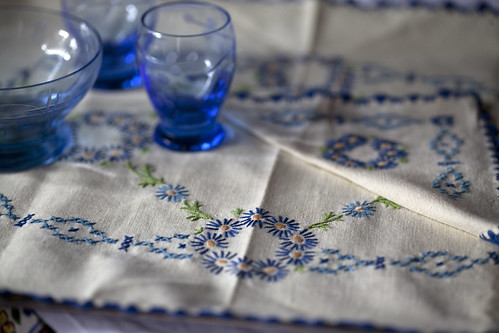
This tea tray cloth set is one of my favorites... Love the colors and the mixture of free embroidery and cross stitch are simply perfect! I've never seen it before.

IMG_20121014_20117974
Vintage tea tray cloth, photo by ZPmoreira

Do you recognise the stitch used in this colorful table doily? I believe it is bullion knot, embroidered using a traditional technique typical in the North of Portugal and applied when a larger bullion knot is needed. Follow the link and learn how to do it with avo Meri.

IMG_20121014_20117979
Embroidered table doily, photo by ZPmoreira
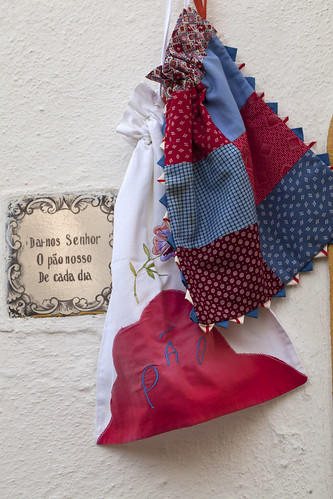
I end this trip with a very simple embroidery piece... A bread drawstring bag where you can read "Pão" (bread in Portuguese). It's close to another bag, a drawstring patchwork bag, very common in Portugal. Although many Portuguese people never heard about its popular name, in rural areas it is still known as "taleigo" (with some differences on the exact word, depending on the region it belongs to).

This photo was taken at the front gate. And as it happens in many Portuguese homes you are received with a welcoming message in ceramic tile.

Bread drawstring bags - sacos do pão
Bread drawstring bags, photo by ZPmoreira
"Dá-nos Senhor o pão nosso de cada dia" - "Give us Lord our daily bread"

*See you next week... Don't forget to pass by... I have a surprise!

November 6, 2012

Tutorial Tuesday


Hello, everyone! Happy Tuesday! I can't believe it's November already, can you? I didn't have any decorations ready for the November/Thanksgiving season, so I stitched some leaves up for a wreath that I am going to share with you as today's tutorial.


Supplies needed to create this Thanksgiving Season wreath are:

- 12-inch styrofoam wreath/ring
- 8 sheets of felt in Fall colors
- One leaf template (available for you here)
- One skien of yarn (you will have left overs)
- Embroidery floss
- Scissors
- Hot glue gun and glue sticks
- 20-inch piece of twine, string, or ribbon


Step 1: Begin the wreath by wrapping the yarn around the styrofoam ring. I placed the end against the ring, then looped the yarn over it. As you continue to loop the yarn around the ring, tighten it as you go and making sure to keep the yarn taut as you cover the styrofoam ring.


Step 2: Once you have finished covering the entire styrofoam ring, pull the yarn as tight as you can and place a dot of hot glue underneath that last string to seal off the yarn covering. Press the yarn down into the glue, making sure not to burn yourself. Once the glue cools, cut the yarn to separate the skein from your covered wreath. Set this aside, as this will be the base of your wreath.


 Step 3: Cut 16 leaves out of felt using this template. My leaves came out to 6-inches high and 4-inches at the widest point. If for some reason the template does not print out in this size range, adjust the size on your computer, and print. You are going to be doubling up the leaves when you stitch them, so make sure to cut two of each color.


Step 4: Take two leaves of the same color, and begin stitching them together with different accent stitches. I varied my stitches between running stitches and back stitches. I added veins to some of the leaves just to give each one a different look. You should have 8 leaves by the time you finish adding stitches.


Step 5: Using your hot glue gun, place a strip of glue on the back of a leaf, and add it to your yarn covered wreath. Keep adding each leaf until you get the look you want. 


Step 6: Cut two 9-inch by 2-inch rectangles out of felt. There should be some large enough pieces of felt left over after you cut out your leaves that you can use for this. Cut triangles out of the ends, as though you were trimming ribbon. Add the phrase, "Give Thanks" to one rectangle with a backstitch. Place this piece on top of the other rectangle, and attach them using a running stitch.

Note: I didn't use a template for the writing. I just stitched it as I went... which is why it looks like a very very young child wrote it. I don't mind this handmade look, but if you want a more polished look, I recommend using an embroidery alphabet pattern or stock computer font of your choice. 


Step 7: Place your "Give Thanks" banner on the wreath and when you have found a place you like it, add some glue to the back and attach it to the wreath.


Step 8: Take the piece of twine or string, and very gently, string it behind the leaves. Tie the ends in a knot and hang.


Step 9: Enjoy!


Hope you have a great Tuesday!

Hi, I'm Kristen! I am a lover of all things stitchy and crafty. I have been sewing for as long as I can remember. My grandmother taught me how to sew Barbie clothes when I was young and I have been sewing ever since.

You can find me at Bobbypin Bandit, on Instagram, and my Etsy shop.

November 4, 2012

Patterns: Penguin & Fish Quiet Book


Top to bottom, left to right
  1. Jil's Book Front by Dunderklumpen12
  2. Jil's Book 1 by Dunderklumpen12
  3. Jil's Book 2 by Dunderklumpen12
  4. Jil's Book 3 by Dunderklumpen12
  5. Jil's Book 4 by Dunderklumpen12
  6. Jil's Book 5 by Dunderklumpen12

Dunderklumpen12 has made the most delightful little quiet book for her goddaughter's 1st birthday using (adapted) Penguin & Fish patterns. Dunderklumpen12 has used the German alphabet and has stitched out the letters of her goddaughter's name, what a lucky girl!

A quick search on Google reveals a number of different tutorials on how to make a fabric book, I think this would make a great Christmas present for the little ones in your life!

Hi, I'm Jo - I feature new embroidery patterns Sundays on Feeling Stitchy. I also post on our Twitter and Pinterest.

Is there a new pattern you'd like us feature? Email me!

November 2, 2012

Amazingness

Untitled
Stitched by poppet with a camera

How amazing is this Blue Velvet cross stitch by poppet with a camera?

I was even more shocked when I saw these progress photos that revealed her stitching the piece using just a screenshot as a reference. Who does that? Someone awesome.

Basically just an ear to go!

She was kind enough to answer my questions on her piece, and she revealed that she usually works from a "rough pattern," switching back and forth between that and the screenshot for reference.

I love the gorgeous jewel-y colors she chose, and the black Aida background. Sheesh it's amazing. And, if you haven't seen Blue Velvet, this commemorates probably the creepiest scene in the whole movie. Awesome work, poppet with a camera!

Hi, I'm floresita, editor of Feeling Stitchy. I'm an avid stitcher, knitter, and crafter. You can see more of my stitching on Instagram and my blog. My vintage transfer collection is on Vintage Transfer Finds.

Feel free to email me with any ideas for the blog!

October 31, 2012

Wayback Wednesday

halloween menu on light

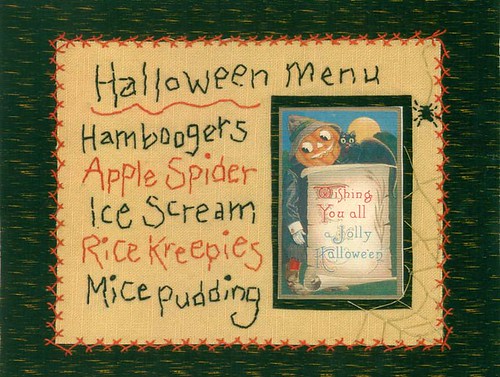
Happy Halloween! Hope your night is a dreadful delight! Special thanks to shebrews for stitching up such a wonderful vintage Halloween menu...but I'll stick to candy!
October 28, 2012

October Stitch Along - week 4


Halloween T by The Stitch Up

We have witchy stitching of clothing this week! I love this Halloween T by The Stitch Up, perfect for the Halloween season! (And full admiration, stitching on T shirts isn't exactly easy!)


Halloween T close up by The Stitch Up

There's still a few days till Halloween, so still time to stitch up the Kitsch Witch, you can find the pattern here.

Hi, I'm Jo - I feature new embroidery patterns Sundays on Feeling Stitchy. I also post on our Twitter and Pinterest.

Is there a new pattern you'd like us feature? Email me!

October 27, 2012

New Embroidery with Vintage Patterns - An interview with gnomecat

Hi, everyone, hope everyone is enjoying the new interview format for my monthly round-up post for the New Embroidery with Vintage Patterns (NEwVP) stitch-alongs (SALs). I think it is really fun and interesting to get to know some of the people behind the stitches!  (If there are questions you wish I was asking, please let me know in the comments!)  This month, instead of featuring someone who participated in the monthly SAL, I am featuring someone who participated in the year-long stitchy quilt along!   

As always, I invite all of you to join our New Embroidery with Vintage Patterns group or at least stop by and take a peek.  There are lots of new embroideries with vintage patterns being added on a regular basis that are totally unrelated to any monthly SAL.  Plus, since I'm doing an interview format now, I'm not able to show-off all the beautiful SAL stitcheries in our photo pool!  

And now I am pleased to introduce you to Flickr peep gnomecat.  I hear her real name is Jen ;)  

1.  Please tell us a bit about yourself.

I am a twenty-something who is obsessed with crafting, junking, reading books, and playing with my five cats [Frank, Stewie, Milo, Hooch and Lily]. I honestly act more like a 70 year old grandma than a twenty-something and I love it.

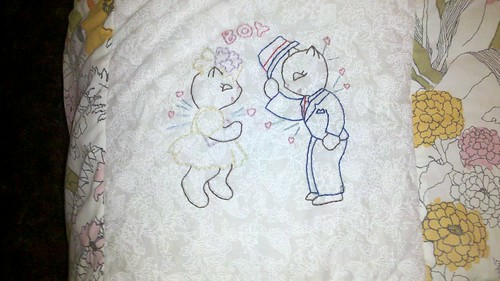
Boy meets girl.


2.  Do you have a vintage embroidery pattern stash?  If so, please tell us about them!

I do. I’ve been building it for a few years, most of them have been found through Hoop Love Vintage Transfers Flickr group. My grandma has also passed quite a few vintage embroidery patterns to me that she no longer uses.

Girl plays hard to get.


3.  How long have you been stitching (embroidering)?  What or who got you started?

I have only been stitching for a few years. The husband and I purchased our first home in 2009 and I felt a strong yearning to learn different crafty mediums so that I could decorate it with a crafty flair and on a budget. One month after purchasing our home, my mother bought me a sewing machine and the rest is history. Since then I have learned lots of different crafting mediums with my favorites being quilting, embroidery and crocheting. My overall goal is to have a very crafty feeling home and I’m slowing accomplishing that.

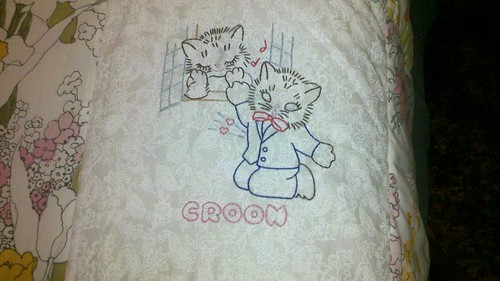
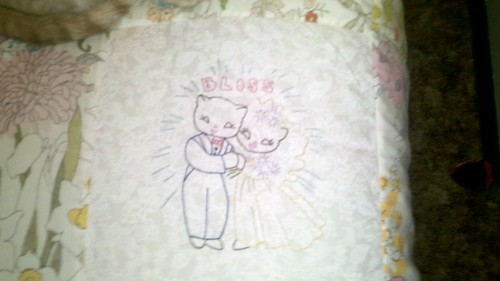
Boy acts romantically.


4.  Why do you like vintage embroidery patterns?  Do you have a favorite one or a favorite theme?

I gravitate towards vintage embroidery patterns because they are so whimsical. Who doesn’t want to dry their dishes with a towel that has smiling silverware? I love how most vintage embroidery patterns will incorporate a face; it brings personification to a whole new level.


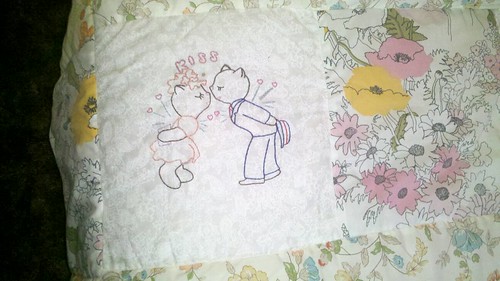
Kisses, due to romanticness.

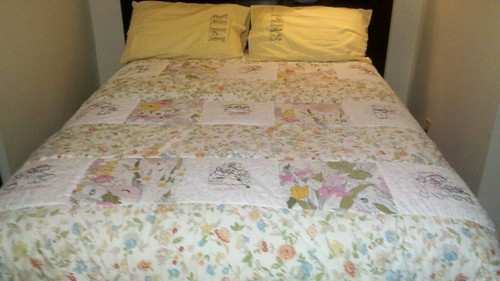
5.  Tell us a bit about the your "storybook of cat love" quilt you made.  (And I see stitchy pillowcases in one of the pictures too!)   
What attracted you to this particular pattern set?  Any story behind the fabrics you chose to piece the quilt together?  What does your hubby think about y'alls bed quilt and coordinating pillowcases?

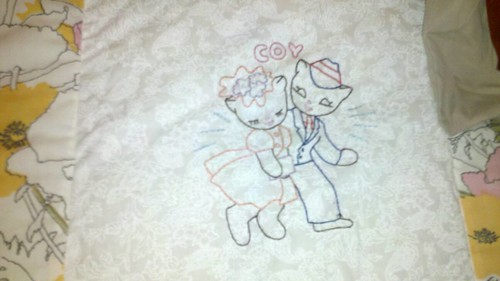
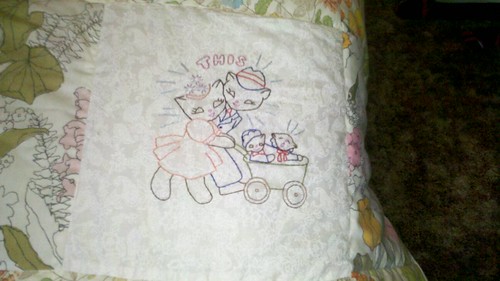
Well as I mentioned, I love cats and I saw the patterns I used from Hoop Love Vintage Transfers about two years ago. I printed them and saved them for a rainy day. Earlier this spring, I was “bored” and needed to start a new project. It hit me, stitch up the cat love patterns. I decided at that point that this quilt should resemble a “storybook” as it went through the phases of the cat’s lives [courtship, marriage, kids, etc.]. As I was stitching the blocks, I even came up with a silly story about how the two cats met [isn’t stitching fun?!]. I had gone thrifting with a friend earlier in the year and had found some really cheap vintage floral sheets that I decided to use as the backing, sashing, boarders and binding. I then used the “stitch in the ditch” technique to “quilt” the quilt. As I was in the quilting phase, I got the urge to embroider again, and decided to find “Mr. and Mrs.” patterns thinking, “how cute would that look to match the cat love quilt?” so I couldn’t help myself.

Luckily, I have a very easy going husband who completely supports my love for crafting. His philosophy is whatever makes me happy, makes him happy. Of course, he likes to give me a hard time about how our house only represents my style but anytime I complete a project and ask for him to critique it; he declares it “the best thing ever” so therefore his opinion doesn’t matter much.


Cuddle time.


6.  Do you have a favorite embroidery stitch?  If so, why?

My favorite stitch is the back stitch. I love how it looks outlining everything! My biggest downfall as a stitcher is not branching out and trying lots of different stitches.

and next comes marriage.
 

7.  Do you have a favorite DMC (or other brand) floss color?  If so, what is the color name & number?

I do not have a favorite DMC floss color, although that is my favorite brand. I tend to gravitate towards mustards and avocados as they are my favorite colors.

Honeymoon!!


8.  And speaking of floss, how do you organize all your skeins of embroidery floss?

I used to keep the majority of my floss in a zippered pouch; however, that got out of control and I started winding them around bobbins and keep them in a plastic case. I haven’t finished putting them all on bobbins [it is quite a project!] but think it will be worth it in the long run. I have a large basket [looks similar to a picnic basket] which I have deemed my embroidery basket.

enjoying time together; knitting the hubby socks.


9.  In your home, where do you usually sit to stitch?  Do you like it to be quiet while you stitch, or do you watch tv, listen to the radio, or talk on the phone while you stitch?

As with all my crafting, I have to have the t.v. on for a bit of a distraction. The best is picking out a t.v. series and then watch it from Season one on. You will be surprised how far through the series you can get just working on one project or one set of blocks to embroider.

and then comes babies in the baby carriage.

 
10.  Anything else you would like to share?

Blog link: zeeramblingsofacatlady.blogspot.com


storybook of cat love quilt.


==========

Thanks for taking the time to read my post and meet just one of the many terrifically talented stitchers in our NEwVP group!  Please do stop by to visit!  Also, have you heard the news that the NEwVP group will be hosting another fantastic stitching contest?!  Oh yes!  Fantastic new prize sponsors too!  Stay tuned for the details coming toward the end of November!  The details will be posted in the NEwVP group!

October 25, 2012

Portugal - a living museum of embroidery - part II

Olá! This a week we'll continue on our trip through Portugal, a living museum of embroidery. Today we'll be indoors, visiting an old family house near Estremoz, in the Portuguese region of Alentejo. Rural houses in the Alentejo countryside are called Montes. Monte means a small hill, an elevation, and in this region, very well known by its vast plains, usually houses were built on small hills. 

These photos were taken on a rainy day, like today... Which is not very typical once Portugal is a shining country!! But I believe this transmitted a special and beautiful light to the photos. Hope you like them!

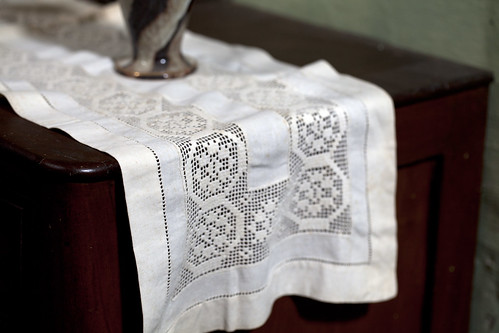
I believe that most of the embroidery pieces pictured were made by the grandmother and the great grandmother of the actual owners of the property, but I cannot be sure. I know both were great embroiderers since they have some signed beautiful pieces of embroidery. Most probably the photos show some designs and technique inspired by Portuguese Traditional Embroidery, but in this case again I cannot prove it. Beginning with this dresser cover, that I believe was inspired by Alinhavados from Nisa...

IMG_20121014_20117959
Vintage embroidered dresser cover, photo by ZPmoreira
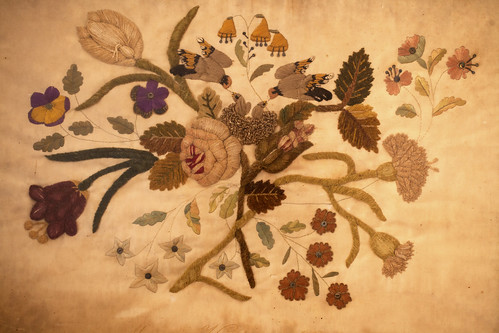
This floral silk embroidery is of unique beauty and, believe me, no photo would be able to show the richness of the stitches and all marvellous details. It is framed and signed by the grandmother of the actual owners.

Vintage stitches...
Beautiful framed piece of embroidery signed by the owner's grandmother, photo by ZPmoreira
It's easy to identify in these blue stitches the influence of Azores embroidery. And there were more similar to this one... All charmingly beautiful.

IMG_20121014_20117981
Inspired by Traditional Embroidery from Azores, Photo by ZPmoreira
I can't describe the singularity of this extremely little and exquisite piece of embroidery. I believe its inspiration comes from Madeira Embroidery. Check here and here to delight yourself with some details.

IMG_20121014_20117976
Inspired by Madeira embroidery, Photo by ZPmoreira
This dresser cover with floral design is so colorful... I find some resemblances with a specific type of Madeira Embroideries, but in this case I would be much more careful to make this association... Charming, anyway.

IMG_20121014_20117961
Floral embroidered dresser cover, Photo by ZPmoreira
Some of these embroideries were being used, but many others were kept in drawers. As it happens in many Portuguese homes. I really would like to shout out loud: "Embroideries out of the drawers"!!
SITE DESIGN BY RYLEE BLAKE DESIGNS