December 6, 2016

Christmas Countdown #6: Little Beach Hut


How about this adorable Christmas Badgers cross stitch pattern in Little Beach Hut's shop? So cute, and perfect to give as a gift or ornament.

There's also a beautiful kit version of this pattern in her shop as well!


What a lovely shop!

Hi, I'm floresita, editor of Feeling Stitchy. I'm an avid stitcher, knitter, and crafter. You can see more of my stitching on Instagram and my blog. My vintage transfer collection is on Vintage Transfer Finds.

Feel free to email me with any ideas for the blog!

December 5, 2016

Christmas Countdown #5: NaNee Hand Embroidery


I adore this sweet Cozy Sweater pattern in NaNee Hand Embroidery's shop. It looks just perfect stitched on natural linen, doesn't it? And the nice traditional Christmas reds and greens are wonderful.


Hi, I'm floresita, editor of Feeling Stitchy. I'm an avid stitcher, knitter, and crafter. You can see more of my stitching on Instagram and my blog. My vintage transfer collection is on Vintage Transfer Finds.

Feel free to email me with any ideas for the blog!

MooshieStitch Monday: Plushwork Wreath

Plushwork Wreath tutorial by Michelle for Mooshiestitch Monday on Feeling Stitchy

Today I am going to show you how to stitch a plushwork wreath for the holidays!

For best results - I highly suggest tapestry wool.

This wreath is stitched with DMC Tapestry Wool (which DMC has so kindly provided).

Plushwork Wreath tutorial by Michelle for Mooshiestitch Monday on Feeling Stitchy
DMC Green 7344 and Red 7108

For my wreath template, I cut a circle about 2.5 inches wide in diameter out of cardboard.

To start, bring your wool up through the fabric (A) and back down (B)

Plushwork Wreath tutorial by Michelle for Mooshiestitch Monday on Feeling Stitchy

Continue with your surface satin stitch - bring your wool back up next to the previous stitch on the same side.

Plushwork Wreath tutorial by Michelle for Mooshiestitch Monday on Feeling Stitchy

Then down again across the template.

Plushwork Wreath tutorial by Michelle for Mooshiestitch Monday on Feeling Stitchy

Back up again next to that stitch on the same side and repeat until your template is covered.

Plushwork Wreath tutorial by Michelle for Mooshiestitch Monday on Feeling Stitchy

Plushwork Wreath tutorial by Michelle for Mooshiestitch Monday on Feeling Stitchy

Here is the first layer complete.

Plushwork Wreath tutorial by Michelle for Mooshiestitch Monday on Feeling Stitchy

I stitched 3 layers of wool around the circle template.

Now you are ready to cut through all the layers.

Plushwork Wreath tutorial by Michelle for Mooshiestitch Monday on Feeling Stitchy

Plushwork Wreath tutorial by Michelle for Mooshiestitch Monday on Feeling Stitchy

Remove the cardboard template.

Plushwork Wreath tutorial by Michelle for Mooshiestitch Monday on Feeling Stitchy

Here it as without any fluffing - notice you can see a gap in the wool.

Plushwork Wreath tutorial by Michelle for Mooshiestitch Monday on Feeling Stitchy

I tried fluffing the wool to remove the gap / indent in the middle of the wreath but it would not go away. Maybe my template was too wide? 

Plushwork Wreath tutorial by Michelle for Mooshiestitch Monday on Feeling Stitchy

Although I was not 100% satisfied with my first attempt, I trimmed the wool a little with my scissors, fluffed it as much as I could and added a red bow and french knots for decoration.

Plushwork Wreath tutorial by Michelle for Mooshiestitch Monday on Feeling Stitchy

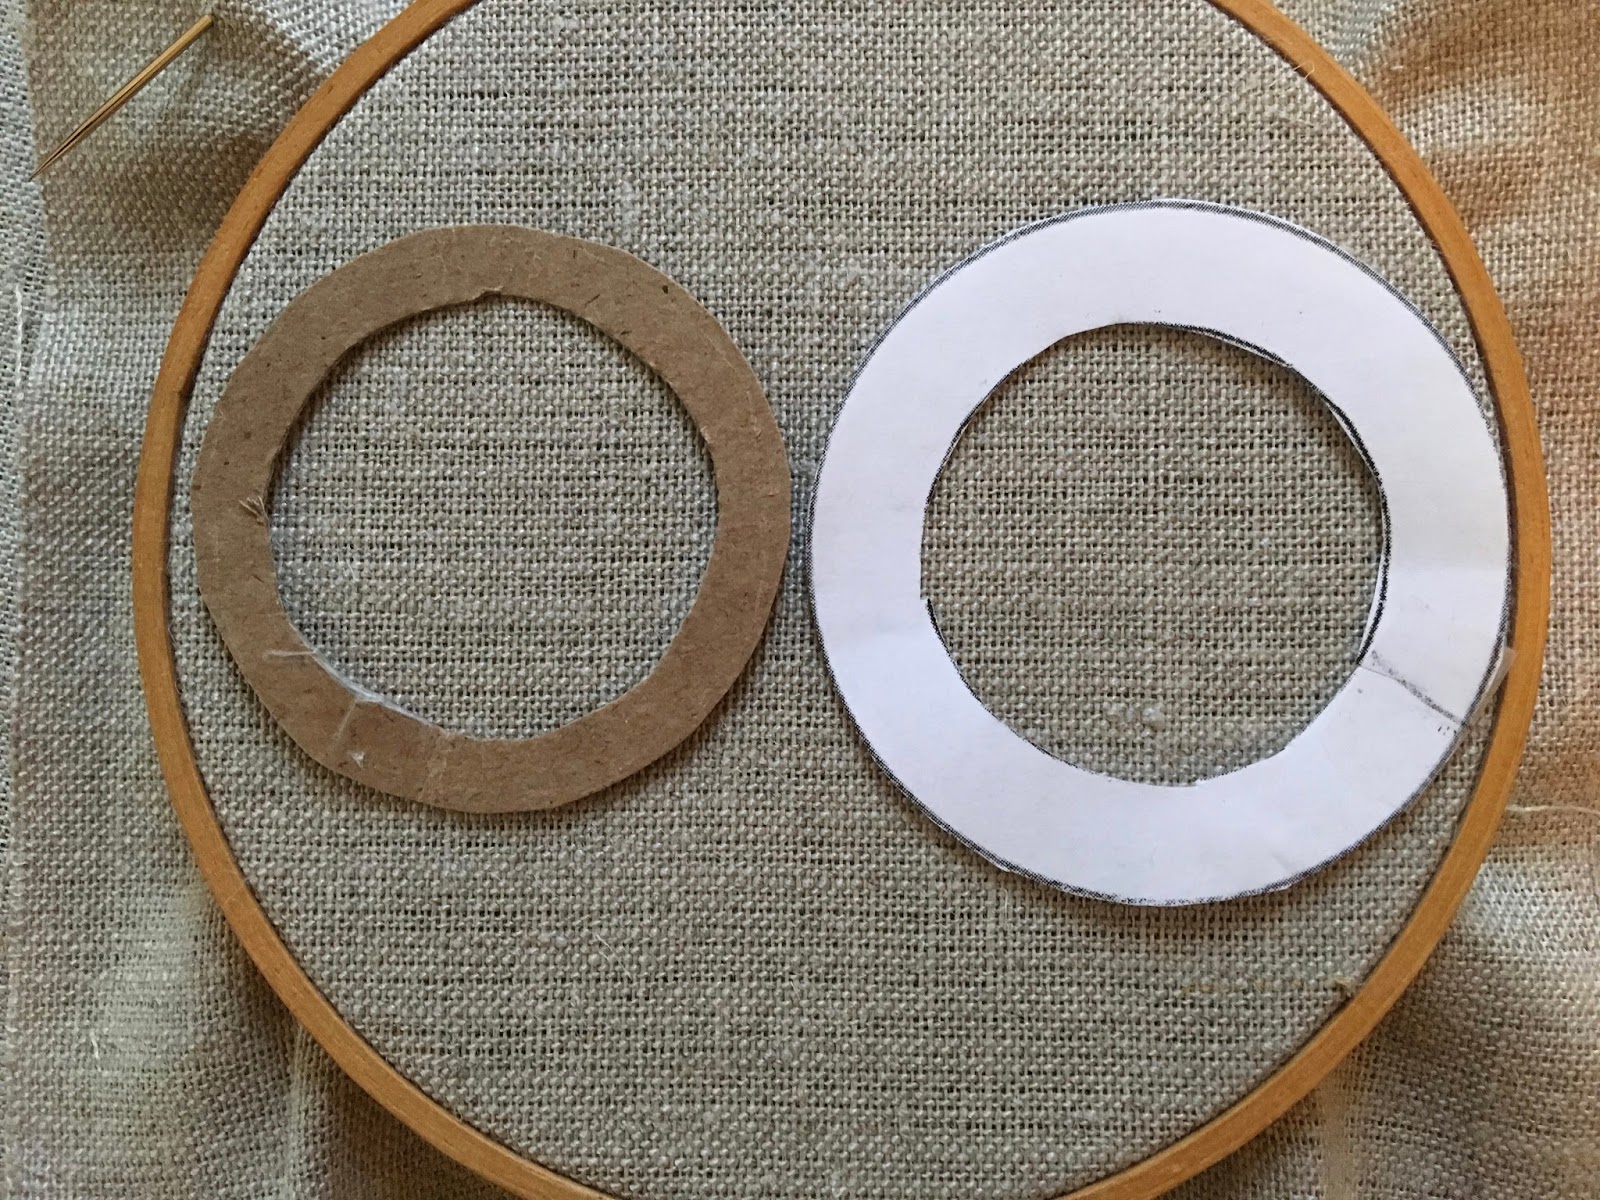
My second attempt, I cut a smaller, thinner circle template.

Below is the first circle in white paper on the right and the new template on the left. 

Plushwork Wreath tutorial by Michelle for Mooshiestitch Monday on Feeling Stitchy

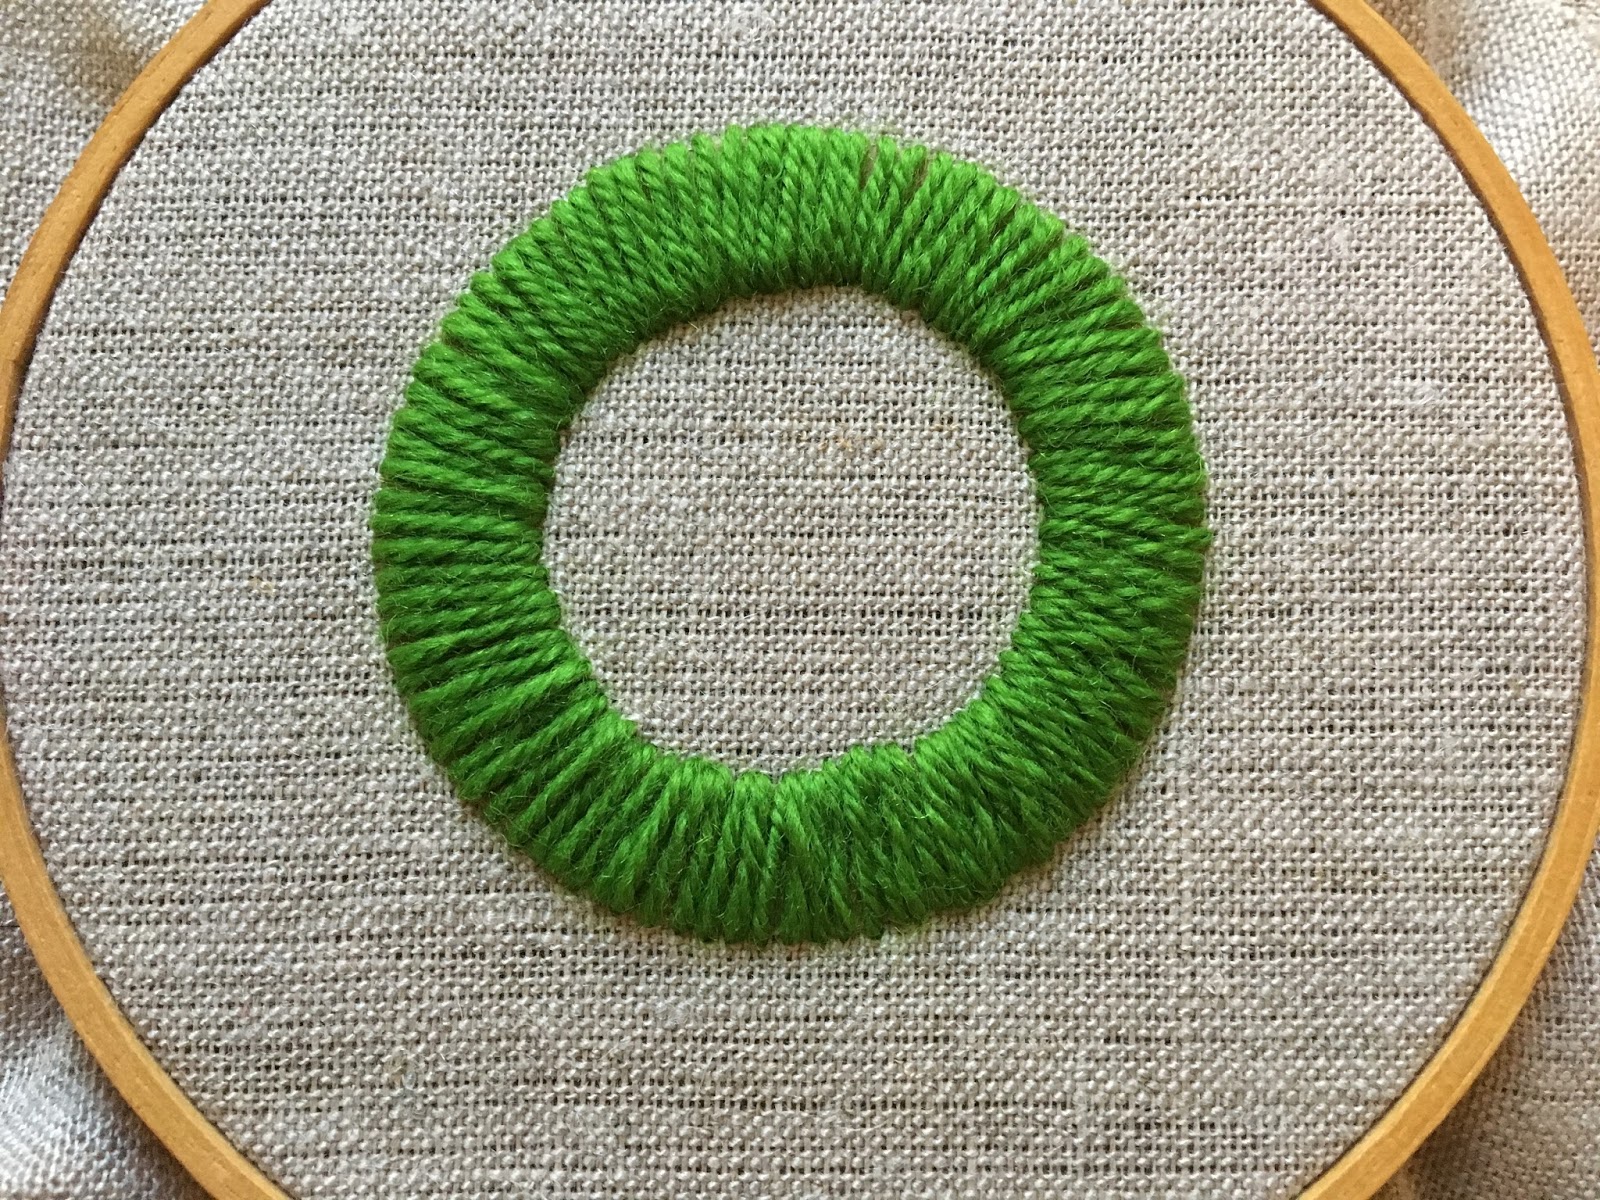
Same process - I stitched three layers of wool.

Plushwork Wreath tutorial by Michelle for Mooshiestitch Monday on Feeling Stitchy

I cut the layers and removed the template. See how there is less of a gap this time??

Plushwork Wreath tutorial by Michelle for Mooshiestitch Monday on Feeling Stitchy

Here it is trimmed and fluffed. You can still see a line around the middle but it's less than the first wreath.

Plushwork Wreath tutorial by Michelle for Mooshiestitch Monday on Feeling Stitchy

Here is the wreath finished with the bow and french knots!

Plushwork Wreath tutorial by Michelle for Mooshiestitch Monday on Feeling Stitchy

Do you like the first or second wreath better? 

I hope you try this plushwork wreath sometime. If you do, leave a comment below and let us know!


December 4, 2016

Christmas Countdown #4: RedBear Design


I'm loving the bold colors in this Joy Cross Stitch pattern by RedBear Design. There are loads of lovely Christmas and holiday patterns and kits in this shop - if you're looking for a sweet small project for the holidays, you might like to visit the RedBear Design shop!

Hi, I'm floresita, editor of Feeling Stitchy. I'm an avid stitcher, knitter, and crafter. You can see more of my stitching on Instagram and my blog. My vintage transfer collection is on Vintage Transfer Finds.

Feel free to email me with any ideas for the blog!

December 3, 2016

Review: DMC Stitchable Mesh and Pattern giveaway


Hello all! Today I am reviewing the new DMC Stitchable Mesh - and for all of you who follow me on Instagram, this post comes as no surprise, as you already saw "sneak peeks" of my thoughts and progress while working with it. Thank you, first of all, to DMC for sending me the stitchable mesh to work with - it was a treat!


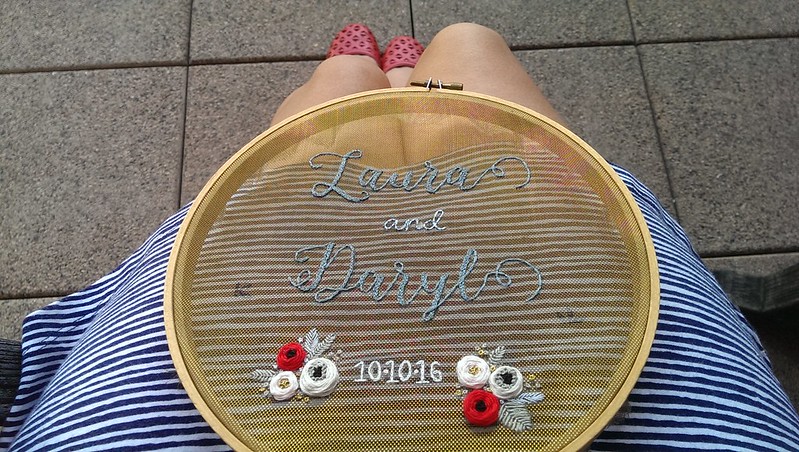
The stitchable mesh is thin enough to put in a regular embroidery hoop - I fit all of mine in an 8 inch hoop. The mesh is very sheer (as you see above), and has two sides - one with a silver-white finish, and one with a gold finish. I chose the gold finish for my project - and it has a very nice sheen.


The edges of the mesh, once cut, unravel very quickly. One of the most important parts of your project, when working with this fabric, will be to secure the edges. If I had it to do again, I would do a quick running stitch around the edges. The raw edges feel like tulle, and are scratchy on the hands, so you may also want to line them with bias tape, if possible.


I initially tried tracing my design using a fine-tipped black marker - don't repeat my mistake. :) Instead, try a permanent ink marker, or you will literally have a bit of a mess on your hands. :)

Detail

Also, be aware as you stitch that the luster is quite fragile - if you pick out your stitches, you'll be able to see where exactly you did that. Squint at the photo above and you'll see where I picked out my stitches. There's a ghostly line, where the gold luster was removed from unpicking.

removed from hoop

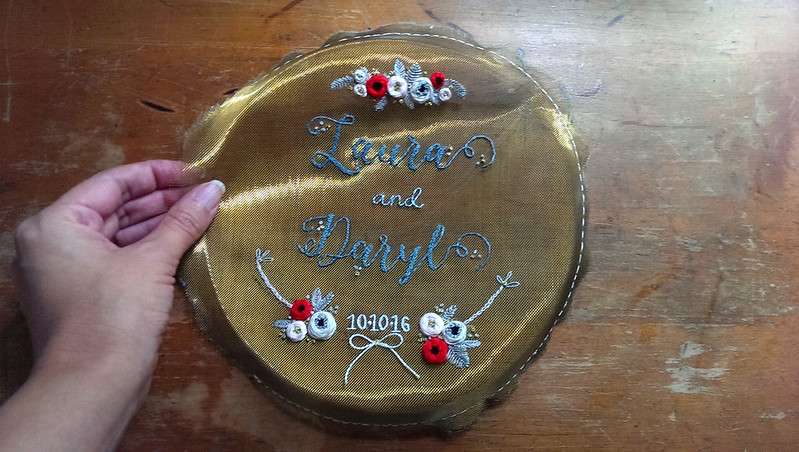
Another thing to consider as you stitch is that once you remove your fabric from the hoop, it will be stretched and bent - as above. So I'd suggest leaving your project in the hoop, or avoiding a hoop, if you don't want this issue.

In progress

As I mentioned before, the mesh is very transparent, and will reveal whatever is behind it. I think this is a plus, though - as it gives you an extra dimension to play with in your stitching!

Taupe fabric background

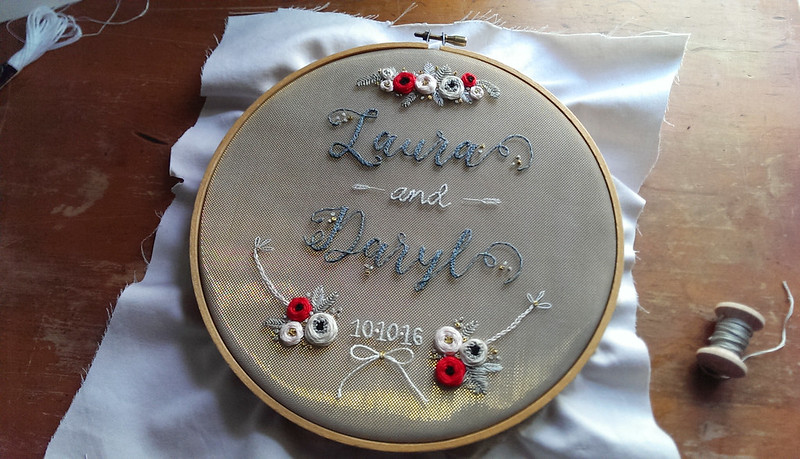
By layering a taupe fabric underneath, I achieved a really lovely 3-D effect, which made it look like the stitches were floating on top of the fabric:

floating
Cool, huh? Now, onto my experiences with stitching on the mesh...

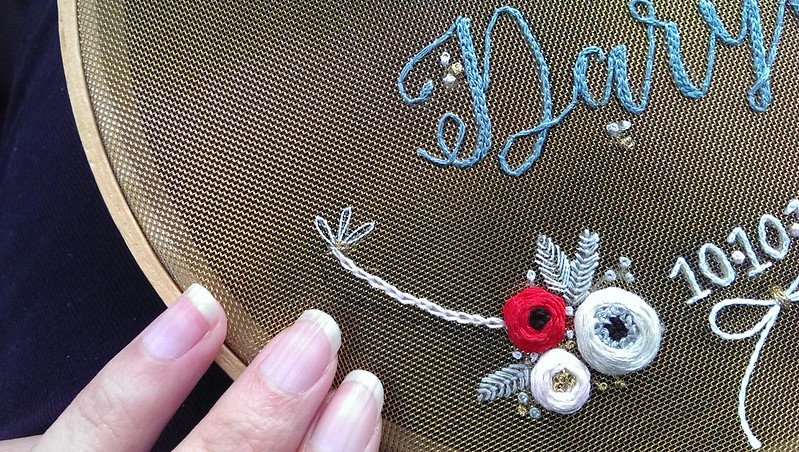
flower detail

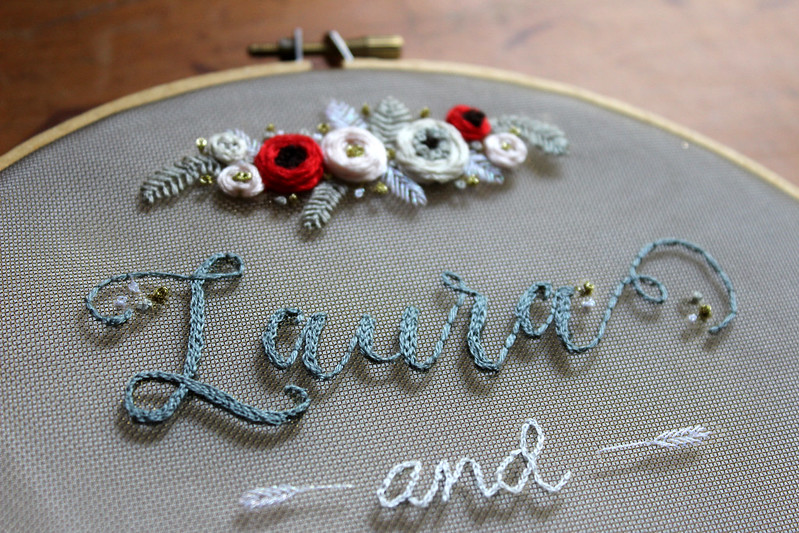
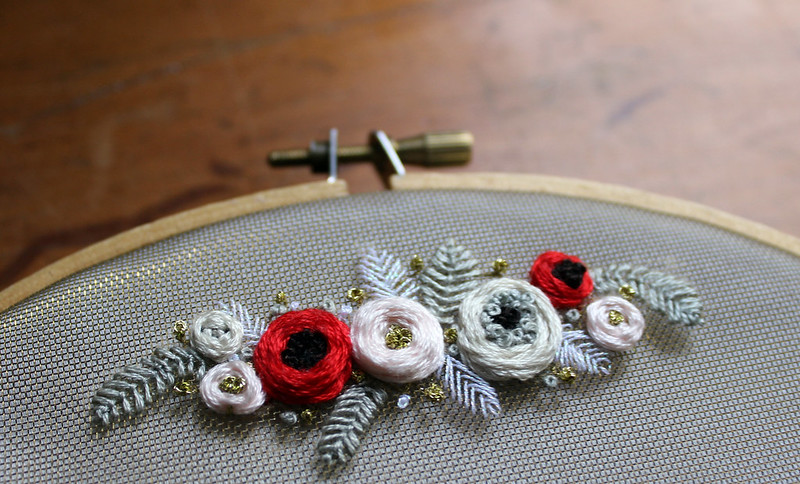
I really enjoyed stitching on this fabric! I won't lie, I was intimidated when I saw it, but once I pulled the needle through, I found that it stitched the same as your average Aida cloth. For some reason, I actually found it easier to stitch French knots on this surface. But I used all of the same stitches I normally use - split, chain, knots, woven wheel, and couching, and I never had any issue - see above for a sampling.

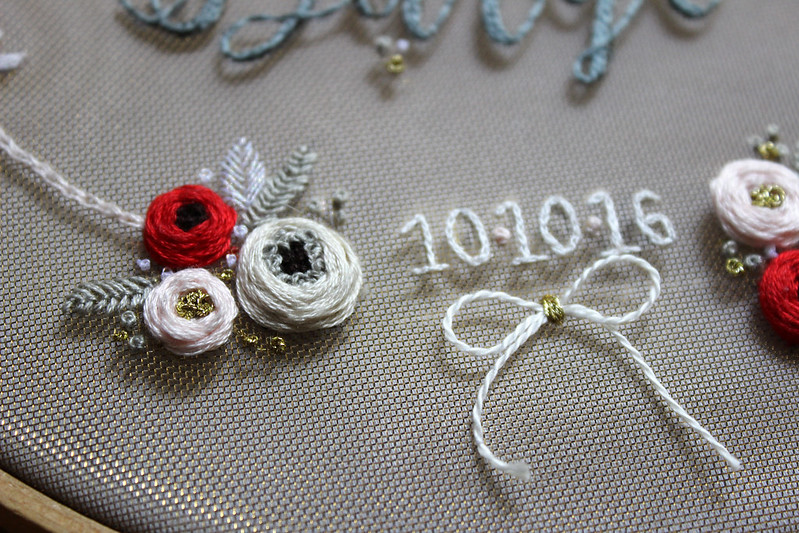
Here's another closeup of that nice mesh surface.

mesh detail

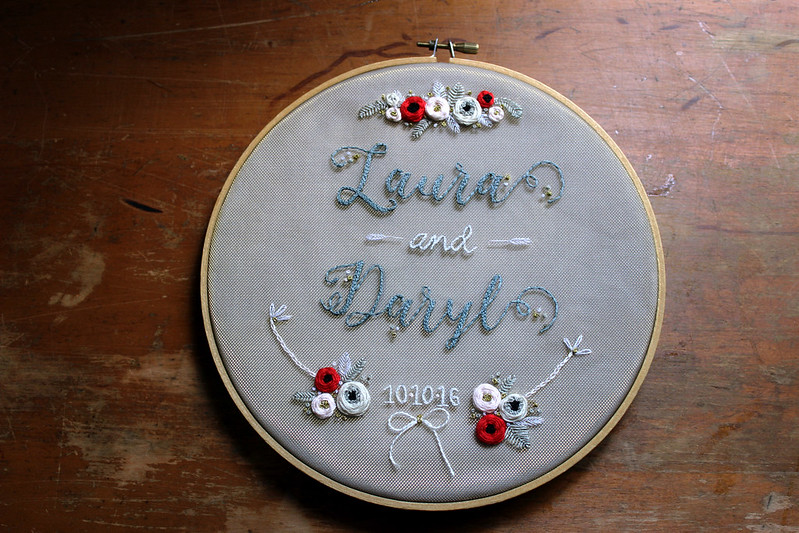
Here is my finished project - a lovely wedding hoop:
finish
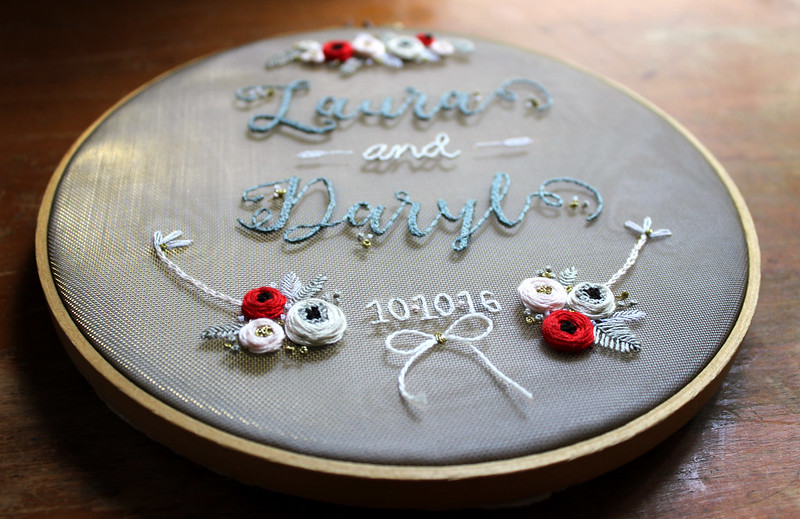
detail
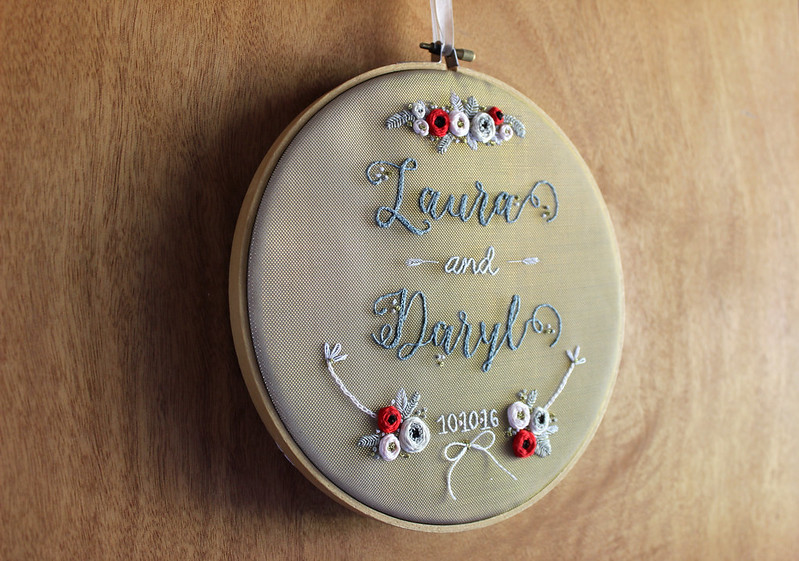
glow

Overall, I found this new stitchable mesh very enjoyable. If you keep in mind the caveats I listed above, and plan your project carefully, I'm sure you can achieve some really lovely and unique results with this fabric. Thank you again to DMC for sending this to me, to try!


Free Custom Pattern Giveaway!

Now, I always like to do a giveaway when I do a review, but this time I thought I'd do something a little different, since I don't have any extra mesh to give away... How about a free pattern? I'll create a free customized pattern with the names you supply!


To enter this custom pattern giveaway, leave a comment on this post, and tell me who you'd like to stitch this pattern for, and why. Please leave a comment on this post by Friday, Dec. 9, at 9 PM US CST, when I'll draw 2 winners!

Hi, I'm floresita, editor of Feeling Stitchy. I'm an avid stitcher, knitter, and crafter. You can see more of my stitching on Instagram and my blog. My vintage transfer collection is on Vintage Transfer Finds.

Feel free to email me with any ideas for the blog!

Christmas Countdown #3: Lolli And Grace


These wonderful Sewing Ornaments by Lolli and Grace certainly merited a feature. The best thing about crafting ornaments for the holidays is that if you run out of time for this year's tree, you can simply pack them up and be ready early for next year's crafting!

Hi, I'm floresita, editor of Feeling Stitchy. I'm an avid stitcher, knitter, and crafter. You can see more of my stitching on Instagram and my blog. My vintage transfer collection is on Vintage Transfer Finds.

Feel free to email me with any ideas for the blog!

December 2, 2016

Christmas Countdown #2: Larissa Holland


How exquisite is this 8 Maids A-Milking pattern by Larissa Holland? The pattern is part of a gradually released series of patterns, based on the 12 Days of Christmas song, here are all 8 patterns so far:

Partidge and Pear pattern   Turtle Dove pattern

French hen pattern   Colly bird pattern

Gold ring pattern   Goose a laying pattern

Swan a Swimming pattern  
It's no secret that I love Larissa Holland's patterns - every year at Thanksgiving I pull out her beautiful Snow bird pattern, and make ornaments to give away to friends and family for the holidays. I know from experience that Larissa's patterns are extremely detailed and well-made, and I highly recommend a visit to Larissa Holland's shop for truly wonderful holiday inspiration!

Hi, I'm floresita, editor of Feeling Stitchy. I'm an avid stitcher, knitter, and crafter. You can see more of my stitching on Instagram and my blog. My vintage transfer collection is on Vintage Transfer Finds.

Feel free to email me with any ideas for the blog!

Friday Instagram Finds No. 81 with Tramp Gramma


Can you believe it's already December? 2016 seems to have flown by! Today we're taking a look at the Instagram feed @trampgramma by Maria. I fell in love with Maria's embroidery the first time I saw it! How many other Hocus Pocus fans are there out there? Isn't her above hoop of the Sanderson sisters awesome?! In addition to her Instagram account, you can also find her on Facebook. Take a look below at more of my favorites from Maria's feed.

A photo posted by Tramp Gramma (@trampgramma) on


A photo posted by Tramp Gramma (@trampgramma) on


A photo posted by Tramp Gramma (@trampgramma) on

Hi, I'm Amy - I feature interesting embroidery and stitch-related photos I find on Instagram. I'm a hand embroiderer and maker.

You can find my embroidery and crafts on:
Instagram | Random Acts of Amy | Facebook

December 1, 2016

Christmas Countdown #1: Threadhoney's Shop

Happy Holidays pattern - Threadhoney shop

Hi all! It's been a rough year, hasn't it? It's December and I thought we might all need some Christmas cheer. So I'll be counting down the days to Christmas - our wonderful friend Pam did our countdown in years past, and I'll be doing it in her honor this year.

I'll put my Wonderful Wednesday posts on pause for the month of December, so I can feature a new inspiring shop every day until Christmas. Whether you're in the market for a new pattern or not, I hope these images will inspire you!

So, first up, is Threadhoney's shop on Etsy - I love the simple style in the Happy Holidays pattern above, and the wintery blue palette.

We Wish You A Merry Christmas pattern - Threadhoney shop

But if red and green are where it's at for you, this We Wish You A Merry Christmas pattern has got you covered. Is there a shop you love that you'd like me to feature? Leave a comment below!


Hi, I'm floresita, editor of Feeling Stitchy. I'm an avid stitcher, knitter, and crafter. You can see more of my stitching on Instagram and my blog. My vintage transfer collection is on Vintage Transfer Finds.

Feel free to email me with any ideas for the blog!

SITE DESIGN BY RYLEE BLAKE DESIGNS