August 19, 2012

August stitch along week 1


Top to bottom and left to right:
  1. lemongirlhanging2 by cscrabeck
  2. Auguststitchalong2012inprogresssuchatease by LaWhimsy
  3. 2012 Summer 124 by mrswaxler
  4. August stitchalong wip 2 by me
  5. Grapefruit Girl by sewjenaissance
What a good start! We've had a variety of citrus fruit, even a grapefruit (check out the grapefruit's cute little shoes)! Check out the links above to see the gorgeous stitching in greater detail (I love how everyone has done the hair)!

It's not too late to join in! You can find the Little Lemon Slice pattern from the oh so talented Cate Anevski here. Happy stitching everyone (and don't forget to add your pictures of Little Lemon / Lime / Orange / Grapefruit slice to the Embroidery pool, using the tag AugustStitchalong2012, so that we can find you)!


Hi, I'm Jo - I feature new embroidery patterns Sundays on Feeling Stitchy. I also post on our Twitter and Pinterest.

Is there a new pattern you'd like us feature? Email me!

August 18, 2012

Interview with Mother Eagle

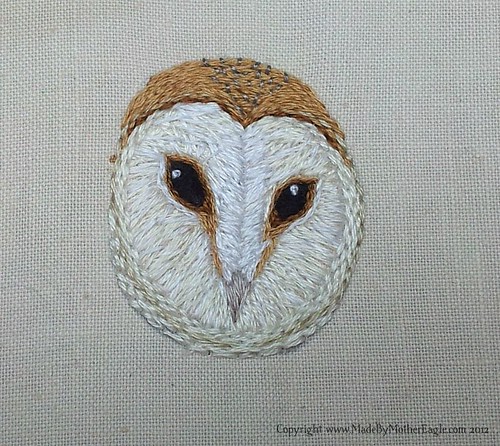
Miniature Barn Owl embroidery

Today I have the special honor of introducing you to Katie - a fascinating artist, Etsy seller, and blogger who crafts under the name Mother Eagle. I remember seeing Katie's embroidery all on its own and briefly marveling at the detail. I was about to move on - THEN, I saw a photo that included her hand for scale, and I nearly fell out of my chair. So tiny! So detailed! Such lovely nail beds! I was hooked. :)

Here are a few questions Katie was kind enough to answer for us - enjoy!

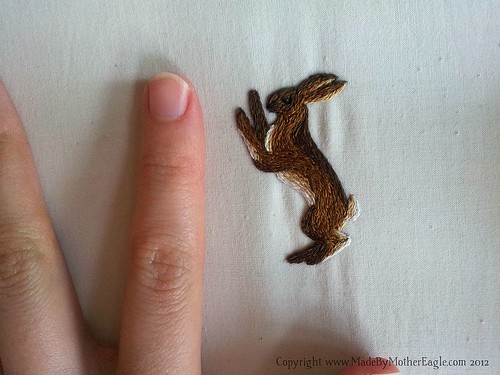
miniature Hare embroidery


How long does it take to embroider one of your tiny works? Do you have to squint? :)

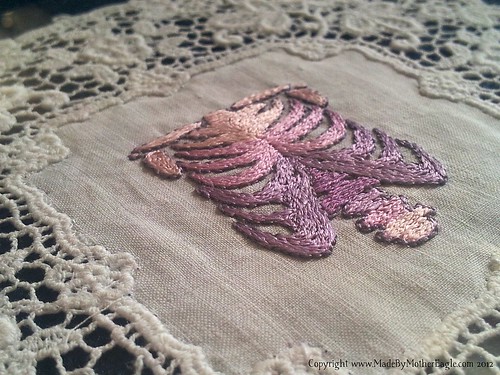
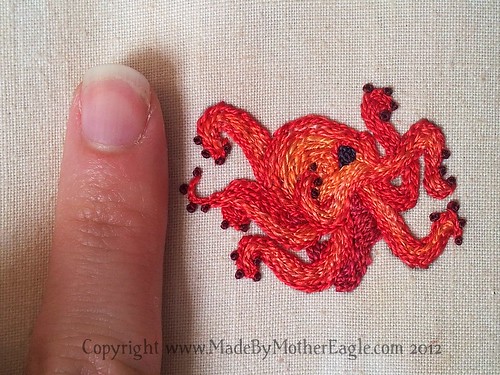
Ha! Well, the time depends on what it is of course, something like the little beetles or the Eye of Horus only takes an hour, but the Hares and the Octopi take about 4.5 hours. The silk rib cage I've just completed for my antique doily series is the most time consuming to date, the embroidery for that took 7 hours. As far as squinting goes, I'm very lucky as I have a fantastic magnifying daylight lamp which I look through when I work, which allows me to do my teeny stitches without going blind ;)


Middle child, only, youngest, or oldest? Do you think this has an influence on what and how you create?

My family have always been so supportive and nurturing, and my mum has definitely been my biggest influence embroidery-wise. Growing up I did a lot of crafty things and making stuff and probably started sewing - basic cross stitch - before I was ten. I remember being really into my mum's cross stitching design books and creating my own pattern - a big sampler style picture of Africa - which I never started! My mum always had a kit project on the go and my parent's house is covered in big framed pictures of her work. When I was 9 she gave me a giant cross stitch of a dolls house she'd done, with all the little room sets. I loved it so much.

Miniature silk Rib cage embroidery on antique hand-made lace cotton panel

When you’re not stitching what do you do? Draw, read, watch TV?

Happily, Mother Eagle takes up the majority of my time, but I am a big multi-tasker! I love to stitch with a Studio Ghibli movie on in the background, or an HP Lovecraft audiobook...massive geek. Otherwise I just like to hang out with my gorgeous husband and 2 Bengal cats, Mi-go and Tulu.


Are you particular about your threads and fabrics? What are your favorites to work with?

Yes and no - one of the triggers for me taking my embroidery more seriously was a massive carrier bag stuffed with a rainbow of stranded cotton floss - my mum's destash. So Anchor and DMC are my go-to for lots of projects. But I do love to work with silk too. 21st Century Yarns' hand dyed Very Fine Silk comes in stunning mottled and variegated shades which I use at every opportunity. As far as fabrics, again having 4 generations of stitchers before me in my family means I have inherited some fabulous antique lace-trimmed pieces which I am embellishing at the moment, but I most often work on heavy old cotton pillowcases which I dye in organic black tea. They are super soft from 60 years of washing and lovely quality for really heavy embroidery.


What is your favorite stitch? Do you have a least favorite?

Before embarking on the jewellery miniatures I bought three Royal School of Needlework instruction books and used them to design a 'sampler' piece so I could teach myself more techniques. It was a Death Cap mushroom and I used a lot of stumpwork, which is a fabulous technique. I have to say I love a raised stitch like a detached woven picot, and you can't beat a French knot! I also love bullion knots but have felt the hot tears of frustration stinging my cheeks when spending hours trying to get them nice and even!

Miniature silk split stitch Octopus embroidery

Are there certain colors you’re drawn to more than others?

I love colour! I was just starting a new project today and had imagined it in plain black until I came to start it. I just couldn't! It will end up in variegated poppy-coloured cotton after all.

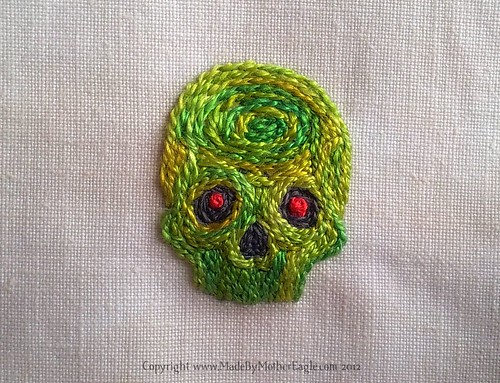
Zombie Skull miniature embroidery in silk

When are you most creative? Is there a certain hour, environment, or time of year?

I do believe in being productive. I think industry begets creativity - if I stop making for more than ten days I find it harder to get going again. Having said that I am lucky in that I always feel inspired to create a new design! I usually embroider something new each week. I created the character of Mother Eagle as my muse and all my designs connect to her in some way or another. I also spend a lot of time blogging about things I find inspiring so that helps, too. The karma of creativity!

*****

Thank you, Katie, for taking part in this wonderful interview! It was such a pleasure to meet you!

For more on Katie and Mother Eagle, visit:
Her blog
Her Etsy shop
Her Flickr photos

Hi, I'm floresita, editor of Feeling Stitchy. I'm an avid stitcher, knitter, and crafter. You can see more of my stitching on Instagram and my blog. My vintage transfer collection is on Vintage Transfer Finds.

Feel free to email me with any ideas for the blog!

August 16, 2012

Embroidered bookmarks

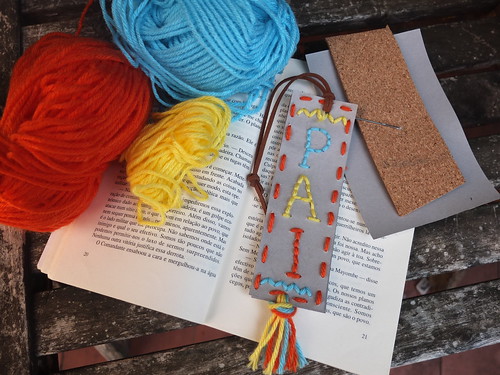
Olá! This week I'll bring you a project you can make with your children... Or students... When we try embroidering with kids the major difficulty is finding a simple and attractive project... On Father's day I held an event to which I gave the name "For dad, made with the heart". The idea was to gather children and make a special gift in 1 hour. Concluding an embroidery project within an hour is an ambitious aim and for some of the kids these were their first stitches... But this project was well-approved!

What will you need? Cardstock, yarn, a needle, suede cord (or any other tie that is easier for you), a pattern and something to perforate the cardstock. Try to be ingenious and use what you have on hand... I used the cards that are included in my lacing card embroidery kits, a common pin and a cork pad - or you can opt for a foam pad... But I always prefer Portuguese stuff :). Never forget that everything that pricks can be very dangerous in children's hands, never leave children alone at this stage...

DSCF4105
Yarn, cork, needle and a card.
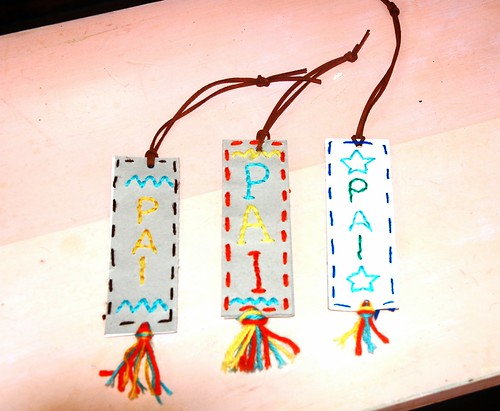
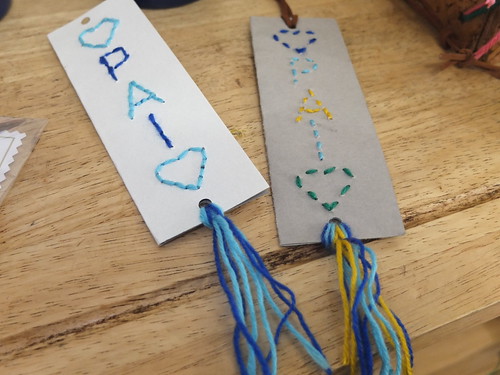
First you must fold the cardstock in half vertically. Choose if you'll want to decorate one side of the bookmark or both sides. I had prepared some patterns that they could choose, using the word "PAI", which means "DAD". I would have preferred to have them design their own pattern but they were too many and there was not enough time. But if you have time, have them draw directly on cardboard, instead of having a pattern on a common sheet of paper, as I did.

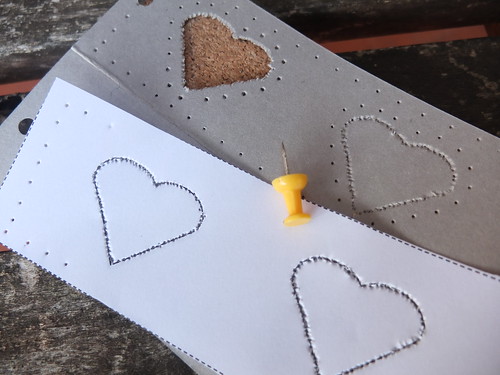
DSCF4108
Use a sheet of paper with a pattern and make the hole punching using the pin and the pad.
Place the card on the cork pad and the pattern on the card and make small punctures through the pattern with the pin, following the lines of the drawing. Space the holes approximately one centimetre apart. Your bookmark is ready to be embroidered... Choose a simple stitch like running stitch or backstitch.

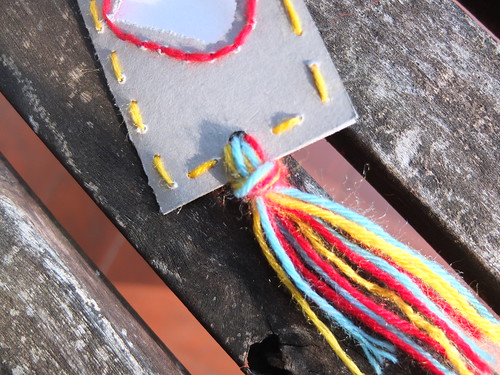
After stitching, join the two parts by folding them in half - punch holes at the top and bottom with a hole punch. At the bottom, use yarn to join the two parts and at the top, the suede cord.

DSCF4113
Use yarn to gather the two parts of the card.
DSCF4116
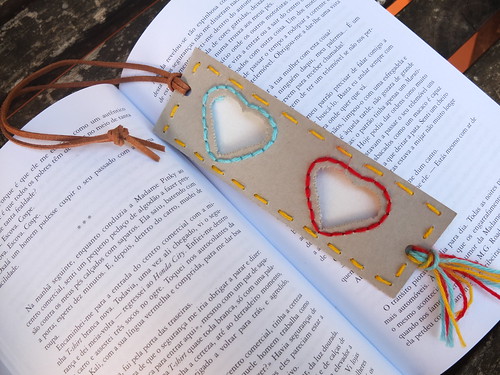
Easy and beautiful finishing..
And the bookmark is done! I said it was easy... Any child over 5 years old will be able to do it (don't forget to be careful with the pins - there are safer ways of doing this...)

Book markers
Three bookmarks, three happy dads!
DSCF4161
More happy dads :)
DSCF4118
More ideas... 

I hope you enjoy it! Good stitches!

August 14, 2012

Tutorial Tuesday


Happy Tuesday, everyone!

The tutorial I have to share with you today is a colorful way to keep track of your glasses or sunglasses. It's still sunny summer in Arizona and I keep losing my sunglasses. I had to buy a leash for my sunglasses... or an eyeglass holder, as the pharmacist said, when I asked if they sold any at the drugstore. Of course the leash was boring, so I added felt charms and embroidery to a different chain, and attached it to the rubber part that fits on my sunglasses. Here is the tutorial for you, in case you lose your glasses like I do and need a leash/chain to keep them around your neck and out of the lost and found.

In order to make a new eyeglass chain/sunglasses leash, you will need:
- Felt (in various colors)
- Embroidery floss
- chain (found this at the craft store for a little over $2.00)
- A little fiber fill
- Scissors
- Pliers
- Pinking Shears
- Eyeglass chain ( I found this at the drugstore for $1.99)


Step 1: Cut the eyeglass chain off the rubber loops that will fit on your glasses. Make sure not to cut the rubber at all.  I didn't throw the rope/string away, but I haven't figured out what to do with it yet, so set it aside for now.


Step 2: Measure 28-inches of chain. Use your pliers to open each end and attach to the rubber loops.


Step 3: Use a small circle, about 1-inch in diameter, to sketch out the area that you will stitch for the felt charms. I used a quarter. If you would like my sketch, you can access it here.


Step 4: Transfer the pattern to the felt. Now, I freehanded my stitches, but if you need to follow a pattern, I recommend using freezer paper or wax paper. If you need those sorts of directions, there are good ones here. Once your pattern is transferred, you will need to stitch two of each image onto each piece of felt.


Step 5: Cut each image out of the felt, leaving 1/4 of an inch border around each image. Cut a second piece of felt for each piece that you will use as the backing. You should have 6 circles of felt with stitching and 6 without.Use pinking sheers to finish the edges.


Step 6: In order to attach the backing to each stitched piece of felt, first bring your embroidery floss through the top piece of felt, then place the backing against the front, and stitch through both layers so your knot is encased in the body of the felt.

Step 7: Before you close up your stitches, add a little fiber fill between the layers of felt to give it some fluffiness.


Step 8: Close up your stitches, making sure to knot the end of your floss between the two pieces of felt, keeping the knot hidden.

Step 9: Repeat steps 6 through 8 for each felt charm.


Step 10: Attach your felt charms to the chain. I placed the first charm 11 chain links down from the rubber loop and completely detached the chain there. I looped the open chain link through the stitch at the top of the felt charm. Then added the chain to the bottom stitch of the felt charm. I spaced the second and third charms 6 chain links away from each other.


Step 11: Place the rubber loops on your sunglasses, and you are good to go!


Hope you enjoy this tutorial. Happy Tuesday!

Hi, I'm Kristen! I am a lover of all things stitchy and crafty. I have been sewing for as long as I can remember. My grandmother taught me how to sew Barbie clothes when I was young and I have been sewing ever since.

You can find me at Bobbypin Bandit, on Instagram, and my Etsy shop.

August 12, 2012

Winners of the Happy Stitch Giveaway!

And we have our random winners!

1 copy of Happy Stitch goes to each of these 2 winners:

Mary
I'm going to start this out with foxes: I live on the Fox River, which is decorated with copper foxes. It's awesome, and they're cute. The end. :D

AND

Gill Watson
Definitely the owl!!

1 pattern of her choice from Jodie's store:
Kristin - Sew Technicolor
I think foxes and owls are cute, but I like owls better. :) I've always had a thing for owls- they're so beautiful in real life and so cute in craft form!

1 felt fox kit from Jodie's store:
Little Ella Lu
The fox on the book cover is cuter
(thank goodness you love foxes) :)


If you see your name and comment here, email me at unafloresita@gmail.com with your details so we can get your prizes sent to you, pronto!

Thanks to everyone who entered, and for the usual range of hilarity, puns, and silliness in the comments - they made for an awesome read as I counted down to the winners! :) And thank you especially to Jodie for writing such a wonderful book, a fabulous tutorial, and for sponsoring this giveaway! :)

Hi, I'm floresita, editor of Feeling Stitchy. I'm an avid stitcher, knitter, and crafter. You can see more of my stitching on Instagram and my blog. My vintage transfer collection is on Vintage Transfer Finds.

Feel free to email me with any ideas for the blog!

August Stitch Along!


We are very lucky to have the lovely and talented Cate Anevski design a pattern for us, for this month's Feeling Stitchy Stitch Along. Don't you think it's just perfect for stitching up in this hot weather, with a glass of ice cold something with a slice of lemon by your side? And in fact it doesn't have to be lemon, if that's not your thing, change the colour scheme and you've got a little lime slice or a little orange slice! You can download the pattern here (thank you Cate!).

I can't wait to see what everyone gets up to with this pattern! Don't forget to add pics of both your work in progress and your completed pieces to the Embroidery pool on Flickr and use the tag  AugustStitchalong2012 so that we can find you!

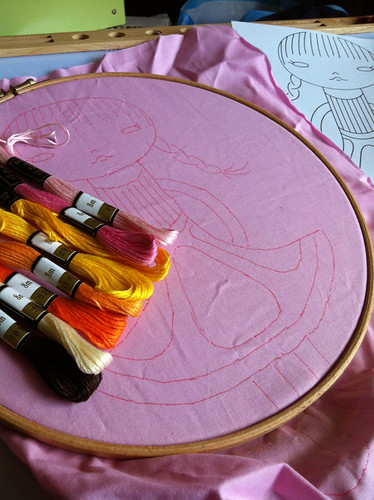
August Stitchalong - wip1

My start of Little Lemon Slice, I've picked some nice summery colours and I've blown the pattern up in Word, to make it slightly bigger, as I have plaaaaaaans.........

Hi, I'm Jo - I feature new embroidery patterns Sundays on Feeling Stitchy. I also post on our Twitter and Pinterest.

Is there a new pattern you'd like us feature? Email me!

August 10, 2012

Happy Stitch: Tutorial and Giveaway!


Many of you embroiderers have probably already heard of Jodie Rackley's lovely new book: Happy Stitch: 30 Felt and Fabric Projects for Everyday. It's a gorgeous book and I was super happy when Jodie asked if we'd like to feature it with a giveaway AND a tutorial she put together just for Feeling Stitchy readers!

Without further ado, here's Jodie! Oh and psst! Be sure to read through to the bottom for the exciting giveaway part! :)


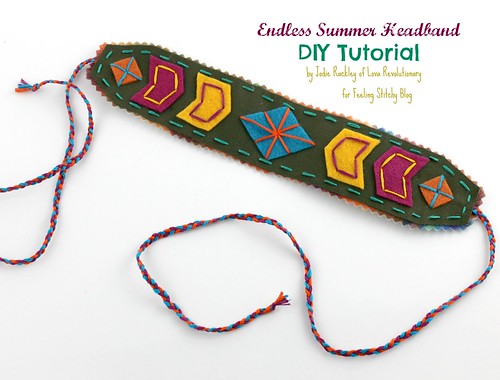
Endless Summer Headband DIY tutorial
Hi Feeling Stitchy Friends! I’m Jodie Rackley of Lova Revolutionary and the author of Happy Stitch! I’m going to share with you a simply stitchy tutorial for a Navajo-inspired Summer Headband! A super cute and perfect accessory for summer!
Tutorial by Jodie Rackley, author of Happy Stitch


Materials:

Several scraps of felt in a few different colors
Canvas fabric or a solid colored fabric
Several colors of embroidery floss
Scissors, pinking sheers
Embroidery needle


*** I used eco felt for all of my shapes in peacock, golden rod, fuschia, and orange and DMC floss in 947, 972, 3844, 718


1. Print and cut out your template shapes. Use the template shapes to cut 1 large diamond, 4 arrows in two different shades, and 2 small diamonds. Using the large headband shape cut one from canvas or another solid fabric and one from felt using pinking shears.


2. Starting with your large diamond shape, center it in the middle of you canvas fabric and use a star stitch to secure your diamond. Center your arrows about a ¼ inch away from your diamond and use a long backstitch to secure them. Use a modified star stitch to secure your small diamonds.


3. After all of your shapes are stitched on to your canvas/solid colored material, cut 12 long pieces of embroidery floss, 4 pieces each of 3 different colors that you are using. Separate them so you have 6 pieces of 3 colors. Tie a knot to hold all the threads together and loosely braid them together, repeat with your remaining threads to use for the other side of your headband, these will become the ribbons for the sides of the headband.

4. Now that you have your braided strands, center the end on the felt piece that you cut out and secure it with a few stitches, repeat on the other side.


5. Last, pin your canvas embellished piece on top of your felt and stitch a straight stitch all the way around the edge.


6. Wear your headband and look super cute and Navajo summery!


Thanks, Jodie, for your beautiful tutorial!

Giveaway Time!
And now, readers, for the exciting giveaway part! I got a sneak peek of this book, and it's so inspiring that I'm giving away 2 copies of Happy Stitch!

My personal favorite pattern is this bird design tote bag - but I'm also pretty charmed by her signature owl design and her cute felt rowhouses.

There are so many gorgeous, colorful projects in this 144 page book! I think you need it. :)

Jodie is also giving away 1 pattern of your choice from her store (I have my eye on that sweet fox) and 1 felt fox kit, also from her store.

So yes, that's 4 prizes - which means 4 chances to win, and in my book, that's pretty exciting indeed. :) Not that I have a book - well, I mean, I have this book - oh, you know what I mean! :)

To win, leave a comment and let's settle a crafty internet rivalry - fox vs. owl: who's cuter? Comments will be closed on Sunday night, August 12 at approximately 9 PM, US Central Time. Go!

Hi, I'm floresita, editor of Feeling Stitchy. I'm an avid stitcher, knitter, and crafter. You can see more of my stitching on Instagram and my blog. My vintage transfer collection is on Vintage Transfer Finds.

Feel free to email me with any ideas for the blog!

August 9, 2012

Embroidery and vanity...

When I began selling in craft shows, I soon understood that women often cannot resist buying a new necklace or bracelet... I observed other crafters and even if their work is very original and beautiful no one can beat those that are selling a little piece of vanity :)). I don't know if this happens everywhere... But in Portugal I can assure it is as I described! So, I thought: "Se não os podes vencer junta-te a eles".... Sorry... Now in English: "If you can't beat them join them"!! And I began creating kits that teach you how to make a necklace with an embroidered pendant. And that's what I'll show you today...

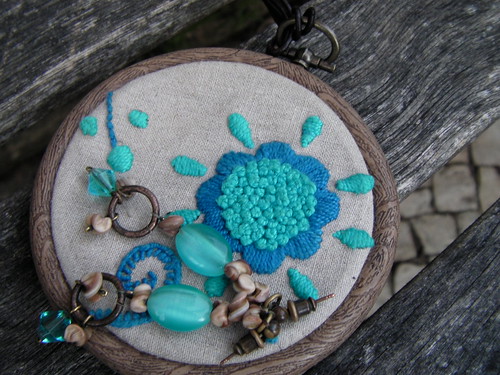
How to make your own embroidered necklace using a flexi hoop. Let's begin!

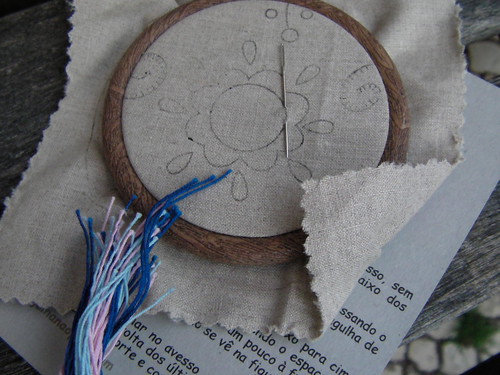
For the embroidery: you need to have a 3" flexi hoop, a pattern, a needle and embroidery floss.
Flexi hoop to make embroidered necklace
Material needed to embroider your pendant
Embroider it as you like, using the stitches you know. If you prefer you may use a bigger embroidery hoop, it's easier than a 3" hoop, and in the end change the embroidery piece to the flexi hoop. With the embroidery already done you'll need to finish the back of your embroidered pendant.

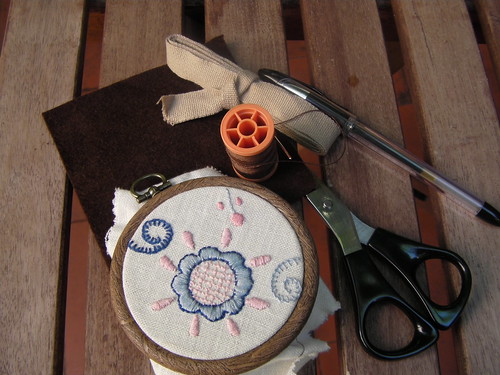
To finish your pendant, here are all the materials you'll need:
Material necessário para acabamento - material needed to finis the embroidered pendant
Material needed to finish your pendant
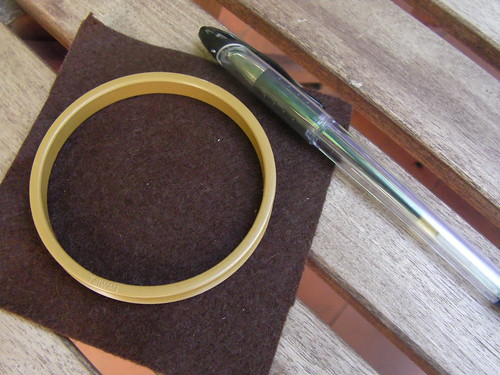
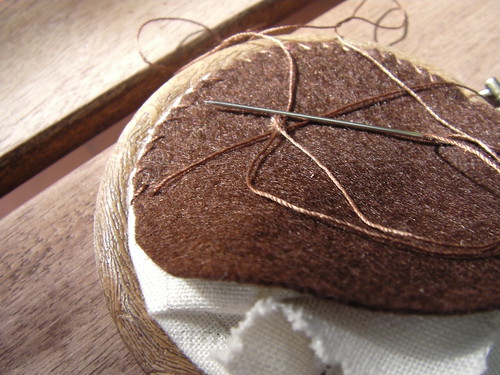
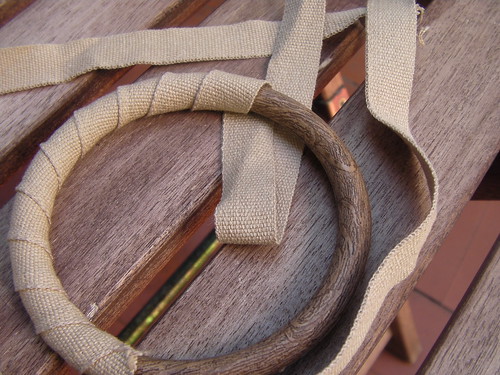
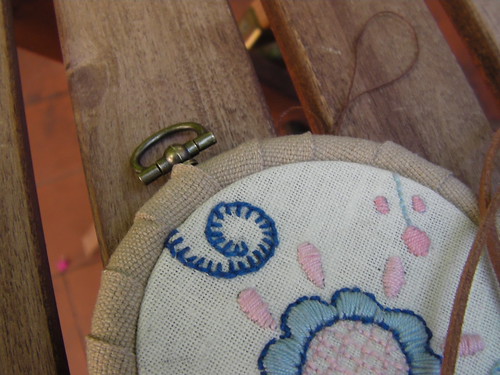
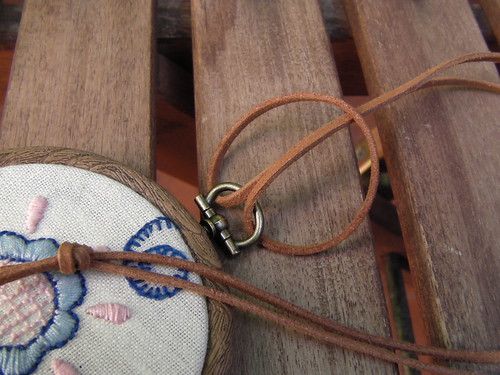
Using the embroidery hoop as a mold, cut out a felt circle for the back cover. Then stitch the felt to the embroidery piece, I used a whip stitch. If you want a different finish, you can choose to wrap the flexi hoop with a ribbon. At the end you must attach the suede cord to the pendant.
Prender o fio de camurça ao bastidor
Adding the suede cord.
Instead of using the suede cord you can use a ribbon to obtain an original final look...
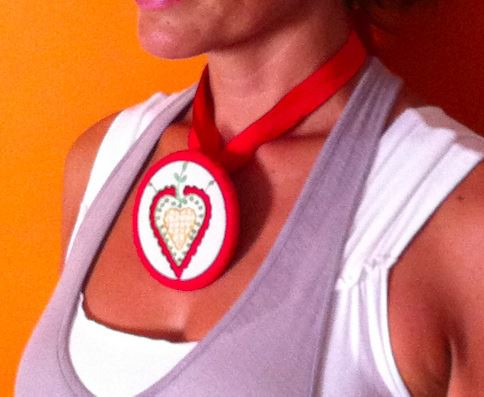
387577_10150372444167320_574824578_n
An original final look obtained with a red ribbon.
I made this one for me, I wanted to wear it with these earrings... It's a success everywhere I go...

Colar pronto - embroidered pendant
Specially made for me!!!
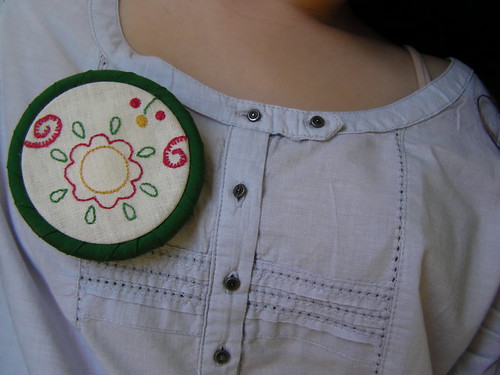
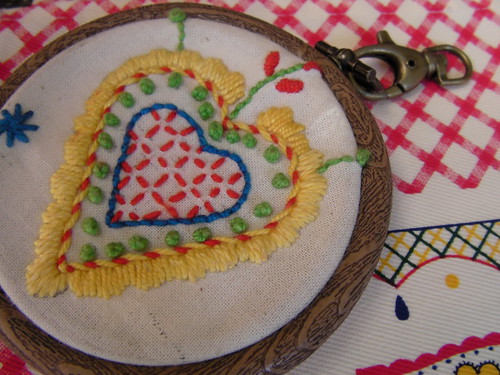
You may prefer to wear it as a brooch or opt for a keyring if jewelry is not for you...

Pregadeira
Using a flexi hoop as a brooch...
Porta-chaves - Keyring
An embroidered keyring...
Hope you like it!!! If you make your own let me know... I would love to see it...
These patterns are both inspired by Portuguese traditional embroidery... Which kind of pattern would you choose?
SITE DESIGN BY RYLEE BLAKE DESIGNS