September 16, 2012

Patterns - (NOT SAFE FOR WORK) States of undress

Just to warn you, the pattern featured below, although perfectly tasteful (and some may consider a little tame) contains nudity and therefore if that is not your thing, you may wish to skip the pattern post this week.

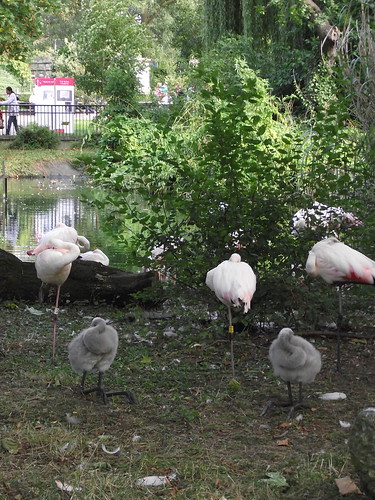
So to shamelessly rip off Mr. X Stitch's NSFW Saturdays, do not go below the cute picture of baby flamingos (who knew they were grey? who knew they could sit on their knees like that? awwwww) if nudity offends you (everyone is going to think this piece is far more graphic than it actually is now!).

London zoo

We did warn you


States of undress

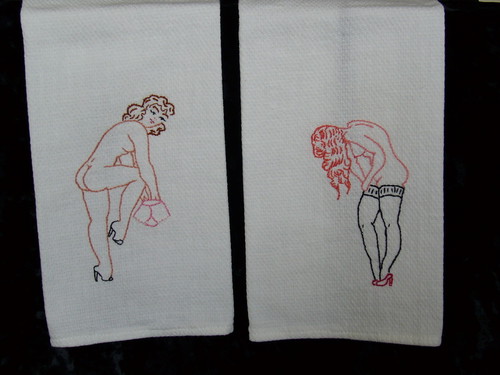
States of Undress by sewclever

I love sewclever's stitching of these vintage patterns from vintage embroidery pattern superstar Brian Campbell's Flickr stream. You can find the patterns here and here (I also particularly love the Made in Hawaii pinup in the second link).

Hi, I'm Jo - I feature new embroidery patterns Sundays on Feeling Stitchy. I also post on our Twitter and Pinterest.

Is there a new pattern you'd like us feature? Email me!

September 12, 2012

Way Back Wednesday

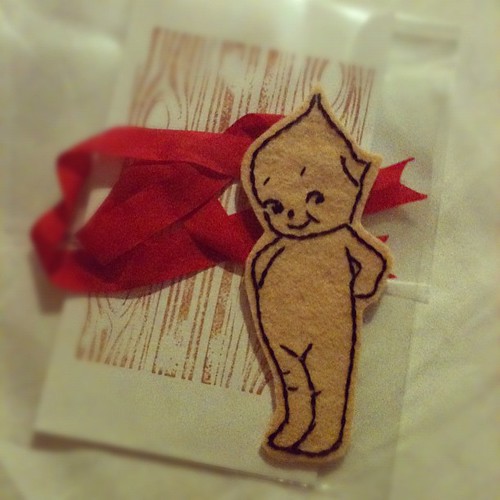
I embroidered another Kewpie ornament...

My grandmother said one of the reasons she fell in love with my grandfather is because he won her a Kewpie doll at the state fair. Michele Lea's embroidery is just too much! Love it! Thank you, Michele, for reminding me of a sweet love story with your wonderful stitching. 

September 11, 2012

Tutorial Tuesday

Happy Tuesday, everyone!

I have a tutorial roundup for you this week. Hopefully you'll get to give one, or all, of these a try, as they are super cute ideas!

If you would like to learn some stitches to include on the edges of a blanket or scarf, the Purl Bee has some great tutorials for a Chevron Blanket Stitch, Triple Blanket Stitch with a knot, and a Knotted Buttonhole stitch. Head over to the Purl Bee site to check some of these out.


If you are looking for a fun way to accessorize with embroidery for you or the little one in your life, this headband with french knots would look dazzling! The instructions for the headband can be found at Heidi & Finn. After the tutorial, there are various images of additional embroidery ideas for the headband.


Aside from having some adorable embroidery patterns for sale, Urban Threads offers some great tutorials on their site. This embroidered sock monkey is one of the cutest and easiest tutorials to follow. 

Hope you all have a fantastic Tuesday!

Hi, I'm Kristen! I am a lover of all things stitchy and crafty. I have been sewing for as long as I can remember. My grandmother taught me how to sew Barbie clothes when I was young and I have been sewing ever since.

You can find me at Bobbypin Bandit, on Instagram, and my Etsy shop.

September 9, 2012

Patterns: Rabbit Heart and Lion Heart Girls


Rabbit Heart New Pattern by Cherry & Cinnamon

This lovely new pattern set by Cherry & Cinnamon features both the Rabbit Heart girl above and a Lion Heart girl. I love the different stitches used on this. You can find the pattern set here.

Hi, I'm Jo - I feature new embroidery patterns Sundays on Feeling Stitchy. I also post on our Twitter and Pinterest.

Is there a new pattern you'd like us feature? Email me!

September 7, 2012

Wee Little stitching

latest stitching

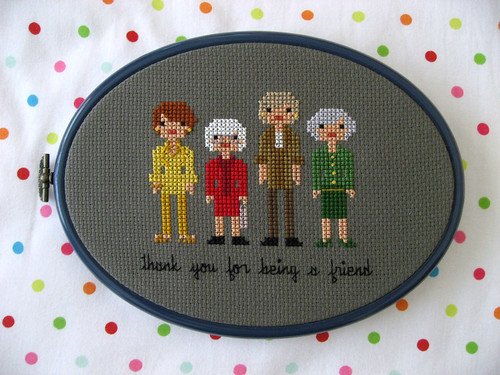
The second that I saw this pattern, it was pretty much a given I was gonna stitch it. That, and I just happen to know someone who loves The Golden Girls enough to own a framed photo of them. :) This pattern, as mentioned before, comes from the genius minds at Wee Little Stitches, and is available through our good friends at Kitschy Digitals.

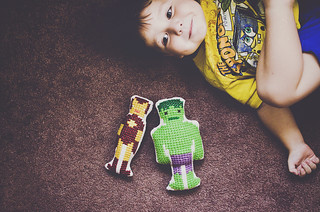
If stitching superheros is more your speed, Jacqueline stitched up doll-size versions of her patterns, using Smyrna Stitch:


Ooh, Smyrna stitch, you are new to me! Jacqueline worked her dolls on 14 count Aida, over 2 squares with the Smyrna stitch, making the pattern twice its normal size. Come to think of it, I'd love doll-sized versions of the Golden Girls - wouldn't they make cute Christmas ornaments? Ok, maybe I'm just being weird, here. :)


I love the added texture the Symrna stitch gives - I'll have to try this soon!

Also inspiring are Lisa's doll versions worked on Monk's cloth:
hanging out with superheroes

Hi, I'm floresita, editor of Feeling Stitchy. I'm an avid stitcher, knitter, and crafter. You can see more of my stitching on Instagram and my blog. My vintage transfer collection is on Vintage Transfer Finds.

Feel free to email me with any ideas for the blog!

September 6, 2012

Silver wings

Untitled
Stitched by whimsiology

One of my favorite things about summer, as a child, was watching cicadas hatch, revealing such pale and delicate wings lined with silver and gold - that's immediately what I think of when I see this delicate, beautiful embroidery by whimsiology. Gorgeous work!

Hi, I'm floresita, editor of Feeling Stitchy. I'm an avid stitcher, knitter, and crafter. You can see more of my stitching on Instagram and my blog. My vintage transfer collection is on Vintage Transfer Finds.

Feel free to email me with any ideas for the blog!

Back to school

Olá! In the next two weeks children will be back to school here in Portugal, after summer break. I'm reminded of those times when I was young (well, I like to believe I'm still young...) and one of the great things about being back to school was that special feeling of writing on the first page of a new notebook. Do you remember that? The first page seems to be made of a different kind of paper...

I loved to make my notebooks unique since I was a young girl. I enjoyed thinking: "my notebook is not like yours..." But I was no longer at school when I started embroidering notebooks. Today I'll show you some of those notebooks, hoping they can inspire you and your kids to make your own!!

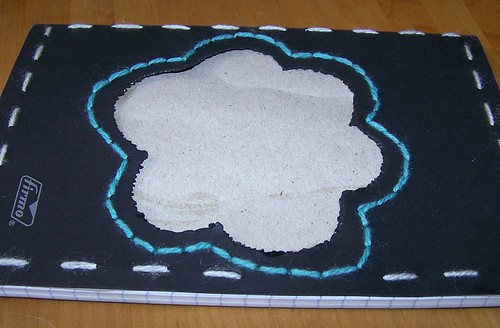
This was my first embroidered notebook. There I wrote down my first orders, the first supplies I bought... Good memories!!

Agulha não pica's notebook
My first embroidered notebook
This one also had a black cover and was embroidered using wool yarn as the first one.

Next agulha não pica's notebook
Using wool yarn on a black notebook...
Some time later I began doing them differently, using more detailed patterns and embroidering with a floss similar to pearl cotton. One of this days I'll show you how I do it!! It's very easy... This is the notebook I use every day now... It's like my right hand, it keeps me from forgetting everything I need in my business. I prefer it to a netbook!

Better than a netbook...
Probably somewhere beside me...
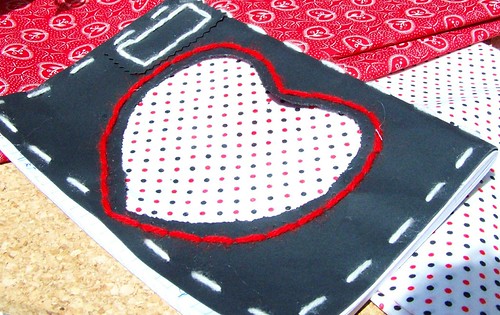
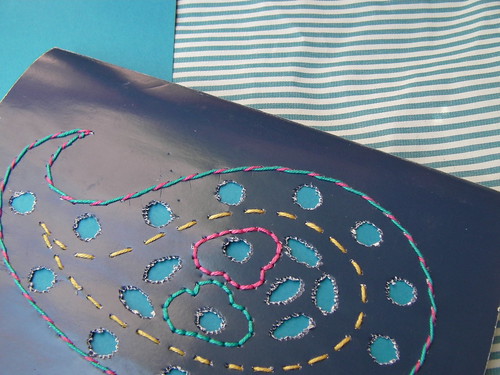
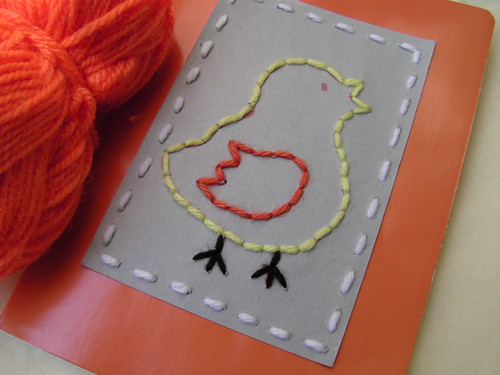
For those younger ones getting back to school here you have an idea to make their notebooks really unique. You'll have to use the technique of embroidering on card stock. The child will make a lacing card, perforating the card stock and then embroidering it using wool yarn. The notebook will look great and kids will be happy to say: "my notebook is not like yours"!

CAM_0361
A lacing card that became a notebook cover
As we would say in Portuguese: "bonito e barato"... Beautiful and cheap...

September 2, 2012

August Stitch Along 2012 round up


Left to right, top to bottom

  1. August stitch along 2012: the sisters by daisyeyes
  2. Passionfruit posing by LaWhimsy
  3. Little lemon slice by me
A big thank you to all those who stitched along with us on the August 2012 stitch along, it was fantastic seeing all the different ways the pattern could be interpreted. 

Don't forget you can still find this fantastic pattern by Cate Anevski here.


Hi, I'm Jo - I feature new embroidery patterns Sundays on Feeling Stitchy. I also post on our Twitter and Pinterest.

Is there a new pattern you'd like us feature? Email me!

August 30, 2012

Cork fabric book cover

Olá! Some weeks ago I made available a free pattern in my weekly post . It was a Japoneira, a traditional Portuguese pattern commonly used in Viana do Castelo typical embroidery.

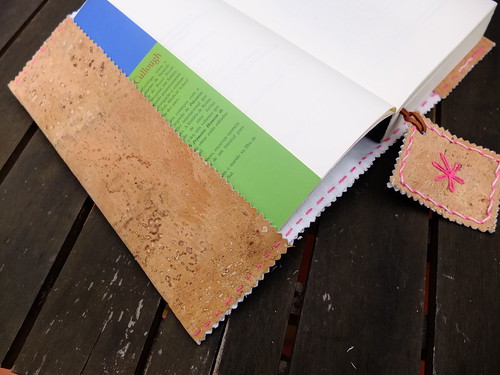
At the time I embroidered that pattern on cork skin (cork fabric or cork leather), a Portuguese great eco-friendly material. I promised I would show the final work using that piece of embroidery and that's what I'll do today.

Last year when I was on a Christmas craft show I was asked many and many times if I was selling bookcovers. And I wasn't!! I said to myself that the next time I couldn't have no as an answer. A few months later I created embroidered book cover kits made of burel, another Portuguese traditional material, and I can say they were the winter season success!

When I finished the Japoneira pattern I thought that it would be great to apply it in a bookcover made of cork fabric. I remember seeing many book covers made of leather in "old times." A friend told me that many years ago it was not common to see someone reading a book that was not protected by a bookcover and usually they were made of leather. I confess that a cork bookcover reminded me of those old bookcovers and I loved the idea.

One of these days I'll make a tutorial on how I make my embroidered bookcovers. It's very easy but I only use fabrics that don't unravel.. That's my secret...

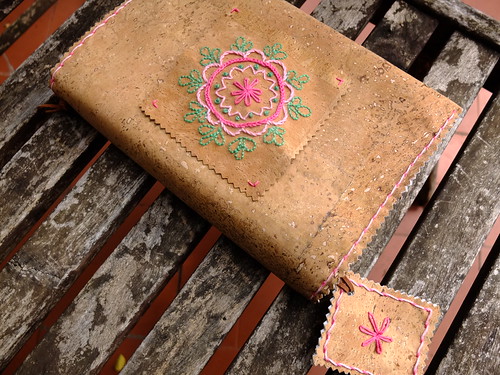
Embroidered cork fabric bookcover
Embroidered bookcover made of cork fabric
I always add a bookmark to my bookcovers and I can assure you that it is very useful. 
Although they are not "universal", the measures I usually use make the bookcover adaptable to almost all books.

If you want you can take a look inside...

Cork fabric Book cover
Take a look inside the cork fabric bookcover...
I'm happy with the final result. But I confess myself desperately in love with cork... So I'm suspicious...
This one I offered to a friend. But I've already made two more. And one of those was for me... My holidays would not have been the same without it.

If you want to try this pattern it is still available and free... You may download it here.

And to end with our Portuguese lesson let me tell you how we say "book", it's "livro", one of my favorite words... 

August 28, 2012

Tutorial Tuesday


Happy Tuesday, everyone!

It seems that Labor Day weekend is a time to squeeze in that last vacation before things pick up with school, holidays, weddings, parties, and celebrations. I needed a new luggage tag for this last trip of the summer, and something stitched seemed like the perfect solution.


To make this embroidered luggage tag you will need:

-Fabric with your stitches
-Batting
-Clear vinyl or plastic (I got half a yard at Joann Fabric for less than $4)
-Sewing machine and coordinating thread
-Iron and an ironing board

I wrote directly onto the fabric, but you can access the template I created for myself, here. I used a back stitch for the happy trails tag and a stem stitch for the bon voyage tag.

Step One: Cut the two body pieces of your tag and a piece of batting into 3.5 by 5.5 inch pieces. Cut the vinyl into a 4.5 by 3.5. Cut one piece of fabric into a 2 by 15 inch strip and a small strip that is 2 by 3.5 inches.

Note: Make sure to measure your fabric accurately, keeping the embroidery at the center of the 3.5 by 5.5 piece of fabric. As you can see, I messed up a little with my Happy Trails tag, so I cut the stitched piece out of the fabric and stitched it onto the center of a correctly measured piece of fabric. 

Step Two: Fire up your iron. Fold the 15-inch strip of fabric in half, lengthwise and press.


Unfold the strip and fold the two long edges in towards one another, and press them in place.


Fold the strip in half using the first fold you made as your guide, and press again.


Stitch close to the edge and set aside. This will be the strap of your tag.


Step Three: Take the 2 by 3.5 piece of fabric and press it the same way as you did the strap above. Before you stitch it, place the clear plastic into the fold and stitch it into place.


Step Four: To construct the body of the tag, place the batting and the blank piece of fabric wrong sides down. Then add the plastic with the trim, aligning the bottom with the fabric and the batting. Place your embroidered piece of fabric face down on top of the plastic piece. 


Stitch along the sides and bottom using a 1/4 inch seam, making sure to catch all the layers.


Clip the corners, and turn.


Step Five: Fold the open seam inward and place the strap in the center. Top stitch all around the tag, making sure to seal the opening.

Note: I found that it was easier to stitch this in the sewing machine with the plastic side down.


A business card slips very nicely into this tag.


Step Six: Attach the tag to the handle of your bag by looping the body of the tag through the tag strap.


Hope you are able to take this on your next trip. This should also help distinguish your bag from someone else's at the airport baggage claim. 

Hope you have a happy Tuesday!

Hi, I'm Kristen! I am a lover of all things stitchy and crafty. I have been sewing for as long as I can remember. My grandmother taught me how to sew Barbie clothes when I was young and I have been sewing ever since.

You can find me at Bobbypin Bandit, on Instagram, and my Etsy shop.

August 27, 2012

Sources, Sources and the joy of more Sources

Hullo! Before we move on to start another project, I would like to share with you where I go look for my sources on-line as someone had asked in the comments awhile back.

When I began, I downloaded most of the embroidery books from Project Guttenberg. Eventually I moved on to the Antique Pattern Library, and well, I am still stuck on this site for there is just so much of everything here! But in the days where I get too overwhelmed there, I pop into the Embroidery Archives of the University of Arizona, or find some gems in Google books, or searching embroidery on the Internet Archives. And I must include The Little Grey Bungalow blog even though it has just a few embroidery titles, for it always puts a smile on my face with all the public domain gems she finds!

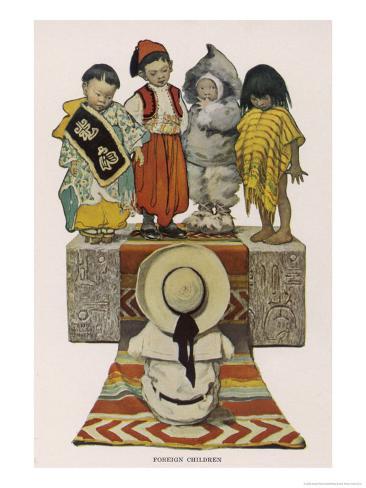
But the best source discovery so far is from Feeling Stitchy reader Cathy! She found where our little children from the doll quilt project came from!!
She shared that it is an illustration by Jessie Willcox Smith and the original link she sent is from Pennelainer's flickr, where it describes it as coming from "A Child's Garden of Verses" by Robert Louis Stevenson. And thanks to Cathy, we now know that the 4 kids are "Little Japanee, Little Turk, Little Eskimo and Little Indian" from the curious poem called "Foreign Children"!

How wonderful this place called the Internet! :-) I hope you all continue to leave comments and share here on Feeling Stitchy, it is such a lovely surprise when one thing leads to another!

Now I must prepare for the next little project! I will be making the pattern this week for an adorable play apron from Priscilla Embroidery Patterns so I will be able to share it with you next Monday. It comes from a catalog so there are no instructions or pattern, but this photo looks promising :-).


Until then, have a happy week everyone and enjoy getting lost in the embroidery of the past!

August 26, 2012

August stitch along week 2


Left to right, top to bottom
  1. August stitch along prep by daisyeyes
  2. WIP Feeling Stitchy Stitch Along by _ErikaJean_
  3. Embroidery Part Done by LaWhimsy
  4. August stitch along wip 3 - embroidering on the beach by me
I am absolutely loving the imagination going into everyone's interpretation of this design; this week we've seen fabric applique, elfin ears, bead work and some lovely fill stitches! 

August has gone by so quickly, I'll be doing a wrap up post for this stitch along next week but it's not too late to join in! You can find Cate's lovely pattern here.

(Click on the links above to see the stitching on these pieces in their full glory!)


Hi, I'm Jo - I feature new embroidery patterns Sundays on Feeling Stitchy. I also post on our Twitter and Pinterest.

Is there a new pattern you'd like us feature? Email me!

August 25, 2012

New Embroidery with Vintage Patterns - August Stitch Along with Interviews!

Hi, everyone, this month (and future months, too) my monthly round-up post for the New Embroidery with Vintage Patterns (NEwVP) stitch-alongs (SALs) is going to be a little bit different! I thought it would be really fun and interesting if we got to know some of the people behind the stitches!  So I picked 2 people who left a "sign-up" comment in our NEwVP August SAL discussion thread and have interviewed them!  I hope you enjoy!  A little background info, the theme for the August SAL was to modify this vintage teapot pattern.

As always, I invite all of you to join our group or at least stop by and take a peek.  There are lots of new embroideries with vintage patterns being added on a regular basis that are totally unrelated to any monthly SAL.  Mom Walds Place & I are are also on working on making the "discussion" part of our group more chatty so keep your eyes out for regular discussion posts by various NEwVP members on a weekly basis -- the first one, exploring different and exciting threads, has already been posted by sugarglider500!  (Please see this post if you would like to volunteer to write one or more discussion posts!) 

MEET FLICKR PEEP XPERIMENTL!!


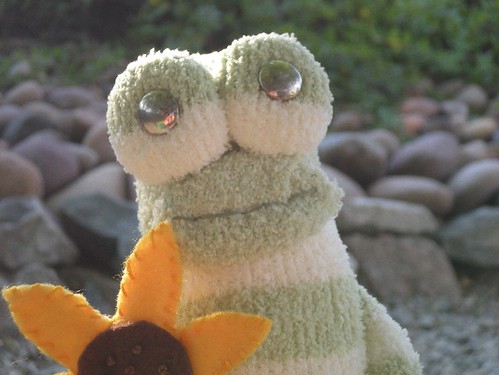
Sonny the Sock Frog1.  Please tell us a bit about yourself.
I am a stay-at-home mom in Prescott Valley, Arizona. I love to cook and bake, garden, sew, thrift, and of course, embroider. Stitching helps me keep those creative juices flowing and has connected me with lots of wonderful people through blogs like this and other needlework groups. The support and guidance that I have received over the years from the stitching community is amazing. Stitchy peeps are the best!

2.  Tell us a bit about the embroidery (specifically your August SAL piece) you made.
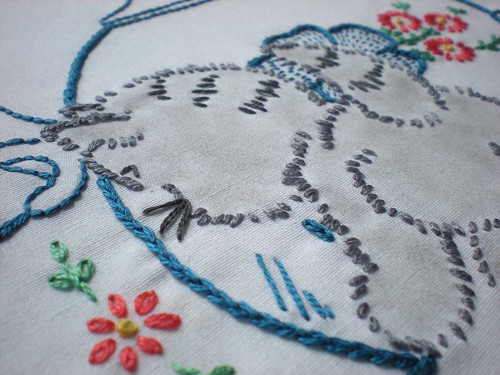
I wanted to create a scene around the basic teapot pattern that was provided for this stitch along, so I began browsing Flickr for vintage patterns that would give me some depth. When I spotted the pattern with the kitten in the teacup, I knew it would be the perfect fit. The cup included a little floral pattern, so I then went on the hunt for some flowers that I could stitch onto the teapot to create a coordinating set. I used GIMP to layer my various patterns and play with scale and wound up with a kitten crashing my tea party. I used basic stitches on the design and tinted the kitten with a little bit of decorator’s chalk to provide some contrast. I finished the piece by using it in the center of a Dresden plate quilt block for some pop.
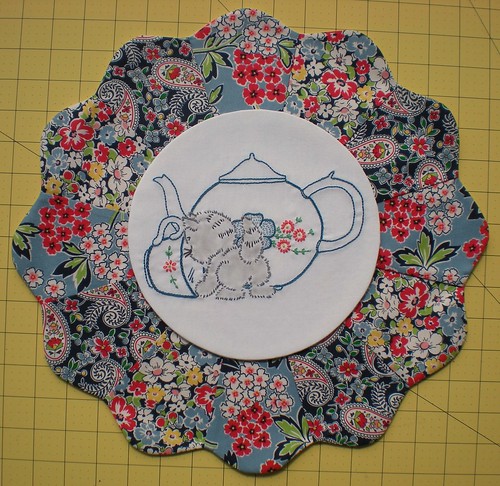
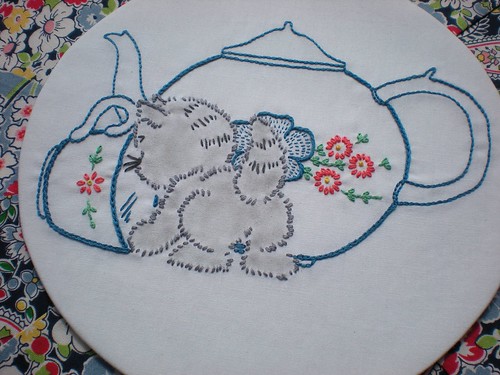
Kit-tea August SAL Entry

Kit-Tea

Detail of Kitten with Teapot  

3.  How long have you been stitching?  What or who got you started?
I did a few needlework projects as a child and teenager, but didn’t really get into embroidery until I had children. I joined a local moms’ group where babies were being born on a regular basis and I wanted something handmade that I could give as gifts. At that time, I didn’t know how to sew and we were on a budget, so I picked up some burp cloths and embroidery floss and started stitching. As my skills improved, I got involved in the needlework communities on Craftster and Flickr where I received great encouragement and inspiration from other stitchers. I’ve been steadily stitching now for the last 7 years or so.

4.  Why do you like vintage embroidery patterns?  Do you have a favorite one or a favorite theme?
My mom said that I was born about 40 years too late. I have always been attracted to the bright colors and cheery designs of items from the 30s, 40s and 50s. When I discovered the Hoop Love Vintage Pattern group on Flickr, I thought I’d died on gone to Heaven. Anthropomorphic patterns that put sweet smiling faces on fruits and veggies and pots and pans are my favorite. I don’t think a kitchen is complete without at least one silly embroidered tea towel.

5.  Do you have a favorite embroidery stitch?  If so, why?
I use backstitch a lot because it works so quickly and can go over a variety of lines. I like stitching text and by varying the number of strands of floss you can do just about any font with backstitch. It isn’t a very exciting stitch, but it gets the job done and it holds up very well if an item needs to be washed.

6.  Anything else you would like to share?

Nope.


MEET FLICKR PEEP MLACOOPER!!


1.  Please tell us a bit about yourself.

(A silly little blurb)
About me: vintage 1954, writer, four smart, funny, accomplished children, three adorable grandkids, cat, dog, old house, sewing, knitting, books, books and more books. And multiple sclerosis.

(A more serious approach)
I am a widowed mother of four grown children. I recently retired as a nurse and healthcare executive due to increasing disability from multiple sclerosis.

2.  Tell us a bit about the embroidery (specifically your August SAL piece) you made.

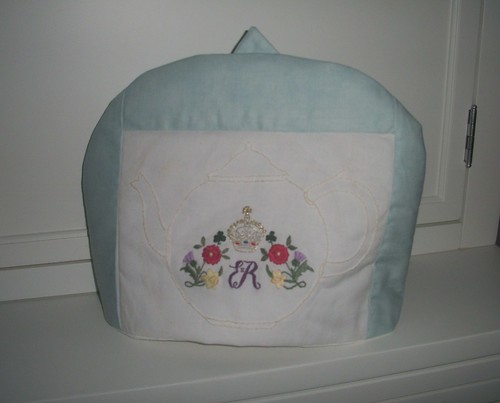
I am a true Anglophile. And a heavy duty tea drinker. So I loved the idea of the tea pot. And I thought since it was the Jubilee Year, it would be fun to put one of bcampbell_to’s Coronation motif’s on a teapot and then maybe stitch it into a tea cozy.
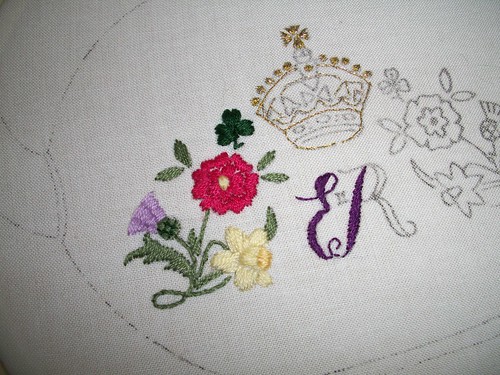

007

002


3.  How long have you been stitching?  What or who got you started?

I have been stitching since I was a little girl. My beloved Aunt, my grandfather’s sister, taught me. She was a brilliant seamstress. She is still alive, bright and active at 96. But I was away from it for many years. I was widowed young and had to work to support four kids. I was just too tired to do much else. Now that they are grown and I am disabled, I have the time to indulge in sewing again.

4.  Why do you like vintage embroidery patterns?  Do you have a favorite one or a favorite theme?

I love the vintage look because it is so nostalgic to me. I especially like patterns from the 1930’s. That is when my house was built and I have it decorated mostly in a 1930’s style.

5.  Do you have a favorite embroidery stitch?  If so, why?

I like anything that is a little intricate and has a lovely result. I like a bullion stitch and the Palestrina stitch. I like experimenting and trying new stitches.

6.  Anything else you would like to share?

I don’t think there is anything left! Except I do write two blogs, Nourish: living, laughing, whining (http//:www.nourishourselves.blogspot.com) and MS Renegade (http//:www.msrenegade.com). Please stop by.

August 23, 2012

Colorful embroidery

Olá! This week only a few words and many colors!!
A couple of years ago when I begun with agulha não pica I decided only to use the five basic stitches that I teach in my kits, trying to show that we can create beautiful pieces of embroidery while keeping it simple. But I wanted something different... And one day I felt that I needed more color... So I tried to stamp my patterns on printed fabrics instead of only using plain fabrics. And I have never stopped...

Today I bring you some of these pieces of embroidery that I've been making... I always use Portuguese fabrics, I try to choose the most traditional ones and avoid too many confusing patterns. I can never forget that these are beginner's kits... Classic stripes, squares and polka dot fabrics are usually my first choices! In Portuguese we say: riscas, quadrados e bolas, in the exact same order.

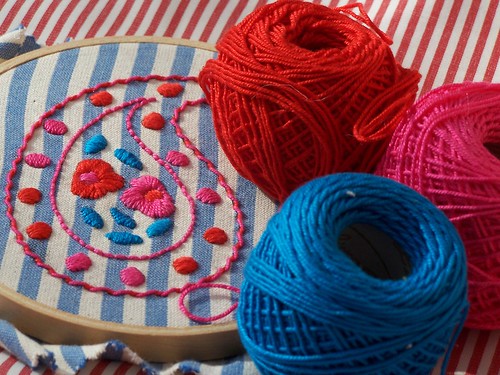
Cornucopia - embroidery kit
Paisley pattern embroidered on striped fabric.
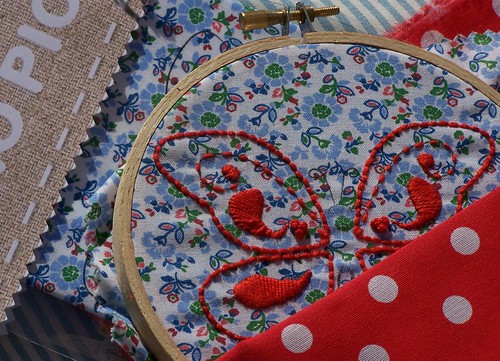
Chamando a Primavera... Butterfly embroidery kit
Butterfly embroidered on floral Portuguese fabric.
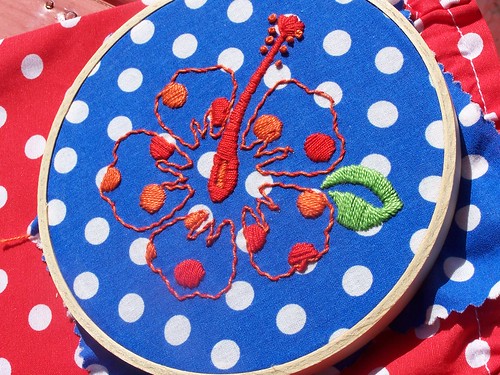
Sometimes it is possible to use the pattern of the fabric to add something different to your embroidery... Look at this hibiscus that features the embroidered circles from the polka dot pattern...

Colorful hibiscus
Hibiscus pattern embroidered on polka dot Portuguese fabric.
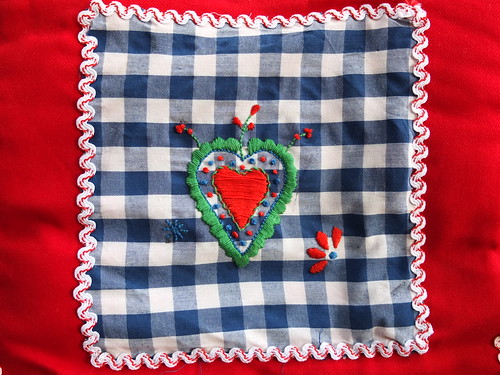
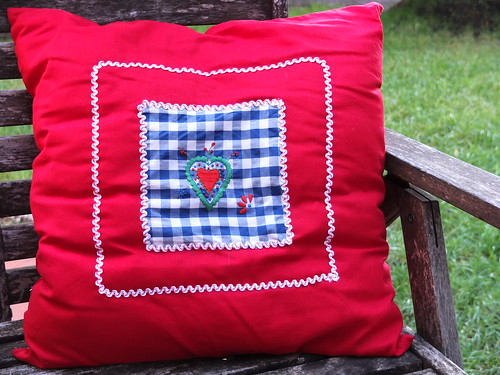
These embroideries can bring new life to a pair of jeans or even to a very common pillow as shown in these photos...

Embroidered pattern
Viana's Heart pattern embroidered on squares Portuguese fabric.
Embroidered pillow
New embroidered pillow finished with ribbons.

Have you ever embroidered on printed fabrics? Although I do not recommend it to those making their first stitches I have to say that I love it!!

It was not intentional... But it seems that red and blue became the colors of this post... 
SITE DESIGN BY RYLEE BLAKE DESIGNS