February 13, 2013

New Life to Found Items

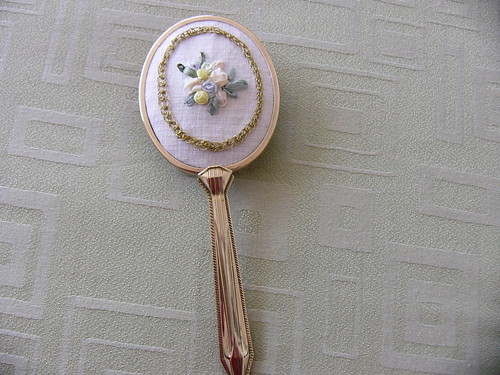
Antique brush with new cover

This is absolutely breathtaking. Meeka5 revamped this antique brush. It is just beautiful.
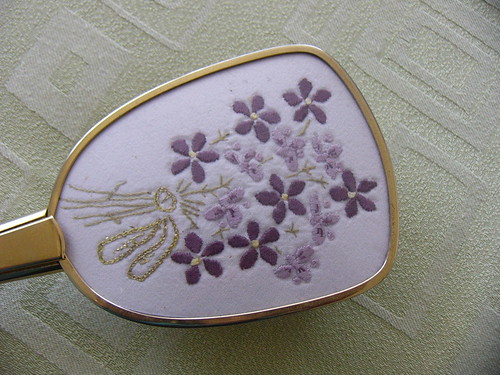
Antique brush new top
Meeka5's stitching is absolutely perfect. I am so jealous of her wonderful stitchy skills.


February 12, 2013

You are...

You Are Loved
Stitching by Dawn Regan

More beauty in unfinished stitching for you today, courtesy of Dawn Regan's Flickr stream. I'm in love with the colors Dawn chose for her piece, and the loveliness of the pattern, by Pam Garrison. Beautiful work, Dawn!

Hi, I'm floresita, editor of Feeling Stitchy. I'm an avid stitcher, knitter, and crafter. You can see more of my stitching on Instagram and my blog. My vintage transfer collection is on Vintage Transfer Finds.

Feel free to email me with any ideas for the blog!

February 10, 2013

Patterns: Valentine's Day


craftmodern.com

Crafty Modern has a lovely typewriter themed free Valentine's Day pattern over on her blog, not too late to stitch up! I love how the pattern is customisable.

And another free Valentine's pattern to watch out for, hopefully later today, is over on Little Miss Crafty's blog, her sneak peak certainly looks tempting!

Freebie Retro Doll design

Little Miss Crafty

Hi, I'm Jo - I feature new embroidery patterns Sundays on Feeling Stitchy. I also post on our Twitter and Pinterest.

Is there a new pattern you'd like us feature? Email me!

February 7, 2013

New stitches with Portuguese Soul - part IV

Olá! One more week proudly showing the work of inspired Portuguese embroiderers...

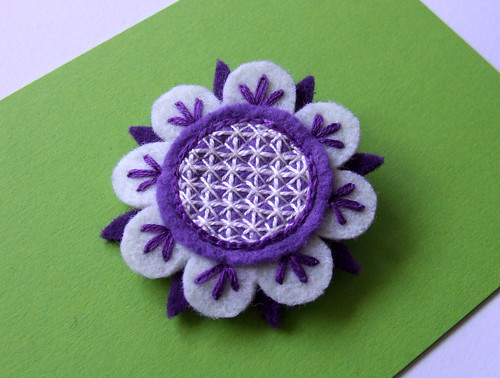
Maria João says that detailed and delicate works make her happy... And her embroideries tell us exactly that... Her cross stitch,  blackwork and shisha bracelets are gorgeous... And her felt creations are full of precious details. Browse her brooches (don't forget the butterflies) and her small purses, you'll love them!! But I've chosen a very special pattern. Our beautiful Portuguese "japoneiras". In her blog, erratic needle, she explains everything about it...


purple "japoneira" brooch
Japoneira brooch by erratica needle


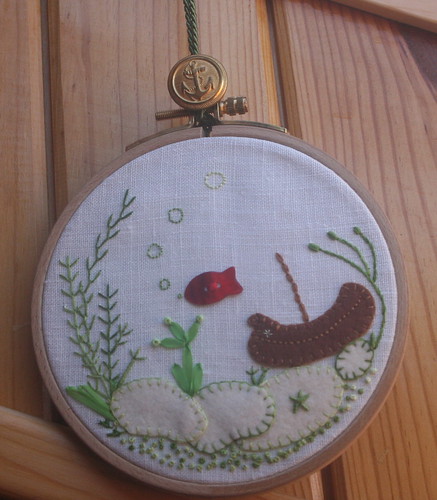
This was the first embroidery hoop project of Dorinda, from Mãos e Manias (hands and manias). She was challenged to use the hoop as a frame and she thought that it reminded her of a little aquarium... The mother of pearl fish button was the perfect choice and I love how she combines felt and ribbons. Such a sweet aquarium... But she uses her needle in many other projects giving them original applications, like brooches, boxesbarrettes and organizers


My little red fish
Aquarium embroidered by Dorinda

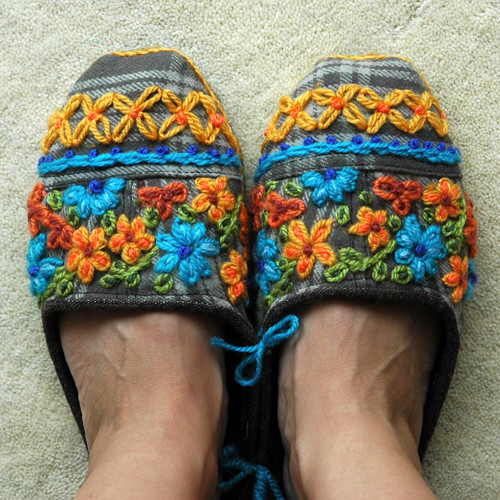
These beautiful embroidered slippers are made by Teresa Cunha, who has no computer nor internet access. But no problem with that as her marvellous work is shown to the world by the artist Ana Ventura. I remember the first time I saw them and how long I took to view one after the other... All different, each one more beautiful... I love the simplicity and the details of some... The autumn look or spring look of others... I love the linear and the rustic looking and the colors' choice... In blue or using the most sweet color, they are always charming!


#56 sold
Embroidered slippers by Teresa Cunha, photo by Ana Ventura
Next week I'll end "new stitches with Portuguese soul" with love in the air...

February 5, 2013

Tutorial Tuesday

Happy Tuesday, everyone!

This week's tutorial is one of my favorite's so far! I found these awesome embroidery frame pins on etsy and knew they would be great to feature as a tutorial. I seem to be leaning toward smaller stitches, lately, but I just love the way these smaller designs are turning out, especially when they are wearable.


If you would like to make this embroidered pin/brooch, here is what you'll need:

-pin/brooch mounting (available here)
-embroidery floss (I used DMC No.8 floss)
-scissors
-small piece of felt
-embroidery pattern
-paper
-water soluble transfer pen or pencil
-muslin or cotton fabric


I took an embroidery design from Aimee Ray's Doodle Stitching book. She has a wonderful collection in this book and they come on a disc, which make it easy to adjust the size prior to printing. 


The pin mounting frame comes in three pieces, the front frame, the backing, and the pin back.


Let's get started!

Step One: Determine the sizing of your pattern according to the frame of the pin mounting. I traced the pin mounting using the inside line of the front frame as a guide, then sized the pattern accordingly. On my computer, scaling the image down to 13% was the perfect fit for this pin mounting, but you may have to play around with sizing to get the right one for you.


Step Two: Once the pattern was the size I needed, I transferred it to the fabric by taping it on the window and using the daylight as a backlight. 


Step Three: Place your fabric with the transferred pattern into a hoop and stitch. I apologize for not taking a picture at this stage, I was too excited to see the pin finished, that I moved to the next step sans photo.

Step Four: Once your stitches are complete, turn your design over and place the frame of the pin mounting over your stitches. Center the design and draw a circle about half an inch around the outside of the frame and cut along that line.


Step five: Using the front frame of the pin mounting piece again, trace the frame onto a piece of felt. This will go behind your stitches in the frame to give it stability and create a firm fit in the mounting.


Step Six: Take the pin backing, and align the felt and your stitched piece over it so that the stitches are centered.


Carefully, turn these three pieces over and using a sewing needle with coordinating thread, make a running stitch along the edge of the fabric with your stitches on it. Pull it snug in order to encase the felt and the pin backing behind your stitched piece of fabric. The tighter you pull this running stitch, the smoother your stitched piece will appear once it is in the frame. Knot the thread when you get it snug enough to your liking and everything is centered in the frame.


Step Seven: Once you have your stitched piece in a place that you like, fit it into the front frame piece. Clip any extra threads and such. Place the pin backing over the back, making sure to place the pin in the right place so it won't look crooked when you pin it to your blouse or jacket. Once it's all aligned, bend the prongs from the front frame over the back. This will cover your running stitch and make the pin clean and neat. I was able to use my fingers to bend the prongs, but you might want to use jewelry pliers. 


Step eight: Pin the embroidered piece to your blouse, or jacket, or hat, or wherever you like, and enjoy!


This is a great way to enjoy some of those smaller embroidery pieces. I hope you get to give this a try. 

Hope you have a happy Tuesday!

Hi, I'm Kristen! I am a lover of all things stitchy and crafty. I have been sewing for as long as I can remember. My grandmother taught me how to sew Barbie clothes when I was young and I have been sewing ever since.

You can find me at Bobbypin Bandit, on Instagram, and my Etsy shop.

January 31, 2013

New Stitches With Portuguese Soul - part III

Olá! This week I bring you one of the most famous regional embroidery from Portugal - Guimarães Embroidery. I've not yet reviewed it here on Feeling Stitchy, but I'll be doing it soon. Today I'll only be showing some very beautiful "re-interpretations" of this traditional embroidery made by inspired Portuguese hands...

Bárbara begun "blogging" last Summer and soon she decided to devote her embroidering days to learn Guimarães Embroidery. As in old times she thought of making a sampler. Her blog, ponto cereja  (cherry stitch), written in Portuguese, is like a diary on that journey of learning the stitches of Guimarães Embroidery where you'll find many photos of the stitches and illustrated step by step instructions. Now we can say she is an expert and her new works show it, like her brooch or keyring.

But she never forgets which is the best stitch in the world...

Guimarães Embroidery, by Bárbara, blogged.

Vânia, from dedal no dedo (thimble on finger), proposes an incredible "reinvention" of Guimarães embroidery... These pieces belong to a project that were shown in the city that gives name to this regional embroidery. The neighboring embroidered little boxes are so cute and original - I simply love them and they were my first choice among Vânia's work. But you must see her "embracing the rain collection" and many other creations. You can get to know more about her work here...


Embroidered little boxes by Vânia, blogged.
Donalberta is an incredible example of how families can work together passing traditions from generation to generation and gathering different knowledge to make something new. In this case, mother and daughters use their skills in stitching and communication to take their project further. You'll find some traditional pieces of embroidery, like the fiancé handkerchiefs or the handmade bowls, but also original applications of old stitches like the dresses of Berta (the doll) inspired by Guimarães or Azores Embroidery or the beautiful bookmarkers. And here you'll find more...

Berta's dress inspired by Guimarães Embroidery, by Donalberta

This amazing neckwarmer is also a great example of how joint efforts can have unpredictable results. The mold of Alice's charming neckwarmers and the stitching of "the girls" (also mother and daughter) from ponto margarida (daisy stitch) created something unique. As always, Alice could not resist to follow all the production process of this piece, beginning in the linen fields. As she usually says" the process is an end in itself" and I believe this was the inspiration for an incredible project (really worth reading - some are translated into English) named "Saber Fazer", where she describes and beautifully illustrates artisanal and semi-industrial production techniques in Portugal. You can get to know Alice better in her blog, noussnouss.


Noussnouss x Ponto Margarida Noussnouss x Ponto Margarida
Embroidered neckwormer by Alice e Ponto Matgarida, blogged.

Each week I'll be more and more proud to show you all these inspired stitches with Portuguese soul! Feeling happy!!!

January 30, 2013

A Challenge!

Hey there all you wonderful stitchy people! Are you up for a fun challenge? Over at Craftster we are doing an altered image needlework challenge. Check it out! If you are not a member of Craftster, go and sign up right now. It's super easy and ten tons of fun!

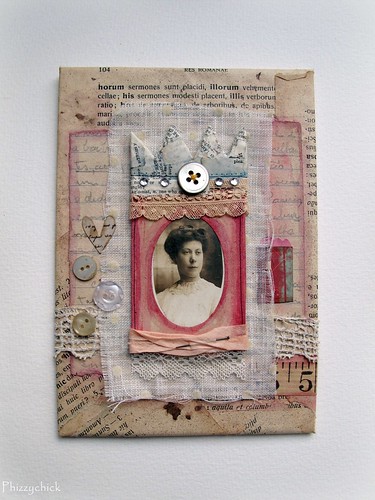
Portrait 3
Special thanks to Phizzychick for making such awesome art! 

Details of the challenge:

YOU MUST BE A MEMBER OF CRAFTSTER.ORG!

Stitch up an altered photo. You can use any type of material and any type of stitch (embroidery, cross, felt...) and post your entry with picture DURING THE PROPER TIME!  The image can be old, new, but it must be a photo.

The rules:

  • The project must contain a photo (old or new) and must have some form of stitching on the photo-see explanation below*-the picture must be incorporated into the piece, not just stitching a frame for a picture
  • It needs to be a project you haven't posted on Craftster before.
  • Each person may only enter one project
  • Entries may be posted between March 1st-7th
  • Voting will happen March 8th-15th
  • The winner will be announce March 16th

    On March 1-7, to post your entry, simply start a new topic on this challenge board (the needlework challenge board). Post a picture and a little bit about the piece. DO NOT POST YOUR CHALLENGE HERE! Easy, peasy!

* The picture has to be incorporated somehow into the stitching. You can stitch on the picture or sew the picture into fabric. You don't necessarily have to actually sew onto the photo unless you want to but it you also can't just create around a picture.  The picture has to have some sort of stitch involved in it. The picture has to be altered some way.

There will be prizes and you will be featured on Craftster and on Feeling Stitchy. 

Beauty in progress

New Embroidery
Stitching by Jeni Baker

I've said this before, but oftentimes, looking at a project right before you begin, laying out your colors, and being in touch with your inspiration is every bit as exciting as finishing a piece. I am in love with the bright, gorgeous colors Jeni has chosen for this project - read more about her project on her lovely blog, In Color Order. Beautiful work, Jeni!

Hi, I'm floresita, editor of Feeling Stitchy. I'm an avid stitcher, knitter, and crafter. You can see more of my stitching on Instagram and my blog. My vintage transfer collection is on Vintage Transfer Finds.

Feel free to email me with any ideas for the blog!

January 28, 2013

Love...

Advances
Stitched by peregrine blue

I'm loving this colorful progress shot in Constanza's Flickr stream - the delicious rainbow colors she's used to handstich little bits of letters are just gorgeous - beautiful work!

Hi, I'm floresita, editor of Feeling Stitchy. I'm an avid stitcher, knitter, and crafter. You can see more of my stitching on Instagram and my blog. My vintage transfer collection is on Vintage Transfer Finds.

Feel free to email me with any ideas for the blog!

January 27, 2013

New Embroidery with Vintage Patterns

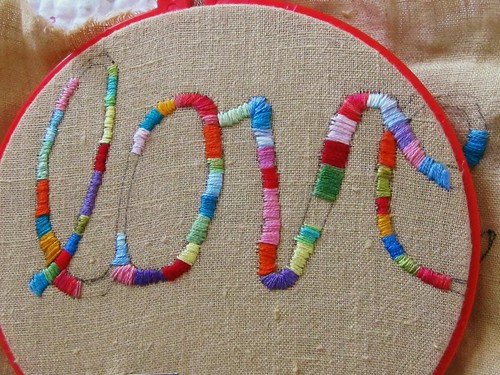
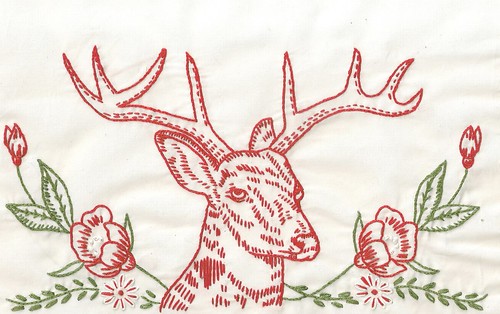
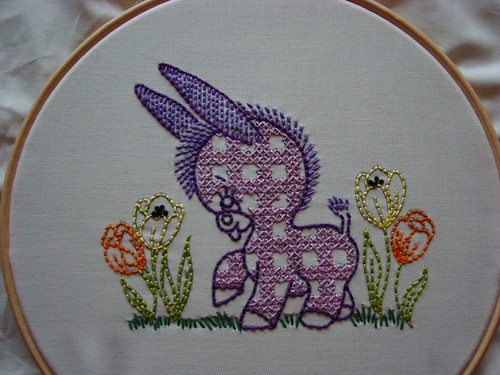
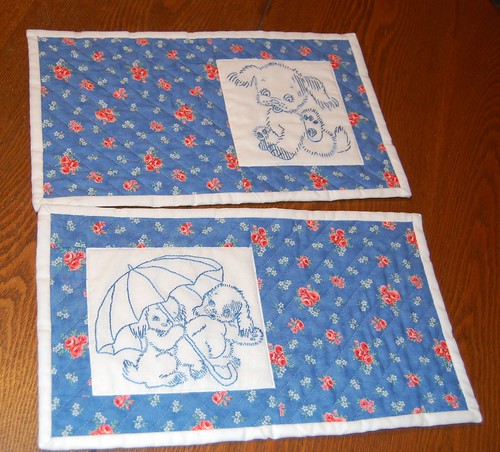
Hi, everyone, and sorry for being a day late with my last-Saturday-of-the-month-post as as I've been a bit busy doing some behind the scenes stuff with our group's contest.  Although I love (and I hope you do too!) the new interview format, this month I'll just doing a round-up of some great photos that were added to our pool recently.  If you like them, be sure to click over to flickr and leave the stitcher a comment!  I'll be back on Saturday, February 23 with an awesome interview and a recap of the contest.

And about that contest...... it's not too late to enter..... All the info is here!


Redwork Reindeer Donkey embroidery DSC_0373 Home Sweet Home Pink fish

January 25, 2013

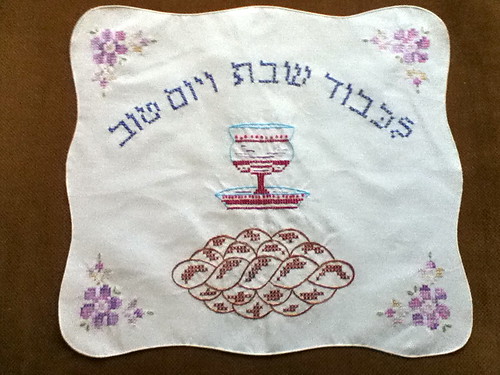
Auntie's Challah Cover

Auntie's Challah Cover
Stitched by ApocalyseHow

I adore this simple vintage Challah cover, as stitched by ApocalyseHow. She says under her photo that her great-aunt began the embroidery on this piece, and she completed it. I love projects like this that span many generations - as if with our skills, we are capable of conversing across time, and sharing meaningful moments with each other. Bravo, ApocalyseHow! :)

Hi, I'm floresita, editor of Feeling Stitchy. I'm an avid stitcher, knitter, and crafter. You can see more of my stitching on Instagram and my blog. My vintage transfer collection is on Vintage Transfer Finds.

Feel free to email me with any ideas for the blog!

January 22, 2013

Tutorial Tuesday

Happy Tuesday, everyone! It seems Valentine's Day is everywhere I turn. In order to join in on the Valentine's Day prep, I searched for some vintage embroidery patterns perfect for the day o' love and found some fantastic ones at French-Knots

Once I had decided on which pattern to stitch, I thought it would be cute for a Valentine's Day coffee/tea cup cozy. I used the lazy daisy pattern of the heart with an arrow through it, which is available here. I scaled the pattern down to 35% and printed it to fit the center front of the cozy.


In order to make a Valentine's Day coffee cup cozy of your own or to gift, you'll need the following supplies:

-fabric for front and back of the cozy (approximately 10x5 inches of each)
-embroidery hoop
-embroidery pattern of choice
-embroidery floss (I used DMC floss No.8 in red 666 and Perle Iris No.8 in 5064)
-batting
-2-inches of elastic 
-one button
-sewing machine
-scissors
-iron

Step One: Transfer and stitch your pattern onto your fabric of choice. I scaled down my pattern of choice to 35%, before printing and transferring it to the fabric. 


Step Two: Once your stitching is complete, take the template and place it over your stitches, making sure the stitching is centered. Using the template, cut one of each of the front, back, and batting.


Step Three: Layer the pieces so they can be sewn together starting with the batting, then fabric back right side up, and fabric front with right side down. Take the elastic and form a loop. Place the loop side between the front and back pieces on one of the shorter sides. Pin the three pieces together. Stitch around the edges with a 1/4-inch seam. Make sure to leave a 2-inch space open so you can turn the cozy. 


Step Four: Clip the corners, turn the cozy, and press. 


Step Five: Stitch around the edge of the cozy to finish off the edges and close the space used to turn it right side out. 


Step Six: Place the button on the short edge of the cozy, opposite the side with the elastic, and stitch in place. 


Step Seven: Wrap the cozy around your next coffee or tea cup, and you have instant Valentine's Day flavor.


Hope you enjoy and give this tutorial a try! Have a great day!

Hi, I'm Kristen! I am a lover of all things stitchy and crafty. I have been sewing for as long as I can remember. My grandmother taught me how to sew Barbie clothes when I was young and I have been sewing ever since.

You can find me at Bobbypin Bandit, on Instagram, and my Etsy shop.

SITE DESIGN BY RYLEE BLAKE DESIGNS