
I was hoping to have a new project ready for today but I'm in the process of moving out of & renovating a house for sale so I just haven't got there...it's a promise for next week OK?
As my Plan B I thought I'd share how I created the design for my very favourite embroidery project (featured this morning in Floresita's introduction).
How to turn a photograph into an embroidery design
(for non-drawer types)
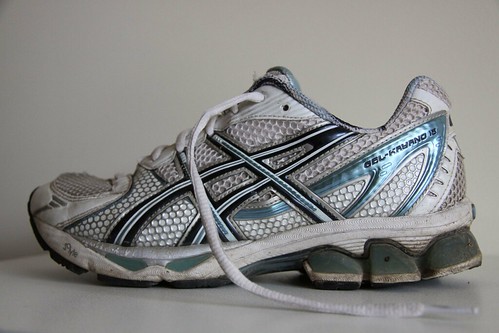
Step 1:
Take a photo of what it is you want to embroider.
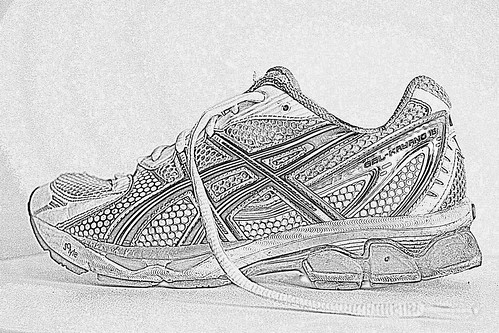
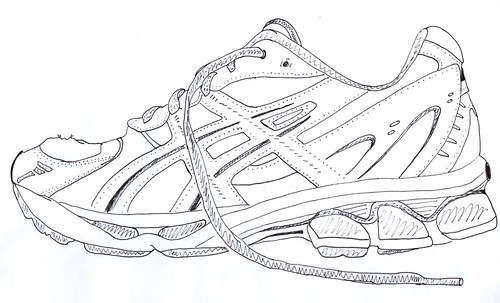
Step 2:
Use either photoshop or picnik to turn your image into a pencil sketch. You could stop here if you want your embroidery project to be "photographic".
If you don't have access to either of these applications you could just photocopy or turn your image black & white.
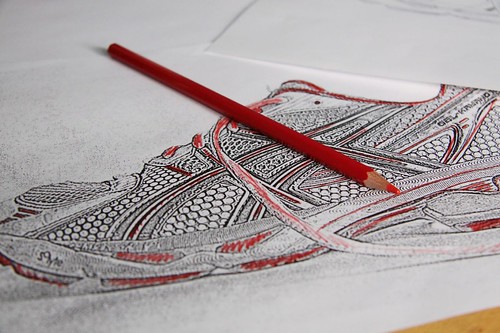
Step 3:
Print your pencil sketch image.
Muck around with your coloured pencils to work out which elements you want coloured.
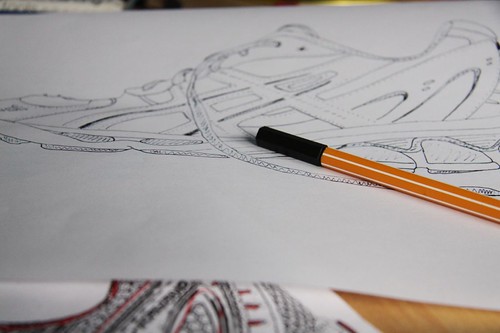
Step 4:
Using a light box or window trace your design with a fine liner.
Step 5:
Scan & size your image according to your project requirements.
Step 6:
Then trace onto your fabric using a water soluable marker.
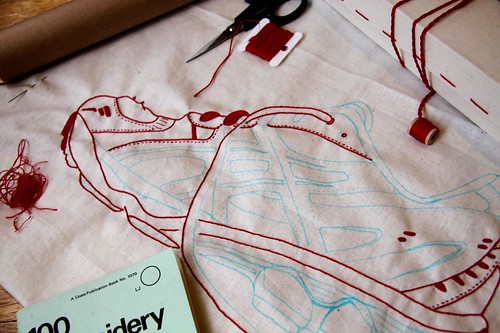
Begin stitching.


Great post! Will have to try it with a photo of my kids :)
ReplyDeletesweet.
ReplyDeleteWow, what an inspiring tutorial! I love how the sneaker turned out. I can't wait to give it a try myself.
ReplyDeleteIs there a way to trace the pattern and then iron it onto the fabric? Any paper out there that can do that? Thanks~!
ReplyDeleteGreat idea! My fingers are itching to start stitching!
ReplyDeleteThat is absolutely Stunning.
ReplyDeleteBrilliant! You found a perfect subject for your first post. :)
ReplyDeleteGreat and fun tutorial, I will try this, I love embroidery!
ReplyDeleteFantastic!
ReplyDeletegreat tutorial! I will definitely have a go at embroidering my favorite drawing!!! Thanks for sharing!
ReplyDeleteGood to see you getting out there Kirst! And you know I love this embroidery of yours. Thanks for the tuesday afternoon inspiration!
ReplyDelete~Holly
http://twocheeseplease.livejournal.com
can't wait to give this a try. great idea and welcome!!
ReplyDeleteI love the shoe! Thanks for the tutorial.
ReplyDeleteey great! I am totally going to try that out with some bird-fotos:)
ReplyDeleteThanks everyone.
ReplyDeleteBex...
I don't know of any iron on product but I know that clover make a carbon paper for exactly this purpose. A package contains 5 sheets - 1 each of white, blue, yellow, green and red.
I guess maybe sublime stitching might be able to help you out with something similar.
This is so cool. I had no idea photoshop and piknik did that. I'll have to try it out. Thank you!
ReplyDeleteThis is great idea..very useful for me..thanks for sharing...
ReplyDeletelove
lakshmi
I usually jsut hand sketch/draw/paint from my photo, but this is a great alternative method and I've seen that function on my Photoshop Elements package.=) Thanks for the ideas!=)
ReplyDeleteBex,
ReplyDeleteIt is possible to get pencils that produce an iron-on line. The "Hemline" brand do them, and I think others as well. You can use ordinary greaseproof paper or baking parchment with the pencils.
That said, the iron on line does fade, so if it is a big project, it's better to find another way.
Bex said...
ReplyDeleteIs there a way to trace the pattern and then iron it onto the fabric? Any paper out there that can do that? Thanks~!
bex -- YES. it's called sulky "totally stable" iron-on, tear away stabilizer. i get mine at jo-ann's. i use it for that purpose all the time -- but be ready to pick, pick, pick with tweezers! you have to carefully peel and pick it out from the stitches after you're done...
gaaahh! I have never messed around with picnik effects before! this is so cool. Thank you. This solves my problems of hating Illustrator and trying to figure out how to make embroidery patterns.
ReplyDeleteGreat idea and easy to follow! I like it very much!
ReplyDelete