Showing posts with label Halloween embroidery. Show all posts

October 26, 2016

Wonderful Wednesday #24: Little Thimble Studios


Ok, I love Halloween, and I also love a quick project you can sandwich in between all of your bigger crafting projects - this Halloween PDF Pattern by Little Thimble Studios looks perfect for that!

By the way, there's a little poll on our blog right now, would you mind clicking over to see it? I'm just curious how you found us, in particular, how you found this post! As you may know Twitterfeed is going away, which is how we've been doing our auto-Twitter and Facebook posts. I'd like to know how you find us, and where you would like to see our posts. Thanks all! :)

Hi, I'm floresita, editor of Feeling Stitchy. I'm an avid stitcher, knitter, and crafter. You can see more of my stitching on Instagram and my blog. My vintage transfer collection is on Vintage Transfer Finds.

Feel free to email me with any ideas for the blog!

October 26, 2015

MooshieStitch Monday: Halloween Ghosts Pattern

halloween ghost embroidery pattern

Halloween week is upon us and I have one more spooky project to share.

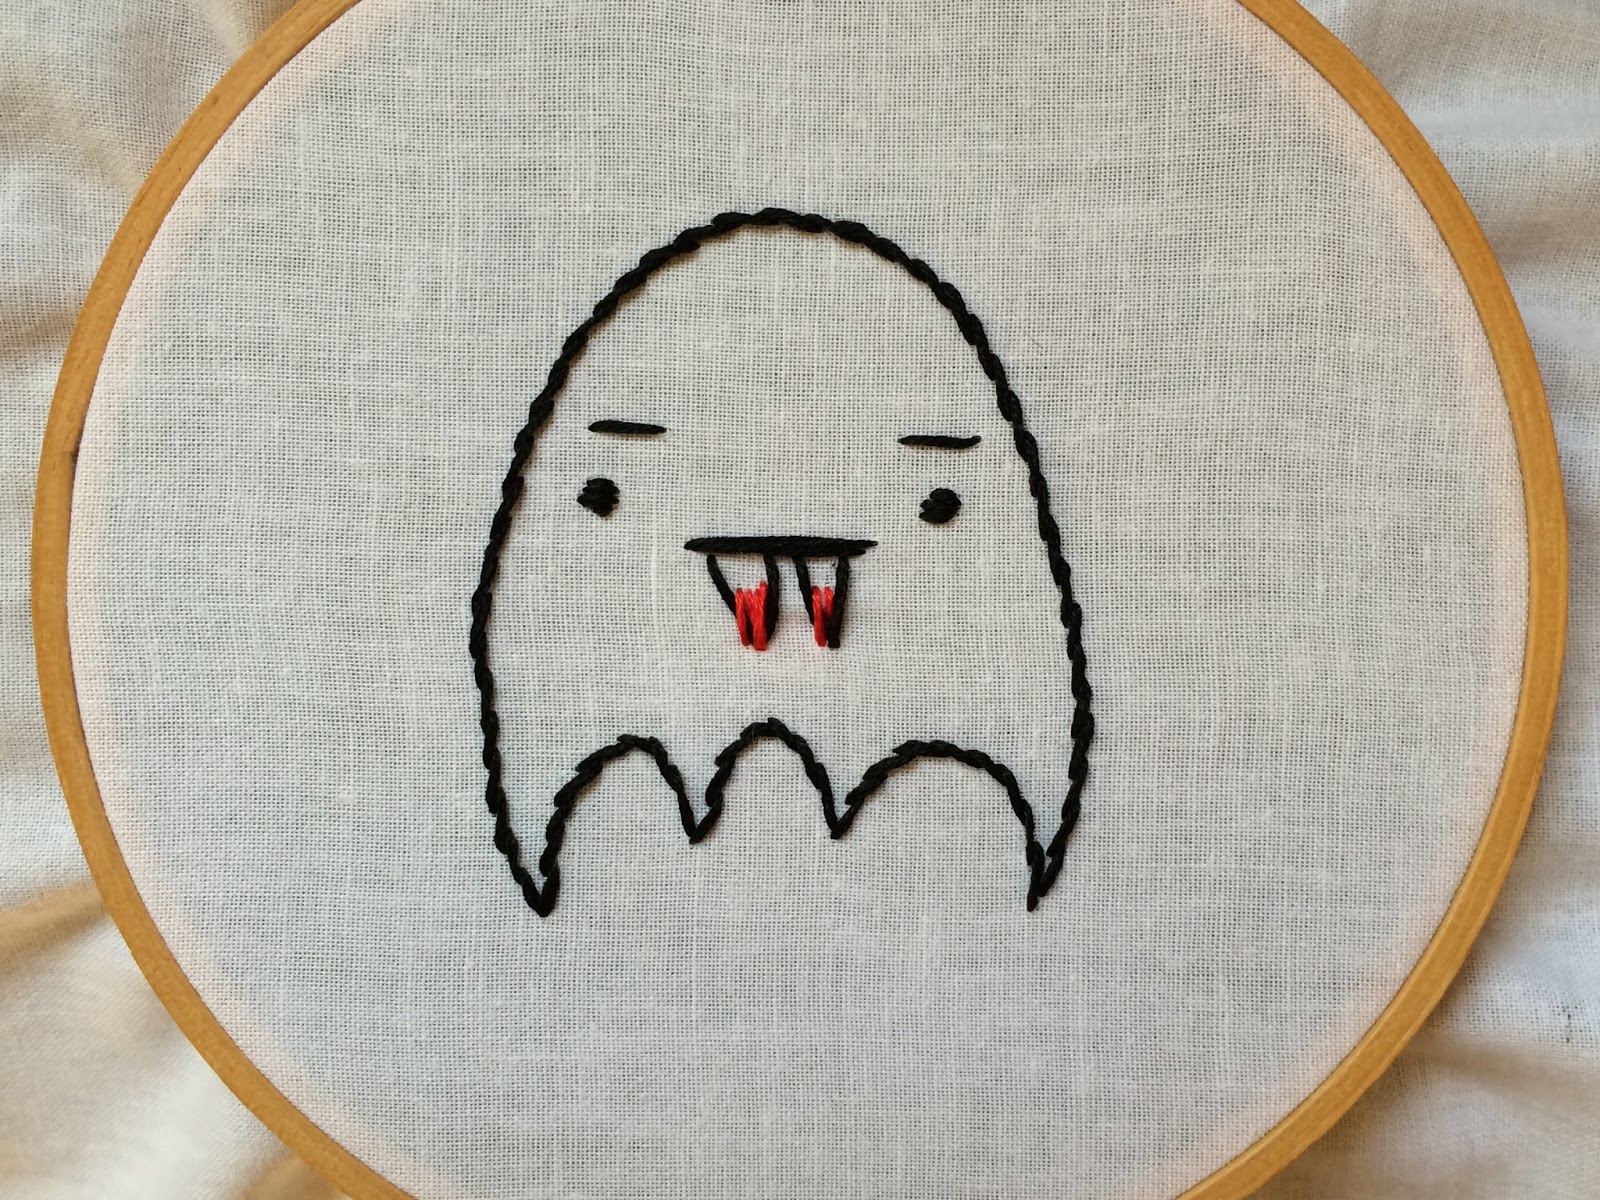
I have a pattern for you! It's a vampire ghost and a Frankenstein ghost.

I decided to use the pattern to make little hanging decorations for Halloween!


halloween ghost embroidery pattern


I traced the ghosts with a water soluble pen and stitched them up.

For the vampire, I added some "blood" on the teeth :)

halloween ghost embroidery pattern


halloween ghost embroidery pattern

Using my pinking shears, I cut the ghosts fabric and black felt into rectangles. 

halloween ghost embroidery pattern

Then, I attached the ghosts onto the felt rectangles with straight stitches around the edges and trimmed the felt down a bit - I thought the felt rectangles were a little too big...

halloween ghost embroidery pattern

halloween ghost embroidery pattern

I attached a piece of black ribbon with french knots onto the felt so I could hang them!

halloween ghost embroidery pattern

Up close!

halloween ghost embroidery pattern

halloween ghost embroidery pattern

If you don't want hanging decorations, you can stitch these ghosts however you like! 

I was thinking maybe stitched onto little fabric treat bags? 

Or stitched on a pillow case that will be used for trick-or-treating? 

(Or maybe I am the only one who used a pillow case as my candy bag for trick-or-treating as a kid?) 

halloween ghost embroidery pattern

Print the pattern, stitch up these ghosts, and share your photos on the Flickr Embroidery Group!


Happy Halloween!


October 12, 2015

MooshieStitch Monday: Embroidered Halloween Pumpkin Lollipop Covers


embroidered halloween pumpkin lollipop covers

Last post I embroidered some Halloween ghost lollipop covers.

Up next: pumpkin lollipop covers!

What you need:
5" x 5" squares orange fabric
Black or yellow embroidery floss
Green ribbon
Lollipops (I used Tootsie Pops)
Basic supplies: hoop, scissors, pencil/transfer pen
Optional: coins (such as a penny or nickel)

1. Draw a pumpkin face on your orange fabric square.

embroidered pumpkin lollipop covers


2. Stitch the face with a satin stitch.


embroidered pumpkin lollipop covers

embroidered pumpkin lollipop covers

embroidered pumpkin lollipop covers


3. Remove the fabric from the hoop and grab your lollipops, ribbon, and coins!


4. Tie the fabric around the lollipop with the green ribbon.

embroidered halloween pumpkin lollipop covers

If you want the pumpkins to stand up, include the coin when you tie the fabric around the pop - it will work as an anchor to stand up.

embroidered halloween pumpkin lollipop covers

Up close....

embroidered halloween pumpkin lollipop covers


I stitched up more pumpkins using yellow floss for the face, outlining it with black.

embroidered halloween pumpkin lollipop covers


These do not have a coin inside and are just laying down.

embroidered halloween pumpkin lollipop covers

embroidered halloween pumpkin lollipop covers


I hope you try stitching these little pumpkin covers! If you do, be sure to post photos in the Flickr Embroidery Group.


September 21, 2015

MooshieStitch Monday: Embroidered Halloween Ghost Lollipop Covers

Is it too early to start with Halloween posts?

Well, I am going to anyways since it is my favorite holiday and I have probably the easiest Halloween embroidery project ever to show you....

Embroidered Halloween Ghost Lollipop Covers


I remember making these as a kid with Kleenex and markers - anyone else?!?

What You Need:
7.5" x 7.5" square white fabric
Black embroidery floss
Black or white ribbon
Lollipops (I used Tootsie Roll Pops)
Basic supplies: small hoop, scissors, pencil/transfer pen

1. Draw a ghost face on your fabric with a pencil or transfer pen. I went very basic with 3 ovals for eyes and a mouth - but get creative and choose whatever ghost face you like!


2. Stitch the eyes and mouth in satin stitch with black floss.


Embroidered Halloween Ghost Lollipop Covers


Don't know the satin stitch? Here is an easy tutorial to learn it!

First eye complete...


Second eye...

Embroidered Halloween Ghost Lollipop Covers


And mouth!

Embroidered Halloween Ghost Lollipop Covers


3. Remove the fabric from the hoop - grab a lollipop and a piece of ribbon or yarn!

I was so lazy that I didn't even bother to iron the hoop marks in my fabric - you don't really see them once you tie the ribbon around your ghost.

Embroidered Halloween Ghost Lollipop Covers


4. Tie the fabric around the lollipop with your ribbon - and you are done!

Embroidered Halloween Ghost Lollipop Covers

I used both black and white 1/4 inch ribbon.

Embroidered Halloween Ghost Lollipop Covers


On one of my ghosts I stitched the word "Boo!"

Embroidered Halloween Ghost Lollipop Covers


Really easy, right?? I hope you decide to make some ghosts for Halloween this year.

Embroidered Halloween Ghost Lollipop Covers


If you do, be sure to post your ghost photos in the Feeling Stitchy Flickr Group!


October 15, 2013

Tutorial Tuesday

Happy Tuesday, everyone!

I can't believe Halloween is nearing. It's my most favorite time of year! I can hardly wait for the costumes and treats and pumpkins! I am having a small get together to celebrate Halloween this year and knew that I needed to infuse embroidery into the festivities. I decided on cloth napkins.


I used Gina Matarazzo's Halloween Pals embroidery patterns on white cotton for these napkins. I love her patterns and these pumpkin pals are super cute. 


To make some Halloween cloth napkins, you will need the following:

- Four fat quarters (18x22-inches) of cotton 
- Embroidery hoop and stitching supplies
- Iron and Ironing board
- Sewing machine and supplies


Step One: Transfer pattern to the lower corner of fabric. Keeping the pattern at least 2-inches away from either edge. I placed the pattern on the lower corner of the right side, but it's up to you which side you prefer. 


Step Two: Stitch each napkin. When all are complete, wash, dry, and press. I don't like to press the embroidery itself, I usually press around them so as not to snag or warp the stitches. It's a good idea to place a thin piece of fabric over your embroidery to press it, so that the hot iron isn't directly on the stitches.


Step Three: Fold the four edges of the napkin over 1/4-inch and press.


Step Four: Fold the edges over a second time and press.


Step Five: Using the zig-zag stitch setting on a sewing machine, stitch along the fold that you just created to seal the edges and create a clean hem. 


Step Six: Fold the napkin so the embroidery is facing to out. Give each napkin another light press. 


Step Seven: Set the table and get ready for smiles and Halloween happiness to ensue!

This is a fun project to put together before Halloween. Hope you get to give it a try!

Hi, I'm Kristen! I am a lover of all things stitchy and crafty. I have been sewing for as long as I can remember. My grandmother taught me how to sew Barbie clothes when I was young and I have been sewing ever since.

You can find me at Bobbypin Bandit, on Instagram, and my Etsy shop.

October 23, 2012

Tutorial Tuesday


Happy Tuesday, everyone! I have a Halloween themed tutorial for you today. I picked up this free embroidery pattern of a crow with a Halloween treat o'lantern over at Bird Brain Designs. I wanted to feature him somewhere in my kitchen, and thought an apron would be perfect. 


To make this apron, you will need:

-Embroidery floss
-Hoop
-Halloween Crow Pattern
-Sewing machine
-1 yard of fun Halloween fabric 
-Sewing machine
-Coordinating thread
-Iron
-Scissors
-Sewing needle
-Measuring tape or a rotary cutting mat

I used a variation of a simple waist apron pattern. I will include the steps here, but feel free to visit this site for a free pattern

Let's get started!

Step 1: Embroider your crow onto the fabric of your choosing. I decided to use white cotton. Cut your fabric into one 33 x 22.5-inch piece, four 3 x 36 inch strips, and one 10 x 10 inch square.


Step 2: Press under the edges of the embroidered fabric. I used a 1/4-inch fold here. Center the embroidery on the pocket front and use your sewing machine to stitch around.


Step 3: Fold all four edges of the pocket under a 1/4-inch and press. Then fold again and press to create a finished edge. Machine stitch around the edges to seal the fold.

Step 4: Pin your pocket on the front side of the apron piece. You can choose either left or right and make sure it is even. Following the stitch you used to seal the folded edged, stitch around the sides and bottom making sure to leave the top open. The pocket piece is finished!


Step 5: Fold and press the four edges of the main apron piece under at 1/4-inch. Fold over again and press. Machine stitch all the way around to close that fold. This will give you a clean hem for the entire apron.


Step 6: Now we move onto the straps for the waistband. Place two straps right sides together and machine stitch the shorter end. This will give you two long strips that will become the waist band. 


Step 7: Carefully press all the edges of both strap pieces under 1/4 of an inch. 

Step 8: Place the strips wrong sides together making sure to match the center seams and edges. Machine stitch all the way around to seal the waistband. 

This is what your waistband will look like. 


Step 9: Fold your apron in half and mark the top center. Do the same with the waistband. When you move on to gather your apron, it will be easy to sew because you will be able to match the centers. 

Step 10: Using a sewing needle and some thread, hand sew a gathering stitch at the top of your apron piece. I placed that stitch right underneath the top hemline. Begin to gather the apron until it measures 17-inches wide. 


Step11: Carefully pin the gathered apron to the waistband and machine stitch slowly, ensuring that you catch the gathered pieces on the underside of your waistband and it stays even. 

Step 12: Tie that apron on and get ready for the Trick or Treaters!


Hope you enjoy this tutorial and you have very happy Tuesday!

Hi, I'm Kristen! I am a lover of all things stitchy and crafty. I have been sewing for as long as I can remember. My grandmother taught me how to sew Barbie clothes when I was young and I have been sewing ever since.

You can find me at Bobbypin Bandit, on Instagram, and my Etsy shop.

SITE DESIGN BY RYLEE BLAKE DESIGNS