Showing posts with label Easter. Show all posts

April 10, 2017

MooshieStitch Monday: Easter (and Spring) Stitching Ideas

Hey Everyone! Looking for something fun to stitch for Easter next weekend?

Here are some ideas found in the Feeling Stitchy blog archives!

* If you want an easy quick project, try this adorable little chick embroidery.

Mooshiestitch Monday - Little Chick Embroidery

Click here to see more photos and to get the link to the (free!) pattern.

* Get your sewing machine out and make this Easter basket. You can personalize it with any embroidery pattern you like also.


* Who likes Peeps?? Make this fun felt Peeps embroidery for Easter!!


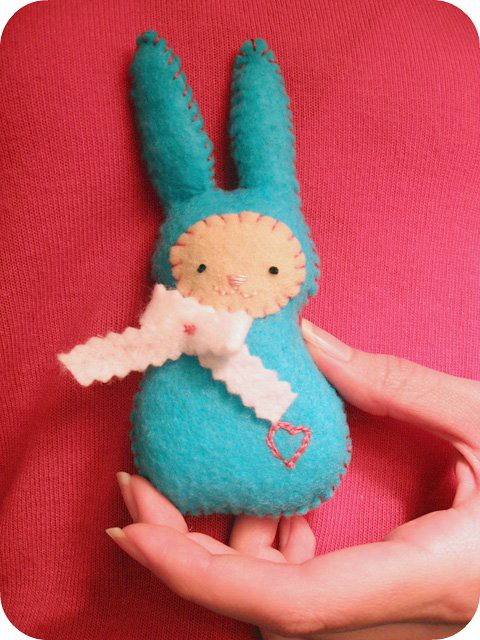
* Make your own Easter bunny!


* For those readers living where it is currently Springtime, you could try stitching this woven basket with flowers (or add little Easter eggs instead of flowers!)


* Lastly, to get you in the mood for "Spring cleaning", I love this tutorial on how to make embroidered labels to organize all your stitching supplies. 


March 21, 2016

MooshieStitch Monday: Little Chick Embroidery

embroidered easter chick


** Free Easter Embroidery Pattern Alert **


This post is to let you know about this adorable free little chick embroidery pattern  I found on the Shiny Happy World blog.

Here is how I stitched it:


embroidered easter chick


I followed her idea of stitching over an appliqué - so I stitched over yellow felt and then added some flowers!


embroidered easter chick

embroidered easter chick

embroidered easter chick


Isn't this little chick the cutest pattern??


FYI:

If you are looking for another project for Easter, check out this Embroidered Felt Easter Egg pattern on Shiny Happy World also (for FREE and with tutorial!)


March 14, 2016

MooshieStitch Monday: Little Felt Peeps


Peeps


If you are a reader in the States, you are well aware it is currently the season of Peeps.

They are in every store for Easter right now.

Although I am not a fan of eating Peeps, I wanted to include them somehow in a simple embroidery project, especially after I found this free Peeps pattern.

Here is what I did:

I traced the pattern onto freezer paper (onto the non-shiny side).


Place the freezer paper Peeps (shiny side down) onto felt and hold your iron over the pattern for about 5 seconds.


I used basic craft felt and set my iron to the Acrylic/Silk (no steam) setting. The freezer paper will adhere to the felt just long enough for you to cut them and the paper will peel right off.


I have never used freezer paper like this before and it works great! I will definitely use this method again.

Then I whip stitched each Peep onto my fabric.


Yellow Peep...

Pink Peep...

Purple Peep...

I stitched french knots for the eyes and nose.


I thought it needed something extra so I added some flowers.


Per the Peeps wiki page, it says they are sold in Canada also (you lucky Canadians!), so I am curious if any readers out there know if they are sold anywhere else in the world!

I hope you liked this little Peeps project. If you decide to use the pattern for an embroidery project or anything else, let me know. I would love to see!

Also, have you ever used freezer paper for tracing patterns??


April 8, 2014

Tutorial Tuesday

Happy Tuesday, everyone!

Spring and Easter time is upon us. There are so many darling tutorials with bunnies and Easter eggs, that I felt a round-up was appropriate to share with you this week. 


The embroidered face on this bunny clutch is too cute for words! Head over to Sew Together for this darling tutorial


Sedef over at Down Grapevine Lane has an awesome tutorial for a french knot bunny! Change up the color of floss to match your decor and it's instant hoppy.... I mean, happy!


If you are in a rush, have no fear, these embroidery hoop Easter eggs come together quickly. Visit Crafting a Green world for all the details.


I love that this bunny looks like he is peeking out over the edge of the embroidery hoop! Gwenny Penny has put together the tutorial that comes with the bunny template. I think her appliqué is fantastic, but her bunny template works well as an embroidery pattern, too.


Don't forget to revisit our tutorial from last year for an embroidered Easter basket. It's still available for you to use!


Hope you enjoy and have the chance to put some, or all, of these together!

Hi, I'm Kristen! I am a lover of all things stitchy and crafty. I have been sewing for as long as I can remember. My grandmother taught me how to sew Barbie clothes when I was young and I have been sewing ever since.

You can find me at Bobbypin Bandit, on Instagram, and my Etsy shop.

March 23, 2014

Patterns: New Bumpkin Bear!


L to R clockwise - Rabbit's Favourite Outfit, Over The Garden Gate, The Giraffe Ride - by Bumpkin

Just in time for some Easter stitching, there are three new embroidery patterns by Bumpkin! You can check these out, alongside Bumpkin's classic designs here.

Hi, I'm Jo - I feature new embroidery patterns Sundays on Feeling Stitchy. I also post on our Twitter and Pinterest.

Is there a new pattern you'd like us feature? Email me!

March 31, 2013

Patterns: Easter Round Up


Bunny in a hoop by Down Grapevine Lane

Happy Easter everyone! I know it's a bit too late for even the speediest of stitchers to stitch anything for Easter now, but here's some suggestions to bookmark for next year! First up is Bunny in a hoop by Down Grapevine Lane, a free pattern that comes with a great tutorial. I love the french knots, they remind me of hama beads!

Next up is this free pattern by LiliPopo, isn't she sweet? Here is in an in progress shot of me stitching the pattern through paper onto felt.

Lilipopo work in progress


And finally and not just for Easter, how about Wendi Gratz's Spring Bird? You can download the free pattern by following the link here.

Flora the Spring Bird

Flora the Spring Bird by Wendi Gratz

Hi, I'm Jo - I feature new embroidery patterns Sundays on Feeling Stitchy. I also post on our Twitter and Pinterest.

Is there a new pattern you'd like us feature? Email me!

March 19, 2013

Tutorial Tuesday

Happy Tuesday, everyone!

Today's tutorial is a little basket, fun for Easter egg hunts and treats that the Springtime brings. I found a fun Spring and Easter Eggstravaganza PDF embroidery pattern pack over at The Split Stitch and used it to create the front of this Easter basket. 


This little basket came together very quickly. To make your own you'll need the following supplies:

-Two 10x10-inch pieces of exterior fabric (I used white cotton muslin)
-Two 10x10-inch pieces of interior fabric
-Two 10x10-inch pieces of felt for lining
-One 18x5-inch piece of fabric for the strap
-Embroidery pattern of choice (I used this one)
-Embroidery hoop and floss in Spring pastel colors
-Coordinating thread
-Sewing machine
-scissors
-Iron and Ironing board


Step One: Begin by embroidering one of the exterior pieces of fabric. The pattern pack I used from The Split Stitch came with the font for the word "Easter," and I used those letters to create the word "eggs."


Step Two: With a finished embroidered exterior piece, now you can begin to build the basket. Create a sandwich beginning with a layer of felt, exterior fabric right side up, exterior fabric wrong side up, and another piece of felt. You want to make sure you have the right sides of the exterior fabric facing each other in between the pieces of felt. Then sew a 1/4-inch seam along the sides and bottom leaving the top open.

Step Three: In order to square the bottom of the basket, take one corner and press it flat so the seams are touching and it creates a triangle. The seams should be flat and pressed open, which I forgot to demonstrate in this step, but it's correct in Step Five. Stitch 2-inches down from the point or peak of the triangle. Repeat on the other corner and clip the excess. Set this piece aside.


Step Four: Place the interior pieces right sides together and stitch around the sides and bottom leaving a 2-inch unstitched space on one side in order to flip the basket inside out.


Step Five: Square off both bottom corners of the interior piece the same as the exterior piece from Step Three above, making sure to press open the seams.


Step Six: Now it's time for the strap. Take the 18x5-inch piece, fold it in half along the long edge and press. 

Open up this piece and fold each long side in halfway, so that the edge meets the fold line you just created, and press.


Fold the strap in half again, so the folded edges meet, and press. 


Sew a 1/4-inch seam along both long edges of the strap.


Step Seven: Now the basket can be assembled. Place the interior piece inside of the exterior piece, right sides together. Take the strap, place it inside the basket body, between the exterior and interior pieces. Making sure not to twist it, match each short edge with a side seam, pin in place.


Stitch a 1/2-inch allowance along the top. 


Step Eight: Pull the interior piece out of the exterior and flip the basket using the unstitched space in the side of the interior piece. 

Stitch the open space closed, as close to the edge as possible, backstitching at the beginning and end. 


Step Nine: Topstitch around the top edge of the basket opening, making sure not to catch the strap.


Step Ten: Fill with eggs or treats and have fun!


Hope you get to give this a try. Have a happy Tuesday!

Hi, I'm Kristen! I am a lover of all things stitchy and crafty. I have been sewing for as long as I can remember. My grandmother taught me how to sew Barbie clothes when I was young and I have been sewing ever since.

You can find me at Bobbypin Bandit, on Instagram, and my Etsy shop.

SITE DESIGN BY RYLEE BLAKE DESIGNS