Showing posts with label embroidery kit. Show all posts

July 12, 2019

Project a Month - Linladan Circle Kit

Project a Month July - Linladan Circle Kit as featured by floresita on Feeling Stitchy

This month I will be stitching a beautiful Circle Kit from Linladan. If you would like to stitch along with me, there are more lovely kits in her store, including alternate color ways of this Circle kit!

Here is an image from Linladan, tantalizing small, of what my finished embroidery might look like:


Isn't it gorgeous? First off, I'd like to give you a tour of the kit, so you can see everything that comes inside...

A Look at the Kit

Linen kit by Linladan

My kit came with a photo of the original Swedish kit from the 1960's that this is based on. On the left you see the stitched version, on the right, the drawing.
Linen kit by Linladan

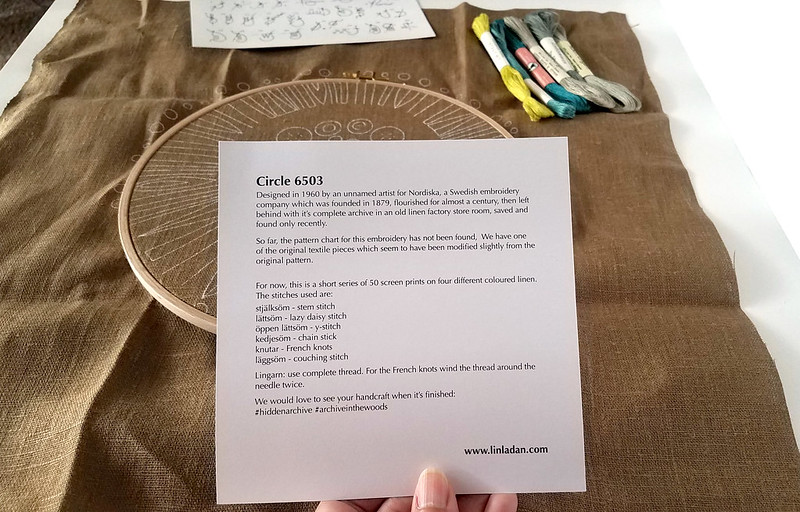
Tanja includes some history on the Circle Kit, with a list of some of the stitches used, as well as their Swedish names!

Linen kit by Linladan

There's another list of stitches included, the screenprinted linen, and vintage linen floss.


About the Linen Threads

Linen kit by Linladan

Linen floss has a very different texture than the cotton floss I am used to using. They are stiffer, sort of the texture of unwaxed tooth floss, if anybody here remembers that! :)

Linen floss has a gorgeous sheen that lends itself really well to couching and satin stitch.

Linen kit from Linladan

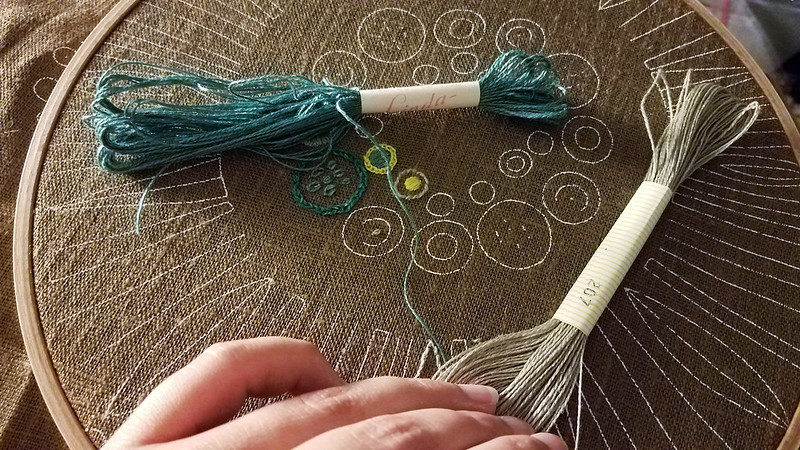
I was so excited to get stitching with these new threads! I began with the darker teal - the name on this label says "Marks Linda Garn." It's about the weight of a size 12 pearl cotton, for comparison.

Linen kit from Linladan

After finding where the threads were tied together under the label, I clipped that, and was able to use this as a pull skein.
Linen kit from Linladan

Some skeins worked better than others as pull skeins. That could just be user error - pulling the wrong thread, I ended up with a tangled mess on 2 skeins! :)

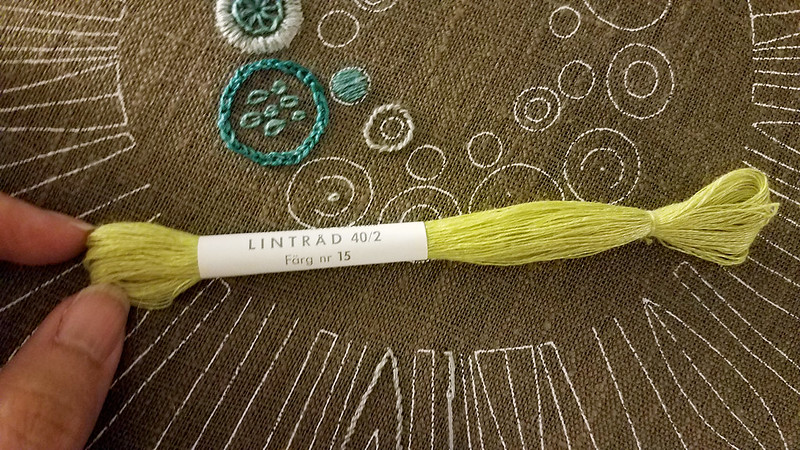
All the threads in this kit had the same weight, except for the bright yellow skein:
Linen kit from Linladan

This label says 40/2, the others say 16/2, which I'm sure has something to do with the thread weight? It felt to me like between 1-2 strands of cotton floss. It felt softer, and produced a much smoother satin stitch.
Linen kit from Linladan

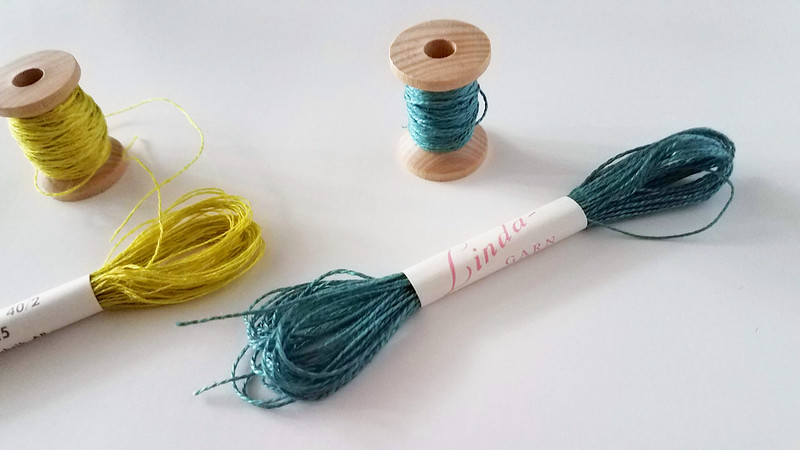
I cleaned up my tangled thread mess on the teal and yellow skeins by winding them on wooden spools...

Linen kit from Linladan

But I left some of the threads in the labels, because I think they're so nice looking. :)

Linen kit from Linladan

Here is my photo to compare thread weights on the thinner (yellow) and thicker (teal) thread... but they look the same don't they? Trust me, the skein marked 40/2 is much thinner!
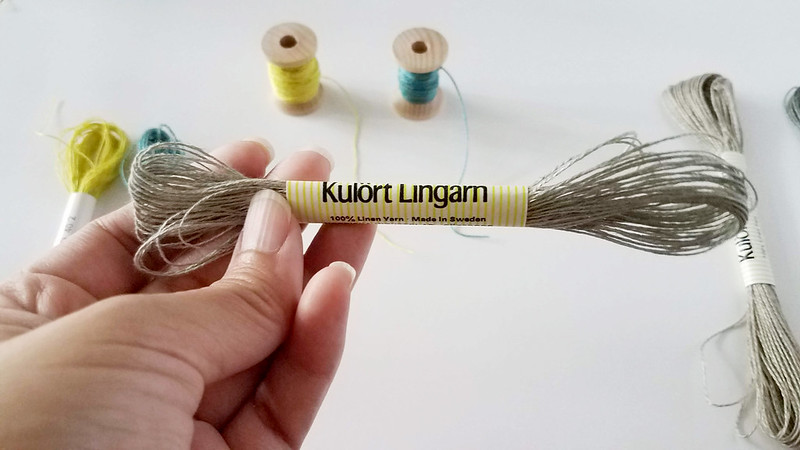
Linen kit from Linladan

Here's another skein that functioned just fine as a pull skein. I'm fascinated by the different Swedish names, but have no clue what they mean.
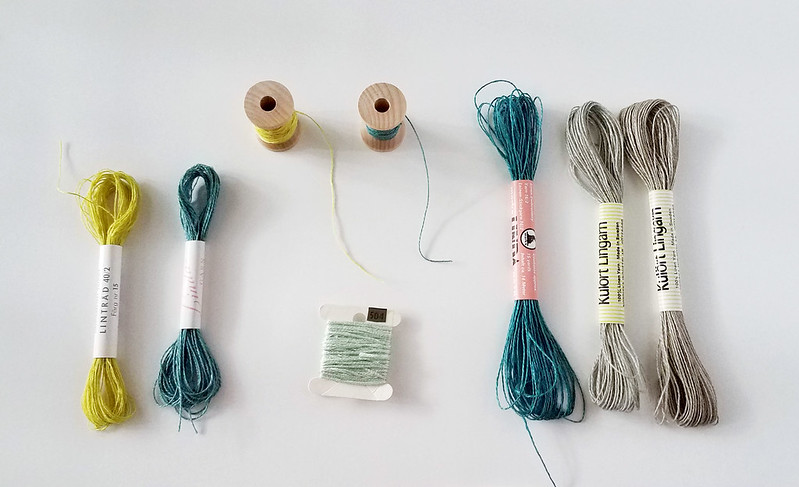
Linen kit from Linladan

This is the full palette I am stitching with so far - I am using 1 DMC floss shade - that lightest teal - DMC 504, to add some contrast. Those 2 beige-ish skeins are so close in color that I will use them interchangeably, and I doubt anyone could tell them apart against the brown background.

Linen kit from Linladan

I'm doing a lot of couching with these threads - it shows up their sheen so well! Knots work just fine. Stem stitch has a very organic quality to it because of the thick and thin qualities of the threads. Everything done in this thread looks nubbly, but I'm enjoying that look immensely!
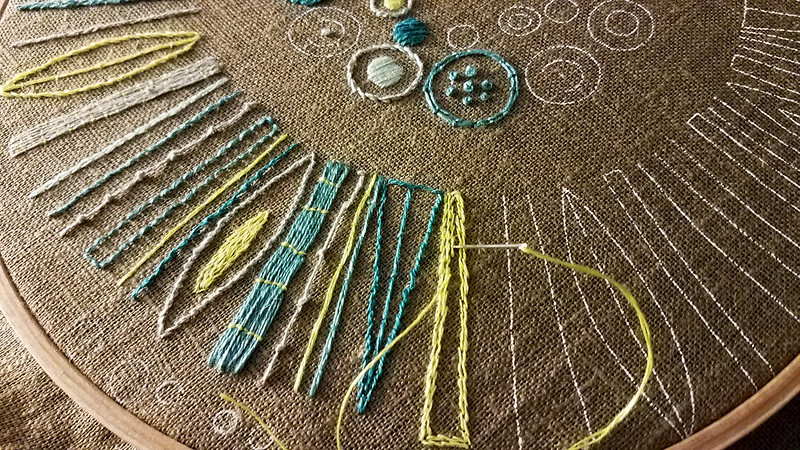
Linen kit from Linladan

On this yellow spoke, I used concentric lines of stem / outline stitch, with 1 strand of thread. I like the look of the brown fabric peeking through!

Linen kit from Linladan

Here's my progress so far - I moved my stitching into a large 14 inch hoop I found on Ebay:
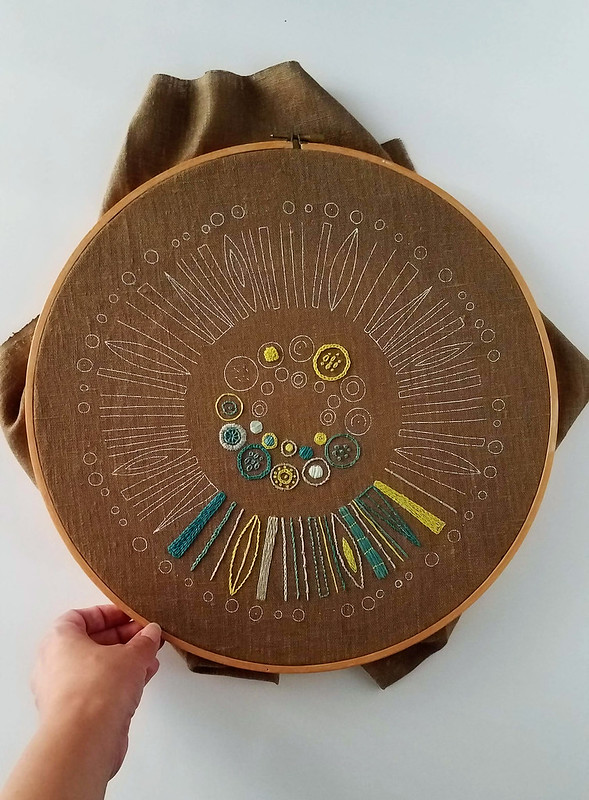
Linen kit from Linladan

I am LOVING this project! It feels so distinct to anything I've embroidered yet - it's geometric, but vintage - I love the sharp lines and the organic quality of the materials.

Again, if you'd like to stitch along, I highly recommend a purchase from Linladan. If you'd just like to experiment with linen threads, she sells boxes of those, too!

Follow my progress on Instagram @nyfloresita!

Hi, I'm floresita, editor of Feeling Stitchy. I'm an avid stitcher, knitter, and crafter. You can see more of my stitching on Instagram and my blog. My vintage transfer collection is on Vintage Transfer Finds.

Feel free to email me with any ideas for the blog!

March 13, 2019

Wonderful Wednesday #68 - Little Dear

Wonderful Wednesday 68 Little Dear Aimee Ray Sewing Kits as featured by floresita on Feeling Stitchy

How wonderful is this lovely Embroidery Sewing Kit by Little Dear? I've loved the stitching, artwork, and design of Aimee Ray for a very long time, and I'm so happy to see her sharing her lovely sense of color by creating these perfect little kits to stitch with!

Kits are available in 4 different color ways, and include beautiful stork scissors in complementing patterns - they are all just gorgeous!

Wonderful Wednesday 68 Little Dear Aimee Ray Sewing Kits as featured by floresita on Feeling Stitchy

Aimee's Books

If you haven't checked out Aimee's books, you really should give them a look! They are full of lovely transfers you can easily iron on to fabric and stitch.

Just so you know, these book links are Amazon Affiliate links - clicking through the link and buying costs no more for you and is one way to support our volunteer reviews.

Doodle Stitching Transfer Pack by Aimee Ray

Doodle Stitching: The Motif Colletcion by Aimee Ray
Embroidered Woodland Creatures by Aimee Ray

Hi, I'm floresita, editor of Feeling Stitchy. I'm an avid stitcher, knitter, and crafter. You can see more of my stitching on Instagram and my blog. My vintage transfer collection is on Vintage Transfer Finds.

Feel free to email me with any ideas for the blog!

February 26, 2018

MooshieStitch Monday: Goldwork Daisy Part 2

Goldwork Daisy Part 2 by Michelle for Feeling Stitchy

In case you missed it, check out Part One of my Goldwork Daisy series.

Next up will be couching the flower stem with gold Japanese thread and leaves with silver Rococco thread.

Todays' post will be what I learned from the following video:

Part 4: Couching Gold Threads

Here is a photo of the Japanese thread that was included in the daisy kit and the sewing thread I used to couch it.

Goldwork Daisy Part 2 by Michelle for Feeling Stitchy

The Japanese thread has a main thread core with a metal foil wrapped around it - which will unwrap at the ends if you are not too careful! Click here for more information on Japanese threads.

Goldwork Daisy Part 2 by Michelle for Feeling Stitchy

To stitch the stem of the flower, you couch down two gold Jap threads at a time. You want to cut them longer than the length you need because to finish off the ends, you will be "plunging" the thread through the fabric to the back....

See the photo below - I left a lot of length on my ends, which Sarah explains in the video is good for beginners until you get used to it.

Goldwork Daisy Part 2 by Michelle for Feeling Stitchy

Let me just say as a goldwork newbie, plunging the threads is so intimidating at first! I watched the video over and over again before I attempted it. Sarah shows the lasso technique on how to plunge the threads through the fabric - and I highly suggest watching the video to see it done if you are unfamiliar (skip to minute 12:30 to jump right to the plunging!)

Here are my first few threads of the stem after plunging on the front side...

Goldwork Daisy Part 2 by Michelle for Feeling Stitchy

My first thread I accidentally pulled through too far and it came out of the couching on the other end! After a mild panic attack - I very gently pulled it back through to the front - but it was no longer couched at the bottom. So when I eventually added my next rows of Jap threads, I added a couple couching stitches to fix the mistake.

Once you pull them through to the back of the fabric, you need to then stitch down the ends and trim them up. Here is so far what the back looked like.


I then needed to repeat those steps of couching down additional threads to fill the entire stem. You will see below I left very long end tails to plunge to the back.

Goldwork Daisy Part 2 by Michelle for Feeling Stitchy

Here is the stem complete and the ends plunged and finished!

Goldwork Daisy Part 2 by Michelle for Feeling Stitchy

Next was couching silver plated Rococco thread with a silver colored sewing thread for the leaves.

Goldwork Daisy Part 2 by Michelle for Feeling Stitchy

The Rococco thread is very different from the Japanese thread. It is like a thin metal wire wrapped around a main thread core, has a wavy appearance, and is more stiff. (More on Rococco threads here)

Goldwork Daisy Part 2 by Michelle for Feeling Stitchy

Again, I left long ends of thread for plunging. I found Rococco to be more difficult to plunge also - I am guessing since it is thicker and stiffer?? I actually used a larger crewel needle to poke a hole in the fabric to make it easier to plunge the Rococco thread through.

Goldwork Daisy Part 2 by Michelle for Feeling Stitchy

Goldwork Daisy Part 2 by Michelle for Feeling Stitchy

Here is the back of the fabric after all my ends have been sewn down. I will admit this is my least favorite part of goldwork so far! I thought it would be the plunging - it does get easier each time you do it - but then having to finish off the ends on the back of the fabric - it is very time consuming! I can't imagine doing this step on large goldwork pieces ... but I understand that it needs to be done.

Goldwork Daisy Part 2 by Michelle for Feeling Stitchy

There you have it - my golden daisy with my first couched gold threads!

Goldwork Daisy Part 2 by Michelle for Feeling Stitchy

To be continued.....see you next time for Part Three ... but before you go...

This goldwork kit is the Golden Daisy by Sarah Homfray.

Be sure to check out Sarah's Instagram , subscribe to her YouTube Channel for lots of video tutorials, and go to her website where you can shop all things embroidery, including kits and supplies.

Thanks for following along!


January 8, 2018

MooshieStitch Monday: "Mountain Road" Vintage Embroidery Kit


Happy New Year Everyone! I am here today to share with you some photos of an embroidery kit I just finished!

A couple months ago, I decided to go on Ebay for embroidery stuff. I randomly searched for "vintage embroidery kits" just to see the results - and what do I find but this Sunset Designs Jiffy Stitchery "Mountain Road" embroidery kit (un-opened) from 1975!


The kit included instructions, wool yarn, needle, and fabric with the design printed on it.


The wool yarn was a 3-ply stranded Persian yarn. Most of the kit was stitched using 1-ply, with the exception of the French Knots, those are 2-plies of yarn.


Only three stitches were recommended: satin stitch, French knots, and Pueblo stitch.

I had never heard of the Pueblo stitch before, but from the stitch drawing included in the instructions, it looked similiar to the back stitch and split stitch combined?? I could be very wrong - and I didn't do much research on it either - so I just worked the split stitch wherever they said to use Pueblo stitch! :)


Here is a better view of the drawing included in the instructions - numbered with what color to use.


Here it is with all the greenery finished. I switched to an oval hoop because it was easier to use.


Making progress on the mountain...


Half way done with all those French knots!!


The finished product!


The fabric really puckers once I remove it from the hoop. I don't have a hoop that is the size or shape to keep the finished work in, so I am not sure what to do with it. Should I try to find a hoop to put it in or should I frame it??

Just for fun I took a photo of the of the finished piece next to the photo on the kit's cover to compare.


Up close!


The surprising thing about this kit was how fast I actually finished stitching it! In 2017, I barely embroidered. So when I got this kit, I used it as motivation to get stitching again and my goal was to finish by the new year. 

I really did enjoy the ease of it - no thinking about what stitches to use, the fabric and yarn were included, and having the kit tell me exactly what colors to stitch and where. (Can you tell I am new to the whole embroidery kit game?? ha ha Maybe I just need to get more kits to stitch....)


What's your favorite embroidery kit? Share in the comments, I would love to hear!


SITE DESIGN BY RYLEE BLAKE DESIGNS
