Showing posts with label vintage embroidery. Show all posts

July 12, 2019

Project a Month - Linladan Circle Kit

Project a Month July - Linladan Circle Kit as featured by floresita on Feeling Stitchy

This month I will be stitching a beautiful Circle Kit from Linladan. If you would like to stitch along with me, there are more lovely kits in her store, including alternate color ways of this Circle kit!

Here is an image from Linladan, tantalizing small, of what my finished embroidery might look like:


Isn't it gorgeous? First off, I'd like to give you a tour of the kit, so you can see everything that comes inside...

A Look at the Kit

Linen kit by Linladan

My kit came with a photo of the original Swedish kit from the 1960's that this is based on. On the left you see the stitched version, on the right, the drawing.

Linen kit by Linladan

Tanja includes some history on the Circle Kit, with a list of some of the stitches used, as well as their Swedish names!

Linen kit by Linladan

There's another list of stitches included, the screenprinted linen, and vintage linen floss.


About the Linen Threads

Linen kit by Linladan

Linen floss has a very different texture than the cotton floss I am used to using. They are stiffer, sort of the texture of unwaxed tooth floss, if anybody here remembers that! :)

Linen floss has a gorgeous sheen that lends itself really well to couching and satin stitch.

Linen kit from Linladan

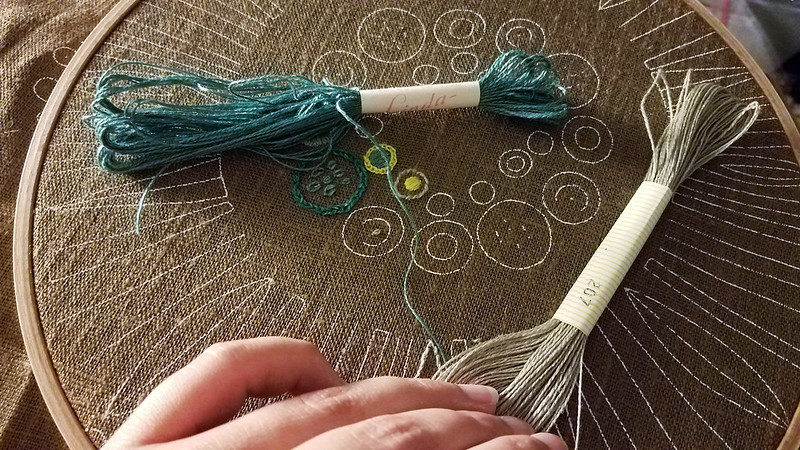
I was so excited to get stitching with these new threads! I began with the darker teal - the name on this label says "Marks Linda Garn." It's about the weight of a size 12 pearl cotton, for comparison.

Linen kit from Linladan

After finding where the threads were tied together under the label, I clipped that, and was able to use this as a pull skein.

Linen kit from Linladan

Some skeins worked better than others as pull skeins. That could just be user error - pulling the wrong thread, I ended up with a tangled mess on 2 skeins! :)

All the threads in this kit had the same weight, except for the bright yellow skein:

Linen kit from Linladan

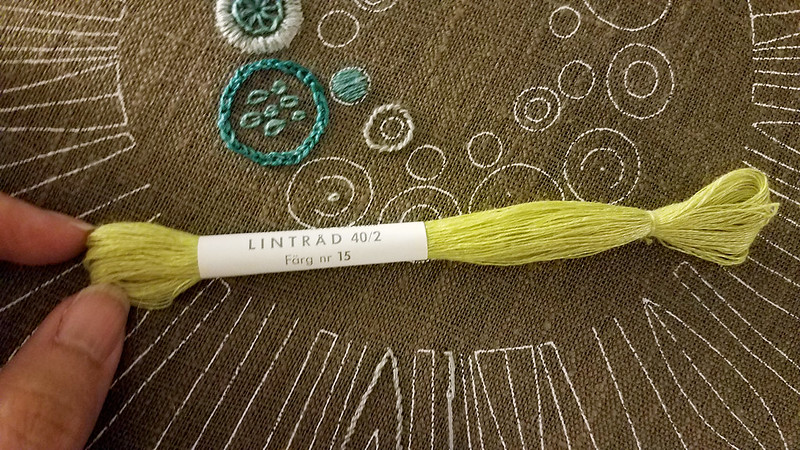
This label says 40/2, the others say 16/2, which I'm sure has something to do with the thread weight? It felt to me like between 1-2 strands of cotton floss. It felt softer, and produced a much smoother satin stitch.

Linen kit from Linladan

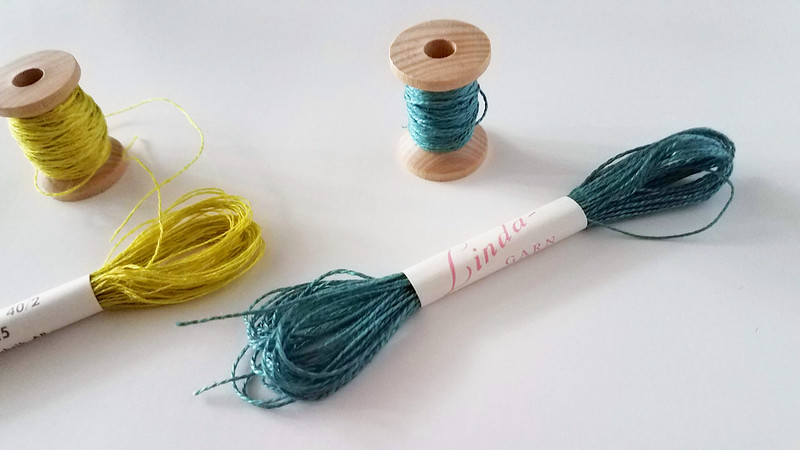
I cleaned up my tangled thread mess on the teal and yellow skeins by winding them on wooden spools...

Linen kit from Linladan

But I left some of the threads in the labels, because I think they're so nice looking. :)

Linen kit from Linladan

Here is my photo to compare thread weights on the thinner (yellow) and thicker (teal) thread... but they look the same don't they? Trust me, the skein marked 40/2 is much thinner!

Linen kit from Linladan

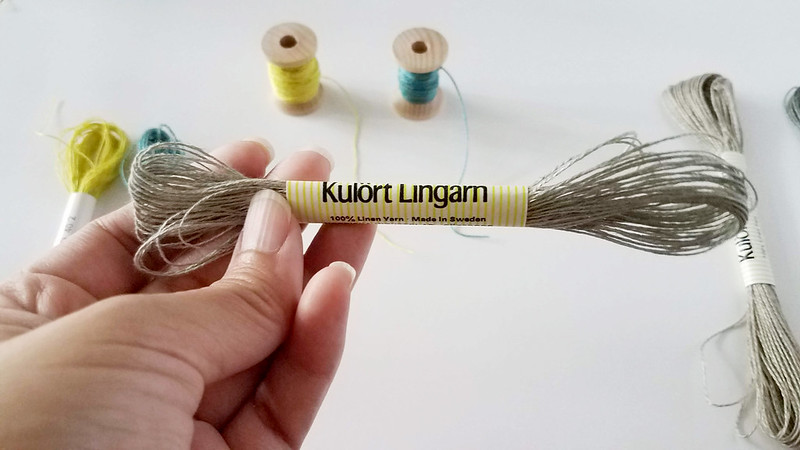
Here's another skein that functioned just fine as a pull skein. I'm fascinated by the different Swedish names, but have no clue what they mean.

Linen kit from Linladan

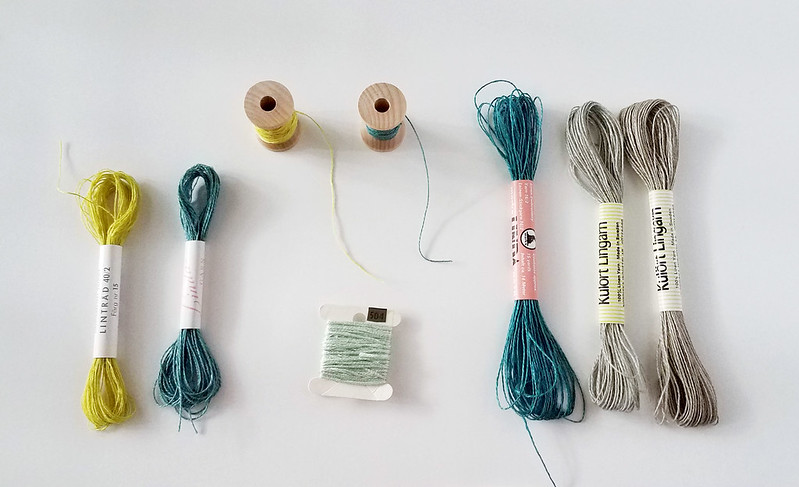
This is the full palette I am stitching with so far - I am using 1 DMC floss shade - that lightest teal - DMC 504, to add some contrast. Those 2 beige-ish skeins are so close in color that I will use them interchangeably, and I doubt anyone could tell them apart against the brown background.

Linen kit from Linladan

I'm doing a lot of couching with these threads - it shows up their sheen so well! Knots work just fine. Stem stitch has a very organic quality to it because of the thick and thin qualities of the threads. Everything done in this thread looks nubbly, but I'm enjoying that look immensely!

Linen kit from Linladan

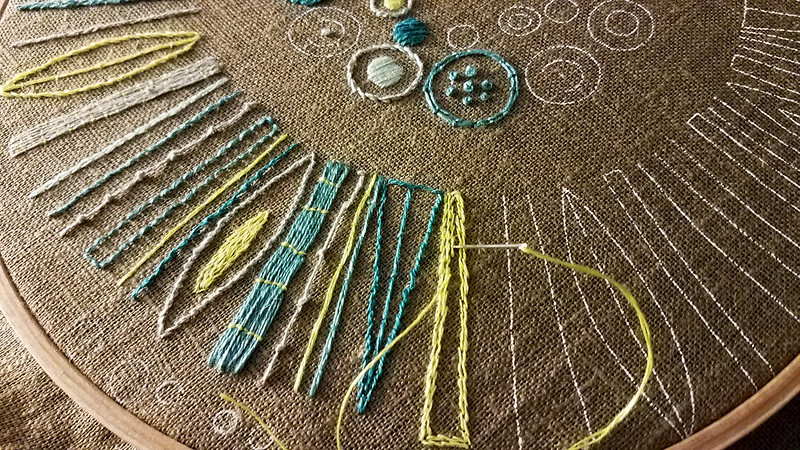
On this yellow spoke, I used concentric lines of stem / outline stitch, with 1 strand of thread. I like the look of the brown fabric peeking through!

Linen kit from Linladan

Here's my progress so far - I moved my stitching into a large 14 inch hoop I found on Ebay:

Linen kit from Linladan

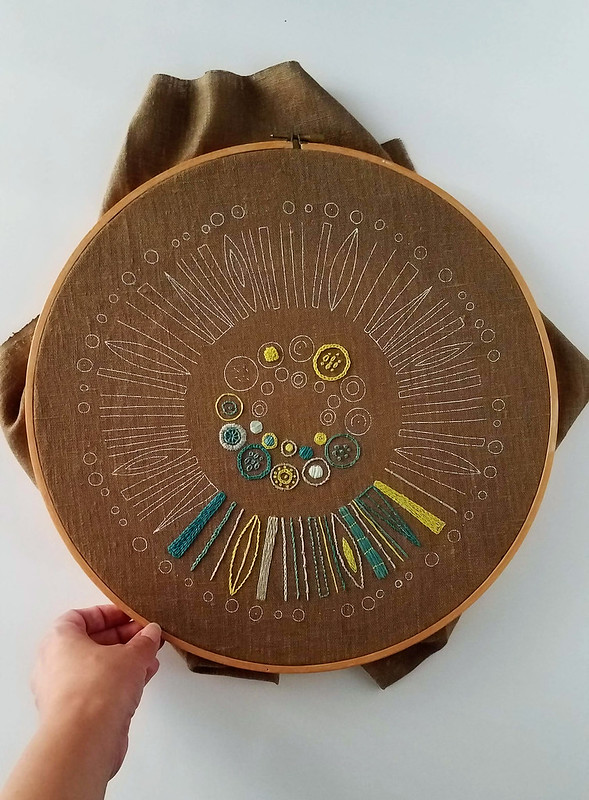
I am LOVING this project! It feels so distinct to anything I've embroidered yet - it's geometric, but vintage - I love the sharp lines and the organic quality of the materials.

Again, if you'd like to stitch along, I highly recommend a purchase from Linladan. If you'd just like to experiment with linen threads, she sells boxes of those, too!

Follow my progress on Instagram @nyfloresita!

Hi, I'm floresita, editor of Feeling Stitchy. I'm an avid stitcher, knitter, and crafter. You can see more of my stitching on Instagram and my blog. My vintage transfer collection is on Vintage Transfer Finds.

Feel free to email me with any ideas for the blog!

April 24, 2019

Wonderful Wednesday #70 - Linladan

Wonderful Wednesday 70 - Linladan as featured by floresita on Feeling Stitchy

How lovely is this vintage reproduction Leaf Swirl kit by Linladan? Using vintage Swedish kit patterns from the 50s and 60s, Tanja from Linladan lovingly recreates kits using screenprinted linen and vintage linen floss. Since we last spoke, I disappeared down a rabbithole of vintage Swedish embroidery from the 50's, 60's and 70s. This rabbithole led me straight to Linladan, who posts tantalizing photos of finished projects on Instagram @linladan.

I am fascinated by the gorgeous colors and unexpected sheen of linen floss - so fascinated that I ordered a small sampling for myself, and I can't wait to try them out!

Nordiska floss from Linladan, as featured by floresita on Feeling Stitchy
Nordiska Flax Flower set

Have any of you ever worked with linen floss? Aside from the discontinued DMC linen floss, which had a matte finish, I have never seen or handled linen floss, so I am excited to see how it stitches!

I fell in love with this Fairy Tale Castle screenprint, if you'd like to try your hand at this I would hop to it, as there are limited quantities available.

Fairy Tale Castle printed fabric by Linladan, as featured by floresita on Feeling Stitchy

This breathtaking version of the Fairy Tale Castle was stitched by @clarkeandridley on Instagram using pastel linen floss from Linladan - isn't it amazing?

Don't forget to follow @linladan on Instagram if you love what you see, but fair warning - her mouthwatering images might make you want everything in her store! :)

Hi, I'm floresita, editor of Feeling Stitchy. I'm an avid stitcher, knitter, and crafter. You can see more of my stitching on Instagram and my blog. My vintage transfer collection is on Vintage Transfer Finds.

Feel free to email me with any ideas for the blog!

July 26, 2016

Stitchy Snippets - Antique Textiles


Louise Saxton has an expert eye for antique embroidery and lace. Her artistic practice is centred around reclaiming vintage needlework to produce contemporary, textile collages and sculptures. Louise Saxton talks about the appeal of embroidery: 'Needlework is an ancient art form, beautiful as well as practical, and whether simple or complex in design it is painstakingly constructed.'


Saxton predominantly uses pins to fix the textiles and fabricate her collages and with this technique she can achieve a textile relief. This technique also echoes the traditional handwork experience and the labour involved.


Undertaking residencies in Mexico and Malaysia has broadened her insight into local artisan technique, influenced her work and also helped in increasing her great collection of needlework.


Saxton regards her artistic process as a 'silent collaboration with the anonymous original makers'. This transformation of forgotten and discarded textiles is integral to her work as it returns importance and value to the craft of needlework and showcases these precious pieces of handwork. Saxton elaborates: 'Historically, handmade embroidery and lace were as economically valuable as gold and silver... Needlework is cross-cultural, but sadly in most parts of the world today, it is in danger of disappearing.' Promoting traditional needlework and textiles within her work helps to protect the art form.

To find out more about her work and upcoming exhibitions look here.


January 14, 2014

Tutorial Tuesday

Happy Tuesday, everyone!

It's a new year and many have us have committed to resolutions and goals. If any of you are like me, there has been a renewed commitment to eating healthy in the new year. Especially after eating one too many cookies over the course of the holiday season. In the spirit of being healthy in the new year, today's tutorial is for a lunch tote, stitched with vintage dancing radishes to remind us to eat our veggies!


To make this lunch tote, you will need the following supplies:

- Embroidery hoop, floss, and supplies
- Embroidery pattern (radish pattern available here)
- Two pieces of exterior fabric cut 13-inches wide by 10-inches high 
- Two pieces of interior fabric cut 13-inches wide by 10-inches high
- One piece of fabric for the strap cut 4-inches by 19-inches
- Two pieces of batting or Insul-Bright 
- Sewing machine and thread
- scissors 
- Iron and ironing surface


Step One: Transfer the pattern to fabric, making sure to center it in the middle of the 13x10-inch piece of fabric. I found this radish pattern here. I apologize for not being able to find the root link to the original of this pattern. Once your pattern is transferred, stitch in the floss colors of your choice. 


Step Two: Trim the embroidered exterior piece, the plain exterior piece, and two pieces of batting/insul-bright to 13-inches wide by 10-inches tall. Create a sandwich of batting with the two exterior pieces, right-sides facing, in between the two pieces of batting. 


Step Three: Stitch a 1/2-inch seam along the three sides of the batting and exterior pieces, leaving the top open. 


Step Four: To create a square bottom for the tote, take one of the bottom corners and press the seams against one another to create a triangle. Mark 1.5-inches from the point of the seam, and stitch straight across the bottom of the triangle. Clip the excess fabric. Repeat for other corner. Turn inside out and set aside.


When you turn this piece inside out, it should look like this. 


Step Five: Take the two interior pieces of fabric, trimmed to 13 by 10-inches, and place them right sides together. Stitch a 1/2-inch seam allowance along the three sides leaving the top open, and leaving a 2-inch opening at the bottom seam in order to turn it out later. 


Step Six: Just as we squared the bottom of the lunch tote exterior in Step Four, we'll do the same for the interior here. Take one of the bottom corners and press the seams against one another to create a triangle. Mark 1.5-inches from the point of the seam, and stitch straight across the bottom of the triangle. Clip the excess fabric. Repeat for other corner. Set this aside. 


Step Seven: To assemble the strap, fold the 4x19-inch piece of fabric in half, length-wise, and press. 


Then, unfold the fabric, take the two long ends and fold them inward toward the crease that you just created. Press.


Fold this in half, lengthwise, and press again. 


Stitch along both long edges of the strap with a 1/8-inch seam allowance. 


Step Eight: Center the raw short edges of the strap over each side seam of the tote exterior, and pin. Make sure the strap is not twisted. Place the exterior tote into the interior/lining, with right sides facing each other, and pin in place. Make sure to match the side seams with the strap in between the exterior and interior/lining pieces. 

Step Nine: Stitch a 1/2-inch seam allowance along the top raw edge of the tote. 


Step Ten: Using the opening at the bottom of the tote interior/lining, flip the lunch tote out. 


Step Eleven: Press the top edge of the tote, so that the seams all lay flat. Top stitch along the top edge of the tote, making sure to move the strap out of the way. 


Step Twelve: Pull the interior/lining out of the bag, and stitch the opening that we used to turn the bag, shut. 


Step Thirteen: Give the entire bag a final pressing, and your lunch tote is ready!


Hope you enjoy and remember to eat your veggies!


Hi, I'm Kristen! I am a lover of all things stitchy and crafty. I have been sewing for as long as I can remember. My grandmother taught me how to sew Barbie clothes when I was young and I have been sewing ever since.

You can find me at Bobbypin Bandit, on Instagram, and my Etsy shop.

SITE DESIGN BY RYLEE BLAKE DESIGNS