Showing posts with label stitchalong. Show all posts

March 31, 2018

12 Months of Christmas: French Hen

12 Months of Christmas Stitchalong 3 French Hen, a feature by floresita on Feeling Stitchy

It's a wrap on the French Hen! Let me take you back two weeks previous, when I first began...

12 Months of Christmas Stitchalong 3 French Hen, a feature by floresita on Feeling Stitchy

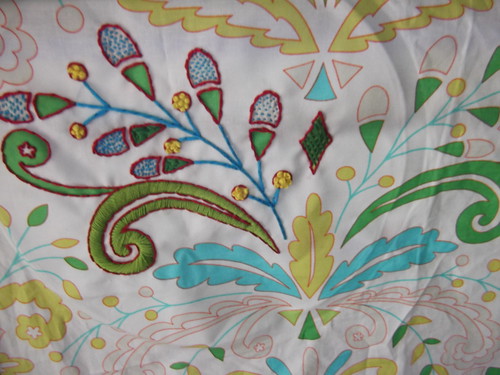
This messy progress shot gives a good idea of just how many threads and bits and needles are in play at any given moment...

12 Months of Christmas Stitchalong 3 French Hen, a feature by floresita on Feeling Stitchy

I started off with the flower shape on the wing in another color, then changed my mind to this darker felt.

I sewed it on using 1 strand of metallic silver thread, which let me say can at times be disastrous, as you can see in the next photo...

12 Months of Christmas Stitchalong 3 French Hen, a feature by floresita on Feeling Stitchy

Use short lengths of metallic thread, work slowly and carefully, and realize you can still have a mess! Deep breaths, the side not seen is not so important. Just wanted to show you my back, so you don't get frustrated when this happens to you. :)

12 Months of Christmas Stitchalong 3 French Hen, a feature by floresita on Feeling Stitchy

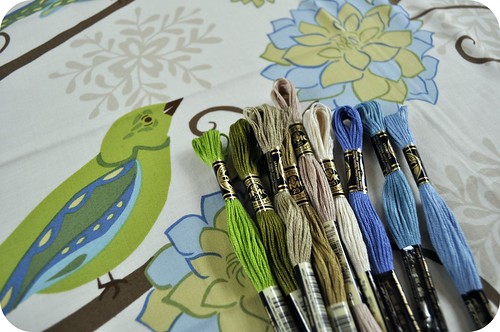
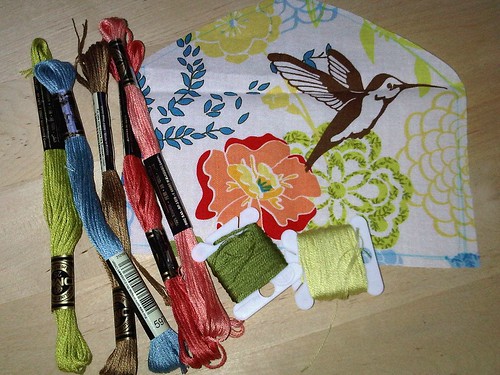
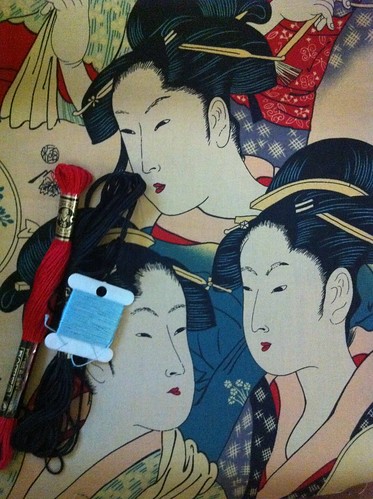
This photo reflects a full day of stitching, along with a few of the threads I used in the little teacup. I tend to find recurring colors around me as an unconscious source of inspiration in my stitching.

So, if you're uninspired in color selection, surround yourself with a few beautiful things you find inspiring, you'll never know what can happen!

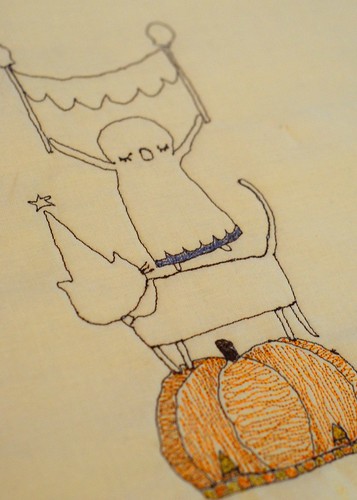
This morning I was just about finished. All that was left was to add the gold pearl cotton to hang the hen, and stuff the shape and close it up...

12 Months of Christmas Stitchalong 3 French Hen, a feature by floresita on Feeling Stitchy

I am glad I remembered to add the hanging thread before I sewed her up - I almost didn't, and that would have made things much trickier!

12 Months of Christmas Stitchalong 3 French Hen, a feature by floresita on Feeling Stitchy

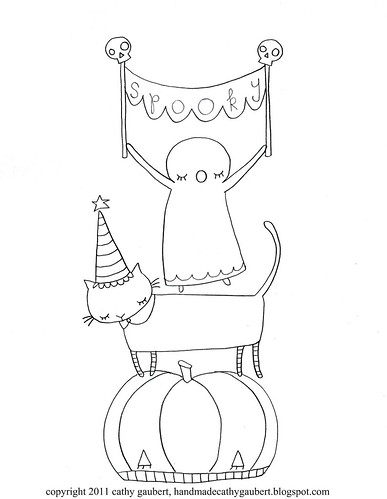
Although the French hen wasn't particularly hard to put together, I did find myself wondering at times if I was doing it right. With the wattle, comb, and little pantaloon-looking shapes above the feet, there are a lot more little pieces in play to sew and sandwich together.

Larissa's tip to use glue to hold the pieces together is perfect, but I'm too impatient to wait for glue to dry, so I haven't done that yet. I'm also messy, and could easily picture myself making a gunky mess of my sewing. :)

12 Months of Christmas Stitchalong 3 French Hen, a feature by floresita on Feeling Stitchy

I'm also fairly sure I botched the feet a bit, but I chose not to dwell on that tiny part of the process, instead enjoying the overall project. It's really fun to stitch these once a month, as it gives me time to really think about the colors and not get too frustrated working towards a deadline...

12 Months of Christmas Stitchalong 3 French Hen, a feature by floresita on Feeling Stitchy

12 Months of Christmas Stitchalong 3 French Hen, a feature by floresita on Feeling Stitchy

Here they all are together - I'm really enjoying how the colors are all coming together - I'm using the same shades of felt and threads on each piece, for the most part, for a few more details on the metallic threads I'm using, check out my previous post!

12 Months of Christmas Stitchalong 3 French Hen, a feature by floresita on Feeling Stitchy

Join the 12 Months of Christmas Stitchalong!

Are you inspired yet? Would you like to join in? Remember, joining this stitchalong is easy, and no-pressure! To join, visit Larissa's shop to purchase the Twelve Days pattern of your choice. Tag your pictures with the hashtag #twelvedaysornaments and #12monthsofChristmas on Instagram so we can find them.

Leave a comment here with a link to your blog, or any space on the internet where you are tracking your progress. Don't miss the page Larissa has set up with lots of tips for stitching this series: http://mmmcrafts.blogspot.com/p/twelve-days.html. Next month is Colly Bird! Let's stitch!

Hi, I'm floresita, editor of Feeling Stitchy. I'm an avid stitcher, knitter, and crafter. You can see more of my stitching on Instagram and my blog. My vintage transfer collection is on Vintage Transfer Finds.

Feel free to email me with any ideas for the blog!

August 27, 2015

Thimblenest Thursdays: Summer/Winter Stitchalong--The Finished Banner


Do you have all of your letters stitched? If not, no worries, autumn doesn't officially begin until September 23, so you have plenty of time! Fall is my favorite season, so I am eagerly awaiting its arrival, although I am actually sorry to see summer go this year!

PATTERN/EMBROIDERY DESIGNS


One more time, here is the pdf with all of the letter/motif designs, as well as enlarged versions of most of the motifs.

MATERIALS


Let's put the bunting/banner together. If you weren't here for Week 1 of the stitchalong, gather the following materials:
  • 6* (or more)  9" x 7" (23 cm x 18 cm) fabric rectangles for backing**
  • 6* (or more) 8.5" x 6.5" (21.5 cm x 16.5 cm) rectangles of lightweight iron-on interfacing**
  • 1 package/3 yards extra wide double-fold bias tape (or make your own)
  • scissors
  • pins/sewing clips
  • sewing machine
*Cut more than 6 if you want to add extra autumn motifs or blank "flags" to your bunting (in addition to the letters).

ATTACH INTERFACING


Affix lightweight interfacing to the wrong side of each quilting cotton rectangle. These will become the backing for your embroidered pieces. Center the interfacing so that there is approximately 1/4" between it and all edges of the fabric.

SEW FRONTS AND FACINGS TOGETHER


With right sides together, sew an interfaced quilting cotton rectangle to the back of each embroidered rectangle using a 1/4" seam allowance. Sew only the sides and bottom. The top edges are left open to turn the embroidery right side out; the raw edges will be enclosed later. To make turning the fabric easier, take the corner stitches at a 45 degree angle, rather than making them square.

TRIM EDGES & CORNERS; TURN TO OUTSIDE; TOPSTITCH


Trim the corners close to stitching. You could trim along the other stitching as well; I opted not to because I felt like the seam allowance was already small enough and I didn't want to compromise the strength of the seam/fabric.

Flip each stitched rectangle right side out. Take your time here--use a turning tool (I use a chopstick) and a hot iron to make sure the edges are straight and the corners as sharp as possible. If needed, roll the edges of the rectangle a little toward the back to keep the quilting cotton from showing from the front.

Once you are happy with the turned edges, topstitch (1/4" from edge) around the sides and bottom to hold everything in place.

Trim any loose threads from the top of each rectangle.

PREPARE BIAS TAPE


Remove bias tape from the package and iron out creases. Find the center of the tape by matching the short edges together; mark with a pin at the center fold.

CENTER & SPACE RECTANGLES; PIN/CLIP


I had an even number of rectangles to sew onto my bunting, thus, the T and the second U needed to be on either side of the center of the bias tape. 


To achieve a 2" space between each rectangle/flag, start by placing the right edge of the T and the left edge of the second U 1" away from the center of the bias tape. 


Sandwich the top of each rectangle inside the bias tape and pin or clip securely in place. Be sure that the shorter edge of the bias tape is on top (on the front of each rectangle) and the longer side is towards the back.


Keeping a space of two inches between the rectangles/flags, continue to work from the center towards the outside edges, sandwiching each new rectangle inside the bias tape and pinning or clipping securely in place.

STITCH


Slowly and carefully, begin stitching at the far left end of the bias tape; with the short side up, stitch through to the back, closing the bias tape as you go. Stitch a continuous seam from the left side of the banner to the right. Each time you reach a rectangle/flag, backstitch a time or two at each edge for added stability. Be sure that the raw edges of each rectangle are fully enclosed within the bias tape.


Your banner/bunting is finished! As you can see, I flipped my two end rectangles around so that the quilting cotton showed on the front side at each end. I'd waited to long to use that Flea Market Fancy to hide all of it in the back!

Thanks for following along this summer as I brought you this stitchalong; I had fun preparing each letter and I'm super excited to hang up my new autumn banner!

As always, we'd love to see this or any other project inspired by a Feeling Stitchy post on Instagram (@feelingstitchyish) or in the Flickr Group!


Hi, I'm Wendy - I've been embroidering since age 9 when my grandma gave me some blank tea towels and a set of Aunt Martha’s transfers. I blog at ThimbleNest.

You can also find me on Pinterest.

July 30, 2015

Thimblenest Thursdays: Summer/Winter Stitchalong, Week 5


And here we are at Week 5 of the Summer/Winter Stitchalong and the letter M! I don't think that mushrooms are necessarily an autumn thing, but I thought they would look cute on the finished banner, so there you go!

Grab this week's pattern for the letter M and let's get started!


I took a quick look back at all of the letters so far, trying to balance the colors and stitch styles so that everything will be cohesive in the final banner. 

Some of my thread skeins are starting to dwindle down, but there are plenty of colors left. Here's what I did:


The M was outlined in chain stitch using DMC 721. The inside of the letter was stitched using the herringbone stitch in DMC 3852. This was the first time I'd tried herringbone, and this video from Nancy Corbett was especially helpful.


The mushrooms were all embroidered in stem stitch using different combinations of DMC 721, 3852, 327, and 350. These little fungi could be stitched in many different ways using a variety of fill stitches. 

I'll be back with the final letter in A-U-T-U-M-N in two weeks. And remember, we're always glad to see your embroidery work on Instagram #feelingstitchy or in the Flickr Group!

Hi, I'm Wendy - I've been embroidering since age 9 when my grandma gave me some blank tea towels and a set of Aunt Martha’s transfers. I blog at ThimbleNest.

You can also find me on Pinterest.

July 16, 2015

Thimblenest Thursdays: Summer/Winter Stitchalong, Week 4


Welcome back to our Summer/Winter Stitchalong. Letter #4 is our second U in the word A-U-T-U-M-N. I've been trying to keep the fall motifs more unique, but I went ahead and included leaves this week, because what's autumn without a few colorful leaves?


As with all of the other letters, this U is outlined with chain stitch. The fill stitch (grouped running stitch) took some concentration and sometimes my eyes went a little buggy. To make the letter look more balanced I opted to add just two rows of the running stitch to the right hand sides of both legs of the U. Getting the curves to look balanced was a little tricky, too.


Here are the pattern, color, and stitch details all in one spot:

Embroidery Design for U #2
U Outline: DMC 728 (yellow), chain stitch
U fill: DMC 779  (brown), grouped running stitch (according to pg. 5 of Anchor Needlework Book #1)
Leaves: DMC 350 (peach/pink), 327 (purple), 721 (orange), back stitch


Just two more letters to embroider! In the meantime, if you're stitching along share your photos in the Flickr Group or on Instagram with #feelingstitchy!

Hi, I'm Wendy - I've been embroidering since age 9 when my grandma gave me some blank tea towels and a set of Aunt Martha’s transfers. I blog at ThimbleNest.

You can also find me on Pinterest.

June 4, 2015

Thimblenest Thursdays: Summer/Winter Stitchalong, Week 1


Welcome to Week 1 of the Feeling Stitchy Summer~Winter Stitchalong! Whether you're traveling cross country on a road trip or sitting by the pool in the Northern Hemisphere or cozying up with a cup of tea and your favorite sweater in the Southern Hemisphere, it's the perfect season for an embroidery project!

Every two weeks over the next three months I'll be posting a new design for the project with stitch tips/suggestions and hopefully some photos featuring your stitching from previous weeks! (Be sure to share your work in the Feeling Stitchy Flickr group and on Instagram with #feelingstitchy!)

When the Stitchalong is finished, you'll have everything you need ready to stitch together an "AUTUMN" banner/bunting, just as the seasons change once again (sorry, Southern Hemisphere, this is the only part I couldn't get to work out for you, too!).

Since this is Week 1, we have a lot to go over. First, let's gather our materials . . .


MATERIALS

  • 6* (or more)  9" x 7" (23 cm x 18 cm) fabric rectangles for embroidering (I'm using linen, but choose whatever you like best!)
  • embroidery floss (suggested color palette below)
  • AUTUMN embroidery design (get week 1 here)
  • embroidery transfer pen, etc.
  • embroidery hoop
  • pinking shears
  • sewing machine
  • 6* (or more)  9" x 7" (23 cm x 18 cm) fabric rectangles for backing**
  • 6* (or more) 8.5" x 6.5" (21.5 cm x 16.5 cm) rectangles of lightweight iron-on interfacing**
  • 1 package/3 yards extra wide double-fold bias tape (or make your own)
*Cut more than 6 if you think you would like to add autumn motifs (provided) to your bunting (in addition to the letters).
**When finished, your embroidered pieces can either be left as-is, or you can back them with a light interfacing and coordinating quilting cotton.

SUGGESTED COLOR PALETTE


The colors above are the ones I'll be pulling from as I stitch each letter; there's no guarantee that I'll actually use all of them by the end of the Stitchalong, but I just couldn't bear to leave any behind. DMC floss from left to right: 779, 327, 154, 350, 352, 721, 720, 728, and 3852.

Prep Fabric

If you plan on backing your embroidered fabric, serge, pink, or zigzag the edges of the linen so it doesn't fray while you're embroidering.

If you don't plan on backing your finished letters, just use pinking shears when you're cutting the rectangles out.

This Week's Letter: A

Click here for the Week 1 embroidery design.


I'm hoping each week's letter design will be accessible for all levels of stitchers, since this is meant to be a laid-back, un-stressful experience. I'm basing most of the stitch ideas off of the running stitch and cross stitch, after finding this gem of a resource. Each week I'll show you what I did, but you can adapt/change/throw my ideas out as you see fit--make this yours!


Here's what I did with the Letter A; for all stitches I used 3 strands of embroidery floss:

  • Chain stitch outline (DMC 720)
  • Vertical interior running stitch (DMC 154)
  • "Zig zag" between running stitches (DMC 728)
  • Acorn bottoms (DMC 3852)
  • Acorn "caps" (DMC 154)--3 strands was too much here; I should have used only 1 or 2.
Any questions?--I'll check the comments below. Otherwise, I'll be looking for your fabulous stitching in the Flickr Group and on Instagram and we'll meet back here in two weeks for the next letter! Happy Stitching!


Hi, I'm Wendy - I've been embroidering since age 9 when my grandma gave me some blank tea towels and a set of Aunt Martha’s transfers. I blog at ThimbleNest.

You can also find me on Pinterest.

October 2, 2011

September Stitch-along | Week 3

We hope you enjoyed Flor's post yesterday, and just in case you're not in the Halloween spirit yet, we're sharing some of the September stitch-along progress from the Embroidery Flickr pool!

Enjoy ...

--

Love Marianne's coordinated fabric selection for her Halloween wall hanging:

Spooky - Design by Cathy Gaubert


A green ghost? Sure, why not?! : )

Boo4

Spooky finished project!

FMQ - Feeling Stitchy - September (In Progress)

Blown away by this amazing fill stitch:

Orangeness abounds.

September 1, 2011

September Stitch-along

Wow, is it September already? Here in North Carolina, it still feels very much like summer ... but September signals the beginnings of Autumn and our beloved fall and winter holiday season. First up, of course, is Halloween, and this month's free stitch-along pattern should help get us all into the spooky spirit.

September's pattern, Hallowe'en Trio, was designed by the talented Cathy Gaubert. Cathy is a mom, a stitcher, a quilter, and an all-around wonderful person, and she blogs about it all at handmade...cathygaubert. Cathy also designs some really great embroidery patterns (as evidenced below), and you can find more in her Etsy shop.

Feeling Stitchy September Stitch-along Pattern

So grab your candy corn (yes, they are already available -- I've checked!), pour yourself a glass of witch's brew, turn on your favorite scary movie and join us in our September stitch-along. Be sure to add your photos to the Feeling Stitchy Embroidery pool, and tag them with "SeptemberStitchAlong". We can't wait to see what you make!

Download PDF

August 11, 2011

August Stitch-Along | Week 2

Feeling Stitchy August Stitch-Along

I'm excited to see so many enthusiastic stitchers joining me for the August stitch-along. For week 1 I asked you to simply find a piece of inspirational fabric that's just screaming to be embellished with stitches, and there were some GREAT photos added to our Flickr pool. Here are a few from some fellow stitchers:

Plans for the August Stitch Along

Some fun chunky birds with black and white flowers, submitted by daisyeyes.

August Stitchalong Fabric

sewjenaissance also chose a print featuring a bird with some fun scroll-like detail to embellish.

008

knitsaholic posted this amazing shot of a work-in-progress that achieves exactly what we're shooting for this month! The design, the colors, the stitching ... perfect!

Fabrics for stitch along

I think it's becoming abundantly clear that people love to stitch both flora & fauna -- and especially birds! -- as evidenced by the 2 fabric selections being considered by Savage Pink (above), and the hummingbird print seen below (by BohoIslandBaby).

August Stitchalong

Some folks haven't decided yet on their fabric.~PixieFey~ is still choosing between the Kate Spain print on the left and the fun & funky coral number on the right.

Getting Ready - August Stitchalong

And Fiber Fairy has narrowed it down to the three prints below:

August StitchAlong

What do you think? Click on over and let them know which one you think they should choose!

Fabric for August Stitch-a-long

The bold, rich colors of the floral pattern above (selected by amyhood21) are just perfect for this project. In contrast, milly and tilly is starting with a black and white print and adding soft colors with her floss selection.

stitchalong materials

Here's a beautiful color selection (and another bird!) from dixieniche:

AugustStitchalong, feeling stitchy

I can't wait to see what Thread Wizard does with this amazing fabric selection!


And there are more! Unfortunately, due to permission restrictions, I wasn't able to post some of the photos here, but I've compiled them all in a Flickr gallery created especially for the stitch-along and that I invite you to check out.

It's certainly not too late to join in. (Shoot, I haven't even had a minute to make my first stitch!) Simply take a picture of your fabric and floss selection or your work-in-progress and add it to our Flickr pool. Be sure to tag your photos with "AugustStitchalong" to make it easy to find them all.

Next week: let's focus on starting our embellishment with some simple stitches. Think backstitching for outlines, seed stitching for fills, and maybe some French knots for flourish. I can't wait to see what you do with your fabric!
SITE DESIGN BY RYLEE BLAKE DESIGNS