Showing posts with label stitch sampler. Show all posts

September 14, 2016

Wonderful Wednesday #18: Hawthorn Handmade


I adore the colors and stitches in this lovely Bear Embroidery Kit. The kits by Hawthorn Handmade look so detailed and a great place to start your stitching or a small side project for the more experienced stitchers.

Hi, I'm floresita, editor of Feeling Stitchy. I'm an avid stitcher, knitter, and crafter. You can see more of my stitching on Instagram and my blog. My vintage transfer collection is on Vintage Transfer Finds.

Feel free to email me with any ideas for the blog!

June 6, 2015

Learn the Butterfly Chain Stitch


Happy Weekend, fellow stitchers!

It's the first weekend in June, which means summer is officially on the way. I bet many of you are preparing for long weeks ahead filled with travel, gardening projects or maybe figuring out how to entertain your kiddos when they finish up the school year! If that's the case, hopefully you have another week or two to relax and take some time out for yourself, which is why this is the perfect weekend to learn another stitch!

Today we're learning the Butterfly Chain Stitch, a very pretty border/band stitch that you can work on pretty much any fabric or canvas. Maybe it's just because it has the word butterfly in the name, but to me this stitch is perfect for summer. It's simple, but there is a special method to doing it correctly. In fact, I realized after I had taken all my photos that I had done the stitch incorrectly, so I had to go back and do it all again!

Setting up the stitch is simple. I'm working on pretty pale blue aida I found in my stash with stranded floss in a few different colors. To start, you'll make a series of three straight stitches evenly spaced across your fabric. These can be any size you want, and spaced any way you want.


Since I'm working on aida fabric, it's easy to put the exact same amount of space between your stitches, in my case 3. But if you're working on linen or cotton you can measure your spaces by making small notches on your finger to help with your spacing, like in the picture in the middle. Make as many sections as you like to fit your space. 

Now here's our trick. Sometimes a picture can do more for me than anything else, so I'll start there!


You'll work the decorative part of your band from right to left. Come up with your fabric to the far right of your last section of stitches. Place your floss over all three stitches. It helps to hold it tight out to the left, especially if you're working with a long piece of thread, so you can create a little loop for your needle. Slip your needle under the three stitches, then over the thread you're holding out to the side, and pull through. (If you're familiar with the twisted chain stitch, this is just like that!) Pull your stitch tight so that the thread pulls the three straight stitches together and pinches them in the middle.


Without piercing your fabric, repeat on all the other stacks. This part of the stitch is worked completely on top of the fabric. Here's another photo further down the row. You'll notice I change colors here, because this is the part I had to redo, after I had done all my other rows correctly :)


And there you have it- the Butterfly Chain Stitch! I love how creative you can be with this technique. I made a little sampler of different versions, most of which I just made up because I thought they would look neat!


I played with the spacing of my straight stitches on the top two rows, doing an even increase/decrease on both sides for the top one, then just showing different spacings on the second. To me, the more space you leave the more celebratory the band becomes. Our middle band is straight forward and by the book. Below that I really enjoyed playing with size. I did sets that were double the height with two evenly spaced decorative chain stitches on top. I think it looks like a little picket fence! The last one is my favorite. The center stitch of each section is slightly longer than the outer two, which makes our pinched sections look like little stars. This option would be lovely on a retro themed project or maybe even and art deco design.

I hope you enjoyed learning this new stitch with me! What ideas do you have for incorporating this into your every day stitching? Share them in the comments below or post projects in our Flickr pool for everyone to see. Happy Stitching!


Hi, I'm Whitney - I share a new embroidery stitch on the blog once a month, learning as I stitch along with the rest of the blog. Embroidery is my first and true crafty love, though I also enjoy painting, sewing and other crafts. My other loves include graphic design, craft beer and baking.

You can also find me on my blog Whitney Makes and on Tumblr.

December 8, 2012

Rebeca Ringquist Sampler Giveaway


Hi guys! Yes, here I am with another giveaway! This time it's courtesy of Rebecca Ringquist who was kind enough to ask if our readers might enjoy a 3 month subscription to her new Sampler series. Um, yeah!


Here's a brief description of them, from Rebecca:

Stuck in a rut with the same old stitches? Can't seem to figure out which one to use next?

Each month, I'll mail you a brand new sampler, available only to subscribers, highlighting a family of embroidery stitches. Each five inch sampler fits perfectly into a five inch hoop, and can easily be completed in a month's time- just in time for the next one to arrive! These small samplers are a perfect on the go project, and if you complete the whole year, you'll have an excellent guide to most of the embroidery stitch lexicon!

An initial card will be sent immediately following your order *, and samplers will ship on the 15th of each month (Starting Janurary 2013). The designs are available only to subscribers (they cannot be purchased individually)

The design size is 5" round, and the fabric they are printed on is 7" square. 100% Cotton.

I recommend using six strand embroidery floss or size 8 perle cotton with a size 5 embroidery needle to complete these samplers.
Read more on Rebecca's blog


These look like a wonderful way to practice your stitches and break out of a stitching rut!

Now, I usually choose random comments, as you know, but this time I thought I'd try something different, in time for the holidays because I'm feeling the stress a bit more than the warm fuzzies this year...

To win, share with us your favorite Holiday memory, ever. Leave a comment here by Dec. 10, 9 PM, US CST. I'll go through the comments and select the one that makes me feel the fuzziest. :) This contest is open to everyone, including our international readers.

Hi, I'm floresita, editor of Feeling Stitchy. I'm an avid stitcher, knitter, and crafter. You can see more of my stitching on Instagram and my blog. My vintage transfer collection is on Vintage Transfer Finds.

Feel free to email me with any ideas for the blog!

June 13, 2010

White Category Winner - Rainbow of Stitches Contest


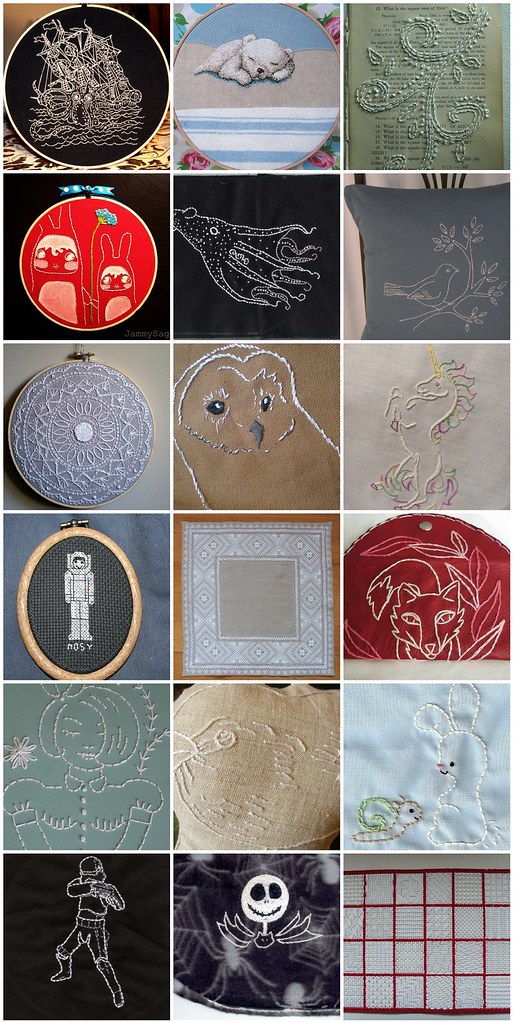
Wow, who knew that judging the Rainbow of Stitches contest would be such hard work? There were so many amazing and highly deserving entries in the white category that it was hard to pick a winner, but big congrats to Caitlin (saltyoat) for her winning entry.

Want to get to know Caitlin a little bit better? Here's how she answered our winners' questionnaire ...


What inspired your entry?

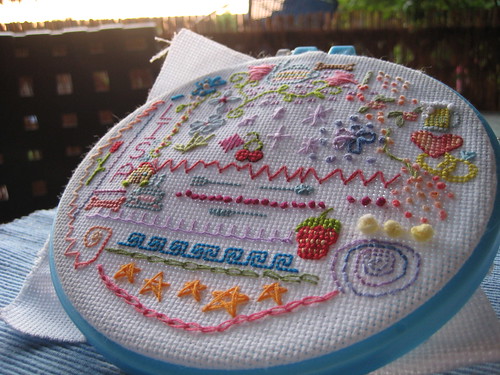
I was actually really inspired by this piece. I love doily and lace patterns, and knew I wanted to create a piece that reflected that. I also liked the idea of using the work to experiment with stitches and create a sampler of sorts. I started stitching the piece in an embroidery class at the Stitch Lab here in Austin.


What is your favorite stitch?

French knot


Who or what inspires you to stitch?

I'm really inspired by vintage embroidery transfers and fabrics. I also get a lot of inspiration from the blogs I read, Flickr, and the thrift stores I frequent.


How long have you been stitching and how did you get started?

I started cross-stitching when I was a kid, using premade kits (horses and Christmas ornaments were a part of my repertoire). I started doing embroidery last fall, using Jenny Hart's Embroidered Effects as my textbook.


Are there any stitchers in the Feeling Stitchy Flickr pool you have noticed?

I really love the white stitching on paper that jessicakelly entered in the contest (editor's note: we love it too and this entry was a close second!), and I'm a big fan of the work of septemberhouse, doe-c-doe, and the Pin Pals.

--

Thanks, Caitlin ... and good luck going up against the colors!

For some more of the outstanding contest entries in the white category, check out the mosaic below or browse our gallery.


White Embroidery Inspiration

February 12, 2010

Stitches I Know


Sampler Detail 3, originally uploaded by tabithaspike.
I've been itching to get stitching on this sampler too! You will find it in Jenny Hart's Embroidered Effects and it has 17 different stitches. I'm especially keen on trying the Open Cretan. Sounds a bit like a tennis tournament but it is the lovely red stitch sandwiched between the cross stitch and what I think is a chain stitch. This sampler was stitched wonderfully by tabithaspike.

January 9, 2010

Gorgeous stitch sampler

sampler
Stitched by Lisa's Tea Time

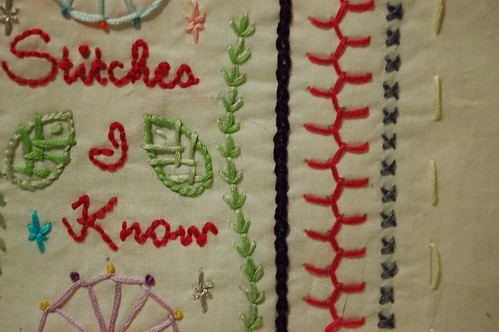
I just love the amazing variety of lines, colors, and textures on this. I'm also really impressed when people embroider anything freehand on Aida cloth - for some reason I find the large weave intimidating for freehand work... Bravo, Lisa!

Hi, I'm floresita, editor of Feeling Stitchy. I'm an avid stitcher, knitter, and crafter. You can see more of my stitching on Instagram and my blog. My vintage transfer collection is on Vintage Transfer Finds.

Feel free to email me with any ideas for the blog!

SITE DESIGN BY RYLEE BLAKE DESIGNS