July 30, 2013
Tutorial Tuesday
Hi, I'm Kristen! I am a lover of all things stitchy and crafty. I have been sewing for as long as I can remember. My grandmother taught me how to sew Barbie clothes when I was young and I have been sewing ever since.
You can find me at Bobbypin Bandit, on Instagram, and my Etsy shop.
July 17, 2012
Tutorial Tuesday
Today's tutorial is a way to toast the summer evenings, have a tasty beverage, and keep track of the time. An embroidered clock made using an embroidery hoop surely means it's time for happy hour!
To make this clock, you'll need:
-fabric of choice with your embroidery
-felt
-quilt batting
-cardboard
-a clock kit (found this one for $10 at the craft store)
-hot glue gun and glue sticks
-box cutter
-scissors
-pencil
I used some patterns from Jenny Hart's Embroidered Effects book. Copies of her book (along with other fantastic stitching patterns and accessories) can be found in her shop at Sublime Stitching.
Once you have all these items ready, it's time to get started!
Step 1: Begin by setting up your embroidery patterns within the hoop. Mark the four areas of the clock at 12, 3, 6, and 9, and stitch. I used my own hand writing for the "happy hour," which is why it's a little crooked, but that's okay.
Sorry this photo came out a little awkward. It started to rain and I couldn't seem to get the lighting right. I am hoping you can see where I marked the four areas of the clock to indicate the 12, 3, 6, 9.
Once you have your stitching ready, it's time to add the layers of batting, felt, and cardboard.
Step 2: Take apart your finished embroidered item and use the inside section of your embroidery hoop to trace the inside of the circle onto a piece of card board (Sorry, forgot to take a picture of the cardboard at this stage). Use that as a template to cut the same size circle out of two pieces each of the felt and batting.
Step 3: Put your stitched piece of fabric back into the hoop and find the center. Use your box cutter to cut a small X shape right in the middle.
Do the same thing for one piece of felt, two pieces of batting, and one piece of cardboard.
Step 4: Layer one piece of felt, the two pieces of batting, and the cardboard into the back of the hoop, right behind your stitches. Use the pencil to push through each layer and make sure the holes are centered. Pull the fabric over the cardboard and hot glue into place.
You may want to trim your fabric a little more. I was apprehensive to cut too much off.
Step 5: Take the second piece of felt and hot glue it to the back to cover the cardboard and folds of fabric, making sure to cut a small hole in the center to match the holes with the rest of the layers.
Step 6: Take the clock kit out of its packaging. Remove the nut from the clock contraption and push it through the layers of fabric and cardboard.
My kit did not come with instructions, if the same thing happens to you, layer the components with the nut first, to tighten the clock on the base you have created.
Next, place the hour hand and the minute hand on the base. Screw the small gear-like nut on top of that.
Then place the second hand on last. It should look something like this now.
Step 7: Add a battery and set the time.
Step 8: Use the hook on the clock component to hang on the wall and enjoy!
I hope you enjoy this tutorial. I used a Happy Hour theme, but you could use any image or theme you like. I thought it might be good to use one of the July stitch along images for this, too. Hope you give it a try.
Cheers!
Hi, I'm Kristen! I am a lover of all things stitchy and crafty. I have been sewing for as long as I can remember. My grandmother taught me how to sew Barbie clothes when I was young and I have been sewing ever since.
You can find me at Bobbypin Bandit, on Instagram, and my Etsy shop.
June 8, 2011
Missing Works of Art
May 27, 2011
For the left-handed stitchers

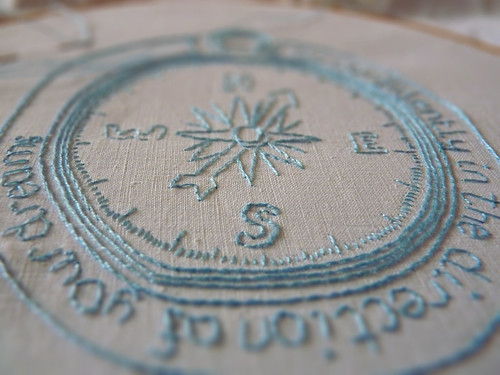
Compass embroidery by Joanna aka Thingshandmade
I am a left-handed stitcher. And I assume that I'm not the only 'southpaw' that learns new stitches only from books and the internet. Many of the books and video tutorials show how to perform stitches for right handed stitchers. For some stitches I'm able to 'translate' the diagrams to my own left-handed version but it's not always easy. So I'm always delighted when I find publications especially for left-handed stitchers.
Last year Yvette Stanton released the Left-Handed Embroiderer's Companion
I hope this post has been helpful for some of my fellow left-handed stitchers. If you have more tips for left-handed stitching please share them in the comments!
February 12, 2010
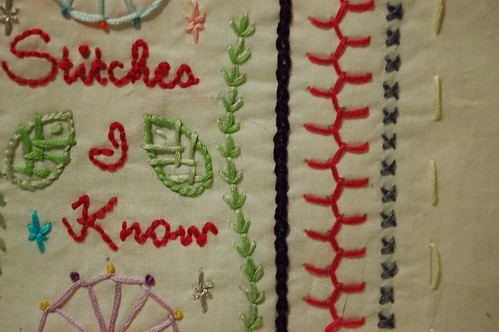
Stitches I Know
February 18, 2009
Embroidery Diagrams for Lefties

Hey you southpaw stitchers! I've added some diagrams designed for left-handed embroiderers on Sublime Stitching. I plan on adding more, so please let me know if they make sense to you!
Stitching Diagrams for Lefties
March 27, 2008
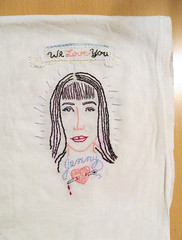
Jenny Hart and the Secret Tea Towel Tour
If you don't know about Jenny, let me tell you a tiny bit about her... what makes Jenny's work truly unique is its power to inspire - she's not only an artist, she's the brains behind Sublime Stitching, and she's happy to share her knowledge and passion for what she does with everyone. Her crafty business tips are a weekly column on Venus Zine: Crafting a Business and she's involved in many online forums like Craftster and Supernaturale.

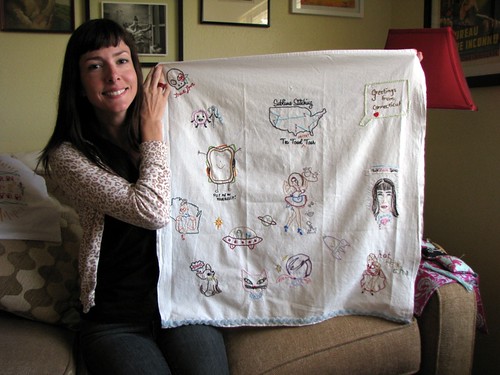
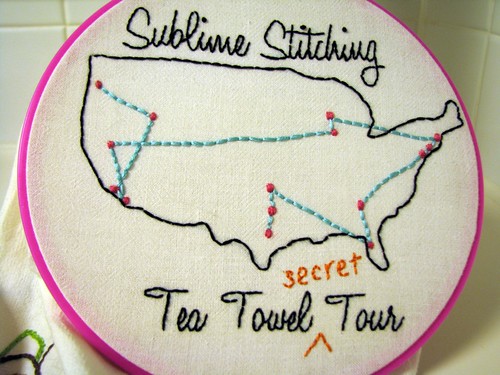
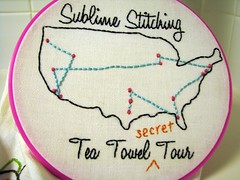
As luck would have it, a few days ago Jenny received the Secret Tea Towel begun 6 months ago by (the awesome) Kittykill on Craftster. This tour replaced the towel that went lost under mysterious circumstances, sincerely bumming everyone out...

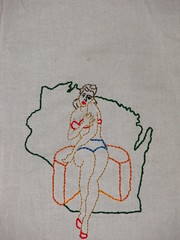
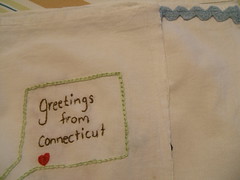
The towel traveled to 14 different places in the US (as illustrated beautifully by Rachel, above), braving forest fires, the Christmas crafting crunch, and family losses. Every stitcher on this towel is an accomplished crafter and I'd like to introduce you to all of them:
- Kittykill - Portland, OR
from Kittykill: A big "Thank You!" to everyone who participated. It took some time but Jenny finally got it. There is something to be said about people from all over the country, all different backgrounds, coming together to do a project. It makes me so happy to be a part of that community. - Brill (GatsbyGirl) - North Hollywood, CA
- Laura (Southern5footer) - San Diego CA

- Gina (Ginamonster) - Reno, NV

- Susie (IamSusie) - Grayslake, IL

- Tab (Ezri_B) - Brandon, WI

- Sarah (Sarahland) - Brighton, MA

- Carol (Ilovepaper) - New Haven, CT

- Floresita (me!)- New York, NY

- Jennifer (Fenifer) - Decatur, GA

- Joolz – Tampa, FL

- Amy (sewwabisabi) - Oklahoma City, OK
- Liz (RubyPurl) - Fort Worth, TX

- Rachel - radwriter - Austin, Tx

from Rachel: Working on this tea towel has been such a privilege, and such a BLAST! I feel incredibly lucky and grateful to have been included, and to have had the chance to stitch with fellow embroidery enthusiasts! It was especially great fun to see - in person - the work of so many people whom I've followed online. Seeing everyone's work in the Flickr Embroidery Group is a blast, but getting to hold one piece with so many of their great works on it ... well that was just fan-freaking-tastic.
Jenny inspires us every day, not only with her great designs, but with her fun, creative spirit, her independent business savvy and her dedication to keeping Sublime Stitching feeling like your best pal instead of some sterile chain store crap. It's what makes Sublime Stitching so special - the personality, the connections, the fun - and that she's been able to so beautifully maintain all that and keep everything so strongly steeped in her spirit speaks volumes to Jenny that our simple stitches can only meagerly attempt to reflect.
And I *really* *really* mean it when I say that I wish everyone could have been there to hand off the towel. I felt a little guilty that I got that opportunity! (actually, a lot guilty.) I send a sincere thanks to all who participated and made it so much fun and so special. :) more from Rachel's blog
Thanks again to everyone who was a part of the Secret Tea Towel Tour (including the crafters who graciously passed on the towel when their schedules got too tricky). And thank you Jenny, for inspiring all of us!

Giveaway! To share a little bit of Jenny love with all of you, I'm giving away one each of Jenny's "greatest hits": a brand new Stitch-It Kit, Sublime Stitching book, and a Craft Pad. (So you have 3 chances to win!) Just leave a comment on this post to enter!
Edit 4/1/08: I just closed the comments on this post and will announce a winner very soon!
Hi, I'm floresita, editor of Feeling Stitchy. I'm an avid stitcher, knitter, and crafter. You can see more of my stitching on Instagram and my blog. My vintage transfer collection is on Vintage Transfer Finds.
Feel free to email me with any ideas for the blog!