Showing posts with label Embroidered Effects. Show all posts

July 30, 2013

Tutorial Tuesday

Happy Tuesday, everyone! We are in the full throes of summer here in Southern Arizona, and sometimes the only reprieve comes in the form of cocktails on the patio while enjoying friendly company. It seems everyone is hosting a get-together this summer, and since my Mom always told me to never go to a party empty-handed, I decided an embroidered wine tote would be a great hostess gift for the occasion.


I have been wanting to use this burlesque fan dancer embroidery pattern from Jenny Hart's, Embroidered Effects book for some time, and why not add her to a wine tote as a flirty hostess or host gift? Sounds good to me. I also thought a monogrammed tote would be great for this project, as well, but I'll do that for the next party.


To make a wine tote you will need the following supplies:

- two pieces of fabric for the exterior cut to 8x14-inches
- two pieces of fabric for the interior cut to 8x14-inches
- two pieces of batting cut to 8x14-inches
- one piece of fabric cut to 4x21 inches for the strap
- embroidery pattern 
- embroidery supplies (floss, scissors, needles)
- sewing machine and coordinating thread
- scissors
- iron and ironing board

Step One: Transfer your embroidery pattern to one exterior piece of fabric and stitch.


Step Two: Assemble the exterior portion of the bag by laying the exterior pieces of fabric right sides together and the batting on the outside of either piece. Stitch around three sides using a 1/4 seam allowance, leaving the top open.


Step Three: Create a square flat bottom for the bag by taking the bottom corner seams and and pressing them flat against one another. Sew 2-inches down from the point. Clip the excess fabric and repeat on opposite corner. 


Step Four: Assemble the lining of the bag by placing the two lining pieces right sides together. Mark a 2-inch space to leave unsewn, this will be used to flip the bag inside out later. Sew around the three sides using a 1/4-inch seam allowance, leaving the top open. Make sure to leave your marked space open, as well.


Step Five: Square off the corners of the lining as you did in Step Three for the tote exterior.


Step Six: To assemble the strap, take the 4x21-inch piece of fabric, fold it in half, and press. 


Unfold, and press the outer edges in toward the center crease you just created. 


Fold in half again and press. 


Top stitch on either side of the strap.


Step Seven: Take the strap, align each edge on the center of each side seam of the tote, and pin in place.


Step Eight: Take the lining of the tote and place it inside of the exterior piece, with right sides together.  Pin it in place, making sure to keep the straps aligned along the side seams. Stitch along the top using a 1/2-inch seam allowance. 


Step Nine: Flip the tote through the opening in the lining and stitch shut. I like to run this through the sewing machine, but it can be hand sewn with a slip stitch if you like. 


Step Ten: Top stitch around the top edge. 


Step Eleven: Insert bottle and you are ready for the party!


Hope you enjoy and have a great Tuesday!

Hi, I'm Kristen! I am a lover of all things stitchy and crafty. I have been sewing for as long as I can remember. My grandmother taught me how to sew Barbie clothes when I was young and I have been sewing ever since.

You can find me at Bobbypin Bandit, on Instagram, and my Etsy shop.

July 17, 2012

Tutorial Tuesday

Happy Tuesday, everyone!

Today's tutorial is a way to toast the summer evenings, have a tasty beverage, and keep track of the time. An embroidered clock made using an embroidery hoop surely means it's time for happy hour!


To make this clock, you'll need:

-7-inch embroidery hoop
-fabric of choice with your embroidery
-felt
-quilt batting
-cardboard
-a clock kit (found this one for $10 at the craft store)
-hot glue gun and glue sticks
-box cutter
-scissors
-pencil

I used some patterns from Jenny Hart's Embroidered Effects book. Copies of her book (along with other fantastic stitching patterns and accessories) can be found in her shop at Sublime Stitching.


Once you have all these items ready, it's time to get started!

Step 1: Begin by setting up your embroidery patterns within the hoop. Mark the four areas of the clock at 12, 3, 6, and 9, and stitch. I used my own hand writing for the "happy hour," which is why it's a little crooked, but that's okay.


Sorry this photo came out a little awkward. It started to rain and I couldn't seem to get the lighting right. I am hoping you can see where I marked the four areas of the clock to indicate the 12, 3, 6, 9.


Once you have your stitching ready, it's time to add the layers of batting, felt, and cardboard.


Step 2: Take apart your finished embroidered item and use the inside section of your embroidery hoop to trace the inside of the circle onto a piece of card board (Sorry, forgot to take a picture of the cardboard at this stage). Use that as a template to cut the same size circle out of two pieces each of the felt and batting.


Step 3: Put your stitched piece of fabric back into the hoop and find the center. Use your box cutter to cut a small X shape right in the middle.


Do the same thing for one piece of felt, two pieces of batting, and one piece of cardboard.

Step 4: Layer one piece of felt, the two pieces of batting, and the cardboard into the back of the hoop, right behind your stitches.  Use the pencil to push through each layer and make sure the holes are centered. Pull the fabric over the cardboard and hot glue into place.


You may want to trim your fabric a little more. I was apprehensive to cut too much off.


Step 5: Take the second piece of felt and hot glue it to the back to cover the cardboard and folds of fabric, making sure to cut a small hole in the center to match the holes with the rest of the layers.


Step 6: Take the clock kit out of its packaging. Remove the nut from the clock contraption and push it through the layers of fabric and cardboard.


My kit did not come with instructions, if the same thing happens to you, layer the components with the nut first, to tighten the clock on the base you have created.


Next, place the hour hand and the minute hand on the base. Screw the small gear-like nut on top of that.


Then place the second hand on last. It should look something like this now.


Step 7: Add a battery and set the time.


Step 8: Use the hook on the clock component to hang on the wall and enjoy!


I hope you enjoy this tutorial. I used a Happy Hour theme, but you could use any image or theme you like. I thought it might be good to use one of the July stitch along images for this, too. Hope you give it a try.
Cheers!

Hi, I'm Kristen! I am a lover of all things stitchy and crafty. I have been sewing for as long as I can remember. My grandmother taught me how to sew Barbie clothes when I was young and I have been sewing ever since.

You can find me at Bobbypin Bandit, on Instagram, and my Etsy shop.

December 14, 2009

And the winners are....


One copy of Embroidered Effects will be mailed to the following 2 randomly selected, lucky peeps!


Winner #1:

Claudia said...

It´s so hard to choose just one favorite color (as well as just one favorite Sublime pattern...), but I´ll try, for the sake of this awesome PRIZE!!! rsrsrrs
- color: 518 - I love blue!
- pattern: Black Apple
- Christmas Carol: I don´t no any title to tell (I know some songs, of course, but not the names...) as here in Brazil it´s not so usual as in the USA.
P.S.: I L.O.V.E Feeling Stitchy!!

December 9, 2009 8:01 AM


feeling merry today
Surprise Prizes!
But, there's more! (Don't you love it when people say that on infomercials? I've kind of been dying to say that my whole life...) :)

The following 10 crafters will receive... surprise prizes!

1. Mary Lynn said...

Oooh - great giveaway!
Favorite color - I want to say all of them, but I always seem to be out of 321.
Favorite pattern - I'm really excited about the Tara McPherson - we have a couple of posters of hers hanging up in our house. I like the Day of the Dead themed patterns a lot (I'm from the Southwest), and the body parts.
Favorite Christmas Carol - "Little Drummer Boy" as sung by Bing Crosby and David Bowie.

December 13, 2009 12:14 AM

2. Beletseri said...

3843 --- A bright and complex blue
Dia de los Muertos! For sugar skulls the VM (Virgin Mary) and Halloween.
And "good king wenceslas" cause it's stuck in my head.

December 9, 2009 2:28 AM

3. MafiosaGrrl said...

hmmmm, this favorite color thing is going to be tough. I think 4050, a variegated number with greens, blues, and golds. I don't use it very often but I do love it. It's like a mermaid :)
My favorite pattern has got to be- Roaring Twenties or Zombies and Monsters.
Fav X-mas song- I saw Mommy Kissing Santa Claus.
Thanks for the chance to win!!

December 8, 2009 2:56 PM

4. jeanne said...

would love this book!
fave color...i am feeling 550...such a nice deep color...
fave pattern...this is hard...i think i am leaning towards the Carson Ellis Artist Series #9...
fave carol...little drummer boy, i think...esp sung by david bowie and bing crosby or johnny cash.

December 8, 2009 2:00 PM


6. Kate said...

ACK!! Bookmarking that colourlist RIGHT NOW.

1) I've just stitched something in 3848 - I'm pretty predictable about loving those bluey greens and greeny blues.
2) I've been eyeing off the roaring twenteis for some time now. Haven't bought it yet, but I think it will be mine soon... oh, yes... soon.
3) What about Santa Baby by Marilyn? Otherwise I love all the old old ones, especially sung in harmonies - I've got the Blind Boys of Alabama CD and was cranking 'Joy to the World' the other day. So beautiful.

I'm internationl, btw!

December 8, 2009 9:45 PM

7. Cas said...

Ooh, I love Sublime Stitching!
I'm a green kind of girl, so that lovely tree-ish no 699 is right up my alley.
I always wanted to be a Sexy Librarian - that's definitely my fave pattern!
Whenever I hear "God rest Ye Merry Gentlemen", I can't help but hear my little brother's 5 year old voice struggling to reach the high notes. Means it must be Christmas :)
Cheers!

December 8, 2009 7:14 PM

8. Lany Carroll said...

Conas atĂ¡ tĂº?
Greetings from the Emerald Isle :)
I love 125- I try to use it to stitch the reciprients name on the back of all sorts of various presents!
I'm feeling the Dutch-Russian patterns.
And Silent Night is just so beautiful.
[White Christmas always gets me in a 'sewing-for-christmas' mood though!]
I love your blog by the way-have been following it since I started stitching as a serious past time =]
thank you for inspiration (and recognition of the many fine stitchers out there).
Wishing everyone a safe and happy Christmas, and the health to enjoy it with people they love.

December 12, 2009 9:37 AM

9. Deb_in_oz said...

i am a blues girl so love 996.
we are an interfaith family and i already embroidered ornaments as gifts so would love to get the new jewish symbols pack - the jewish star is lovely.
favourite christmas carol? any on my Neil Diamond Christmas CD (i hate that i love him but i do and even more that this legendary Jewish performer has done an awesome job with Christmas music!)
so i guess this is my big interfaith blog answer LOL

December 8, 2009 5:18 PM

10. Claudia said...

All colours in yellow, orange and red, my pick is 971, a kind of orange. My favorite stitching pattern is Black Apple and Camp out. And my favorite Christmas song is either In the bleak mid winter or Chris Rea singing Driving home for Christmas. Around Christmas time you can hear me singing all day long! One loved Christmas carol after the other. Greetings from Germany - thanks for shipping internationally - my chance!

December 8, 2009 3:58 PM


Contact Me, Winners!

All winners in the giveaway, please email me at unafloresita@gmail.com with your shipping address. If you won a surprise prize, some of you will receive your prize immediately in an email (so be sure to give me an email you check often). And for the rest of you, stay tuned for a bit of fun with those holiday songs and floss colors! :)


Hi, I'm floresita, editor of Feeling Stitchy. I'm an avid stitcher, knitter, and crafter. You can see more of my stitching on Instagram and my blog. My vintage transfer collection is on Vintage Transfer Finds.

Feel free to email me with any ideas for the blog!

December 8, 2009

Embroidered Effects Giveaway

Embroidered Effects Giveaway!

In July of 2008, I received the embroidery project of a lifetime, courtesy of Jenny Hart of Sublime Stitching. My mission, should I choose to accept it, would be to stitch 3 projects for her upcoming book, Embroidered Effects. I would even (*gasp*) be paid for it! I received a full set of colorful Presencia floss to aid my quest, and sparkly Glow in the Dark SS threads. Eep. And I would have to keep it extra-secret, until the book was published next year. Now, when I have to, I can keep a secret, but it eats and eats away at me because let's face it, peeps, I am a bit of a bigmouth. :)


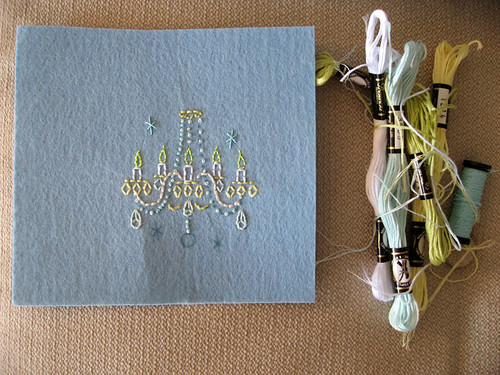
chandelier in progress

There was absolutely nothing like seeing the finished book this summer, and tracing each little stitch with my fingers (after carefully inspecting my fingers for taco grease, naturally) and thinking, I stitched that! It IS a beautifully made book, something my mom even commented on, and my mom is a tough person to impress. Other awesome stitchers were Rachel of Craftzine, Amy of Early Bird Special, and even Ginger, who owns the coolest embroidery store in Austin TX, Ginger's Needlearts. My 3 projects were the Sugar Skulls, Chandeliers, and Pillowcase Birds.


I was honored to be a part of this project, so I wanted to share a little holiday spirit with you Feeling Stitchy readers... in the form of.... a giveaway! I'll be giving away 2 copies of Embroidered Effects! (But no way am I giving away my personal copy - uh-uh!) I'll ship 1 copy internationally, so you overseas peeps can enter!


To enter the giveaway, leave a comment with the following info by Monday morning, Dec. 14th:
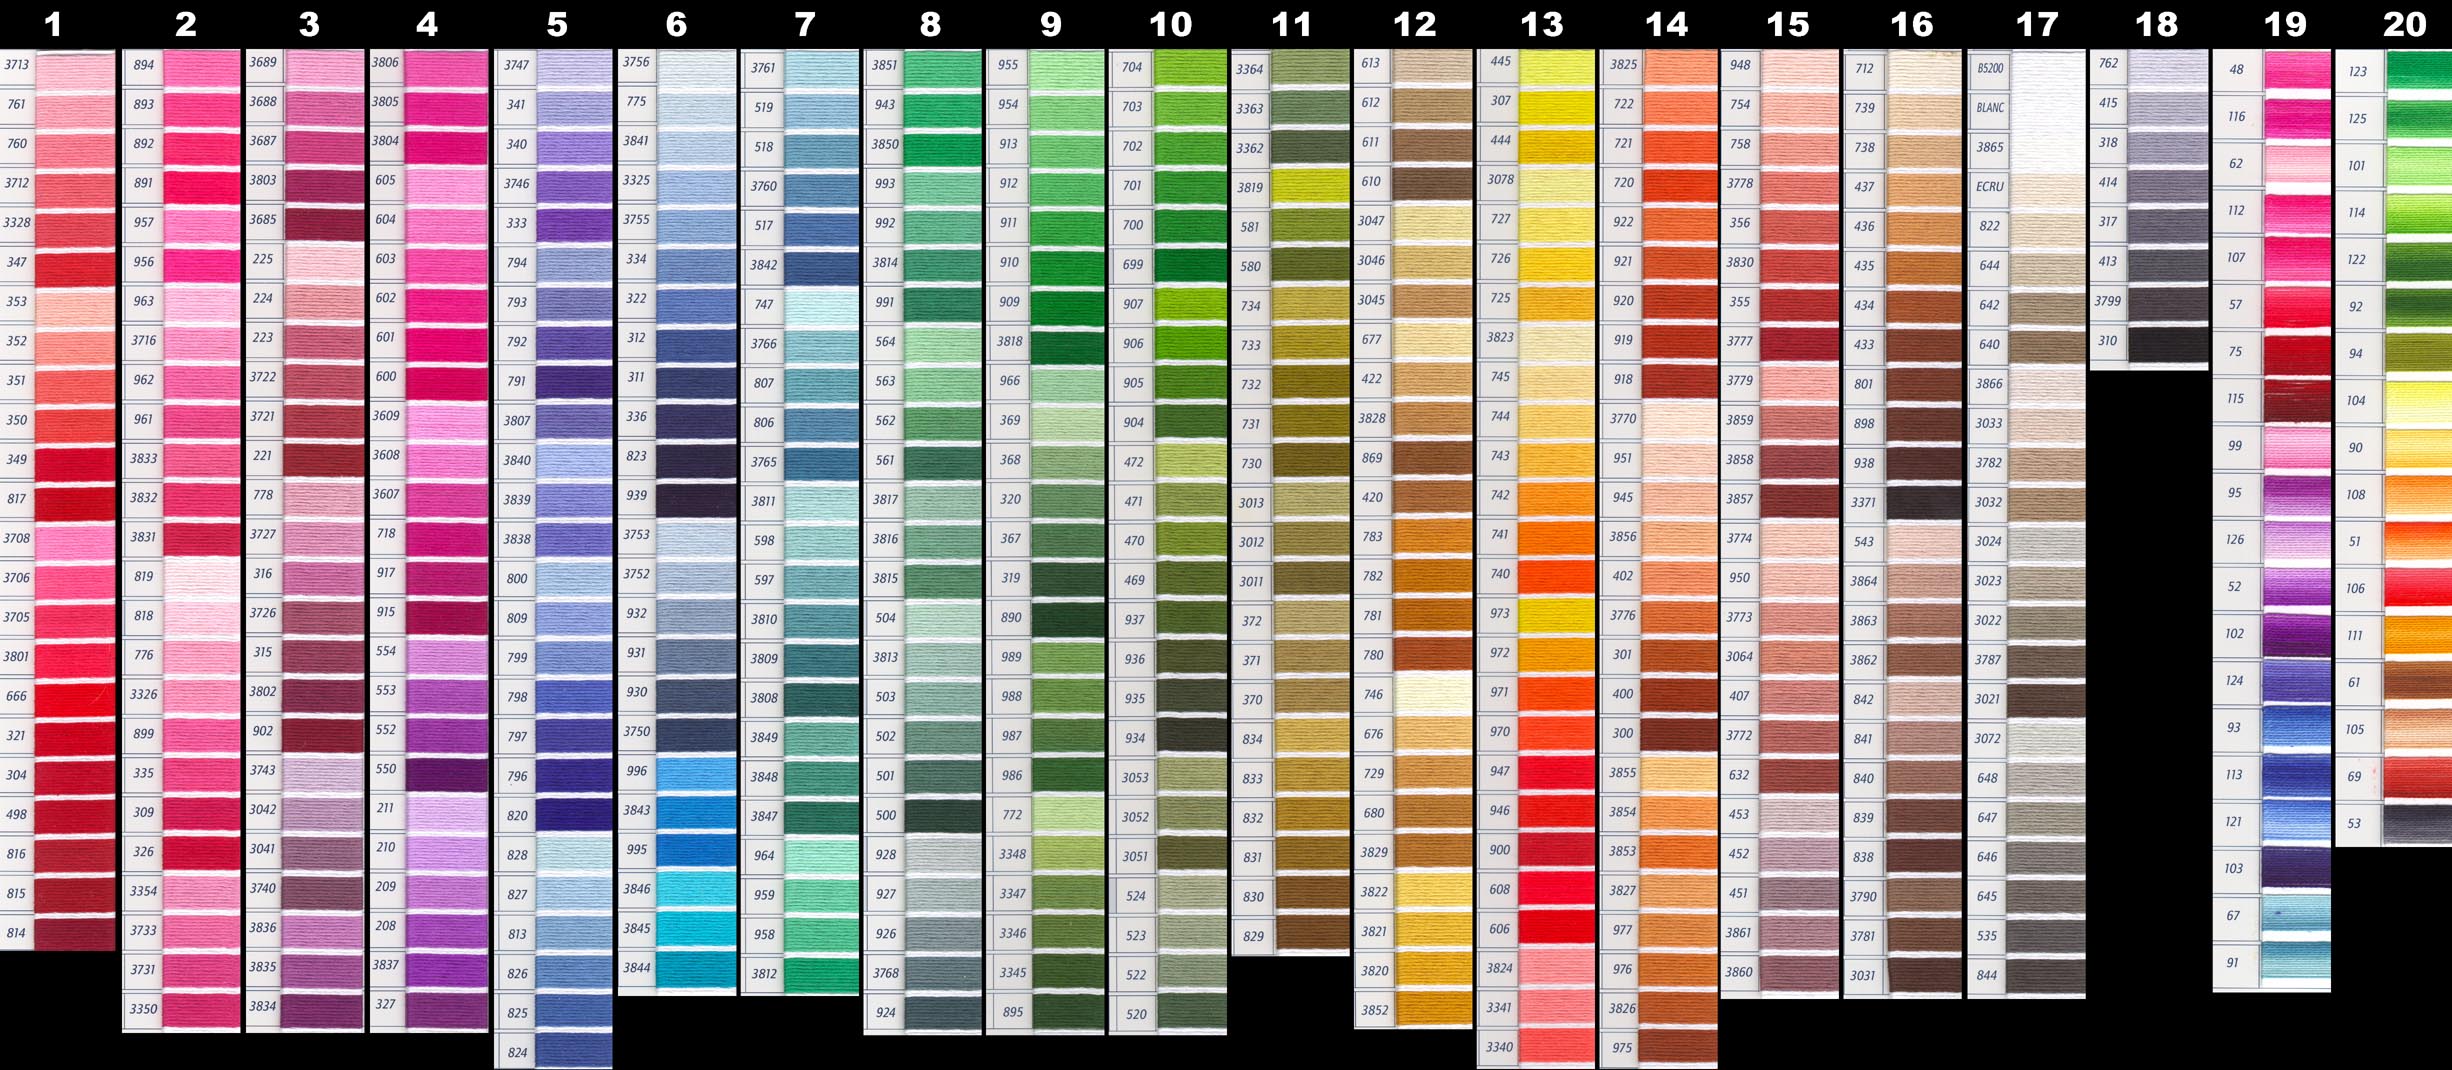
1) your favorite floss color (here's a DMC list, if you like)
2) your favorite Sublime Stitching pattern
3) your favorite Christmas carol (or, you can just say you hate Christmas carols) :)


P.S. Because I'm feeling extra generous, there may even be a few surprise prizes, too! So keep that in mind while you, ahem, answer those questions... ;)

P.S.S. We moderate comments on FS (to keep out spam), so it may take awhile for your comments to appear. No fears, we get every comment you submit, so there's no need to submit again (or 5 times more). :)

EDIT: monday, Dec. 14th, 7:30 am - comments closed - winners announced soon!

Hi, I'm floresita, editor of Feeling Stitchy. I'm an avid stitcher, knitter, and crafter. You can see more of my stitching on Instagram and my blog. My vintage transfer collection is on Vintage Transfer Finds.

Feel free to email me with any ideas for the blog!

SITE DESIGN BY RYLEE BLAKE DESIGNS