Showing posts with label applique. Show all posts

June 27, 2019

Project a Month: English Paper Piecing - Embroidery


So, I wanted to wrap up this month's Project a Month posts with embroidery - as mentioned this month I was stitching along with the wonderful English Paper Piecing class with Liza Lucy on Creativebug.

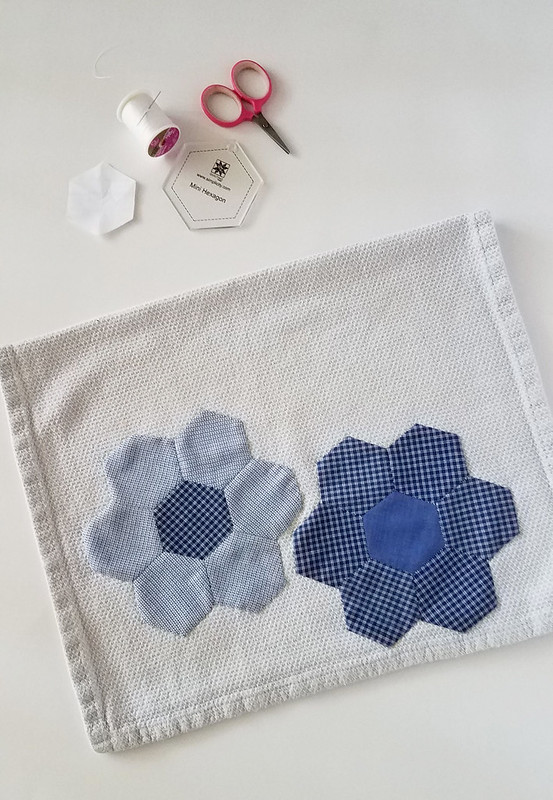
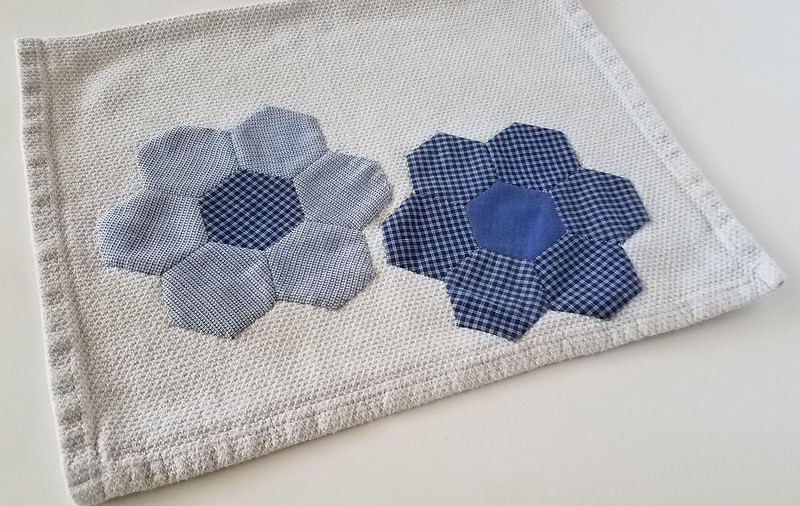
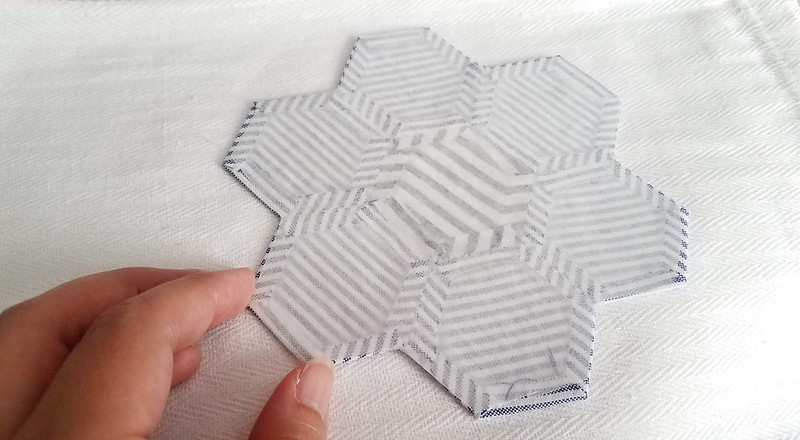
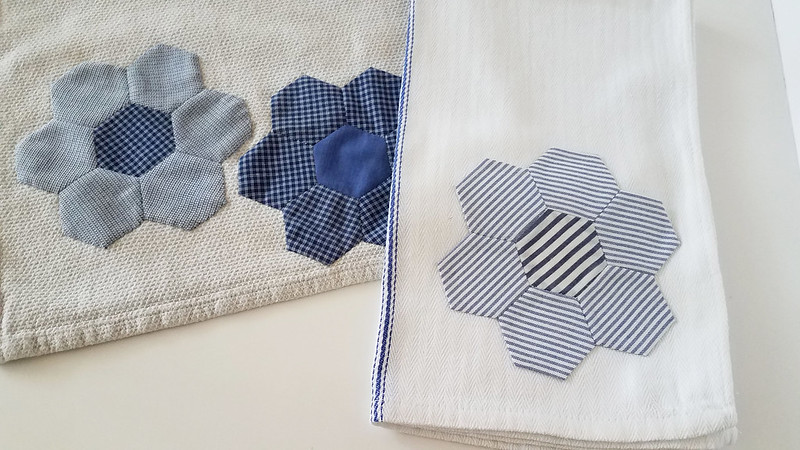
The final project in the class involves attaching your completed hexagons to a tea towel, I showed you my completed efforts last week, but this being an embroidery blog, I wanted to take it further and add embroidery!

Incorporating embroidery in EPP

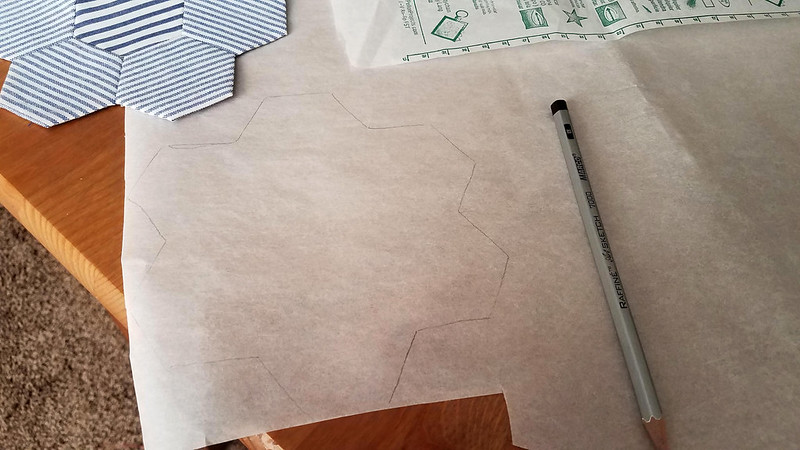
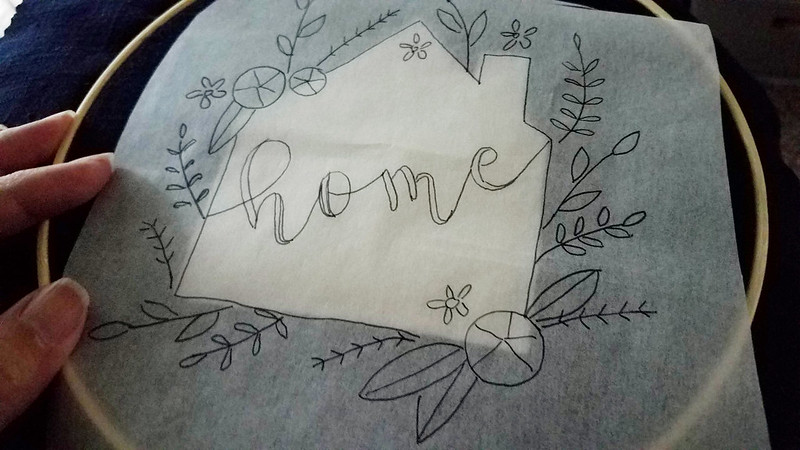
When using hexagon shapes, it is so helpful at this point to have an acrylic or cut out template so you can line up your embroidered motif exactly!

I saw to my delight that the tiny test motifs I stitched earlier this year fit perfectly in my hexagon shape...

Incorporating embroidery in EPP

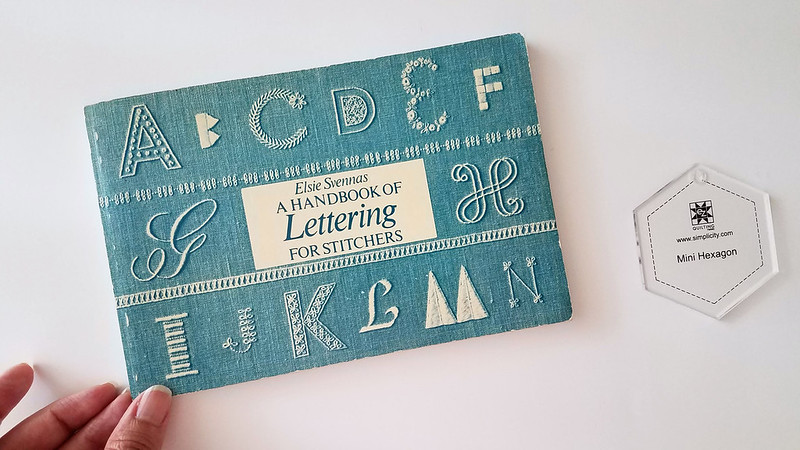
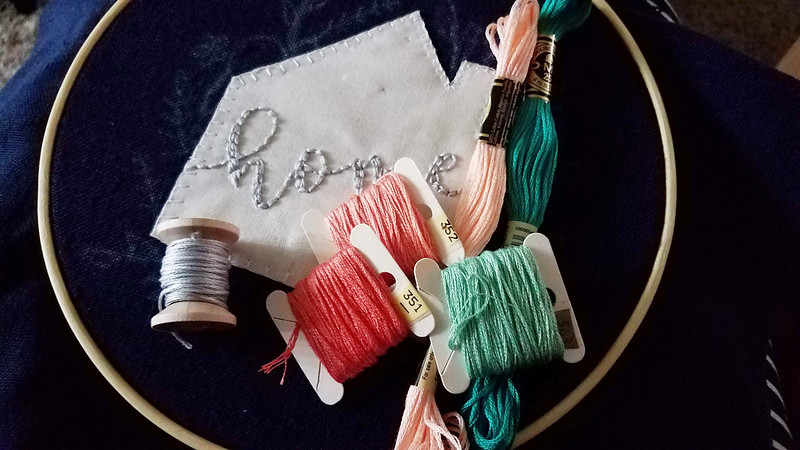
But I did want to stitch something specifically for my project, so I took out my copy of A Handbook of Lettering for Stitchers by Elsie Svennas - I've mentioned this little book before - it is delightful. Do a Google search to find the free PDF out there before you pay too much money on this out of print book!

Incorporating embroidery in EPP

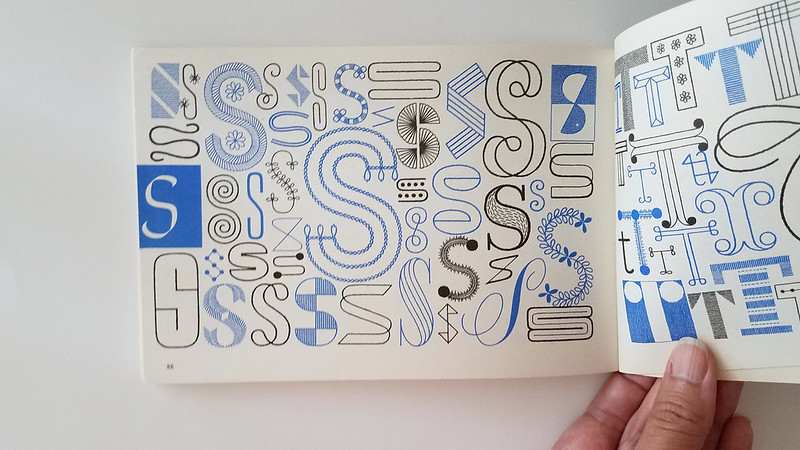
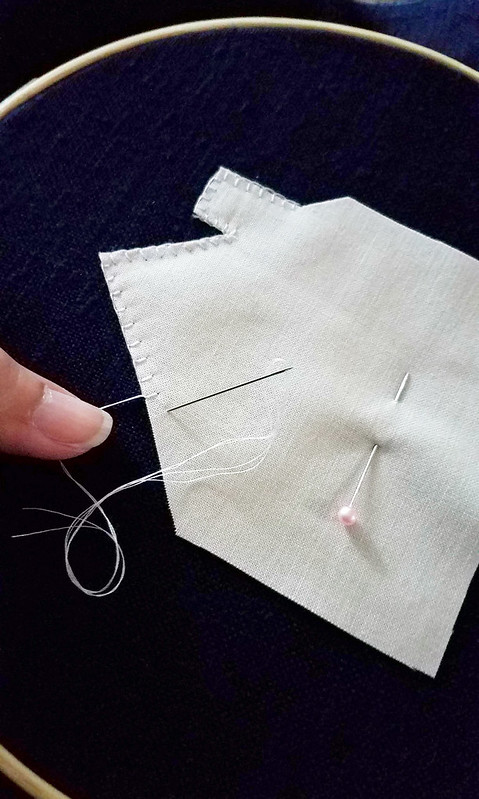
There are some lovely pages at the back with letters in so many imaginative shapes for monograms - I found a tiny buttonhole stitch "S" that fascinated me...

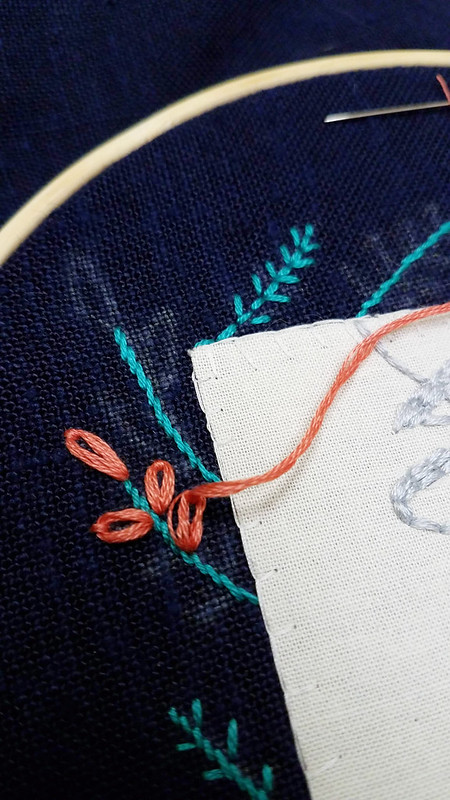
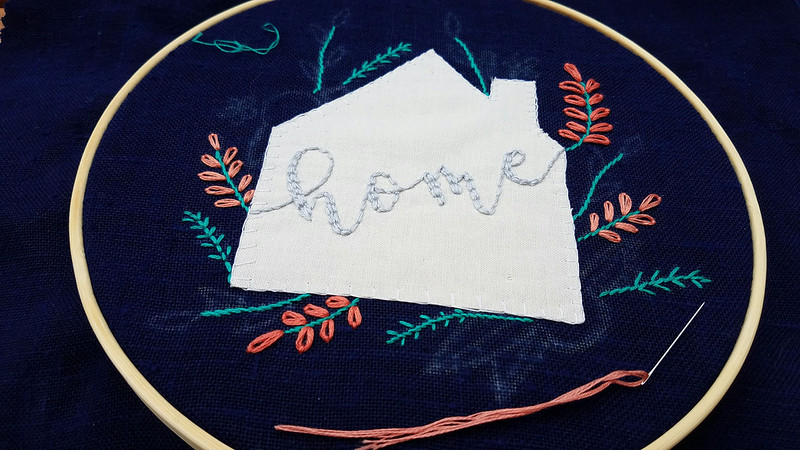
I used my acrylic template to make sure it fit well within the borders, and stitched it up:

Incorporating embroidery in EPP

This is just one simple way to incorporate embroidery in hexagonal shapes - there are so many other imaginative ways to do so, as I've been highlighting this month in the embroidery of Emma Jones, the Jam a Month Stitch Club by Mollie Johanson, and so many others!

I hope this month's Project a Month has inspired you to try English Paper Piecing as a way to broaden your stitching horizons! As mentioned before, I highly recommend the English Paper Piecing class with Liza Lucy on Creativebug, but there are numerous wonderful resources out there!

Additional classes on EPP

I am also enjoying 2 classes by Helen Stubbings on Bluprint: Quick and Easy English Paper Piecing and English Paper Piecing: Beyond the Basics. One thing I enjoy about Bluprint (formerly Craftsy) is that they include paper patterns and go into more depth.

That said, I currently have monthly subscriptions to both Creativebug AND Bluprint, and I'm enjoying going back and forth between them both! Again, when you're paying less than a Netflix, Amazon or Hulu subscription, it's hard to argue with the convenience of having inspiring content that keeps you creating!

I have 1 more inspiring resource on EPP to share with you before I close out the month, so stay tuned for that!

Hi, I'm floresita, editor of Feeling Stitchy. I'm an avid stitcher, knitter, and crafter. You can see more of my stitching on Instagram and my blog. My vintage transfer collection is on Vintage Transfer Finds.

Feel free to email me with any ideas for the blog!

June 14, 2019

Project a Month: English Paper Piecing with Liza Lucy - Attaching Your Applique

Hi all! For this month's Project a Month, I am stitching along with the English Paper Piecing class with Liza Lucy on Creativebug.

English Paper Piecing

When I left you last week, I had hand-sewn my hexagon flowers together, and was ready to attach them to a tea towel -

2 ways of attaching hexagon appliques

Honestly, I'd been itching to hand sew appliques for awhile now.

I've always been terrified of needle-turn applique, so what reassured me about English paper piecing is that your corners are already neatly tucked under.

I took out my extra-fine thread and thinnest needle, and got started. You can just barely see my teeny stitches here:

2 ways of attaching hexagon appliques

That's the magic of this applique method - if you choose a thread color close to your fabric, use tiny stitches, just under the edge, they will be virtually invisible on both sides!

Again, I recommend Liza Lucy's explanation of this method in this Creativebug class - I don't know about you, but I have to see someone doing something before it really clicks. Her explanation was thorough and helped me understand where to put my needle. All the photos and illustrations in the world don't help me as much as a clear video can!

And here is my finished applique towel!

2 ways of attaching hexagon appliques

Left unsecured in the center, the fabric tends to kind of flow and look a bit rumpled:

2 ways of attaching hexagon appliques

In a close-up photo like this, you might think it's more noticeable than it actually is. In real life, I barely notice it at all - so I think it all boils down to personal preference. Hand-sewing each edge down is a time-consuming, slow craft, but I enjoy the soft vintage look and feel of it!

Another way to applique

I had just bought some Pellon paper-backed interfacing, and I was curious to try attaching my appliques this way...

2 ways of attaching hexagon appliques

I traced my hexagon on the paper side...

2 ways of attaching hexagon appliques

Gave the applique a quick press, removed the papers, and pressed it again to keep the edges extra neat...

2 ways of attaching hexagon appliques

Cut out the Pellon...
2 ways of attaching hexagon appliques

Ironed it down, peeled off the paper backing...
2 ways of attaching hexagon appliques

Then I ironed the applique onto the towel, and voila! My new tea towel!

applique tea towel

I like how crisp the edges look and how nice and flat the entire applique is. This is definitely a more photogenic piece...

2 ways of attaching hexagon appliques

On the left, hand-sewn applique secured only on the edges; on the right, applique secured with paper-backed fusible interfacing.

More Hexagon Projects

Hexagon placemats

When I realized how FAST and easy attaching my appliques with Pellon was, I went a bit nuts with it. :)

one more hexagon towel

I spent a whole afternoon appliquing anything that would sit still long enough! Ok, maybe I didn't go THAT crazy. But I did end up with matching placemats and another tea towel, seen above. I loved adding more than one big hexagon flower, and the bold graphic look it has.

It was in this full-tilt applique madness that I discovered that some fabrics did not take to the applique as well - my tea towels have a weave to them, so that might be part of the problem, but the edges did begin to lift and separate.

So all in all, I think the best option for items you will throw in the wash frequently is to secure with paper-backed interfacing AND hand-stitched edges. If you aren't going to wash your items, just paper-backed interfacing is probably fine.

Which Applique Method is Better?

I think both methods have their pros and cons and it all boils down to personal taste.

Hand-sewn Applique
Pros:
Stitching is virtually invisible
Finished applique is soft and moves more like fabric

Cons:
Time consuming (could be a pro if you like slow-stitching)
Fabric rumples a bit (could be a pro if you like this more vintage look)

Paper-backed Interfacing Applique

Pros:
Very fast!
Finished applique lays very flat and sharp corners are preserved.

Cons:
Fabric has a stiffer feel and look
Edges must be very neat before ironing as they will show through if they are bulky
Certain fabrics don't take perfectly, and parts of your applique may start to lift

What do you think?

Have you tried either method of applique? Which do you think looks better? Which do you prefer to stitch?

Next week: Embroidery!

Next week, I'll take you through my experiments in adding embroidery to my hexagon projects!

Hi, I'm floresita, editor of Feeling Stitchy. I'm an avid stitcher, knitter, and crafter. You can see more of my stitching on Instagram and my blog. My vintage transfer collection is on Vintage Transfer Finds.

Feel free to email me with any ideas for the blog!

May 23, 2019

Project a Month: Sweet Home Ebook by Cutesy Crafts

Project a Month 6 - Sweet Home Ebook by Cutesy Crafts a feature by floresita for Feeling Stitchy

Remember that lovely Sweet Home Embroidery Ebook by Cutesy Crafts? Jessica was kind enough to share a copy of her Ebook with me, and I was determined to stitch something from it!

I chose the "Home" pattern - which has a lovely palette of navy blue, gray, coral and teal - colors I always love to stitch with! And yes, I did 2 projects this month, with time to spare. I'm glad I'm gaining speed on my finishes!

I started with the appliqué part first, and can I just admit, appliqué terrifies me?

Sweet Home Ebook by Cutesy Crafts

I used the same Ecru quilting cotton for the little house that I used in the Mother's Day Stitchalong, and a navy linen I've used for several projects now.

I didn't have the paper-backed interfacing that the pattern calls for, so instead I ironed on a lightweight interfacing and stitched it to my fabric the old fashioned way, with pins to secure it and a blanket stitch:

Sweet Home Ebook by Cutesy Crafts

And that's when I realized, appliqué really isn't that terrifying. Why had I been waiting so long to just try it?

As I stitched, it finally made sense to me that the blanket stitches protect and secure the raw edges of the appliqué. I also think the lightweight interfacing helped keep the raw edges secured and the appliqué house flat, but I'm not 100% sure on that.

Sweet Home Ebook by Cutesy Crafts

And voila! My first-ever appliqué done! You might notice that there is a mark from the pin I used to hold it in place, but I didn't stress about that, and the mark came out easily after washing and ironing later...

Sweet Home Ebook by Cutesy Crafts

When it came to transferring the pattern, I didn't have any advanced technique - I used tracing paper to prick the outline of the design, and filled in the pinpricks with chalk. Then I connected the dots using a chalk pencil.

If I had white carbon paper, I'd have used that instead - the pinprick method was messy and laborious!

Sweet Home Ebook by Cutesy Crafts

I could have used an iron on transfer pencil at this point, but I didn't want to have to flip the image, trace, and iron. So instead I stitched directly over the tracing paper, and picked out the paper after stitching:

Sweet Home Ebook by Cutesy Crafts

I used 6 strands of floss and back stitch for these letters, as the pattern calls for, in a technique very similar to the Mother's Day Stitchalong earlier this month.

Sweet Home Ebook by Cutesy Crafts

Here's a peek at the rest of the lovely colors that pattern calls for - I did make a few substitutions - the lightest peach color was too light for me, so I chose a darker - I didn't have the darkest teal the pattern calls for, so I just used the closest shade I had.

I stitched all the dark teal stems then moved on to the coral lazy daisy stitches... which brings me to this question...

Who out there hates stitching with all 6 strands of embroidery floss?

Sweet Home Ebook by Cutesy Crafts

I sure do. I know this chunky look is popular with modern embroiderers on Instagram, and I love it when others use it, but my threads *always* tangle when I use all 6 strands.

There were lots of helpful suggestions on Instagram, with Jessica from Cutesy Crafts beinng kind enough to chime in - try another needle, strip your threads, try 3 strands, folded over, and I tried them all, but still I'd get the tangles you see above.

Sweet Home Ebook by Cutesy Crafts

So I substituted 4 strands for the lighter coral lazy daisies, and I think they look just fine. Perhaps a tiny bit less chunky, but just as lovely!

Sweet Home Ebook by Cutesy Crafts

Next I stitched the light teal leaves in a fishbone stitch - I found this stitch a bit more challenging on linen, vs. quilting cotton. It looks less clean and regular, to me.

I tried 4 strands and 3 strands of floss, I preferred the look of 3 strands, which you see here.

Sweet Home Ebook by Cutesy Crafts

Next I stitched my woven wheel roses.

Sweet Home Ebook by Cutesy Crafts

Those are always easy and fun.

Sweet Home Ebook by Cutesy Crafts

And done! I don't like to stitch my gifts right before I give them, but I at least had time to wash and press my project, which caused me some anxiety - what if the colors ran, what if the appliqué shrank (I hadn't remembered to pre-wash, of course), what if I couldn't get the wrinkles out?

Sweet Home Ebook by Cutesy Crafts

But it all came out beautifully, I think! I ironed my project damp, face down on a towel, taking care not to smoosh the woven wheel roses. Then I flipped it over and very very carefully ironed the appliqué, taking care not to iron and flatten the embroidered letters.

The slight shrinking helped removed the buckling in my appliqué, so it all worked out!

This was a quick stitch- it only took me a few days, and it was very fun and lovely. If you'd like to stitch this pattern, you can find it, as I mentioned in the Sweet Home Embroidery Ebook by Cutesy Crafts, it is chock full of lovely patterns, I highly recommend it! I wouldn't be surprised if I work in another project from Jessica's Ebook later this year!

Hi, I'm floresita, editor of Feeling Stitchy. I'm an avid stitcher, knitter, and crafter. You can see more of my stitching on Instagram and my blog. My vintage transfer collection is on Vintage Transfer Finds.

Feel free to email me with any ideas for the blog!

October 3, 2017

Stitchy Snippets - Applique Art

Original artwork by Mika Harasa, featured by Julia Titchfield on Feeling Stitchy

This beautiful and charming textile art is by illustration artist Mika Hirasa. Combining a collection of antique cloths with decorative embroidery, Mika Hirasa creates playful characters and stories in her art work. Much of her art work is commissioned for advertising and magazines and book covers. Talking about her art, Mika Hirasa states that her 'fabric art gives off a warmth that can only be felt from hand-made works'.

Original artwork by Mika Harasa, featured by Julia Titchfield on Feeling Stitchy

Original artwork by Mika Harasa, featured by Julia Titchfield on Feeling Stitchy

Original artwork by Mika Harasa, featured by Julia Titchfield on Feeling Stitchy

Original artwork by Mika Harasa, featured by Julia Titchfield on Feeling Stitchy

Original artwork by Mika Harasa, featured by Julia Titchfield on Feeling Stitchy

Original artwork by Mika Harasa, featured by Julia Titchfield on Feeling Stitchy

September 16, 2016

Friday Instagram Finds No. 70 with Lolli and Grace


Good morning! This Friday we're featuring @lolliandgrace. Anne's Instagram feed is so colorful and beautiful! Her pictures are gorgeous and beautifully staged. I adore her Lady Flower Crown hoops that use appliques using pretty fabrics to add visual pop. You can find out more about Anne and Lolli and Grace on her Instagram feed and Etsy shop.


A photo posted by Lolli & Grace (@lolliandgrace) on


Want to be featured on Friday Instagram Finds? Tag your best stitch-related photos with #feelingstitchyig!

Hi, I'm Amy - I feature interesting embroidery and stitch-related photos I find on Instagram. I'm a hand embroiderer and maker.

You can find my embroidery and crafts on:
Instagram | Random Acts of Amy | Facebook

June 1, 2016

Wonderful Wednesday #3: Abigail Cecile Design

Postmarked: Italia PDF Pattern by Abigail Cecile Design

What I love about this PDF Pattern by Abigail Cecile Design is the simple hand-stitched elements combined with delicious little bits of fabric scraps. So many possibilities with this gorgeous and minimal design!

Hi, I'm floresita, editor of Feeling Stitchy. I'm an avid stitcher, knitter, and crafter. You can see more of my stitching on Instagram and my blog. My vintage transfer collection is on Vintage Transfer Finds.

Feel free to email me with any ideas for the blog!

May 1, 2015

Friday Instagram Finds No. 4


Today I'm going to share with you three needle artists I "discovered" because they used the hashtag #feelingstitchyig on Instagram. You can click on any of their user names (at the beginning of each section, or on the Instagram photo) to go directly to their Instagram feed.

@cozyblue
Among other things, Liz, a.k.a. Cozy Blue, is an embroiderer and illustrator who creates detailed hand embroidery pieces. She uses texture and color to tell a story with each of the pieces she creates.

This beautiful piece is one she created based on a photo of a beautiful filed of yellow flowers with a backdrop of mountains in Asheville, NC. As a big fan of French knots, I just love all of the French knots, and the variation in the shades of yellow. It looks like she used paint on the fabric to create the beautiful clouds.

A photo posted by liz (@cozyblue) on


This beautiful closeup is a poppy that Liz designed. Isn't it neat when an artist creates something that isn't an exact replica of what it's supposed to be? I think this shows a high level of creativity and cleverness.

A photo posted by liz (@cozyblue) on


This neat piece combines embroidery with weaving. Isn't it clever?! It reminds me of the sun.

A photo posted by liz (@cozyblue) on


@bustleandsew
Bustle & Sew is a mother (Helen) and daughter (Rosie) team who create original applique and embroidery designs and put out a monthly magazine. Their embroidery work features gorgeous florals, whimsical motifs, and beautiful color schemes.

This workroom hoop is so pretty, and would look great on any workroom wall (or door). The stitching is precise, and, again, I just love the colors Helen and Rosie use.

A photo posted by Bustle & Sew (@bustleandsew) on


This pillow has an interesting blend of embroidery and applique, that Bustle & Sew is known for. They used freestyle machine embroidery to affix the applique and create stems.

A photo posted by Bustle & Sew (@bustleandsew) on


This cute fox looks like felt applique with embroidery accents, and the texture is what gives it such great character.

A photo posted by Bustle & Sew (@bustleandsew) on


@cotton_clara
Cotton Clara, a.k.a. Chloe, creates needlepoint kits that she sells, and her Instagram feed is filled with color and her cutie kids.

This little robin is made up of lots of seed stitches in different colors. I think it had to take a lot of patience and a vision for what it should and would look like in the end. Personally, I have a difficult time working with seed stitch, and I always end up making too many. Chloe has the perfect number, in the perfect alignment.


I'm going to continue with the bird theme with these plastic canvas birds Chloe created. I have never tried plastic canvas needlepoint before, but these make me want to try!

A photo posted by Chloe Hardisty (@cotton_clara) on


Here's another plastic canvas needlepoint design that Chloe created. This little bunny is super cute, and I think it would have made a great addition to an Easter basket or Spring-themed wreath.


I hope you've enjoyed edition number four of Friday Instagram Finds (FIF) on Feeling Stitchy! Please leave comments below to let me know what you thought. If you'd like to be considered for FIF, or if you find a great embroiderer or stitch-related needle worker who you think I should feature, be sure to tag one of their pictures with #feelingstitchyig, and I'll take a look!

While you're on Instagram, make sure you follow Feeling Stitchy! We're @feelingstitchyish. We'd love for you to stop by and say hello :)

Friday Instagram Finds, No. 5 will be published Friday, May 15, 2015.

Hi, I'm Amy - I feature interesting embroidery and stitch-related photos I find on Instagram. I'm a hand embroiderer and maker.

You can find my embroidery and crafts on:
Instagram | Random Acts of Amy | Facebook

July 6, 2014

Patterns: Friendly Fox

Friendly Fox

Friendly Fox by Helen Dickson

You can find this friendly applique fellow in the July issue of the Bustle and Sew magazine. You can find out more about the magazine here.

Hi, I'm Jo - I feature new embroidery patterns Sundays on Feeling Stitchy. I also post on our Twitter and Pinterest.

Is there a new pattern you'd like us feature? Email me!

December 25, 2013

Countdown to Christmas: So many hoops!

Embroidery Hoop Christmas Tree
Stitched by Rhapsody and Thread

I am in love with this festive group of holiday hoops stitched by Tabatha on Rhapsody and Thread. And I think it's the perfect amount of Christmas spirit - a TON - to wrap up the Countdown to Christmas.

Merry Christmas to you all - have a wonderful day with your family and friends, and wherever life may find you, happy stitching to all!

Hi, I'm floresita, editor of Feeling Stitchy. I'm an avid stitcher, knitter, and crafter. You can see more of my stitching on Instagram and my blog. My vintage transfer collection is on Vintage Transfer Finds.

Feel free to email me with any ideas for the blog!

February 22, 2013

Sweet snail

New Year, Mixed Media "Slow it down"
stitched by xperimentl

I have to say, I agree with this sentiment! So much of our current world is about viewing and acting and consuming life at top speed. One of the loveliest things about crafting is that it puts you in touch with impulses that are the opposite of that. Thanks, xperimentl, for your wonderful stitching, and Happy Friday to you all! :)

Hi, I'm floresita, editor of Feeling Stitchy. I'm an avid stitcher, knitter, and crafter. You can see more of my stitching on Instagram and my blog. My vintage transfer collection is on Vintage Transfer Finds.

Feel free to email me with any ideas for the blog!

December 7, 2012

Picado - Appliqué embroidery from the Northeast of Portugal

Olá! Today I'll talk about a very specific type of needlework technique: "appliqué". I really don't know if it is rigorous to consider this technique as a type of embroidery, but in Portugal we do it. As I've already talked about, we find these embroideries in Nisa - Bordado de Aplicações (Appliqué embroidery) - and as you'll see today we also find them in the North of Portugal. There, in the north, this technique is called Picado (the best translation I find is "punched").


Picado work,  from here
I couldn't find too much about the historical perspective, but I decided to publish it anyway once the images talk by themselves and I truly love this type of embroidery. At the same time, and continuing last week theme, I believe it would be fun to show more embroidered pieces wear by men.

All the embroideries I will show come from Tras-os-Montes (behind the hills), a region in the Northeastern corner of the country. Facing a very hard climate and isolation, people that live "behind the hills" maintained many folklore forms preserved up to our days among which are included these embroideries on wool cloth, really needful in cold winter days. Burel, saragoça and surrobeco are the fabrics used, but distinguish from each other is not easy, once they are all made of wool.


Picado work,  from here
I believe the origin of this type of embroideries was the Capa de Honras (Cloak of Honours). Many consider it the most luxurious Portuguese costume. Traditionally they come for Miranda do Douro and are brown male cloaks with a pendant on the shoulders, open in the back and decorated with appliqué embroidery, Picado. It was worn by cattle keepers and shepherds to be protected in coldest days and by the wealthy men. It's a work of great complexity, taking 20 days to get done. A long time ago they took more than 60 days once all the decorations were hand trimmed and then hand sewed to attach the apliques to the cloak. 


Beautiful photo of a Capa de Honras, by Ana Rojas
The "honor" in the name does not refer to the fact of being used by noble people but instead to the fact of being so elaborated. There are still some artisans that dedicate their lifes to this art. Follow the link and you'll find a video about one of those tallented tailors, check and don't worry about not understanding Portuguese once the images of his work speak for themselves.
Nowadays Capas de Honra are used in important cerimonies. Recently, a renowned Portuguese stylist, Nuno Gama, brought them to his 2010/2011 winter collection and fashion show.

Another application of Picado are the charmimg decorated vests from Pauliteiros de Miranda. I would say they are one of the most original piece of Portuguese traditional outfits. And they gain increased beauty when we see the whole costume. 


Vest decorated with Picado, from Pauliteiros de Miranda
"Pauliteiros are the dancers of a Portuguese folklore dance, the warrior dance of Terras de Miranda, called “dança dos paus” (“the stick dance”), which represents local historical moments. It uses bagpipes, a snare drum and a bass drum, and it’s traditionally danced by eight men that wear a skirt and a linen shirt, a brown vest, leather boots, whool socks, a hat that can be decorated with flowers and finally, a pair of sticks that they use in a diverse series of steps and coordenated movements that simulate a fight." (1
Check here and see the beatiful photos of Pauliteiros de Miranda and again here to watch a performance.


Beautfiully decorated vests with the Picado technique, photo from here
Recently some artisans begun using the same technique with different applications, in home decoration, accessories, handbags, clothing...


Home decoration using Picado, photo for here
Home decoration using Picado, photo for here
Would you say that the Picado technique is a type of embroidery? I promised myself that soon I'll learn how to do it, and then I'll tell you!! The first lesson is here, but I will need many more.


SITE DESIGN BY RYLEE BLAKE DESIGNS