Showing posts with label lazy daisy stitch. Show all posts

March 14, 2016

MooshieStitch Monday: Little Felt Peeps


Peeps


If you are a reader in the States, you are well aware it is currently the season of Peeps.

They are in every store for Easter right now.

Although I am not a fan of eating Peeps, I wanted to include them somehow in a simple embroidery project, especially after I found this free Peeps pattern.

Here is what I did:

I traced the pattern onto freezer paper (onto the non-shiny side).


Place the freezer paper Peeps (shiny side down) onto felt and hold your iron over the pattern for about 5 seconds.


I used basic craft felt and set my iron to the Acrylic/Silk (no steam) setting. The freezer paper will adhere to the felt just long enough for you to cut them and the paper will peel right off.


I have never used freezer paper like this before and it works great! I will definitely use this method again.

Then I whip stitched each Peep onto my fabric.


Yellow Peep...

Pink Peep...

Purple Peep...

I stitched french knots for the eyes and nose.


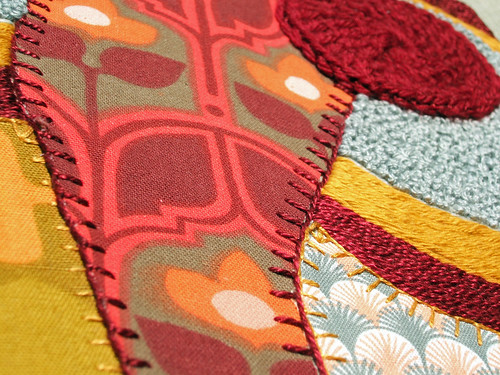
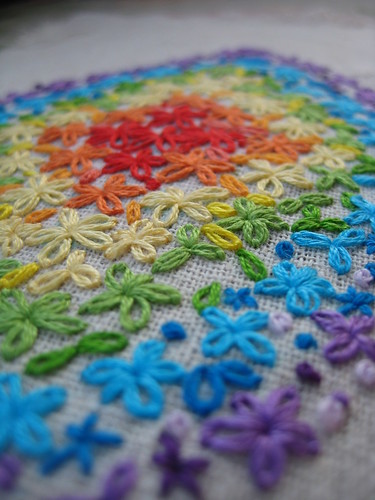
I thought it needed something extra so I added some flowers.


Per the Peeps wiki page, it says they are sold in Canada also (you lucky Canadians!), so I am curious if any readers out there know if they are sold anywhere else in the world!

I hope you liked this little Peeps project. If you decide to use the pattern for an embroidery project or anything else, let me know. I would love to see!

Also, have you ever used freezer paper for tracing patterns??


February 29, 2016

MooshieStitch Monday: Whipped Lazy Daisy

Whipped Lazy Daisy stitch, a tutorial by Michelle for Mooshiestitch Monday on Feeling Stitchy

Remember my whipped wheel post from last year?

When  I was searching for more "whipped" stitch ideas, I found this Ribbed Spider Daisy Flower on Needle 'N Thread and had to try it!

First stitch a basic lazy daisy. I used a circle template to mark my flower petals as evenly as possible.

Whipped Lazy Daisy stitch, a tutorial by Michelle for Mooshiestitch Monday on Feeling Stitchy

Follow the same directions as the whipped wheel stitch.

One exception: when you start whipping, do not come up through the middle of the daisy, come up in between two of the petals and then start whipping around each petal.

Whipped Lazy Daisy stitch, a tutorial by Michelle for Mooshiestitch Monday on Feeling Stitchy

The red daisy petals are #5 perle cotton whipped with DMC floss.

Whipped Lazy Daisy stitch, a tutorial by Michelle for Mooshiestitch Monday on Feeling Stitchy

I stitched a couple more daisies in #5 perle cotton to practice.

Whipped Lazy Daisy stitch, a tutorial by Michelle for Mooshiestitch Monday on Feeling Stitchy

The blue and white daisies are also whipped with DMC floss.

Whipped Lazy Daisy stitch, a tutorial by Michelle for Mooshiestitch Monday on Feeling Stitchy

Whipped Lazy Daisy stitch, a tutorial by Michelle for Mooshiestitch Monday on Feeling Stitchy

All three whipped!

 Whipped Lazy Daisy stitch, a tutorial by Michelle for Mooshiestitch Monday on Feeling Stitchy

Whipped Lazy Daisy stitch, a tutorial by Michelle for Mooshiestitch Monday on Feeling Stitchy

Whipped Lazy Daisy stitch, a tutorial by Michelle for Mooshiestitch Monday on Feeling Stitchy


Hope you try this stitch sometime!


March 26, 2015

Thimblenest Thursdays: Twisted Lazy-Daisy Edge Stitch


In two weeks I'll be bringing you another project tutorial. As I started pulling that post together, though, I realized that I didn't know a great stitch to give it the finish I wanted. After searching in vain for an edge stitch that: 

1. accommodates a curved edge 
2. could be used for joining two (preferably knit) fabrics together
3. and provides a dressier touch than something like blanket stitch, 

I decided to invent something I'm calling "Twisted Lazy-Daisy Edge Stitch". By outlining the steps for this stitch here today, my next tutorial won't need to include directions for that project and this stitch. By the way, I found this post helpful in developing the directions below.

Here we go . . . 


For the purposes of this tutorial, I'm joining the circle above to the square. 


Mark dots around the inside of the circle, spacing them your desired distance apart. The dots indicate where the top of each stitch will be. For this circle, my dots were 3/8" (0.95 cm) from the edge of the circle; I eyeballed the distance between each dot. The next time I use this stitch, I think I will decrease the amount of space between stitches.


Pin the circle to the square and thread your needle. In these pictures I used three strands of embroidery thread, but two worked fine during some of my practice runs.


Bring your needle up through the square fabric right at the edge of the circle, and directly below one of the dots.


Insert your needle back down through the fabric slightly to the left of where you brought the thread up, and continue back up through both thicknesses, coming up through the dot.


Continue pulling the thread up until just a small loop remains; stop short of pulling the thread taut. Twist the loop one turn to the left.


Above you can see the difference between a stitch that is twisted and one that is not. I felt that adding a twist added a little more finesse, as well as strength to the edge of the fabric that is being secured.


Now, just like with lazy-daisy stitch, bring your needle up just inside the top of the loop, holding the loop in the general area of the small dot; then go back down through the fabric just outside the top of the loop.


Bring your needle back up just above where you twisted the loop and then go back down just under the twist. One stitch is complete!

Begin the next stitch by coming up at the edge of the circle in line with the next dot to the right. Continue stitching until you have completed a full circle. I'll be back in two weeks with a fun project that uses the Twisted Lazy-Daisy Edge Stitch; see you then!


Hi, I'm Wendy - I've been embroidering since age 9 when my grandma gave me some blank tea towels and a set of Aunt Martha’s transfers. I blog at ThimbleNest.

You can also find me on Pinterest.

February 17, 2012

Love: knot (and lazy daisy) addiction

Knot Addiction.
stitched by dozydotes

Wow. Just had to show you this amazing example of french knot and lazy daisy addiction, by dozydotes. In case you didn't know - lazy daisy is this week's stitch in the Take a Stitch Tuesday challenge.

How many hours do you think this piece took? Let's get some guesses going, then we'll ask her! Wonderful work!

Hi, I'm floresita, editor of Feeling Stitchy. I'm an avid stitcher, knitter, and crafter. You can see more of my stitching on Instagram and my blog. My vintage transfer collection is on Vintage Transfer Finds.

Feel free to email me with any ideas for the blog!

February 14, 2012

Take a Stitch Tuesday: Lazy daisy

d7

d2

This week's Take a Stitch Tuesday stitch is the Lazy daisy. Well, I am no stranger to the Lazy daisy (or detached chain) stitch, so I had fun playing with it last night. I've done many embroidered pieces that used oodles of Lazy daisies - most notably Lottie the dog-faced girl (a pattern by Badbird) and this pink doe.

If you dig vintage embroidery patterns like I do, you'll find tons of lazy daisies in them, so if you want to stitch vintage, this is the stitch to learn.

If you'd like to learn the Lazy daisy stitch, try:


I kept it simple on the daisies, stitching most of them in increments of 5 - an arrangement that seems to be common in real flowers.  I used the same 3 colors of floss I used for the last piece - I plan to use only those 3 on all my hoops.

Here she is next to my chevron hoop from last week's Take A Stitch Tuesday:
d3

You'll notice I used a scrap from the same striped blue and white pillowcase, I just turned it in a different direction for variety. I promise I will get them in better light for a final set of photos - in the meantime, thanks for bearing with these evening shots. :)

Here's the links to people participating in TAST:
Jennifer: http://www.marriedtoabmw.com/search/label/Embroidery
Hanna: http://www.ihanna.nu/tag/tast/
Faith: http://airynothing.net/Blogs/anblog/tast/
Kathy: http://eclecticlamb.wordpress.com/category/embroidery/
Susan: http://cq4fun.livejournal.com/

If you've joined in, please leave a link to your blog or Flickr set in the comments and I'll add you to next week's post! Until next week! :)

Hi, I'm floresita, editor of Feeling Stitchy. I'm an avid stitcher, knitter, and crafter. You can see more of my stitching on Instagram and my blog. My vintage transfer collection is on Vintage Transfer Finds.

Feel free to email me with any ideas for the blog!

October 7, 2011

Flower Power


This is some serious gorgeous stitching by Anne (aka Dozydotes on Flickr)! An abundance of lovely satin stitches, French Knots, Lazy daisy stitches and a few other stitches as well. The flowers seem to be bursting from the hoop and I love that the stitching nearly covers all of the fabric. The autumnal colours Anne used for this piece are also spot on: rusty brown, yellow, orange and even a hint of pink. Do check out Anne's other 'Flower Power' pieces here.

November 5, 2010

Vintage Deer


Beautiful embroidery in progress by Jaime (Sew she sews)! Love all the Lazy Daisy Stitches, the neat stitching and the colours are just perfect. I don't know about you but I really want to stitch this pattern too. Like right now! Well you can get your hoop out because Jaime has shared this vintage gem here for all to enjoy. Thank you Jaime.

September 17, 2010

Hidden Elephant


Can you find the hidden elephant in this picture? Poppy and Lime combined vintage fabrics with funky prints, hand stitching and impressive amounts of fill stitching to form this colourful creature. The fill stitching is done by using the Stem Stitch and lots of French Knots.  If you haven't mastered Le French Knot yet, head over to this tutorial by Jenny Hart, there is even one for left handed embroiderers!

Remember last weeks post about the Lazy Daisy Stitch? It inspired me to make this Lazy Daisy Peacock Feather Stitch.  Which is actually a confusing name because it isn't a Feather Stitch at all, just a stitch variation to create a Peacock Feather!

September 10, 2010

Lazy Daisy

Rainbow Lazy Daisy 003

Last week I wrote about 'Especially useful stitches to know' and Kelldandy commented that the Lazy Daisy Stitch should be added to the list. And she is totally right! The Lazy Daisy stitch is also known as the detached chain stitch. Another name for this stitch is the Tied Loop Stitch and that pretty much tells us how this easy-to-master stitch is done. But if you'd like a little more information check this video tutorial. Very often the Lazy Daisy Stitch is used for embroidering flowers. Lisa created this beautiful flowery piece using mainly Lazy Daisy stitches. However the Lazy Daisy Stitch is not just a 'flower' stitch, it's actually a very versatile stitch. I used it just a couple of days ago to stitch some mossy plants for example. It's also great as a fill stitch and wonderful in combination with other stitches like the French Knot. Hope this inspires you to explore the Daisy Stitch a bit more!
SITE DESIGN BY RYLEE BLAKE DESIGNS