Showing posts with label product review. Show all posts

August 19, 2017

Review: Stitcharama Embroidery Transfers

Stitcharama embroidery transfer review by floresita on Feeling Stitchy

Hello all, today I have the pleasure of doing a review of Stitcharama embroidery transfers, which you can find at www.stitcharama.com. They were kind enough to send me the embroidery transfer you see, so that I can try it out and report back to you with my findings.

Well, I suppose I can tell you the end at the beginning if you have no time to read this - I was very pleased with my results, and I do recommend them. But let me walk you through my process!

Stitcharama embroidery transfer review by floresita on Feeling Stitchy

I started off with a regular flour sack tea towel and my transfer pattern. I did a quick read through of the instructions, and I wondered how well it would transfer. It looked just like a regular medium weight sheet of paper, and the lines didn't look particularly thick or dark.

Stitcharama embroidery transfer review by floresita on Feeling Stitchy

I pinned the transfer into place and started ironing. After a few passes with a hot, dry iron, I pulled the transfer back to peek and I did indeed see some very faint lines appearing...

Stitcharama embroidery transfer review by floresita on Feeling Stitchy

And after a few more passes with the iron I began to see darker lines appearing.

Stitcharama embroidery transfer review by floresita on Feeling Stitchy

And voila! After working at the fainter lines for a bit, I was rewarded with a very nice transfer, and nice clean lines - not too thick or inky. I really like that the pattern is still clearly visible on the paper, which could be really handy if you wanted to re-trace the pattern to use it again.

I was curious to see if the ink had passed through the tea towel fabric, as the directions warned me it might, so I flipped over the fabric...


Stitcharama embroidery transfer review by floresita on Feeling Stitchy

Indeed, I did see a very ghostly image on the back, but it did not transfer to my ironing board, which was nice.

In summary, I am really happy with the transfer, as I mentioned above. When purchasing a transfer pattern, you also receive a nice PDF with a finished image and stitch and color guide. I like how Stitcharama promotes the work of many artists through its patterns and credits them. Just FYI, this particular Kasia Jacquot pattern is no longer available.

But there are many lovely patterns and kits still up for grabs on the Stitcharama site (including some really cute Mollie Johanson patterns). Here are a few of the latest patterns that I think are adorable:

Screenshot of Stitcharama store, as featured by floresita on Feeling Stitchy
I wholeheartedly recommend the transfer option for your lighter colored fabrics, and the PDF pattern option if you'd like to do your own transfer method.

Thank you Stitcharama, for sharing this lovely pattern with us. For more on Stitcharama, you can follow them on Instagram @stitcharamacraft, or visit their site: www.stitcharama.com.

Stitcharama embroidery transfer review by floresita on Feeling Stitchy

Hi, I'm floresita, editor of Feeling Stitchy. I'm an avid stitcher, knitter, and crafter. You can see more of my stitching on Instagram and my blog. My vintage transfer collection is on Vintage Transfer Finds.

Feel free to email me with any ideas for the blog!

December 3, 2016

Review: DMC Stitchable Mesh and Pattern giveaway


Hello all! Today I am reviewing the new DMC Stitchable Mesh - and for all of you who follow me on Instagram, this post comes as no surprise, as you already saw "sneak peeks" of my thoughts and progress while working with it. Thank you, first of all, to DMC for sending me the stitchable mesh to work with - it was a treat!


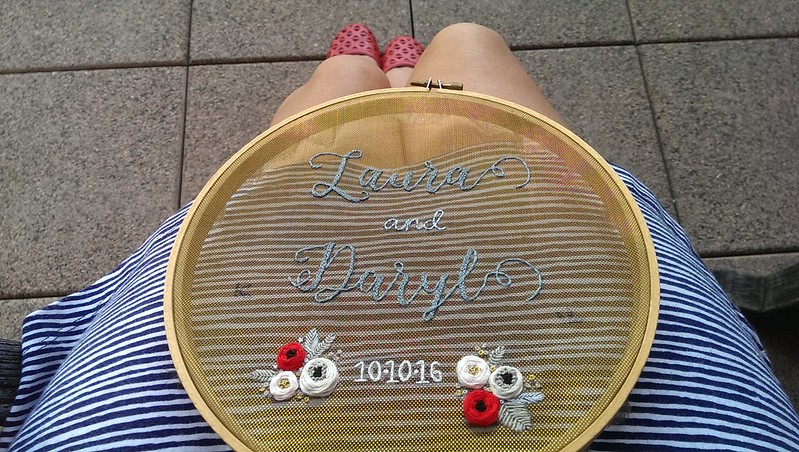
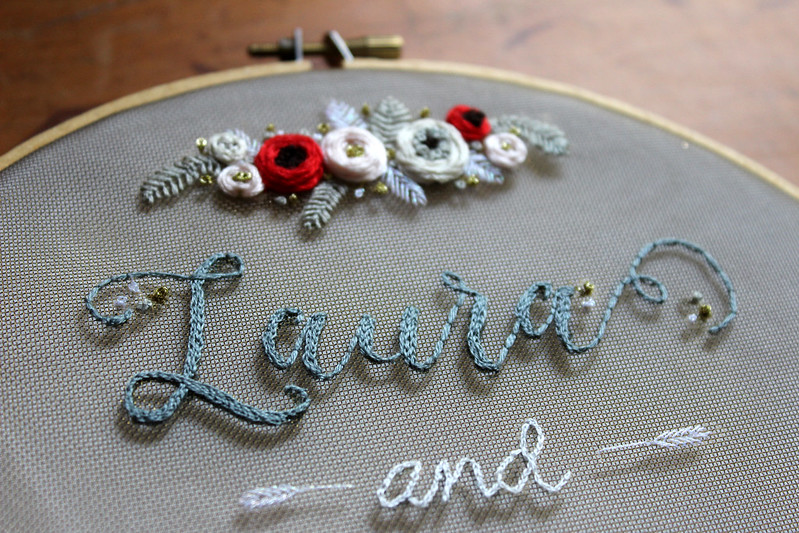
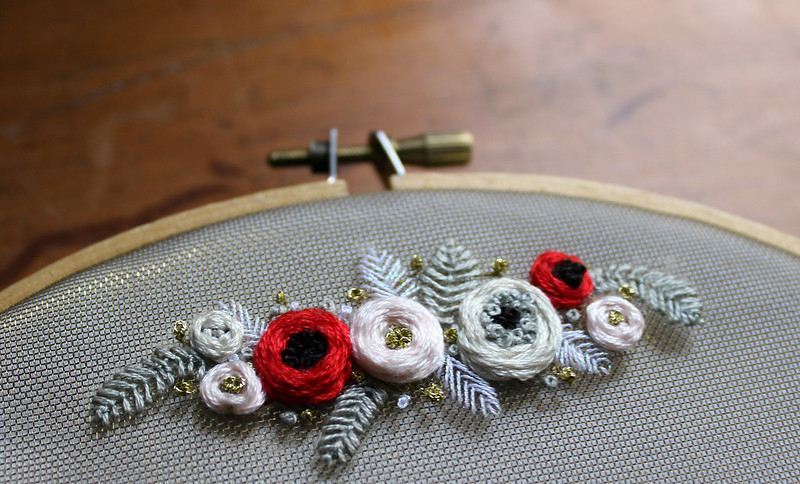
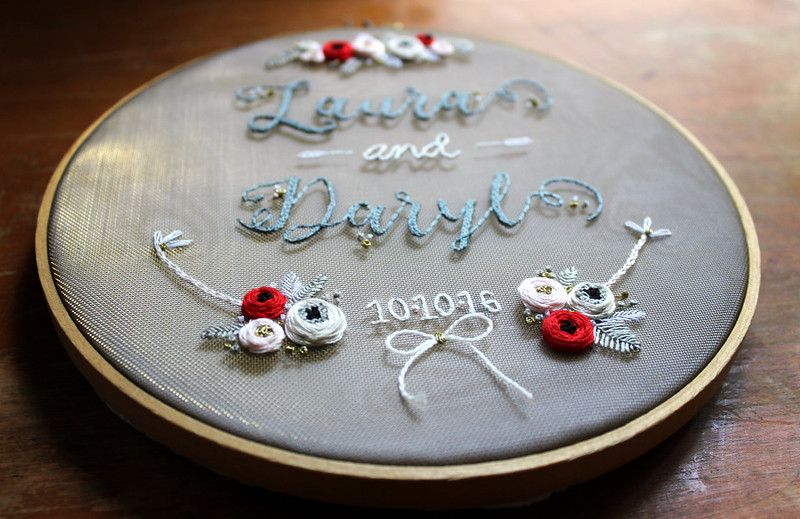
The stitchable mesh is thin enough to put in a regular embroidery hoop - I fit all of mine in an 8 inch hoop. The mesh is very sheer (as you see above), and has two sides - one with a silver-white finish, and one with a gold finish. I chose the gold finish for my project - and it has a very nice sheen.


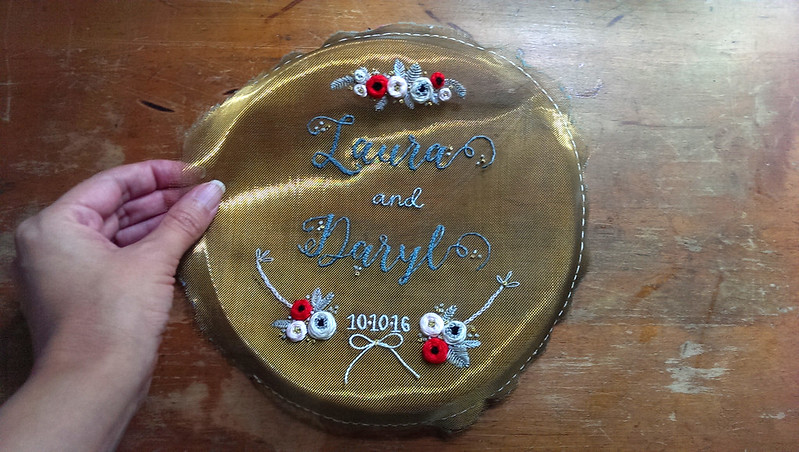
The edges of the mesh, once cut, unravel very quickly. One of the most important parts of your project, when working with this fabric, will be to secure the edges. If I had it to do again, I would do a quick running stitch around the edges. The raw edges feel like tulle, and are scratchy on the hands, so you may also want to line them with bias tape, if possible.


I initially tried tracing my design using a fine-tipped black marker - don't repeat my mistake. :) Instead, try a permanent ink marker, or you will literally have a bit of a mess on your hands. :)

Detail

Also, be aware as you stitch that the luster is quite fragile - if you pick out your stitches, you'll be able to see where exactly you did that. Squint at the photo above and you'll see where I picked out my stitches. There's a ghostly line, where the gold luster was removed from unpicking.

removed from hoop

Another thing to consider as you stitch is that once you remove your fabric from the hoop, it will be stretched and bent - as above. So I'd suggest leaving your project in the hoop, or avoiding a hoop, if you don't want this issue.

In progress

As I mentioned before, the mesh is very transparent, and will reveal whatever is behind it. I think this is a plus, though - as it gives you an extra dimension to play with in your stitching!

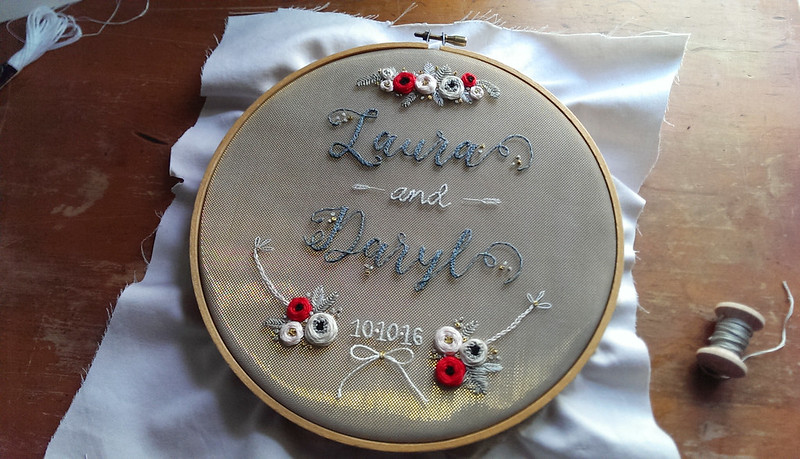
Taupe fabric background

By layering a taupe fabric underneath, I achieved a really lovely 3-D effect, which made it look like the stitches were floating on top of the fabric:

floating
Cool, huh? Now, onto my experiences with stitching on the mesh...

flower detail

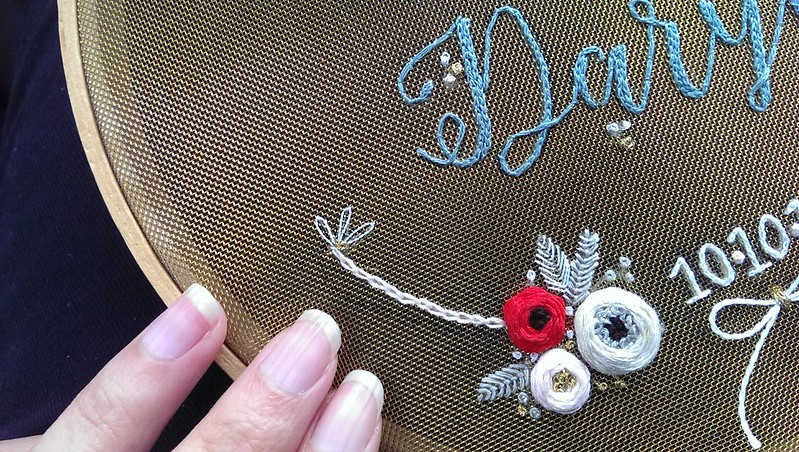
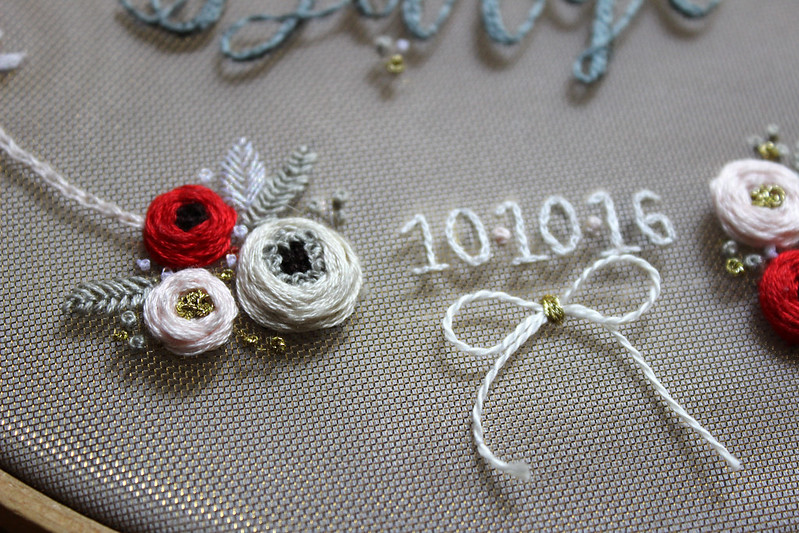
I really enjoyed stitching on this fabric! I won't lie, I was intimidated when I saw it, but once I pulled the needle through, I found that it stitched the same as your average Aida cloth. For some reason, I actually found it easier to stitch French knots on this surface. But I used all of the same stitches I normally use - split, chain, knots, woven wheel, and couching, and I never had any issue - see above for a sampling.

Here's another closeup of that nice mesh surface.

mesh detail

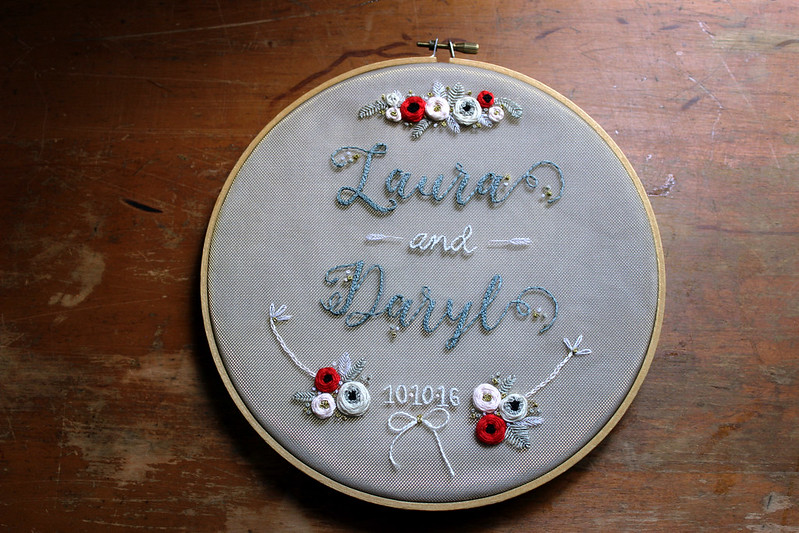
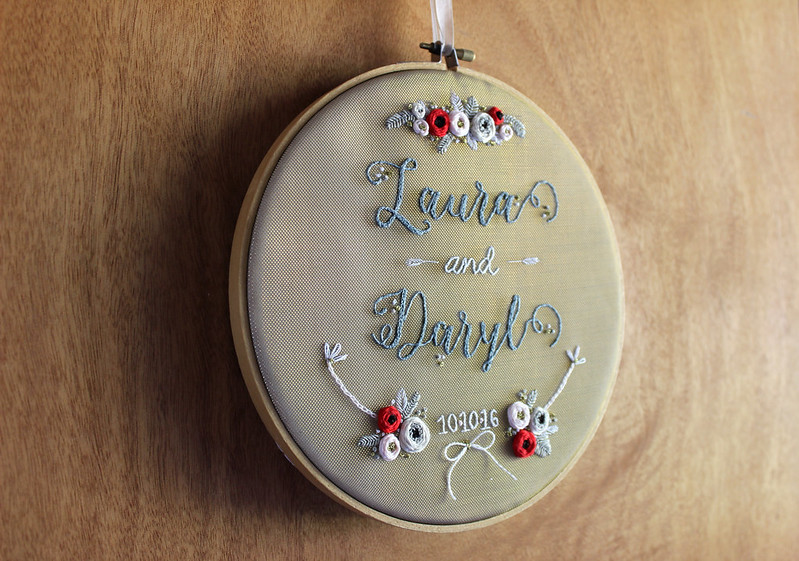
Here is my finished project - a lovely wedding hoop:
finish
detail
glow

Overall, I found this new stitchable mesh very enjoyable. If you keep in mind the caveats I listed above, and plan your project carefully, I'm sure you can achieve some really lovely and unique results with this fabric. Thank you again to DMC for sending this to me, to try!


Free Custom Pattern Giveaway!

Now, I always like to do a giveaway when I do a review, but this time I thought I'd do something a little different, since I don't have any extra mesh to give away... How about a free pattern? I'll create a free customized pattern with the names you supply!


To enter this custom pattern giveaway, leave a comment on this post, and tell me who you'd like to stitch this pattern for, and why. Please leave a comment on this post by Friday, Dec. 9, at 9 PM US CST, when I'll draw 2 winners!

Hi, I'm floresita, editor of Feeling Stitchy. I'm an avid stitcher, knitter, and crafter. You can see more of my stitching on Instagram and my blog. My vintage transfer collection is on Vintage Transfer Finds.

Feel free to email me with any ideas for the blog!

April 29, 2013

Laying Tool Review and Giveaway!

l7


Hi guys! Remember this lovely doodad I showed you last week? The folks at JR Crafter sent me one of their Best Laying Tools to try out and I'm ready with a full report for you!

First of all, if you've never used a laying tool, it takes a bit of time to get used to, and like any skill, you get better with practice.

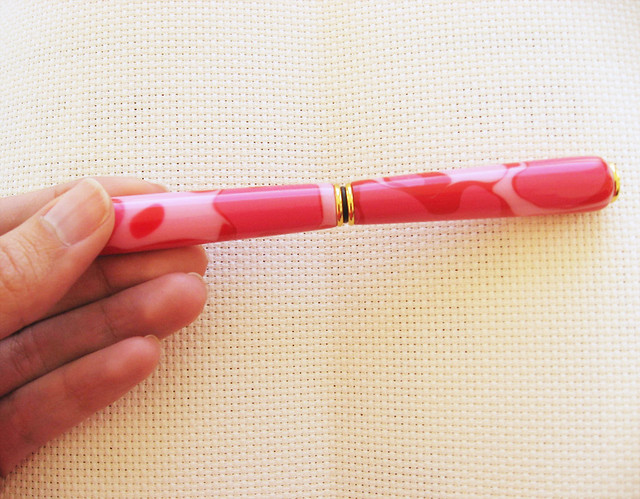
I like that this tool is lightweight and easy to hold - it's the width and length of a pen, and quite pretty, as well.

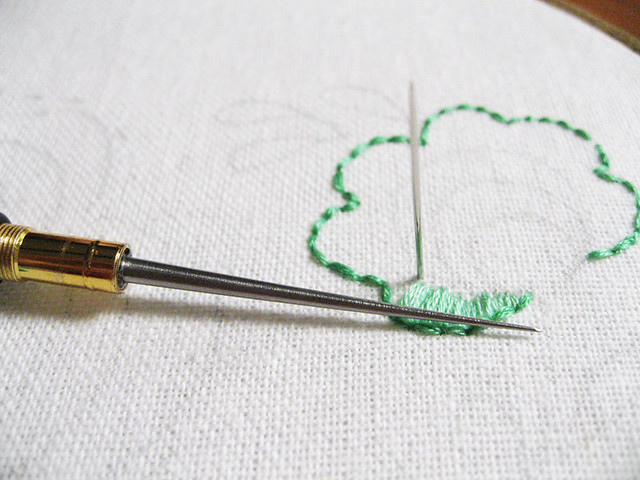
The end is wicked sharp - here it is next to my needle, for comparison:
l1


That said, even with my slightly clumsy paws and the smooth acrylic finish on my tool, I managed not to stab myself. I'd take Mary Corbet's advice and use a floor stand for embroidery, to leave both hands free. I did okay by resting my hoop on the edge of a table and just sort of finagling it.

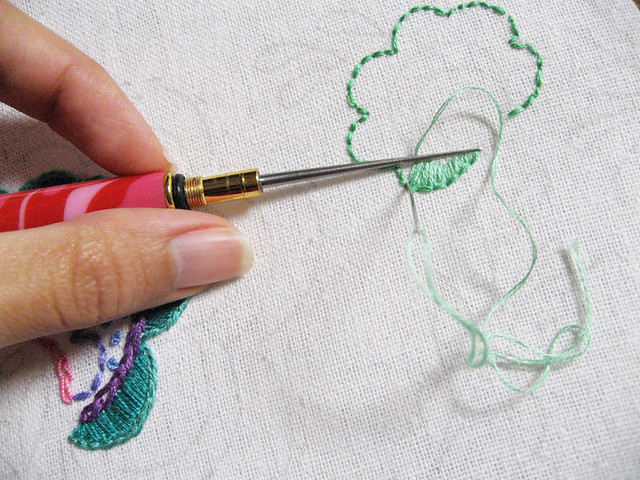
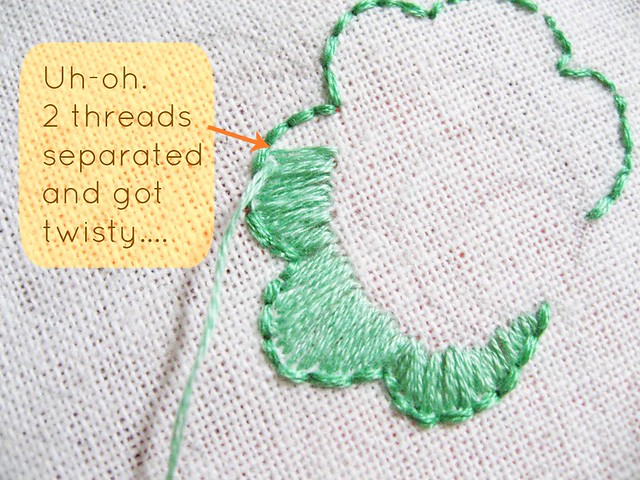
I tried the laying tool on a section of Satin Stitch - in these photos I'm using 2 strands of embroidery floss. First I stitched without the laying tool, as I normally do - and you know what happens - sometimes it works fine and sometimes the threads get all twisty, separate-y, and just plain sad:

l3text


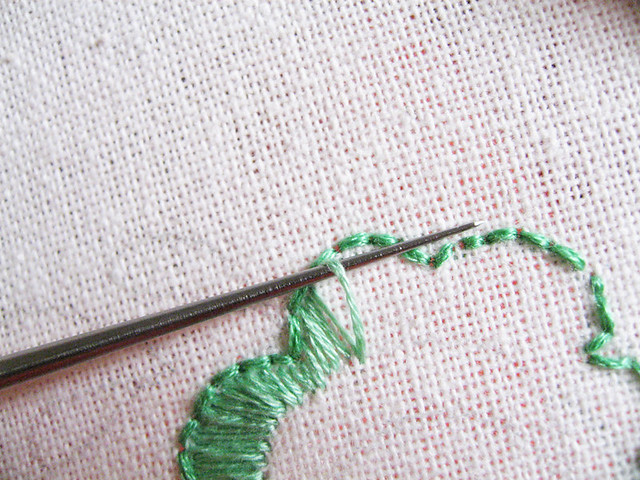
Laying tool to the rescue!

l4


I realized that in the past, I was already using my needle unconsciously to do this - tugging out and straightening the twisted threads after I'd stitched them so that they'd lay flat. Tugging at threads after the fact is touch and go and many times I grumpily have to re-stitch it.

With the laying tool, I had none of those problems - you use it to hold the threads taut and straight while you're pulling them through, so there's no last-minute twisting, separating, or bumps. Yay! When I get better, I'd like to try it on stem stitch, another stitch that frustrates me at times.

This laying tool really is a pleasure to use - since it's the length and width of a pen, your hands already have a pretty good idea of how to handle it. When you're done using the tool, the top screws on nice and tight to keep you safe and the tip nice and sharp. If your satin or stem stitching makes you grumpy, I'd say it's definitely worth a try. I mentioned Mary Corbet's helpful post on laying tools before, but I'll plug it again because her photos and video tell you everything you need to know about how to use this lovely thing.

And now for what you've been waiting for huh - the giveaway! Not only is this a great-looking, easy-to-use tool, it comes in SO MANY lovely configurations. Well you know what? One of you lucky peeps will be getting the laying tool in the color combination of your dreams, thanks to the wonderful people at JR Crafter!

Untitled


To win, check out all the beautiful colors and finishes on their website. To see what they look on the actual tool, click over to their Etsy store for some nice photographs. Leave a comment on this post with your favorite color, by 9 PM CST, Friday, May 3, when I will draw a random winner.

My color combo is "Pink Cloud," if you like mine. But, hey, maybe you're not a pink acrylic fan - to each his/her own - let's hear your favorites!

Hi, I'm floresita, editor of Feeling Stitchy. I'm an avid stitcher, knitter, and crafter. You can see more of my stitching on Instagram and my blog. My vintage transfer collection is on Vintage Transfer Finds.

Feel free to email me with any ideas for the blog!

SITE DESIGN BY RYLEE BLAKE DESIGNS