Showing posts with label couching. Show all posts

November 28, 2016

MooshieStitch Monday: Puffy Couching (and Stitchable Cork!)


Have you ever heard of puffy couching? 

I was looking through one of my embroidery stitch books (The Embroiderer's Handbook by Margie Bauer) and saw it in the couching techniques section.

Essentially, a bundle of threads is puffed up between each couching stitch. 


To practice: I cut three 12 inch lengths of DMC floss and then pulled apart all 6 strands to create my bundle of threads below.


Smooth out the bundle of threads as best as you can. Fold the bundle in half and secure it to the fabric with a straight stitch.


Bring your first couching thread up and over the thread bundle.


Use your needle to lift and puff the thread bundle section.


Continue to couch down the thread bundle and lifting each section to desired puffiness.


To finish, bring your thread bundle through to the back of the fabric and secure. 


Here is the finished puffy couching.


DMC sent me a sample of their new stitchable cork fabric, so I decided to stitch a puffy couching project with it.

dmc stitchable cork fabric

To give it a little different look, instead of bringing my thread bundle through to the back of the fabric to finish each color,  I left a little tassel on the end.

couching

You can see my puffy couching has gaps in my thread bundle sections. I think it is because I didn't take as much time to smooth out my thread bundles, compared to above when practicing with the red thread.

So, it is important to get the bundles as smooth as possible. (But I still think they turned out ok!)


I liked stitching on the cork - it has a cool texture and it is similar to stitching on a thicker fabric.

I used the natural cork fabric for this project, but they also have a gold flecked cork.


Have you ever heard of puffy couching? It's definitely an easy stitch to give dimension to your embroidery. The tassels and puffy couching could be a good technique for stitching hair ... it reminds me of pony tails! :)


Thanks again to DMC for sending the stitchable cork!!

FYI - if you are interested in purchasing the book Michelle mentioned, here is an affiliate link to Amazon: The Embroiderer's Handbook. Clicking through this link to buy a book on Amazon is one way to support Feeling Stitchy and keep our all-volunteer work going. We use funds in our Amazon account to do new reviews and giveaways!

August 1, 2015

Learn the Couching Stitch

To those of you just now experiencing the height of summer weather, let me just share with you how incredibly jealous I am. Here in the South it's been the height of summer for a couple of months now, and the heat and humidity are definitely starting to take their toll! About all I can do these hot, sunny days is fan myself on the couch with a large glass of lemon-aid ice cream sandwich. Which of course makes our stitch today oh so appropriate, as we'll be learning to couch!

As much as I'd love to just share with you how I relax, couching is the name of our new stitch for August, and it's a pretty important one to have in your arsenal of stitches.

Couching keeps all your primary thread above the fabric, and you use a secondary thread to anchor it down to your design. It's a great way to work with materials that are otherwise hard to work with. Think metallic threads, unusually thick threads and a variety of other fibers.

So, let's begin! Start with your fabric stretched tightly in a hoop. I'm using cotton, but another beauty of this stitch is that as long as your fabric and your anchor material works well together, you're all set to use pretty much whatever you like.

Start by laying out your top thread, in my case all six strands of a super fun silver metallic, where you want it on the fabric, and hold in place with a finger or two. Using your anchor thread, in my case two strands of a bright red for easy to see contrast, come up with your needle just below the top thread. Stitch over the top thread and reinsert your needle into the fabric. Pull tight!


Working left to right, choose a small distance away to place another anchor stitch, repeating the same steps as above.

For your first few stitches, you'll probably need to work a little harder to hold your top thread in place. This can be both a good and bad thing, as it allows you to adjust your top thread as you go, but can also mean if you aren't careful you could end up pulling it right out of your anchors. Of course, you won't need both of your hands to take pictures while you stitch, so you might be a bit better off!

When couching you can really work in any shape. You'll want to up the quantity of anchor stitches around sharp turns and curves but the result is a nice thick line. Since I'm working in a nice shiny metallic thread, I drew a quick gemstone shape to stitch up.


I was able to stitch the entire design, including corners and curves, without changing out my top thread. If you've ever worked with metallic threads before you know how amazing that is!

When I got to a section that overlapped, I simply worked on top of the previous line of thread. When you're down, simply use your needle (I changed to a bigger one) to bring your top thread through the fabric, and tie off in the back. Once you get all those anchor stitches in, I promise the design isn't going anywhere!


And that's how to use the couching stitch! Hope you enjoyed learning with me today! Be sure to upload your examples into the Feeling Stitchy flickr pool, and let me know in the comments below how you plan to use this stitch. Happy Stitching!

Hi, I'm Whitney - I share a new embroidery stitch on the blog once a month, learning as I stitch along with the rest of the blog. Embroidery is my first and true crafty love, though I also enjoy painting, sewing and other crafts. My other loves include graphic design, craft beer and baking.

You can also find me on my blog Whitney Makes and on Tumblr.

May 2, 2015

Learn the Couched Filling Stitch

I don't know about all of you, dear readers, but I am so relived that it's finally the weekend. It's been so busy in my little world that I was thrilled to find the time to sit down and teach myself a new stitch from my encyclopedia this month, and it turned out to be a fun one!

Today we're going to learn something called the Couched Filling Stitch, also known as Jacobean couching. It's simple but the result is really fun! I love fill stitches like this that are open and airy. They lend themselves to so many different uses. This one is also a great fill stitch because the whole fill is worked at once, meaning you see progress much faster! 

Let's dive in! I'm working in a plain weave fabric, with two different colors of stranded floss. This stitch would also be beautiful on aida or canvas where you can count out your spacing and be really precise. It's extremely important to use a frame or hoop to stretch your fabric though, as we'll be starting with some long stitches that we want to keep tight and even. I'd also recommend a ruler and a pencil or (preferably) a water soluble pen. 


The first thing you need to do with this stitch is lay out your foundation stitches. You can eye ball it if you wish or count your stitches on your aida, but I used a ruler to make tick marks every quarter of an inch across my hoop. I did the same thing from top to bottom, making a right angle with my hash marks. You can see the cross section in pencil in the photo below.

Now you can begin stitch. You're going to create long stitches all the way across your hoop. Start in one direction (I chose top to bottom) and make all of those stitches first.


In the first picture, you can see how I used the ruler to guide my stitches and kept them aligned with the hash marks and nice and straight. This isn't necessary, but it really helped. Once you have all your stitches from top to bottom, do the same thing from side to side on top. (This is where a water soluble pen and a super tight hoop come in handy! You can see a few pencil marks because my fabric came a little loose while I was stitching.)


Unlike some other couching stitches where you have to weave your foundation stitches together, this one doesn't need that. It's going to look loose and messy at this point, but once we add our final step it will all fall into place.

Now that our whole area is covered in this grid, we're going to add individual cross stitches at every intersection to anchor the threads. You can begin anywhere in the area that you like. Simply choose an intersection and come up with your needle in the bottom left corner and go back through your fabric in the top right corner. Come up again in the top left, finishing in the bottom right.


Repeat this step at every intersection! If you're filling in a shape you can use different colors on your cross stitch to add shading or use a different texture from your foundation grid.


This would be a great fill stitch for any kind of silhouette project, and actually made me think of stars while I worked. It would be fun to use similar colored fabric and grid thread, and a metallic thread in certain spots to stitch the big dipper or other constellation. Of course, it also looks nice all on its own! 

I myself went a little rouge on my hoop. It's fun knowing how to complete all the traditional stitches, if only so I can break the rules when I use them later! 

I loved how geometric this was turning out, so I decided to leave a portion of my hoop open at the top with only vertical grid stitches, and to fill in only sections of my grid with cross stitches. Sometimes it's fun to use embroidery to simply create a texture, not stitch a particular object. Of course, you can see some spots where I missed the pencil marks completely, but those will erase right out! 


Well I hope you enjoyed learning the couched fill stitch, and if you already knew it I hope I inspired you to try it again in a fun new way! Be sure to upload your examples  of this stitch to the Flickr Pool for everyone to see and leave me a comment with any questions or suggestions. See you next time! 

Hi, I'm Whitney - I share a new embroidery stitch on the blog once a month, learning as I stitch along with the rest of the blog. Embroidery is my first and true crafty love, though I also enjoy painting, sewing and other crafts. My other loves include graphic design, craft beer and baking.

You can also find me on my blog Whitney Makes and on Tumblr.

March 12, 2012

February stitchalong update and a surprise!

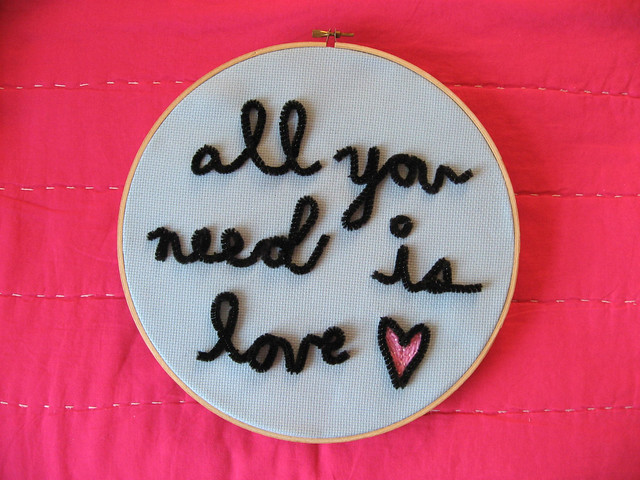
finished

Hey guys! It was really sweet that so many of you de-lurked and commented! It sounds like the comment issues may be with Blogger - I've been thinking about migrating our comments to Disqus for some time now, so I might go with that. In the meantime, I've enabled comments to appear as a pop-up window (thanks for the suggestions regarding that!) and we'll see if that helps.

Up above, you see my tardy contribution to the February stitchalong - I was determined to stitch along, even if I had to do it late! Like I do with most projects, I kind of winged it and modified it as I went along.

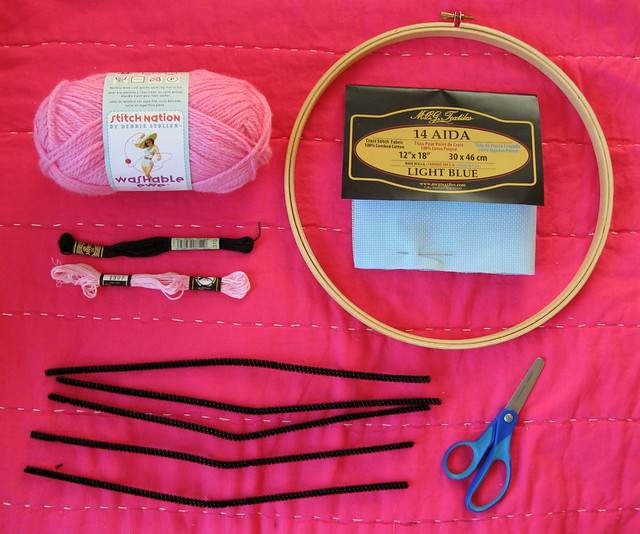
If you'd like to stitch a fuzzy pipe cleaner version like mine, here's the materials I used:

my february stitchalong supplies

14 ct light blue Aida cloth
12 inch hoop
pink yarn
black floss
pale pink floss
black pipe cleaners
scissors
needle

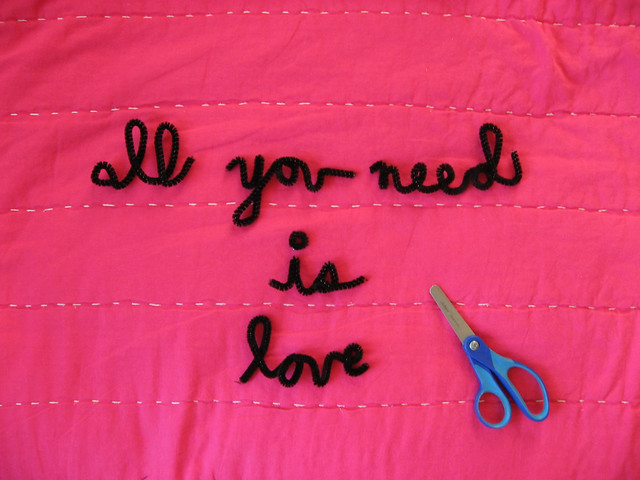
bending the pipe cleaners

I can be very persnickety about perfection, so this step was surprisingly fun. I chose fuzzy black pipe cleaners- they sort of look like cute caterpillars. Not that I would ever sew with caterpillars - I certainly don't recommend it... :)


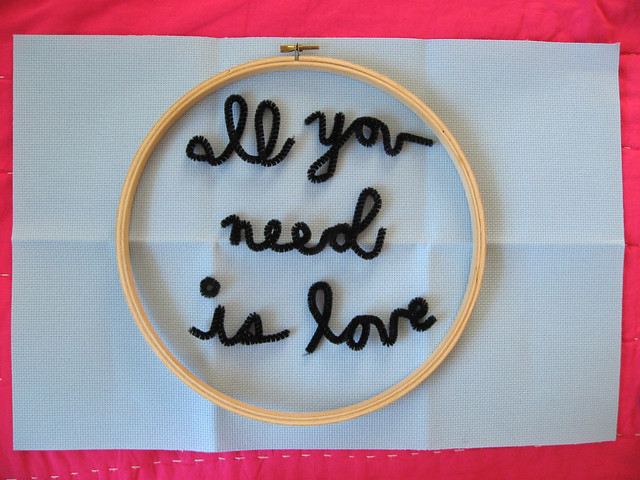
sticking it in the hoop

I used light blue Aida cloth, because it has a stiff texture right out of the package, which gives the pipe cleaners some support. I used a big 12 inch hoop from my (embarrassingly large) stash of embroidery hoops.


tacking em' down

Couching them was super easy and quick - since the pipe cleaners were bendy, I could smoosh or expand them as needed. I used six strands of black embroidery floss, but a contrasty color would work well, too.

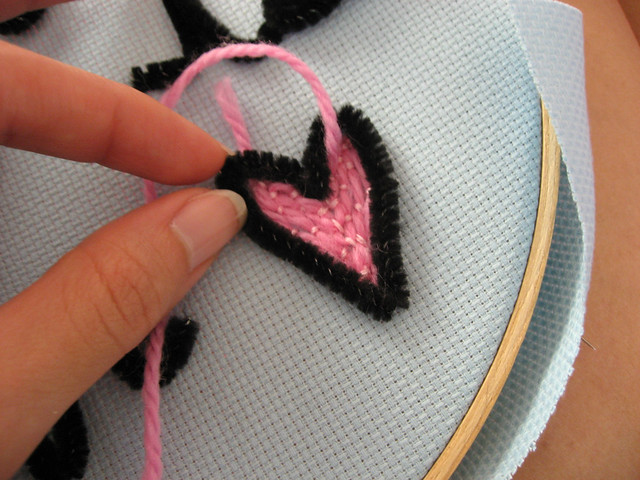
pink yarn to couch inside the heart

I liked how it looked at this point, but it was missing some color, I thought. So I grabbed some pink yarn to couch inside the heart.


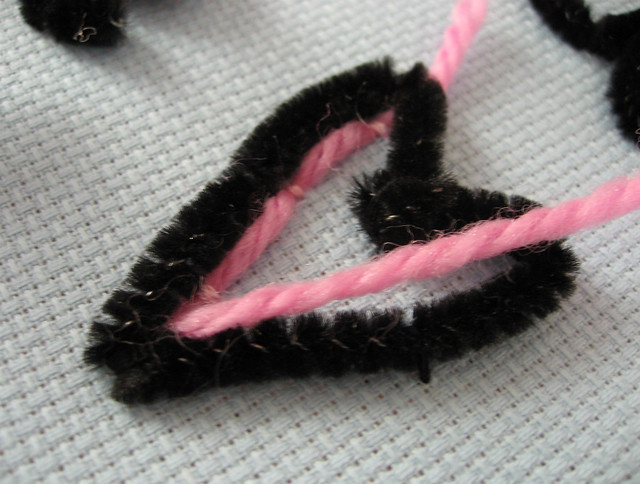
couching in the heart

This step was tricky, since the yarn I chose was very fluffy and a bit splitty - but all in all, I ended up with a fun texture I really liked:

all done


So, here you have it, my version of the February stitchalong. Feel free to stitch along with us, even if it's a bit late! :)


I hinted there might be a surprise for all of you who overcame your shyness, de-lurked, and commented - and here it is - I put together 2 mini kits with everything you see here:

a little prize?
1 mini hoop, pipe cleaners, floss, yarn and needle

I'm also sending 5 fiesta-bright colors of embroidery floss to 4 different people - you can use them to stitchalong this month, or for any of your own projects!

Here are the six surprise winners!

Luciana said...
I have no problems.
I love the blog.
March 10, 2012 1:46 PM


Kitsch and Curious said...
I've been able to leave a comment this time, but in the past, I have had problems on blogs like yours where the comments are on the same page as the blog post. On my blog, I have the comments box set to open in a new window, and that seems to be ok. I think it depends on the browser that people are using (e.g. which version of Internet Explorer, etc.)Let me know if you need any help with this.

I also agree that the new Captcha images are really difficult sometimes!
March 10, 2012 5:43 PM


Kaytea said...
Delurking to leave a comment. Love the blog :)
March 10, 2012 12:19 PM


crazycandigirl said...
Let's see if this works. I'm pretty quiet, but I love looking at the beautiful stitchy eye candy.
March 10, 2012 1:58 PM


Char said...
Ok I'm leaving a comment!
March 10, 2012 1:27 PM


Cheryl said...
I admit it, I'm a lurker. Everything you post inspires me tremendously, and I just wanted you to know. Thanks!
March 10, 2012 2:15 PM


If I drew your name tonight, please email your address to me: unafloresita@gmail.com - and I'll get your surprise prize sent out to you! Thanks everybody! :)

Hi, I'm floresita, editor of Feeling Stitchy. I'm an avid stitcher, knitter, and crafter. You can see more of my stitching on Instagram and my blog. My vintage transfer collection is on Vintage Transfer Finds.

Feel free to email me with any ideas for the blog!

March 11, 2012

Couching from Hanging-by-a-thread

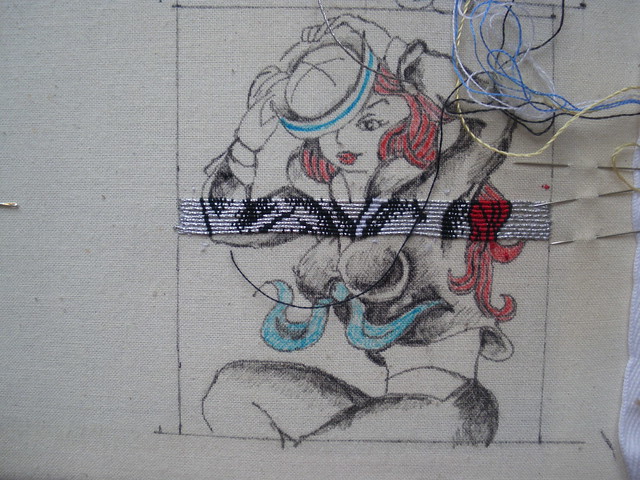
Embroidered sailor girl WIP
Embroidered sailor girl WIP by Hanging-by-a-thread

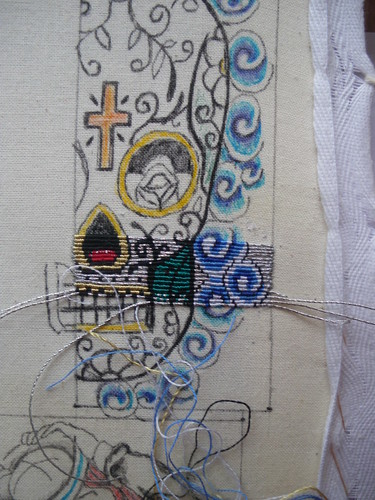
After January and February's couching inspired stitchalongs, I thought I'd post today some examples of exactly how far you can take the technique. Charlotte (Hanging-by-a-thread) is a student at the Royal School of Needlework (which has to be one of the most amazing places to study) and she has been posting some of her couching WIPs on Flickr. As always, I love WIP shots, as I think it gives you far more of an idea about the technique involved (it's inspiring for a start, to see how Charlotte has drawn her pattern onto the fabric).

skull tattoo WIP
skull tattoo WIP by Hanging-by-a-thread

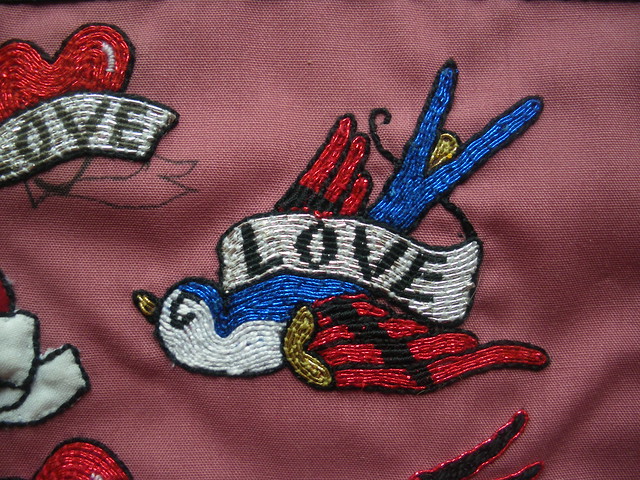
I also love her couched swallows.

couched swallow tattoo
Couched swallow tattoo by Hanging-by-a-thread

You can see more of Charlotte's couching work here, where she talks about her experiments with lettering.

Hi, I'm Jo - I feature new embroidery patterns Sundays on Feeling Stitchy. I also post on our Twitter and Pinterest.

Is there a new pattern you'd like us feature? Email me!

February 27, 2012

Love: kghawkes stitching

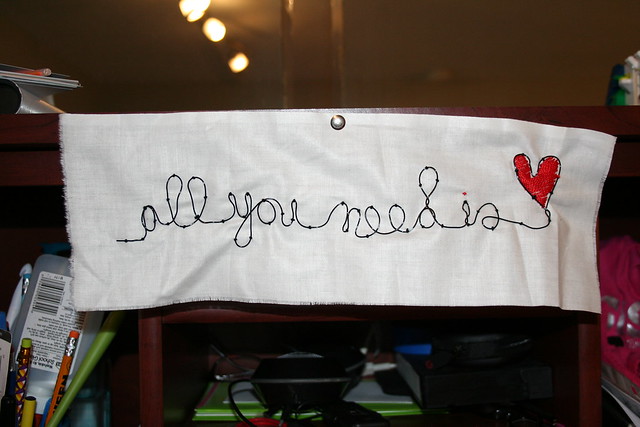
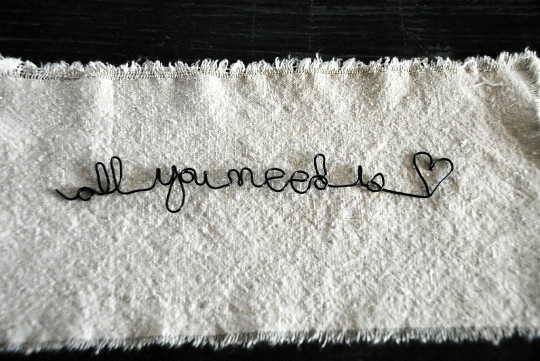
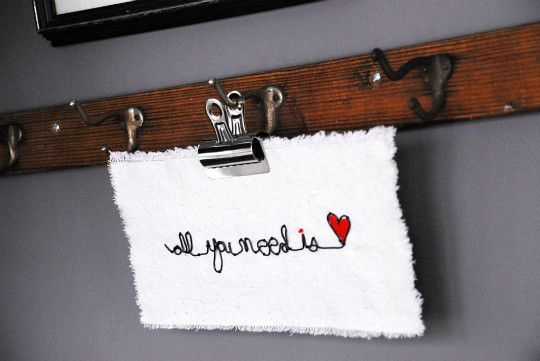
all you need
stitched by kghawkes

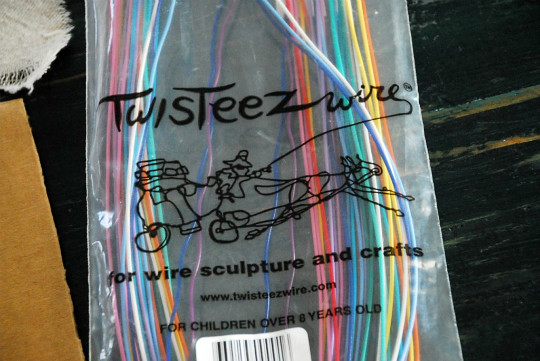
It seems that kghawkes had trouble finding the Twisteez brand wire and subbed jewelry wire instead for the February stitchalong - I think her version looks just as lovely! It's um, looking pretty bare in the pool for this stitchalong - only 1 in progress and 1 finish! I'll be doing a final check-in post on Wednesday, so you still have time to craft your own version, tag it "feb2012stitchalong" and add it to the pool.

I was noticing kghawkes stitched up both stitchalongs already this year and that got me thinking - I'd like to give a special prize at the end of the year to someone who crafts every stitchalong with us. Sound fun? Then join in! :)

Hi, I'm floresita, editor of Feeling Stitchy. I'm an avid stitcher, knitter, and crafter. You can see more of my stitching on Instagram and my blog. My vintage transfer collection is on Vintage Transfer Finds.

Feel free to email me with any ideas for the blog!

February 1, 2012

February Stitchalong - All You Need Is Love

Hi! I'm Camilla from the DIY home decorating blog, Family Chic and I am so thrilled to be writing this guest post for Feeling Stitchy! I've had a soft spot in my heart for embroidery ever since the age of 5 when my mom sat me down with a square of burlap and some yarn and taught me the basics. I was hooked at that very moment!

One thing I love to do is experiment with my stitches; I get a kick out of adding embroidered details to almost anything. For this project I tried something different and combined sculptural wire with a simple couching stitch to make a Valentine for my kids. I hope you enjoy it!

February Stitchalong on Feeling Stitchy!

For this project you will need:
- Embroidery floss
- An embroidery needle
- Sculptural wire (I use Twisteez Brand - available at Blick for about $6.00 a bag)
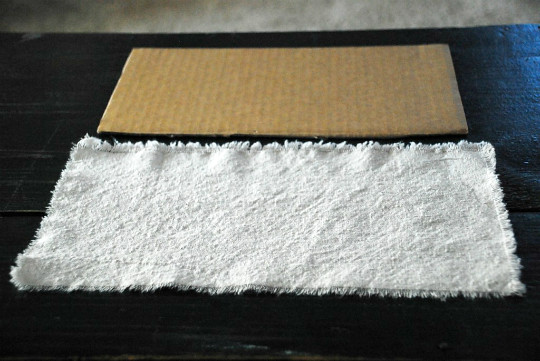
- A piece of rough linen and a piece of cardboard; both of the same size
- A glue gun
- A metal clip

step 1 - cut fabric and cardboard

Step 1: Cut out a piece of fabric and a piece of cardboard - both of the same size.


step 2 - use Twisteez wire

Step 2: Grab a bag of Twisteez Brand Wire and select your color.


step 3 - shape your sentence

Step 3: Shape your sentence by bending the wire.


step 4 - tack down wire with embroidery floss

Step 4: Using embroidery floss in the same color as your wire, tack down your sentence with small stitches spaced about 1-inch apart.


make sure all loops are tacked down

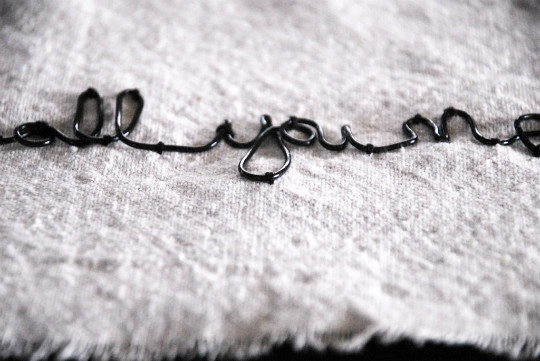
It is especially important to tack down all the loops so your sentence stays flat against the fabric.


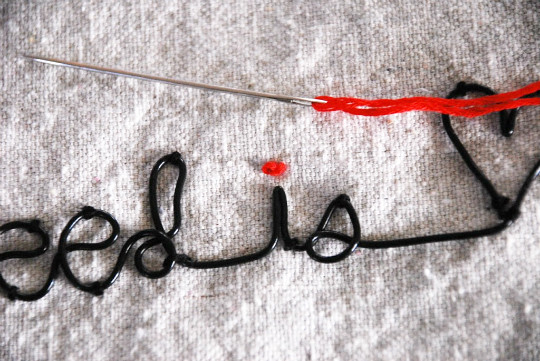
step 5 - dot the i with a french knot

Step 5: Using red embroidery floss, dot the "i" with a french knot.


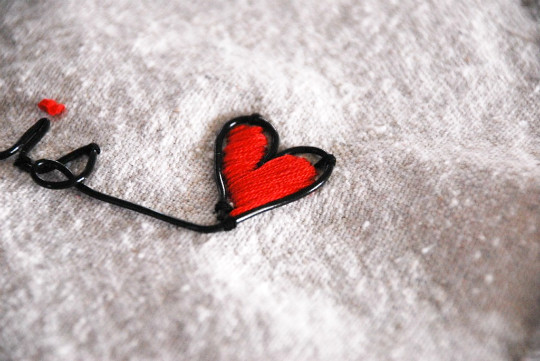
step 6 - fill in heart with satin stitch

Step 6: Fill in the heart with a satin stitch in red.


step 7 - attach linen to cardboard using a hot glue gun

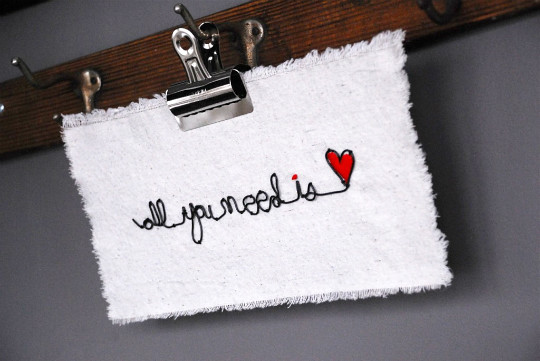
Step 7: Using a hot glue gun, attach the linen to the cardboard. I like easy and unusual ways to hang art so, I hung my work from a metal clip.


finished close-up

This is so easy - you can get it done in less than 30-minutes. Happy Valentine's Day - Enjoy!

I have over 200 easy-to-make projects on my blog, Family Chic. Be sure to stop by and take a look at my sewing and embroidery section!

Thanks Feeling Stitchy!

****
Thank you, Camilla, for this wonderful guest post, and for kicking off our February Stitchalong. I love how well this ties in with last month's stitchalong - this is basically couching, but with wire - feel free to use yarn, pipe cleaners, or anything bendy to complete your project!

To join in, add your projects to the pool and tag them "Feb2012Stitchalong". I'll be checking in later this month with your progress, so have fun with it!

February is going to be extra-special here on Feeling Stitchy. I've decided to celebrate "love" this February - love for this community, blogs we love, artists we love, books we love, businesses we love - in short, there's gonna be a whole lotta love this month. And, giveaways! I've worked extra-hard to shower you with love this month, so think of us as your Valentine!

love, floresita :)

Hi, I'm floresita, editor of Feeling Stitchy. I'm an avid stitcher, knitter, and crafter. You can see more of my stitching on Instagram and my blog. My vintage transfer collection is on Vintage Transfer Finds.

Feel free to email me with any ideas for the blog!

SITE DESIGN BY RYLEE BLAKE DESIGNS