Showing posts with label bookmarks. Show all posts

June 5, 2015

Friday Instagram Finds No. 7


It's Friday - hooray! I don't know about you, but even though I LOVE my day job as a library manager, I do look forward to my weekends off so I can stitch. Since it's Friday, that means it's time for another installment of Friday Instagram Finds!! I have a question for you at the very end, and I'd really appreciate it if you would comment on this post or over on our IG account @feelingstitchyish with your thoughts. This week I'm featuring...

@daisyeyes
Daisy Eyes, aka Aimee, used the #feelingstitchyig to make sure I saw her work. I've been following @daisyeyes on my personal account for quite some time, and I like her style. Did you read a few lines back how I mentioned I'm a librarian? Well, among the pieces that @daisyeyes creates are these very lovely bookmarks that utilize @dandelyne mini hoops as a dangly bit on the end!

A photo posted by aimee d (@daisyeyes) on


A photo posted by aimee d (@daisyeyes) on


Aimee also uses black colored fabric accented with white stitching and buttons - BUTTONS - as stars to create this uniquely beautiful hoop. This is the second verse from the song In Western Lands sung by Samwise Gamgee in Lord of the Rings. Look at those teeny tiny stitches!


A photo posted by aimee d (@daisyeyes) on


This custom birth announcement Aimee created is a beautiful piece of art that will always be treasured. That's one of the things I really love about embroidery, if well taken care of, it can last for centuries. What a legacy to leave!

A photo posted by aimee d (@daisyeyes) on


I hope you've enjoyed this edition of Friday Instagram Finds (FIF) on Feeling Stitchy, which is now brought to you weekly! Please leave comments below to let me know what you thought. If you'd like to be considered for FIF, or if you find a great embroiderer or stitch-related needle worker who you think I should feature, be sure to tag their pictures with #feelingstitchyig, and I'll take a look!

While you're on Instagram, make sure you follow Feeling Stitchy! We're @feelingstitchyish. We'd love for you to stop by and say hello.

Here's my question to you: Do you like the way the pictures come across? I'm using Instagram's embed feature to insert them into the posts. I noticed that my Feedly blog reader was not showing the pictures, just a caption that said, "This is a picture of____ on Instagram." I had to click the user name and get transferred to IG to see the pictures. The whole point of this post is to see the pictures, and I don't want it to be too much work for you to see them. I could always save the picture and link it to the featured artist's IG account instead of using IG's embed feature.

Hi, I'm Amy - I feature interesting embroidery and stitch-related photos I find on Instagram. I'm a hand embroiderer and maker.

You can find my embroidery and crafts on:
Instagram | Random Acts of Amy | Facebook

May 21, 2015

Thimblenest Thursdays: Embroidered bookmark for summer reading


Summer reading lists are popping up everywhere as people anticipate the laid-back days that often come with warmer weather. As much as I enjoy technology, I'm still pretty old-school when it comes to books: there's just something about the weight of a book in your hand and the feel of paper on your fingers as you turn a page. I have a bad habit of dog-earing pages (even in library books--shhh!), so maybe a new bookmark will start me on a new path. So, regardless of whether your summer (or winter) reading is required or purely for leisure, join me in creating an embroidered bookmark!

MATERIALS

13" of 2" wide ribbon
6" x 6" square of fabric
2" x 2" square of lightweight iron-on interfacing
file with two flower designs and square template (1.8" x 1.8") or choose your own
Embroidery floss
Pinking shears
Water soluble fabric marker


Transfer and embroider the design on the 6" x 6" fabric square.


Iron the interfacing to the backside of the embroidered design.


If using the square template provided, cut out the inside of the square without cutting through any of the square's edges. Center the resulting square hole over your embroidered design and trace a square around it with the water soluble fabric marker.


Use pinking shears to cut out the design, following the square's outline.


Fold the ends of the ribbon under twice--1/4" each time and sew in place. The open weave of my ribbon made stitching a little tricky. If your ribbon won't fray you can cut an inverted triangle at each end instead of stitching. 


Position the embroidered square wherever you would like on the ribbon and hand- or machine-stitch in place using a scant 1/8" seam allowance.


Pop your finished bookmark in your latest read and head for the nearest beach, hammock, or hearth (for those in the Southern Hemisphere!).

What's on your to-read list for this summer/winter?

P.S. In two weeks I'll be back to kick off a stitch-along that will span June, July, and August; the end result will be a fun project to add to your autumn decor. See you then!

Hi, I'm Wendy - I've been embroidering since age 9 when my grandma gave me some blank tea towels and a set of Aunt Martha’s transfers. I blog at ThimbleNest.

You can also find me on Pinterest.

August 16, 2012

Embroidered bookmarks

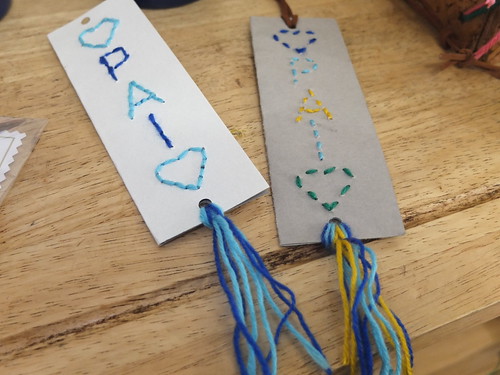
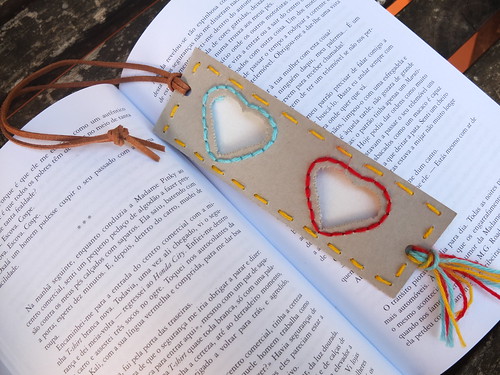
Olá! This week I'll bring you a project you can make with your children... Or students... When we try embroidering with kids the major difficulty is finding a simple and attractive project... On Father's day I held an event to which I gave the name "For dad, made with the heart". The idea was to gather children and make a special gift in 1 hour. Concluding an embroidery project within an hour is an ambitious aim and for some of the kids these were their first stitches... But this project was well-approved!

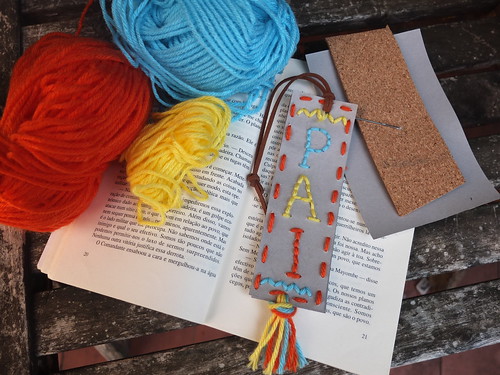
What will you need? Cardstock, yarn, a needle, suede cord (or any other tie that is easier for you), a pattern and something to perforate the cardstock. Try to be ingenious and use what you have on hand... I used the cards that are included in my lacing card embroidery kits, a common pin and a cork pad - or you can opt for a foam pad... But I always prefer Portuguese stuff :). Never forget that everything that pricks can be very dangerous in children's hands, never leave children alone at this stage...

DSCF4105
Yarn, cork, needle and a card.
First you must fold the cardstock in half vertically. Choose if you'll want to decorate one side of the bookmark or both sides. I had prepared some patterns that they could choose, using the word "PAI", which means "DAD". I would have preferred to have them design their own pattern but they were too many and there was not enough time. But if you have time, have them draw directly on cardboard, instead of having a pattern on a common sheet of paper, as I did.

DSCF4108
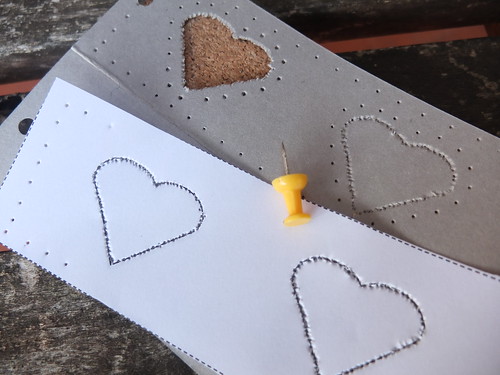
Use a sheet of paper with a pattern and make the hole punching using the pin and the pad.
Place the card on the cork pad and the pattern on the card and make small punctures through the pattern with the pin, following the lines of the drawing. Space the holes approximately one centimetre apart. Your bookmark is ready to be embroidered... Choose a simple stitch like running stitch or backstitch.

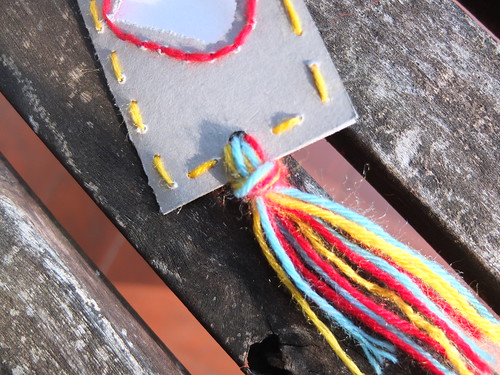
After stitching, join the two parts by folding them in half - punch holes at the top and bottom with a hole punch. At the bottom, use yarn to join the two parts and at the top, the suede cord.

DSCF4113
Use yarn to gather the two parts of the card.
DSCF4116
Easy and beautiful finishing..
And the bookmark is done! I said it was easy... Any child over 5 years old will be able to do it (don't forget to be careful with the pins - there are safer ways of doing this...)

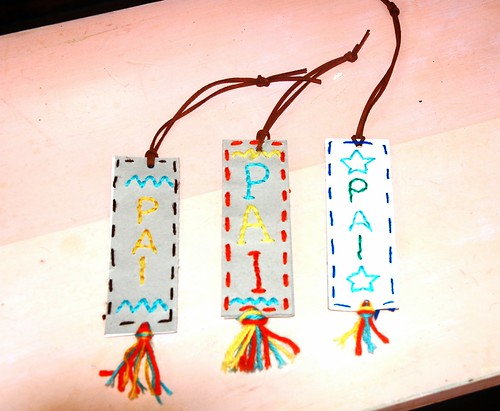
Book markers
Three bookmarks, three happy dads!
DSCF4161
More happy dads :)
DSCF4118
More ideas... 

I hope you enjoy it! Good stitches!

June 23, 2008

Bookmark it!

She knits, felts, and sews among other things, but one of my favorite items at Lisa's Needle Wood Designs Etsy shop are these darling embroidered bookmarks. The "flowers" are bits of cotton with a French knot.

On her blog, Lisa wrote: "I'm not happy unless I'm creating something new, something pretty, something unique. I love to work with my hands so hand sewing (embroidery, needle felting, quilting) are my passion. I create every day. Sometimes with success and sometimes not."

Oh, dear Lisa. These are quite successful.
SITE DESIGN BY RYLEE BLAKE DESIGNS